READ AND SAVE THESE INSTRUCTIONS 3
2) When lowering the table height, be sure there are no foreign obstacles are underneath your table
that could obstruct it from lowering completely. This could damage your table.
3) Never set anything under the table frame to avoid collision if lowered.
4) Never operate your table on an uneven surface. Adjust the leveling feet so that your table is stable.
5) Never raise the head or leg section with a client in the prone position (face down.)
6) Never use or store your table in a wet or very humid environment. Water and excessive moisture
can damage the wood cabinet and electrical components. Evidence of exposure to water or
moisture will void your warranty.
7) If you have purchased the Flexible Armrest Option, never use the Armrests as handholds or body
support mechanisms, especially when setting clients on or off the table.
8) Never drop or insert any object into any opening.
SECTION 1: SAFETY INFORMATION
1) Use this furnishing only for its intended use as described in these instructions. Do not use
attachments not recommended by the manufacturer.
2) Do not operate this equipment unless properly trained.
3) Install this furnishing in treatment area not accessible to the public.
4) Close supervision is necessary when this furnishing is used by, or near children, invalids, or disabled
persons.
5) This product does not have “pinch point” protection. Only operate when no possibility of any portion
of the body could be caught and injured while moving the table top upward/downward, or activating
the back/foot tilt.
6) Do not use this furnishing to support video equipment such as televisions or computer monitors.
7) Never attempt to use the Head or Leg lift section to support concentrated weight such as sitting
or standing
To reduce the risk of burns, re, electric shock, or injury to persons:
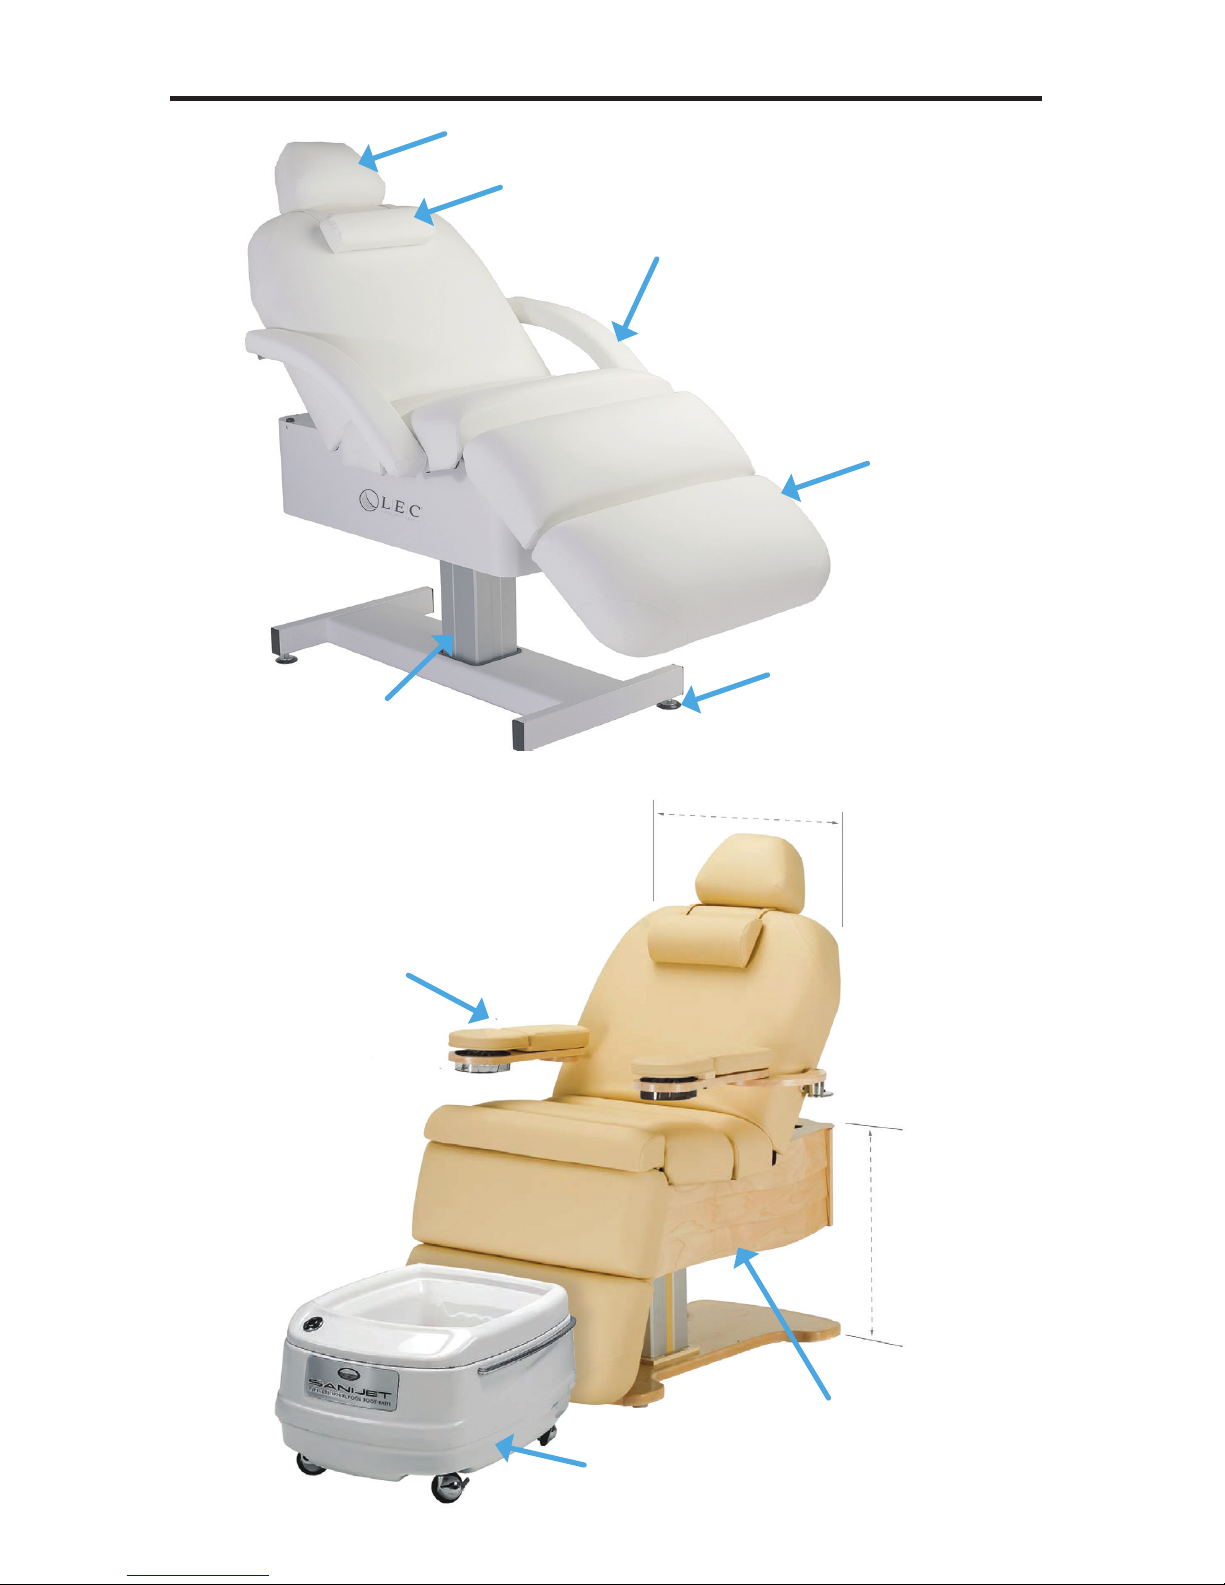
The Cloud 9 comes equipped with support bars that must be used properly to ensure the safety of your
clients and protect the integrity of your table. The support bars must be engaged/extended whenever
there is a weight in excess of 15 pounds placed on the thigh/leg section of your table.
Without these support bars in place the thigh/leg section is NOT a weight bearing surface. Sitting or
placing excess weight on the thigh/leg section without these bars in place may void your warranty.
Removable footrest section is not a weight bearing surface. Weight placed on the footrest should never
exceed 35 pounds . Never try to lower the calf section of your table lower than at while the support bars
are extended. This could damage your table and void your warranty.
See page 9 for full instructions on how to use the support bars.
1) When lowering any section of the table, make sure that no supplies or any
part of yours or your client’s body is between the top of your table and its base.
This could result in injury, or could damage your table as well as the item. It is
recommended that you always return your table top to the lowest at position to
avoid leaving the base exposed.
IMPORTANT NOTE ABOUT CLOUD 9 SUPPORT BARS