Lec+ Wilshire LE User manual

Wilshire LE Pedicure Chair
USER MANUAL
1-400-0002 • Rev B• 1/15/20
© Living Earth Crafts 2020, All Rights Reserved
*shown with oponal accessories and/or nishes

© Copyright 2020
Living Earth Cras®
All rights reserved. is document or any
portion thereof may not be reproduced
in any way, including photocopying or
translation to another language without
the prior written permission from Living
Earth Cras.
Living Earth Cras® is a registered trade-
mark of Earthlite, LLC,
Legal Notice
e information provided in this document is intended
for informational purposes only and is subject to change
without notice. e information provided in this docu-
ment should not be construed as a commitment by
Living Earth Cras®.
Living Earth Cras® assumes no responsibility for the
accuracy or suitability of the information contained in
this document. is document may contain technical
inaccuracies or errors. Living Earth Cras® makes no
expressed or implied warranties of any kind concerning
the information contained in this document, including,
but not limited to, the implied warranties of merchant-
ability and tness for purpose.
Living Earth Cras® shall not be liable for incidental or
consequential damages in connection with or arising out
of the product, performance, or use of this document
and the information and material it describes.

Introduction
Congratulaons on your purchase of the Wilshire LE pedicure chair. The Wilshire LE is a luxurious
mani/pedi combo chair with a retractable, motorized, and fully plumbed pedicure bowl.
Electronic chair and bowl adjustments enable perfect client and technician ergonomics. The
hidden pedicure unit features whisper quiet, reliable pipeless hydrotherapy, and is packed with
praccal features including a hand sprayer, power remote drain, and electronic footrest.
The Wilshire LE is designed for licensed therapists and technicians and is intended to be used in
a professional spa, salon, or similar commercial environment. While no special training is needed
to operate the product, for safety reasons it is important that the instrucons contained in this
manual are reviewed in detail before the rst use. This manual should be read in its enrety by
each professional who will be operang the product to ensure the safety of both operator and
client. This manual should be saved for future reference.
The Wilshire LE should not be used in any other manner than described in this manual. Please
read, understand, and follow all safety warnings, labels, and instrucons. Misuse, use of
unnecessary force, or using the chair for unintended or unauthorized procedures can result in
injury to operator, client, and/or equipment.
Detailed instrucons for use and maintenance can be found in this user manual. If you have
further quesons, please contact us at (800) 358-8292 for US customers, or (760) 597-2155 for
internaonal customers. We can also be reached via e-mail at info@livingearthcras.com
Secon 1: Safety Informaon
Safety Symbols/Warnings
Secon 2: Product Overview
Product Diagram
Product Specicaons
Secon 3: Operang Instrucons
Electrical Specicaons
Retractable Tub
Water Fill Valve
Jets & Lights
Drain Release & Discharge Pump
Footrest Operaon
Relaxor
Secon 4: Care & Maintenance
Cleaning & Ongoing Maintenance
Upholstery Cleaning & Maintenance
Tub Cleaning Guide
Troubleshoong
Warranty Informaon
Secon 5: Installaon
Technical Drawings
Contact Us
2-3
4
5
6
6
7
7
8
8
9
10
11
12-13
14
15
16-17
back cover
Table of Contents

READ AND SAVE THESE INSTRUCTIONS
2
IMPORTANT SAFETY INSTRUCTIONS - FOR COMMERCIAL USE ONLY
Read all instructions before using this product.
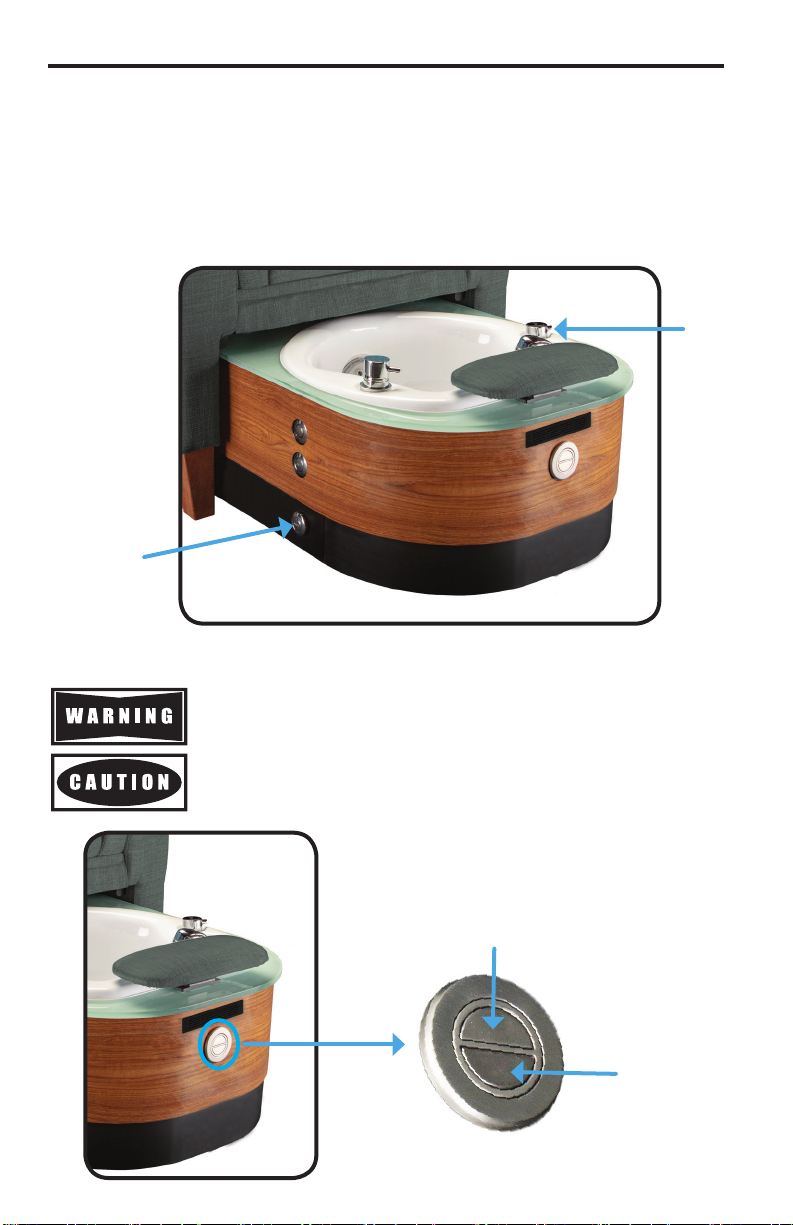
Safety Symbols
Familiarize yourself with the following
Safety & Warning symbols. They are
designed to prevent damage and injury
to you, your clients, and your new Living
Earth Crafts product.
IMPORTANT: The important safety
instructions and warnings in this manual
cannot cover all possible problems and
conditions that can occur. Use common
sense and caution when installing,
operating, or maintaining this appliance.
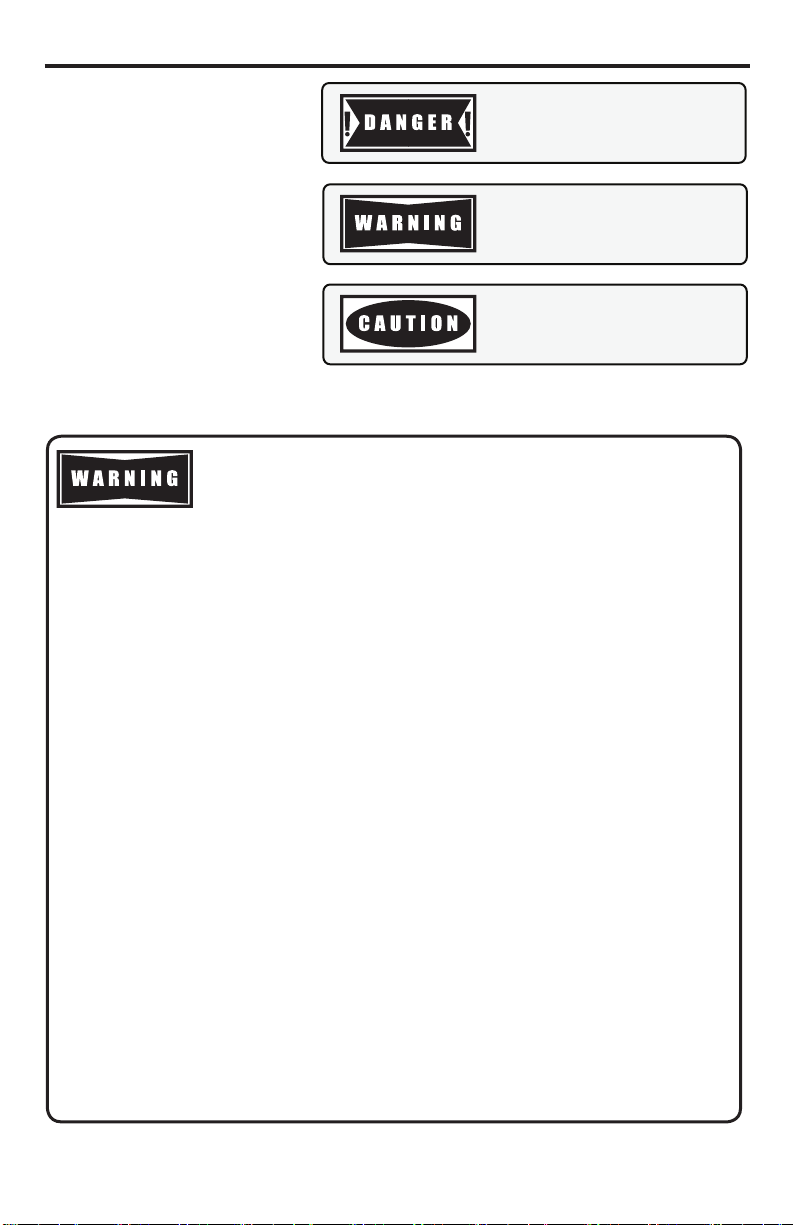
Indicates an imminently hazardous
situation which could result in serious
or fatal injury.
Indicates a potentially hazardous
situation which could result in serious
injury.
Indicates a potentially hazardous
situation which could result in
equipment damage and/or injury.
SECTION 1: SAFETY INFORMATION
RISK OF ACCIDENTAL INJURY OR DROWNING. DO NOT USE
DRUGS OR ALCOHOL BEFORE OR DURING USE. CHILDREN
OR HANDICAPPED PERSONS SHOULD NOT USE WITHOUT
SUPERVISION.
Hyperthermia occurs when the internal temperature of the body reaches a level several degrees above
the body temperature of 98.6°F or 37°C. The symptoms of hyperthermia include an increase in the internal
temperature of the body, dizziness, lethargy, drowsiness, and fainting. The effects of hyperthermia include:
a) Failure to perceive heat,
b) Failure to recognize the need to exit the hydromassage bathtub,
c) Unawareness of impending hazard,
d) Fetal damage in pregnant women,
e) Physical inability to exit the hydromassage bathtub, and
f) Unconsciousness resulting in the danger of drowning. WARNING - The use of alcohol, drugs, or
medication can greatly increase the risk of fatal hyperthermia.
WARNING - RISK OF ELECTRIC SHOCK - Do not permit electric appliances (such as hair dryers,
lamp, telephone, radio, or television) to be within 5 ft (1.5m) of this unit.
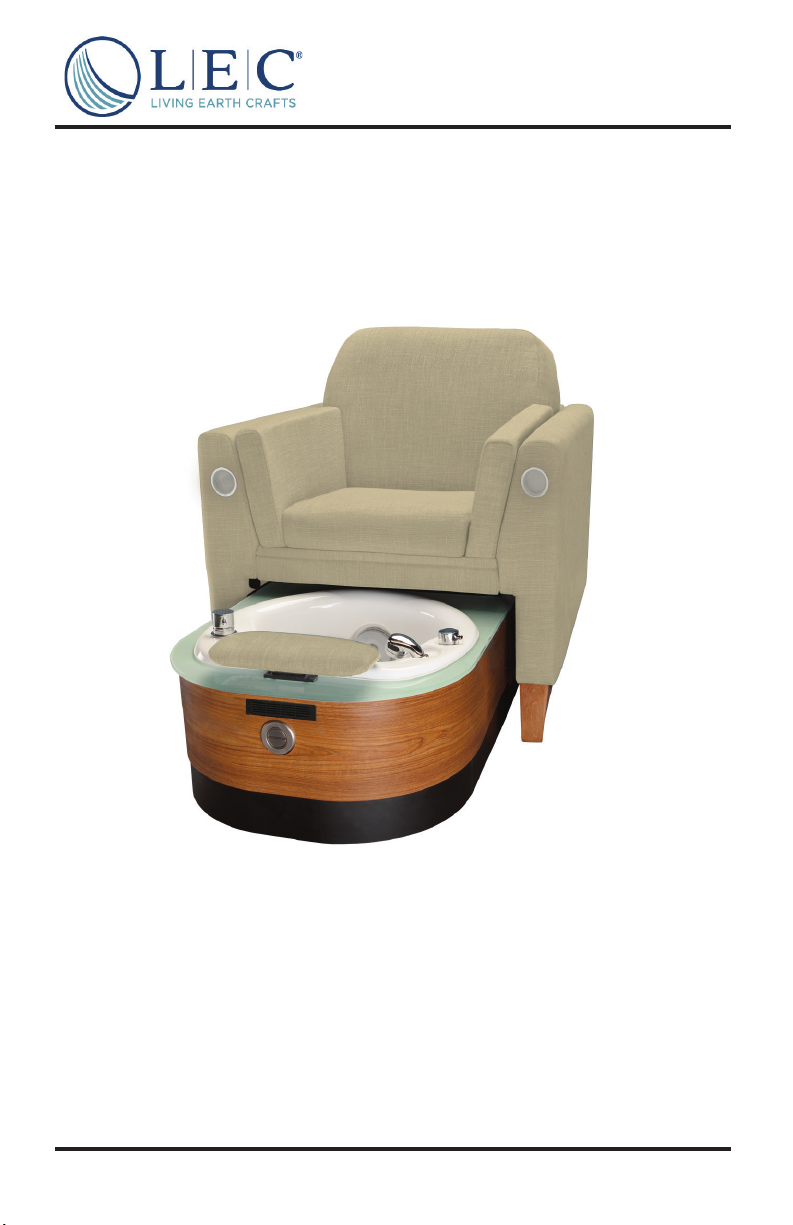
WARNING - RISK OF INJURY - Exercise care when using a foot bath. Use this product for its
intended purpose: a manicure chair and ll and drain indoor commercial appliance for foot and ankle hydro
massage. DO NOT use attachments not recommended by manufacturer.
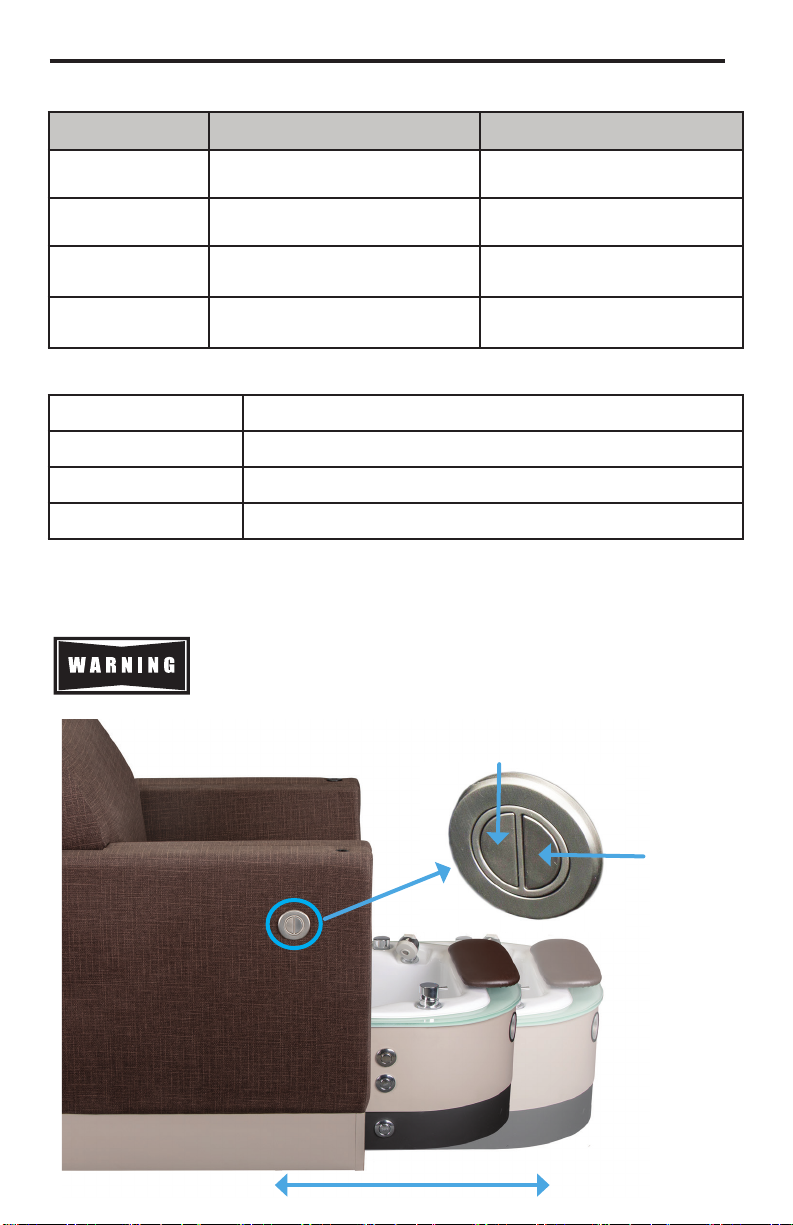
WARNING - MOVABLE PARTS, RISK OF INJURY:
• Keep children away from adjustable seat armrests, tilt back, and seat slide, and footrest.
WARNING - To reduce the risk of burns, re, electric shock, or injury to persons:
• Unplug from outlet before putting on or taking off parts.
• Close supervision is necessary when this furnishing is used by, or near children, invalids, or disabled
persons. DO NOT leave children alone or allow them to operate the controls. Keep controls out of
reach of children. DO NOT allow children to crawl behind the chair.
• Never use this furnishing if it has a damaged cord or plug, if it is not working properly, if it has been
dropped or damaged, or dropped into water. Return the furnishing to a service center for examination
and repair.
• Keep the cord away from heated surfaces.
• Never operate the furnishing with the air openings blocked. Keep the air openings free of lint, hair, etc.
• Never drop or insert any object into any opening.
WARNING - RISK OF HYPERTHERMIA AND POSSIBLE DROWNING. WATER
TEMPERATURE IN EXCESS OF 38°C or 100.4°F CAN BE INJURIOUS TO YOUR HEALTH.
CHECK AND ADJUST WATER TEMPERATURE BEFORE USE.

READ AND SAVE THESE INSTRUCTIONS 3
SECTION 1: SAFETY INFORMATION
• DO NOT reach for any electrical object that has fallen into the water. Unplug immediately.
• DO NOT drop or insert anything into jet opening.
• DO NOT operate without the complete jet assembly installed or without water lled 1 inch above jets.
• DO NOT overll the basin.
• DO NOT stand on or in the basin, or on the foot rest.
• DO NOT leave this appliance unattended when in operation.
• DO NOT use outdoors.
• Keep the electrical cord away from heated surfaces.
• Connect this appliance only to a properly grounded outlet.
• To avoid injury, exercise care when entering or exiting the chair and foot bath.
• Use caution when making positioning adjustments to your chair. Keep all equipment and body parts
away from moving parts while making any adjustments.
• It is important that you clean and disinfect the jets and basin after every use.
• Hydrotherapy should be pleasant and comfortable. Should you or a client experience any pain or
discomfort while using the foot bath, discontinue use immediately and consult a physician.
• You or your clients should consult a physician if diabetic, have poor circulation, if feet or legs are in-
amed, have an open wound, or if you have questions about whether you should be using hydro mas-
sage equipment.
• A qualied plumber and electrician are strongly recommended to install your foot bath.
• Make certain that the cord and plug are maintained in good condition and are not allowed to become
damaged while in use. Avoid positioning the cord in the trafc lane and it is always kept out of the way.
Take this furnishing out of service immediately if the cord or plug becomes damaged in any way.
• Do not attempt to repair. All repairs must be performed by an authorized service representative.
1. RISK OF ELECTRIC SHOCK. Connect only to a circuit protected by a ground-fault
circuit-interrupter.
2. Grounding is required. The unit should be installed by a qualied service
representative and grounded.
This product must be grounded. If it should malfunction or break down, grounding provides a path of
least resistance for electric current to reduce the risk of electric shock. This product is equipped with
a cord having an equipment-grounding conductor and grounding plug. The plug must be plugged into
an appropriate outlet that is properly installed and grounded in accordance with all local codes and
ordinances.
Improper connection of the equipment-grounding connector can result in a risk of electric shock. Check
with a qualied electrician or serviceman if you are in doubt as to whether the product is properly grounded.
Do not modify the plug provided with the product - if it will not t the outlet, have a proper outlet installed by
a qualied electrician.
INSTALLATION INSTRUCTIONS / GROUNDING INSTRUCTIONS
Reset
Button
GFCI Outlet
Grounding Pin
Test
Button

SECTION 2: PRODUCT OVERVIEW
4
Footrest
Adjustment
Button
Light Button
*Chair shown with oponal nishes
Footrest
Tub Basin
Integrated
Ventilation
Discharge Pump
Button
Water Fill
Valve
Integrated
Ventilation
Jet Button
Sprayer/Fill
Drain Release

*Measurements may vary due to natural material variaons.
5
Feature Standard Oponal
Electric Retractable
Footbath X
Electronic Footrest X
Hand Sprayer X
Power Drain &
Flexible Plumbing X
Tempered Glass
Basin Top X
Upholstery Nature’s Touch
Ultra Velvet
Ultra Weave (with
Alta Guard treat-
ment)
Integrated Venlaon X
Manicure Sidetrays X
Relaxor® Heat &
Massage X
Included Features
Product Specications
Overall Width 34” (88 cm)
Length (chair only) 34.25” (88 cm)
Length (chair w/tub) 58.125” (147 cm)
Chair Height 39” (99 cm)
Seat Height 22” (56 cm)
SECTION 2: PRODUCT OVERVIEW
Sprayer/Fill
Drain Release

SECTION 3: OPERATING INSTRUCTIONS
Retractable Tub Operation
Always use extreme cauon when making any posion adjustments to your
chair/tub. Ensure all body parts and objects are clear from all moving parts.
Push & hold to
retract tub
Push and hold to
extend tub
Light Button
Your Wilshire LE has a tub that conveniently retracts underneath the chair for manicure
posioning. A cover is included that can be placed over the tub once fully retracted.
6
Jet Button
Electrical Specications
Spec North America Europe/Asia
Input Voltage 120 VAC 220 VAC
Input Frequency 60 Hz 50 Hz
Total Consumpon
- Standard Features 5.9 Amps, 708 Was 3.2 Amps, 708 Was
Consumpon -
Relaxor Addional 4 Amps, 480 Was Addional 2.2 Amps, 480 Was
Discharge Pump Specication
Motor Design Single-phase synchronous motor
Flow Rate (120V) 24 l/min at 0, 1 bar
Flow Rate (220V) 20 l/min at 0, 1 bar
Duty Cycle Connuous

SECTION 3: OPERATING INSTRUCTIONS
7
Pipeless Jet & Chromasoothe Light
Pressing the jet On/O buon once will turn on the jet, and pressing the buon again will turn
the system o. The light buon works in the same manner. NOTE: Turn on the jet ONLY AFTER
the tub is lled with water, and ensure you turn the jet OFF before draining the tub.
Running the jet without lling the tub with water can damage or destroy
the jet. Ensure that a MINIMUM of one (1) inch of water is above the jet
prior to use.
Light Button
Water Fill Valve
There is no automac shuto with the water ll valve. You MUST turn the
valve OFF aer the tub is lled to prevent overow and/or ooding. Do not
walk away from the tub when it is lling with water.
Down-OffUp-FillLeft-Cold Right-Hot
The water ll valve is OFF when poinng DOWN. Water dispenses when you pull the valve UP.
Hot water is dispensed when the valve is turned to the RIGHT. Cold water is dispensed when
the valve is turned to the LEFT.
Jet Button
Motor Design Single-phase synchronous motor
Flow Rate (120V) 24 l/min at 0, 1 bar
Flow Rate (220V) 20 l/min at 0, 1 bar
Duty Cycle Connuous

SECTION 3: OPERATING INSTRUCTIONS
8
Drain Release & Discharge Pump Operation
• Turn the drain knob clockwise to close the drain when lling the tub.
• Turn the knob counterclockwise to open the drain and empty the tub.
• Discharge pump buon is locaon directly below the jets/light buon. Before pressing the
buon, open the drain with the drain knob and let the water start draining towards the
pump. Wait approximately 5-10 seconds for the pump to register, then push the discharge
pump buon.
Discharge
Pump
On/O
Buon
Drain
Release
Footrest Operation
Always use extreme cauon when making any posion adjustments to your
footrest. Ensure all body parts and objects are clear from all moving parts.
Do not sit on or put full body weight on the footrest. It is meant only to
support a client’s feet for a pedicure, not to support body weight.
Push & hold to
raise footrest
Push and hold
to lower
footrest

Drain
Release
SECTION 3: OPERATING INSTRUCTIONS
9
Relaxor® Heat & Massage (Optional)
The following diagrams illustrate the ease-of-use and funconality that the Relaxor® system
provides to you and your clients.
SELECT
WA
VE
PULSE
Ultra
PWR
LO HI
1
2
3
Power
Lower Back Heat - High
Lower Back Heat - Low
Massage All Zones - Connuous
Massage All Zones - Sequenal
Massage All Zones - Short Bursts
Raise Massage Intensity
Raise Massage Speed
Upper Back Massage
Mid Back Massage
Low Back Massage
Lower Massage Intensity
Lower Massage Speed
RISK OF ELECTRIC SHOCK
Keep hand control and all electrical components away from water.
PWR
PWR
• Massage 15 Minute Timer (Standard)
• Massage 30 Minute Timer (Hold Down Button)
• Indicates Active Button
• Indicates Normal Standby
• Indicates High Mode
• Indicates Low Mode
Green Light
Blue Light
Red Light
Orange Light
Symbol Description

SECTION 4: CARE & MAINTENANCE
YOU ARE REQUIRED TO CHECK WITH YOUR STATE BOARD FOR MANDATORY CLEANING AND
DISINFECTING REQUIREMENTS AND PROCEDURES.
The following procedures are important guidelines that will help in keep your Wilshire LE clean
and trouble free for years. It is extremely important to clean and disinfect each pedicure chair
aer each pedicure and aer the last pedicure of the day. (See next page for instrucons.)
Cleaning & Ongoing Maintenance
DO NOT USE acetone, paint thinner, “Armor All” type cleaners, or
industrial cleaners for ANY part of your chair, tub, or components.
DO NOT place nail care products on the tub.
Extended exposure to harsh chemicals can damage the basin, footpad, and/or upholstery.
Failure to comply with all cleaning instrucons can cause damage and void your warranty.
Category Care Recommendation
Upholstery See next page
Laminate
Never use abrasive cleaners. A mild liquid detergent and warm water will
clean soiled surfaces. To avoid discoloraon, cleaners containing petroleum
disllates must not remain on surfaces.
Basin-Acrylic/
Capped/
Fiberglass
Do NOT use abrasive pads or cleaners on any surface. Wipe clean with a
sponge or so brush. Follow Stateʼs cleaning and disinfecng procedures.
Stubborn
Dirt, Stains, or
surface
imperfecons
Occasionally stains will not be removed by the above steps, in this case the
use of a Mr. Clean® Magic Eraser will allow for a more aggressive cleaning
without damaging the surface nish. Use the Magic Eraser following the
direcons on the package.
Footrest
A mild detergent and warm water is all that is needed to clean the padded
footrest. However care should be taken to prevent nail polish or acetone
from coming in contact with the footrest. These products may damage or
discolor the upholstery.
10

SECTION 4: CARE & MAINTENANCE
Follow the below cleaning instrucons for your chair’s upholstery. NOTE: There are dierent
instrucons for Nature’s Touch upholstery vs. Ultra Velvet and Ultra Weave. Ensure you follow
the correct procedures.
Upholstery Cleaning & Maintenance
Remove day-to-day dirt and smudges with a mild soap and water soluon. For tough stains
and to disinfect, use a (100 to 1) water to bleach soluon. Spray a damp cloth with the solu-
on to clean.
Aer each cleaning, gently wipe the upholstery with a damp cloth and clean water, then allow
upholstery to air dry before using or storing.
For more dicult stains, please contact your dealer or please call us directly for guidance. For
best results, use only the products suggested above.
Nature’s Touch Upholstery
1. Clean liquid spills quickly with a dry, clean, absorbent cloth. For liquids sll beading up:
• Gently blot (don’t rub) a spill immediately with a dry, clean, absorbent cloth
• No rinsing needed!
2. If any residual spot remains, rinse freely with warm water:
• Remove any excess soil or debris from the surface. Flush soiled area liberally with
warm water then blot with a dry, clean, absorbent cloth.
• Change towel surface frequently unl spot is gone. Try to avoid brushing which can
spread the stain; keep repeang the process unl the spot has been removed.
• Repeat again by rinsing with warm water and then blot clean, dry cloth if needed.
• It is ok to use a water extracon machine if desired (follow direcons on machine).
3. For dicult or stubborn stains:
• Follow steps 1 & 2 rst, then using 2-3 drops of a mild dishwasher detergent with a
cup of water - apply to the soiled area.
• Gently work the soluon into the area, wait a minute and blot the spot with a
clean, dry, absorbent cloth. Repeat unl spot has been completely removed.
• Aer cleaning, be sure to rinse thoroughly with warm water and blot to remove
any soap residue.
• Any remaining soap not rinsed away in the fabric can cause a reoccurring stain.
• For more dicult stains, please contact your dealer or please call us directly for
guidance.
4. DO NOT USE:
• Harsh detergents or solvents
• Fabric soeners
• Cleaners containing oxidizers
Ultra Velvet & Ultra Weave Upholstery
11

SECTION 4: CARE & MAINTENANCE
Tub Cleaning Guide
Always refer to your state and local codes for specic cleaning requirements.
NEVER USE abrasive cleaners on any surface area. Failure to comply can
cause damage and void your warranty.
The removable jet assembly MUST be placed into the motor housing in the correct order and
posion or the jet may be damaged. This will NOT be covered by any Living Earth Cras war-
ranty. Never turn the jet on without adequate water in the basin. There must be at least one
(1) inch of water above the motor housing.
12
Recommended Cleaning and Disinfecting Products
Your state board requires disinfecng of your pedicure basin. Living Earth Cras recommends
“Splish Splash One-Step Disinfectant.”
While other EPA registered products are available for maintaining pedicure tubs, we have found
Splish Splash to be the most eecve, mul-purpose and economical product on the market.
Products NOT Recommended
• Silicate based bath addives/scrubs - may void warranty.
• Oil-based products.
• High foam agents (use only low foam soluons).
• Abrasive cleaners that might damage the system components, and scratch/dull the basin
surface (major scratches will require professional renishing.
• To avoid discoloraon, products with petroleum disllates must not remain on surfaces.
Jet System Components
Jet Housing
Jet Cover
Magnec Impeller
Tub Liners
Tub liners may be used with this system - it must sit between the housing and the impeller.

13
SECTION 4: CARE & MAINTENANCE
Tub Cleaning Guide
Cleaning After Each Client & End of Day
1. Drain the tub of all water.
2. Firmly pull the jet assembly away from the tub to remove. (Fig. 1)
3. Rotate the cover to unlock and separate the cover, magnec impeller, and housing. (See
Fig. 2 to show how to unlock, See previous page for image idenfying jet assembly parts.)
4. Place jet cover, impeller, and housing into a sink. Use a non-abrasive liquid soap and a
clean brush to remove any visible residue. Rinse with fresh water, and dry with a clean
paper towel.
5. Reassemble the jet assembly and reaach to the tub.
6. Fill basin with warm water and add the correct amount of an EPA-registered liquid
disinfectant (Splish Splash strongly recommended). Turn on the jet to circulate the water
for at least 10 minutes, scrubbing all visible residue from the inside walls of the basin with
a sponge/so brush. NOTE: Brushes must be cleaned/disinfected aer each use.
7. Drain the basin, rinse with fresh water, and wipe dry with a clean paper towel.
Fig. 1 Fig. 2
Cleaning Every Other Week
1. Fill tub with water and one-third (1/3) cup of 5.25% chlorine bleach for each one (1)
gallon of water. (An alternave to bleach would be an EPA-registered disinfectant with
demonstrated bactericidal, fungicidal, and virucidal acvity.)
2. Turn on the jets to circulate the soluon for 5-10 minutes and then sit for 6-10 hours.
3. Drain the basin, rinse well with fresh water, and wipe dry with a clean paper towel.

14
SECTION 4: CARE & MAINTENANCE
This helpful troubleshoong guide will provide you with informaon about how to recognize a
problem with your product, determine possible causes, and nd a soluon.
In the event your specic situaon is not covered in this guide, please contact Living Earth Cras
so our technical support department can assist you. Beyond the troubleshoong guide below, do
not aempt to repair the issue yourself. This can void your warranty.
Unauthorized service will not be covered. Please be sure to contact Living Earth Cras Customer
Service rst at (800) 358-8292, (760) 597-2155 Int’l.
Troubleshooting
Issue Solution
No Power/Not
Operang
1. Ensure the power cord is properly plugged into an operaonal GFCI
power supply/outlet.
2. Check GFCI reset and circuit breakers or fuses.
3. Ensure the outlet in your room is receiving power. This can be done
by plugging in a small appliance and turning it on.
No Power to Jet/
Jet not Operat-
ing
1. Ensure the power cord is properly plugged into an operaonal GFCI
power supply/outlet.
2. Check GFCI reset and circuit breakers or fuses.
3. Check jet cover is locked into posion. You will feel the cover “click”
into place.
4. Ensure magnec rotor/impeller is correctly installed in the case.
5. Reset the motor by unplugging the system, waing 5 seconds, then
plugging in again.
Excessive Noise
from Jet
1. Remove jet assembly and inspect for dirt buildup, debris, or damage.
2. Follow cleaning instrucons or replace if necessary.
Water Leakage
1. Check and ensure all visible bolts are ghtened.
2. Call a plumber to determine the source of the leak.
3. If the leak is from the jet system, contact LEC customer service.

15
Living Earth Cras (LEC) oers an industry best warranty on all pedicure units.
• Motors and controls, actuators, foam and upholstery are warranted for two
(2) years, including parts and labor unless otherwise noted.
• Glass parts are warranted for one (1) year.
• Accessories and replacement parts are warranted for ninety (90) days from
date of shipment.
Living Earth Cras may repair or replace defecve components at our discreon.
Living Earth Cras will return the warranted product, standard shipping pre- paid, to
customers in the connental US. Internaonal customers are responsible for any ap-
plicable dues and taxes, as well as all shipping charges inbound and outbound.
Excluded from Limited Warranty:
1. Unauthorized repairs.
2. Damage due to freight, accident, natural disaster, and/or abuse.
3. Damage or malfuncons due to improper installaon including but not lim-
ited to, failure to comply with all naonal, state, and local plumbing, electri-
cal, and building codes.
4. Fading, discoloraon, or staining of any part due to improper water addi-
ves, hard water, or harmful cleaning agents or chemicals.
5. Damage to drain pump due to obstrucon in drain hose and/or debris in
pump impeller housing.
All warranes are limited to repair or replacement, at Living Earth Cra’s discreon,
unless otherwise stated. This limited warranty applies only to pedicure chairs installed
in any one of the y (50) States of the United States, the District of Columbia, or
provinces of Canada.
• Jet cover and/or impeller
• Footrest/leg supports
• On/o air actuated buon
• Black plasc parts
• Manicure trays
• Replacement upholstery
• Faucet cartridge and/or ller-sprayer
• Relaxor
• Any LED light
• Handheld control wands
• Any internaonal shipment includ-
ing but not limited to Canada and
Mexico
Parts and/or circumstances for which labor is NOT COVERED - Parts noted below are
simple to replace and DO NOT require a service technician:
Warranty Information
SECTION 4: CARE & MAINTENANCE

2½” External Vent Pipe
Wall Mount male stub
Flex or Hard Mount
16
SECTION 5: INSTALLATION
Technical Drawings
WATER LINES HOT/COLD
1/2” female pipe thread
WATER DISCHARGE LINE
1” female pipe thread
VENTILATION
LINE
2 1/2” outlet
Water, discharge, and venlaon lines will need to be connected. See technical drawings below
showing connecon points. A licensed plumber and electrician must make the ulity connecons
to this pedicure chair.
NOTE: INSTALLER/OWNER BEARS ALL RESPONSIBILITIES TO COMPLY WITH ALL STATE AND LOCAL CODES
FOR PLUMBING AND ELECTRICAL WHEN INSTALLING THIS PRODUCT. FAILURE TO COMPLY WITH THESE
INSTRUCTIONS MAY VOID WARRANTY.
22”
23 7/8”
39”
25 3/8”
57 1/2”
Power Cord
29 3/4”
34 1/2”
34 1/2” 34 1/2”
2½”
Diameter
Vent
5” x 1½”
Vent
Vacuum Outlet: 165-170 CFM
to achieve 50 CFM with all
vents open

SECTION 5: INSTALLATION
Recommended Spacing
Wall
Wall
18”
for trolley
12”
minimum
8”
minimum
34 1/2”
25 3/8”
Wall
Wall
Plumbing & Power Connections - Required Setup
2½” External Vent Pipe
Wall Mount male stub
Flex or Hard Mount ¾” MPT Waste Line / male stub
Flex-line Connecon recommended
½” MPT Hot/Cold Supply Valves
Wall Mount 4-8” Apart
Flex-lines Connecons recommended
Separate and dedicated 20 Amp
GFCI protected circuit is required
single
spaced
bench
spaced
17
WATER LINES HOT/COLD
1/2” female pipe thread
WATER DISCHARGE LINE
1” female pipe thread

Contact Us
Living Earth Crafts
990 Joshua Way
Vista, CA. 92081
(800) 358-8292
(760) 597-2155 Int’l
(866) 449-8872 fax
Hours of operation:
Monday - Friday
8:00 a.m. to 5 p.m. PST
Saturday - Sunday
Closed
Visit us online at: livingearthcrafts.com
Join us on
Facebook
Follow us on
Twitter
Connect with us
on Linked In
Follow us on
Instagram
Table of contents
Other Lec+ Indoor Furnishing manuals
Popular Indoor Furnishing manuals by other brands

American Worldwide Imports
American Worldwide Imports DX-0601C Assembly instructions

LDI Spaces
LDI Spaces SAFCO 6689 Assembly instructions

Superfront
Superfront TOP BESTA Mounting instructions

Forte
Forte TZS52RBB Assembling Instruction

Lightolier
Lightolier Lighting Systems LP-9 Specification sheet

Safavieh Furniture
Safavieh Furniture SEA8018 quick start guide

Cello
Cello 502311697 instruction manual

Neo Chair
Neo Chair DBS Assembly instruction

Whalen Furniture
Whalen Furniture Airstream MAL-70BK Assembly instructions

DRAENERT
DRAENERT WHY NOT 1212 Assembly instructions

LDI
LDI SAFCO Vue 3395 Assembly instructions

vedere
vedere DUAS PORTAS 600089 Assembly instructions