SAFE ALL
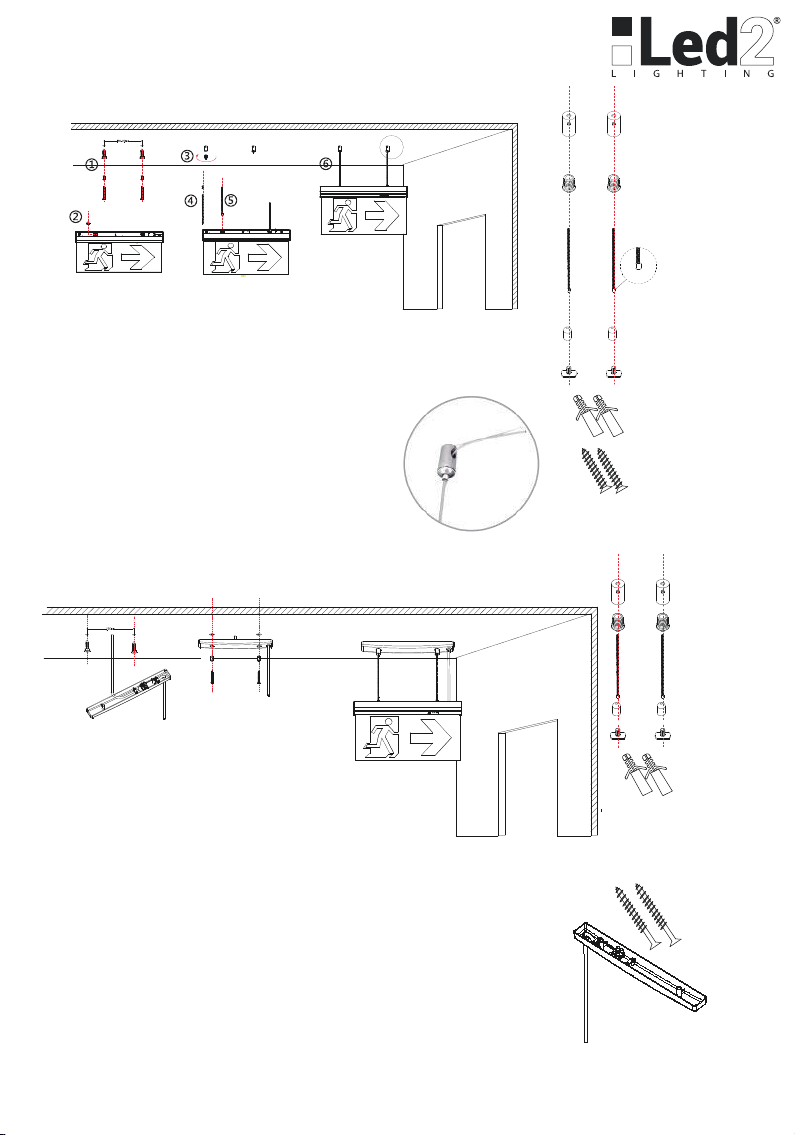
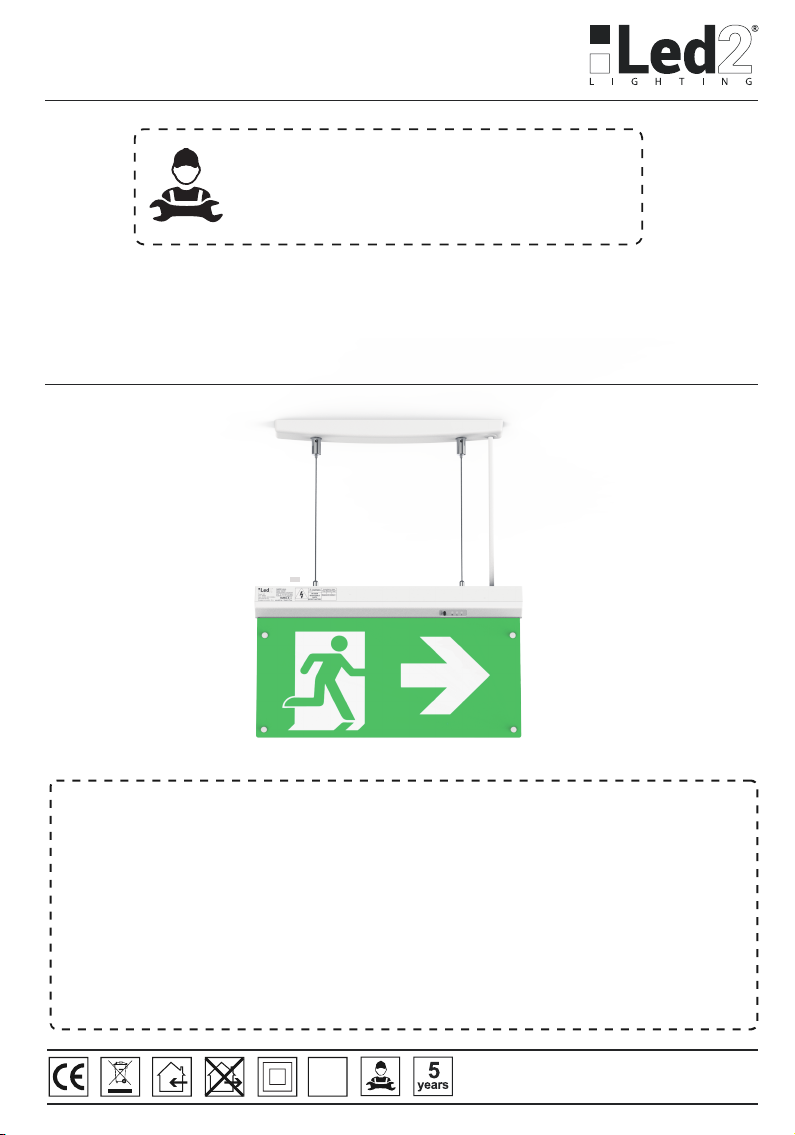
The installation may only be carried out by a technician
Nur ein Techniker kann die Installation durchführen
Instalaci smí provádět pouze technik
Inštaláciu môže vykonať iba technik
This product contains a light source of energy efficiency class G
Dieses Produkt enthält ein Leuchtmittel der Energieeffizienzklasse G
Tento výrobek obsahuje světelný zdroj třídy energetické účinnosti G
Tento výrobok obsahuje svetelný zdroj triedy energetickej účinnosti G
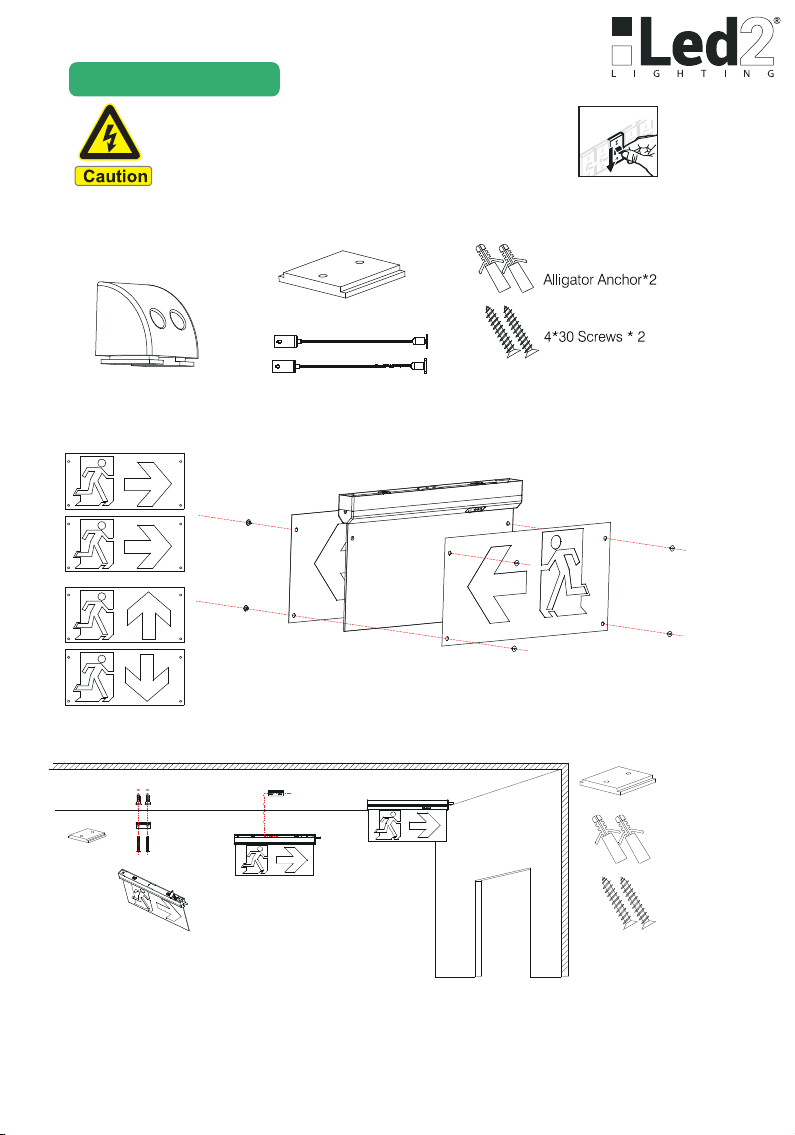
(EN) CAUTION!
Turn off the main power before proceeding with the installationin order to prevent possible shock. The installation may only be carried out by a technician or a qualified
person. If the lamp has a lampshade/diffuser, handle it carefully as it is fragile. With an integrated LED light source, only a technician or a qualified person can make the
replacement. The manufacturer is not responsible for the incorrect use and assembly of its products.
(DE) ACHTUNG!
Vor der Installation ist es notwendig, den Hauptstromkreis zu unterbrechen, um ein Stromschlag zu vermeiden. Die Installation darf nur von einem Techniker oder einer
qualifizierten Person durchgeführt werden. Wenn die Lampe einen Lampenschirm/Diffuser hat, gehen Sie vorsichtig damit um, da sie zerbrechlich ist. Mit einer
integrierten LED-Lichtquellekann nur ein Techniker oder eine qualifizierte Person den Austausch vornehmen. Der Hersteller ist nicht verantwortlich für die fehlerhafte
Verwendung und Montage seiner Produkte.
(SK) UPOZORNENIE!
Pred inštaláciouje nevyhnutné odpojiť hlavný elektrický okruh, aby ste predišli zasiahnutiu elektrickým prúdom. Montáž môže vykonať iba kvalifikovaná osoba. V prípade,
že má svietidlo tienidlo/difúzor, narábajte s ním opatrne, pretože je krehké. Pri integrovanom LED svetelnom zdroji môže výmenu zrelizovať iba technik alebo
kvalifikovaná osoba. Výrobca nenesie zodpovednosť za nesprávne zachádzanie s produktom.
(CZ) UPOZORNĚNÍ!
Před instalací je nutné odpojit hlavní elektrický okruh, abyste předešli zasažení elektrickým proudem. Montáž může provádět pouze kvalifikovaná osoba. V případě, že
má svítidlo stínidlo/difuzor, zacházejte s ním opatrně, protože je křehké. Při integrovaném LED světelném zdroji může výměnu zrelizovať pouze technik nebo kvalifikovaná
osoba. Výrobce nenese odpovědnost za nesprávné zacházení s výrobkem.
www.led2.eu
IP
40