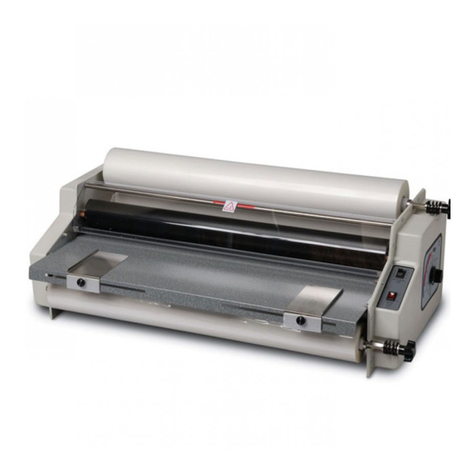
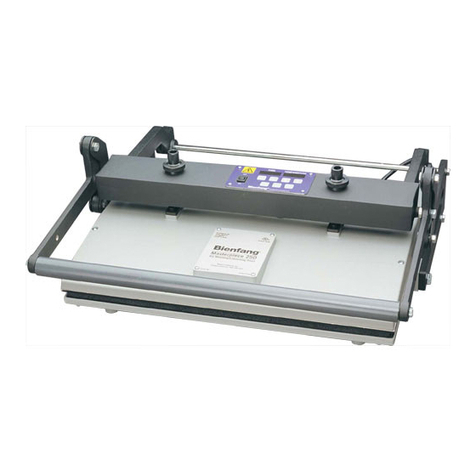
Ledco XL-44 User manual

Instruction Manual
Provided By
http://www.MyBinding.com
http://www.MyBindingBlog.com
Ledco XL-44
Wide Format
Pouch Laminator

READ ALL PRECAUTIONS &
INSTRUCTIONS CAREFULLY
BEFORE OPERATING LAMINATOR
Setup
Instruction
Operation
Maintenance
Operation
Manua
December 2000
44” POUCH
LAMINATOR

TABLE OF CONTENTS Page No.
1.0 INTRODUCTION 2
1.1 Features and benefits 3
1.3 Specifications 4
1.4 Princip es of operation 5
1.5 Warranty 6
2.0 UNPACKING AND INVENTORY 8
3.0 SAFETY PRECAUTIONS 10
4.0 SETUP & OPERATION 12
4.1 Warm up to operating temperature
4.2 Durafi m Pouch Laminating 12
4.3 Durafi m Mounting & Laminating 13
4.4 Durafi m Mounting 14
5.0 MAINTENANCE 15
5.1 Month y Service Schedu e 15
5.1.2 Rubber Ro C eaning 15

1.0 INTRODUCTION
The 44” Pouch Laminator, when used in conjunction with Graphic Durafi m
mounting boards and pouches is designed to provide a qua ity amination
using a wide range of papers and materia s. Common app ications inc ude
but are not imited to: maps, digita imaging, packaging, posters, menus,
instructiona aids, signs, presentation materia s, photographs, copies
(B&W or co or), prints, f yers, promotiona sheets, and many other items.
To assure the best performance from your new aminator, p ease fo ow
the safety, insta ation, operation, and maintenance instructions in this
manua . Read the manua before using the aminator. Keep the manua with
the machine and periodica y review the instructions. This manua a so
contains the warranty. Additiona copies are avai ab e from the
manufacturer.
We take this opportunity to thank you for se ecting a LEDCO Pouch
aminator and to assure you of our commitment to your satisfaction with
our products.
As you unpack your new aminator, p ease comp ete the fo owing
information. A ways have this information ready when ca ing.
Dea er Where Purchased_____________________________________________
Insta ationDate______________________________Seria #__________________
GWJ Company
2117 Weeping Wi ow Lane
Hacienda Heights, CA 91745
Phone: 626-336-1134 or 800-336-1138 (US on y)
Fax: 626-336-2409

1.1 FEATURES & BENEFITS
Your new pouch aminator has severa standard features that set it apart
from other mode s
•Variab e Heat Contro The heat may be adjusted by the turn of a
knob from 200 to 400 degrees Fahrenheit.
•Rubber Ro Adjustment from 0 to 1 ½” The ro height adjustment
graduations are 0, 1/16, 1/8, 3/16, 1/4, 3/8, 1/2, 5/8, 3/4, 1, 1 1/4, 1 1/2.

1.3 SPECIFICATIONS
US Europe
Maximum laminating width 44" 1117mm
Speed 1 FPM .3 MPM
Maximum laminating thickne up to 1 ½” up to 38mm
Dimen ion 66L 16H 19W 1677mm L
406mm H
483mm W
Shipping Dimen ion 72L 24H 26W 1829mm L
609mm H
660mm W
Weight/Shipping weight 130/200 Lb . 59/91 Kg
Power Supply Requirement
110-125V Model 110V
15 amp 50/60Hz
208-240V Model 220V 220V
ingle pha e ingle pha e
15amp 50/60Hz 15amp 50/60Hz
Supply connector 125V Con ult Dealer
NEMA 5-15R
250V
NEMA L6-20R

1.4 PRINCIPLES OF OPERATION
Durafi m Pouch Laminating Two sheets of fi m are put together with
therma adhesive facing each other and sea ed at one edge forming a
pouch. An item to be aminated is p aced between these two sheets of
fi m. The pouch with the item to be aminated is p aced on a s ed and s id
into the pouch aminator. The pouch aminator has one set of ro s. The
bottom ro is co d and driven. The top ro is heated and id es. When the
s ed with pouch intact is s id into the aminator, the top and bottom rubber
ro s come in contact. The bottom ro pu s the s ed through and the top
ro heats the pouch and activates the therma adhesive. The fi m’s
adhesive is pressed into the ink and fibers on the surface of the item being
aminated.
Durafi m Mounting & Laminating One sheet of aminating fi m is
sea ed to the ead edge of a mounting board. The therma adhesive on the
board and the therma adhesive on the fi m, face each other. An item to be
mounted and aminated is p aced between the fi m and the board. When
the board is s id into the aminator, the top and bottom rubber ro s come in
contact with the mounting board. The bottom ro pu s the board through
and the top ro heats the fi m. The fi m’s adhesive and the board’s
adhesive are pressed into the ink and fibers on the surface of the item
being mounted.
Durafi m Mounting – On y The mounting board has a therma adhesive
on one side. An item to be mounted is p aced on the therma adhesive side
of the mounting board. A re ease iner sheet with si icon coating on one
side is p aced over the surface of the item and covering the entire board
(with the si icon surface facing item and board to prevent adhesive from
the mounting board transferring to the top heated aminating ro ). When
the board is s id into the aminator, the top and bottom rubber ro s come in
contact with the mounting board. The bottom ro pu s the board through
and the top ro heats the item to be mounted and the mounting board. The

board’s adhesive activates and is pressed into the ink and fibers of the
item being mounted.
This pouch aminator is guaranteed against defects in materia and
workmanship for a period of two years after date of shipment. Defective
parts wi be rep aced without cost within the warranty period, provided
the aminator has not been abused, a tered, or operated contrary to
instructions. Ledco, Inc. sha not be iab e for any a terations or repairs
except those made with its written consent.
This ob igation under warranty sha not extend to the fo owing:
•The adjustment or rep acement of parts which are the norma
responsibi ity of the owner. For examp e, rubber ro s, scratched or
chipped paint, oose fasteners (screws, nuts, etc.), or other items that
show wear under norma use; i.e. "norma wear parts".
•Norma operating adjustments to heat, thickness, etc.
•Parts that are not manufactured by Ledco, Inc. If the individua
manufacturer warrants these items, their warranty is, in turn, passed
on to the origina purchaser of the aminator. Ledco, Inc. does not incur
any ob igation or iabi ity as a resu t of the warranties, which are the
so e responsibi ity of the appropriate individua manufacturer.
Any pouch aminator that proves defective during the warranty period may
be returned to Ledco, Inc. un ess it is decided that the necessary repairs
can be made during a service ca . Notice of the defect shou d be
submitted in writing or by phone to Ledco before any steps are taken to
repair or return the machine. Phone: 585-367-2392 Fax: 585-367-2978
If the machine is returned, the fo owing shou d accompany it.
DURAFILM is a trademark of Graphic Laminating. DURAFILM
MOUNTING BOARDS are constructed of 3/16” foam board with a heat-
activated adhesive on the aminating side of the board. The aminating
fi m on the Mounting /Laminating pouch is avai ab e in G oss, Satin,
Matte, and Crysta . For guaranteed best resu ts fo owing our mounting
instructions, we recommend using on y DURAFILM MOUNTING
BOARDS, DURAFILM MOUNTING & LAMINATING POUCHES,
DURAFILM POUCHES and SLEDS. Heat sea irons and g ue sticks are
a so avai ab e at www. edco aminator.com.

•Customer name, address, and phone number
•Written particu ars regarding the ma function
•Date of insta ation
•Seria number of the machine.
•RA number on outside of box
Send a returned equipment freight PREPAID to:
Ledco, Inc., 4265 North Main Street, Hem ock, NY 14466
If your machine needs servicing after the warranty has expired, p ease
contact your dea er. Ledco, Inc. does offer technica support if your dea er
is unab e to assist.
This warranty is express y in ieu of a other warranties expressed or
imp ied. This inc udes the warranties of Merchantabi ity and Fitness For
Use and of a other ob igation or iabi ities of Ledco, Inc. Ledco neither
assumes nor authorizes any other person to assume it for any other
ob igation or iabi ity in connection with the sa e of this aminator except as
provided for above.
Further, this warranty wi not app y to any machine or part thereof which
has been damaged as resu t of an accident or as a resu t of abuse,
misuse, or neg ect of the machine. The warranty is a so void if the pouch
aminator has been a tered or repaired by any other than an authorized
repair faci ity or dea er. If you have any questions about this warranty,
contact Ledco.
Phone: 585-367-2392
Fax: 585-367-2978
Emai : www. edco@ edcoinc.com
RETURNS MUST HAVE A RETURN AUTHORIZATION NUMBER
ON THE OUTSIDE OF THE SHIPPING CONTAINER.

2.0 UNPACKING AND INVENTORY
The aminator arrives fu y assemb ed. Upon arriva , inspect the unit
immediate y and thorough y using the packing ist that accompanies the
shipment. P ease fo ow these steps to correct any prob em with your
shipment. Ledco, Inc. cannot accept any responsibi ity for damage or oss
un ess you notify us within ten days of receipt of shipment and fo ow
these procedures:
BREAKAGE OR DAMAGE: It is imperative that any shipping damage is
reported and a c aim is fi ed with the de ivering carrier immediate y upon
receipt of damaged shipment. The procedure for reporting damage
depends on the method of shipment. P ease note damage on bi of ading.
FREIGHT, EXPRESS, or TRUCK DELIVERY: According to the contract
terms and conditions of the carrier, the responsibi ity of the shipper ends
at the time and p ace of shipment. The carrier then assumes fu
responsibi ity for the shipment.
1. Notify Ledco IMMEDIATELY.
2. Ho d damaged goods with container and packing for inspection by
the examining agent. Ledco wi arrange the inspection.
3. DO NOT RETURN ANY GOODS TO LEDCO PRIOR TO
AUTHORIZATION BY LEDCO.

4. Submit a copy of the inspector's report to Ledco. Ledco wi fi e the
c aim with the carrier. Ledco wi rep ace your machinery if
necessary. You wi be credited for the damaged machinery when the
c aim is processed.
SHORTAGE:
1. Check the packing ist notations. The apparent shortage may have
been marked as an internationa short-shipped (back-ordered) item.
2. Examine the container and packing materia , particu ar y for sma er
items.
3. Make certain that unauthorized personne prior to comp ete
unpacking did not remove the item and inventory.
4. Ca us and send immediate written notification of the shortage.
INCORRECT SHIPMENT:
1. If the materia you receive does not correspond with your order,
notify Ledco immediate y. Inc ude the order number and item(s).
2. Ho d item(s) unti return instructions are received.
RETURNS: DO NOT RETURN DAMAGED OR INCORRECT ITEMS UNTIL
YOU HAVE RECEIVED SHIPPING INSTRUCTIONS AND AN
AUTHORIZATION NUMBER FROM LEDCO.

3.0 SAFETY PRECAUTION
DO NOT OPERATE THIS MACHINE UNTIL YOU READ AND FULLY
UNDERSTAND THE FOLLOWING SAFETY PRECAUTIONS.
1. Never operate this machine without reminding yourse f that a
aminator is a potentia y dangerous too . If misused, used care ess y,
or used without observing the ru es of safe operation, very serious
injury can resu t.
2. Never operate this machine un ess you have been fu y trained and
have received and fu y understood a operating instructions. Make
sure you know how the machine works and how it is contro ed.
3. Never operate this machine without a guards, housings, safety
shie ds, stop switches or other safety devices in p ace and fu y
operationa .
4. Never use this aminator for other than its intended use.
5. Never immerse your aminator in who e or part in any water or other
iquids.

6. Never enc ose your aminator whi e in use as to interfere with its
proper venti ation.
7. Never operate the aminator with a damaged cord, p ug, or after the
aminator has been dropped or damaged in any manner.
8. Never operate this machine if it is not working proper y or if you
notice any abnorma ity in its performance.
9. Never tamper with, rewire, or bypass any contro or safety device on
this machine.
10. Never attempt to c ean feed ro ers whi e the power is on.
11. Never remove the machine housing or attempt any kind of
maintenance without disconnecting power to the unit.
12. A ways be sure a persons are c ear of the machine before pushing
the start button, especia y when mu tip e operators or observers are
present.
13. Never wear oose c othing, ties, jewe ry or any item, which cou d get
caught in the ro ers or machinery when operating the machine.
Operators with ong hair must put their hair up before running the
machine.
14. A ways keep your hands c ear of any moving parts except when the
power is off and you intend to adjust the aminator.
15. A ways unp ug the aminator when it is not to be used for a ong
period.
16. Because castors raise the center of gravity and increase the risk of
tipping, use a minimum of two peop e to move the machine. Move
s ow y, and avoid any obstructions.
17. A ways connect to the proper power supp y of the vo tage, amperage,
and frequency. The aminator comes with a grounded p ug. To reduce
the risk of e ectrica shock, this p ug is intended to fit on y a
grounded out et of proper amperage, and in on y one way. If it does
not fit in the out et, contact a qua ified e ectrician. Do not modify the
p ug in anyway.
18. If the supp y cord is damaged it must be rep aced by a specia cord
avai ab e from the manufacturer or servicing agent.

4.0 SETUP & OPERATION
This section exp ains in detai the setup and operation of your pouch
aminator.
4.1 WARM UP TO OPERATING TEMPERATURE
1. Remove machine from shipping container and p ace in work area.
2. P ug the machine into proper out et.
3. 110v standard 44" 110v 15amp NEMA 5-15R
220v standard 44" 220v 15amp NEMA L6-20R
4. Turn on main power switch.
5. Set ro height adjusting knob to desired thickness of materia to
aminate.
NOTICE TO EMPLOYER: A copy of these safety precautions must be given
to a operators, set-up personne , maintenance peop e, and supervisors of
this machine. A copy shou d a so be hung on the machine readi y
accessib e and visib e to the operator. Additiona copies are avai ab e upon
request.
IMPORTANT: Where a anguage barrier or insufficient schoo ing wou d
prevent a person from reading and understanding these safety
precautions, you shou d either trans ate this information or have it read or
interpreted to the person, and get assurance that it is understood.

6. Set to recommended temperature of 350 degrees.
7. Wait 35-45 minutes for machine to warm up to operating temperature.
4.2 DURAFILM POUCH LAMINATING
You wi need a proper sized mounting s ed (f at board used to carry pouch
through aminator whi e keeping it f at and smooth), and the proper sized
pouch.
Pouch size S ed size
18.5” x 24.5” 21” x 28”
25” x 37” 27” x 40”
37” x 49” 40” x 52”
When ready to aminate, p ease fo ow these easy steps:
1. Turn on your machine by pressing the ON SWITCH.
2. Set to recommended temperature of 350 degrees.
3. A ow the machine to heat for approximate y 35-45 minutes.
4. Check s ed to make sure there are no foreign partic es on the surface.
5. Lay your s ed on f at surface with foam side up.
6. Lay your pouch on the s ed with sea ed edge of pouch toward the front
of the s ed.
7. Make sure the pouch has the thin side up as indicated by the UP
STICKER.
8. Pu back top ayer of pouch and insert item to be aminated. Make sure
item is centered in pouch.
9. Insert sea ed end of pouch under Ho d-down F ap on front of s ed
making sure at east ½ ” is under f ap. Square pouch on s ed.
10. SET MACHINE GAP OPENING TO ¼” by pu ing out Gap Knob on right
side of machine and turning to the proper setting (Pu out to set and
then push in to ho d).
11. Insert pouch and s ed into aminator making sure they are square to
aminating ro s.
12. Remove s ed as soon as it exits aminator. BE CAREFUL NOT TO
TOUCH POUCH UNTIL IT IS COOL.
resu ts when fo owing our pouch aminating instructions, we
recommend using on y DURAFILM POUCHES and SLEDS; to order,
p ease visit www. edco aminator.com

4.3 DURAFILM MOUNTING & LAMINATING POUCHES
When ready to aminate & mount, p ease fo ow these easy steps:
1. Turn on your machine by pressing the ON SWITCH.
2. Set to recommended temperature of 350 degrees.
3. A ow the machine to heat for approximate y 35-45 minutes.
4. Check item to be mounted and aminated to make sure there are no
foreign partic es on the surface.
5. P ace aminating pouch on f at surface and insert item to be mounted
and aminated between the fi m and board. Make sure item is square
to edges of board.
6. SET MACHINE GAP OPENING TO THE THICKNESS OF THE
MOUNTING BOARD (examp e 3/16” board = 3/16” gap) by pu ing out
Gap Knob on right side of machine and turning to the proper setting
(Pu out to set and then push in to ho d).
7. Insert board into aminator (sea ed edge FIRST) making sure the fi m
is f at on the item.
8. The board wi be aminated at a speed of one foot per minute.
9. Remove board from aminator as soon as it is ejected from machine.
10. Lay on f at surface unti coo to touch.
4.4 DURAFILM MOUNTING
MOUNTING BOARDS are constructed of 3/16” foam board with a heat-
activated adhesive on the aminating side of the board. The aminating
fi m on the Mounting /Laminating pouch is avai ab e in G oss, Satin,
Matte, and Crysta . For guaranteed best resu ts fo owing our mounting
aminating instructions, we recommend using on y DURAFILM
MOUNTING LAMINATING POUCHES; to order, p ease visit
www. edco aminator.com
DURAFILM is a trademark of Graphic Laminating. DURAFILM
MOUNTING BOARDS are constructed of 3/16” foam board with a heat-
activated adhesive on the aminating side of the board. For guaranteed
best resu ts fo owing our mounting instructions, we recommend using
on y DURAFILM MOUNTING BOARDS. Heat sea irons and g ue sticks
are a so avai ab e at GRAPHIC LAMINATING; to order, p ease visit
www. edco aminator.com

When ready to mount, p ease fo ow these easy steps:
1. Turn on your machine by pressing the ON SWITCH.
2. Set to recommended temperature of 350 degrees.
3. A ow the machine to heat for approximate y 35-45 minutes.
4. Check item to be mounted and mounting board to make sure there are
no foreign partic es on the surface.
5. P ace mounting board on f at surface and p ace item to be mounted
on the adhesive side of board. Make sure item is square to edges of
board.
6. Tack item to board using a heat sea iron or g ue stick. Tack on y the
front two corners of the item.
7. SET MACHINE GAP OPENING TO THE THICKNESS OF THE
MOUNTING BOARD (examp e 3/16” board = 3/16” gap) by pu ing out
Gap Knob on right side of machine and turning to the proper setting
(Pu out to set and then push in to ho d).
8. P ace re ease sheet over entire surface (si icon side down). This
prevents adhesive from adhering to the rubber ro .
9. Insert board into aminator (tacked edge FIRST).
10. The item wi be mounted at a speed of one foot per minute.
11. Remove board from aminator as soon as it is ejected from machine.
12. Lay on f at surface unti coo to touch.
5.0 MAINTENANCE
This section exp ains the schedu e and the maintenance in detai .
5.1 MONTHLY SERVICE SCHEDULE
5.1.2 CLEANING RUBBER ROLLS

1. Disconnect power to machine.
2. Lift the top front cover up.
3. Use a c ean rag and spray the rag unti damp with a c eaning so ution
(we recommend an a purpose c eaner & degreaser manufactured by
Finger Lakes Chemica , Inc. named ENVIRONMENTALLY CONSCIOUS
SAFER STUFF SAFER THAN SOLVENTS; to order, p ease visit
www. edco aminator.com).
4. Return top front cover to c osed position.

NOTES

NOTES
Table of contents
Other Ledco Laminator manuals

Ledco
Ledco HD-25 User manual

Ledco
Ledco Professor 27 User manual

Ledco
Ledco Econocraft Laminator User manual

Ledco
Ledco Premier 4 User manual

Ledco
Ledco Signmaster User manual

Ledco
Ledco Educator User manual

Ledco
Ledco HS-30 User manual

Ledco
Ledco Professor User manual

Ledco
Ledco Premier 4 User manual

Ledco
Ledco Compass User manual
Popular Laminator manuals by other brands

Lamination Depot
Lamination Depot TL-600 Operation manual

Swordfish
Swordfish 230LR operating instructions

Lami Corporation
Lami Corporation Lotus-14LK-H instruction manual

Rexel
Rexel LP25HS operating instructions

UNITED OFFICE
UNITED OFFICE ULGD 350 A1 operating instructions

UNITED OFFICE
UNITED OFFICE ULG 300 A1 A3 LAMINATOR operating instructions