LEDVANCE LMS Sensor Value Infrared
3
black
score dimension 148 x 210 mm
How to Install:
a. Switch off the power.
b. Please move the upper cover with anti-clockwise whirl as per the diagram on the right.
c. Connect the power and the load according to the connection-wire diagram.
d. Fix the bottom on the selected position with the inflated screw.
e. Install back the upper cover on the sensor.
f. Switch on the power and test it according to the testing guide.
Wire Connection diagram:
(See the right figure)
Connect L, N with power;
Connect N, A with load.
SENSOR INFORMATION
Testing Before Using:
a. Turn the TIME knob anti-clockwise to the minimum (-). Turn the SENS
knob clockwise to the maximum (+). Turn the LUX knob clockwise to the
maximum (sun).
b. When you switch on the power, the sensor and its connected lamp will
have no signal at the beginning. After warm-up for 30sec, the sensor can
start to work. If the sensor receives the induction signal, the lamp will
turn on. If there is no another induction signal any more, the load should
stop working within 10sec±3sec and the lamp would turn off.
c. Turn LUX knob anti-clockwise on the minimum (-). If the ambient light is more than 10LUX, the sensor would not
work, and the lamp stop working too. If the ambient light is less than 10LUX (darkness), the sensor would work.
The sensor should stop working after receiving no induction signals for 10sec±3sec.
Note: When testing in daylight, please turn LUX knob to (SUN) position, otherwise the sensor lamp could not
work! If the lamp is more than 60W, the distance between lamp and sensor should be 60cm at least.
Product Features:
a. Infrared motion sensor with integrated photocell sensing function can help to save
power consumption via turn on and turn off the power according to its setting; It
detects human motion within its detection range.
b. motion sensor cannot receive the induction if there is glass, wood or metal materials
in between within detection range;
c. Selectable time delay period from 10 seconds to 10 minutes via knob switch;
d. Selectable daylight sensing level from 10 lux to 2000 lux via knob switch.
Product Specification:
a. Detection method: Infrared motion sensor with photocell integrated
b. Power Input: 220-240V/AC
c. Input Frequency: 50/60Hz
d. Detection Range: 360°
e. Installing Height: 2.2~4m
f. Ambient Light (Selectable): <10-2000LUX
g. Time-Delay (Selectable):
• Min.:10sec±3sec;
• Max.:10min±3min;
h. Nominal Power Consumption: 0.9W
i. Transmission Power: <10mW
j. Maximum Rated Load:
• 2000W (incandescent lamp)
• 1000W (energy-saving / led-lamp)
k. Detection Motion Speed: 0.6~1.5m/s
l. Detection Distance (selectable): max. 2-6m (<24°C)
Selectable Functions via Knob:
a. Selectable daylight luminance level: Sensing luminance level can work both in the daytime and at night when
you select the “sun” position (max) via knob. It can work in the environment that the luminance is less than
10LUX when it is adjusted to the “moon” position (min). As for the adjustment pattern, please refer to the testing
pattern.
b. Selectable sensitivity (SENS) distance: Sensitivity can be adjusted according to application enquiry. Lowest
sensitivity is with 2m detection diameter and highest sensitivity is with 6m which is suitable for large area.
c. Time-Delay is added continually: When sensor receives the second induction signal after the first induction, it
will perform the time delay period again according to the 2nd induction.
d. Selective time delay period length: It can be set according to the consumer’s desire. The minimum delay period
is 10sec±3sec. The maximum delay period is 10min±3min.
Installation Guide and product diagram
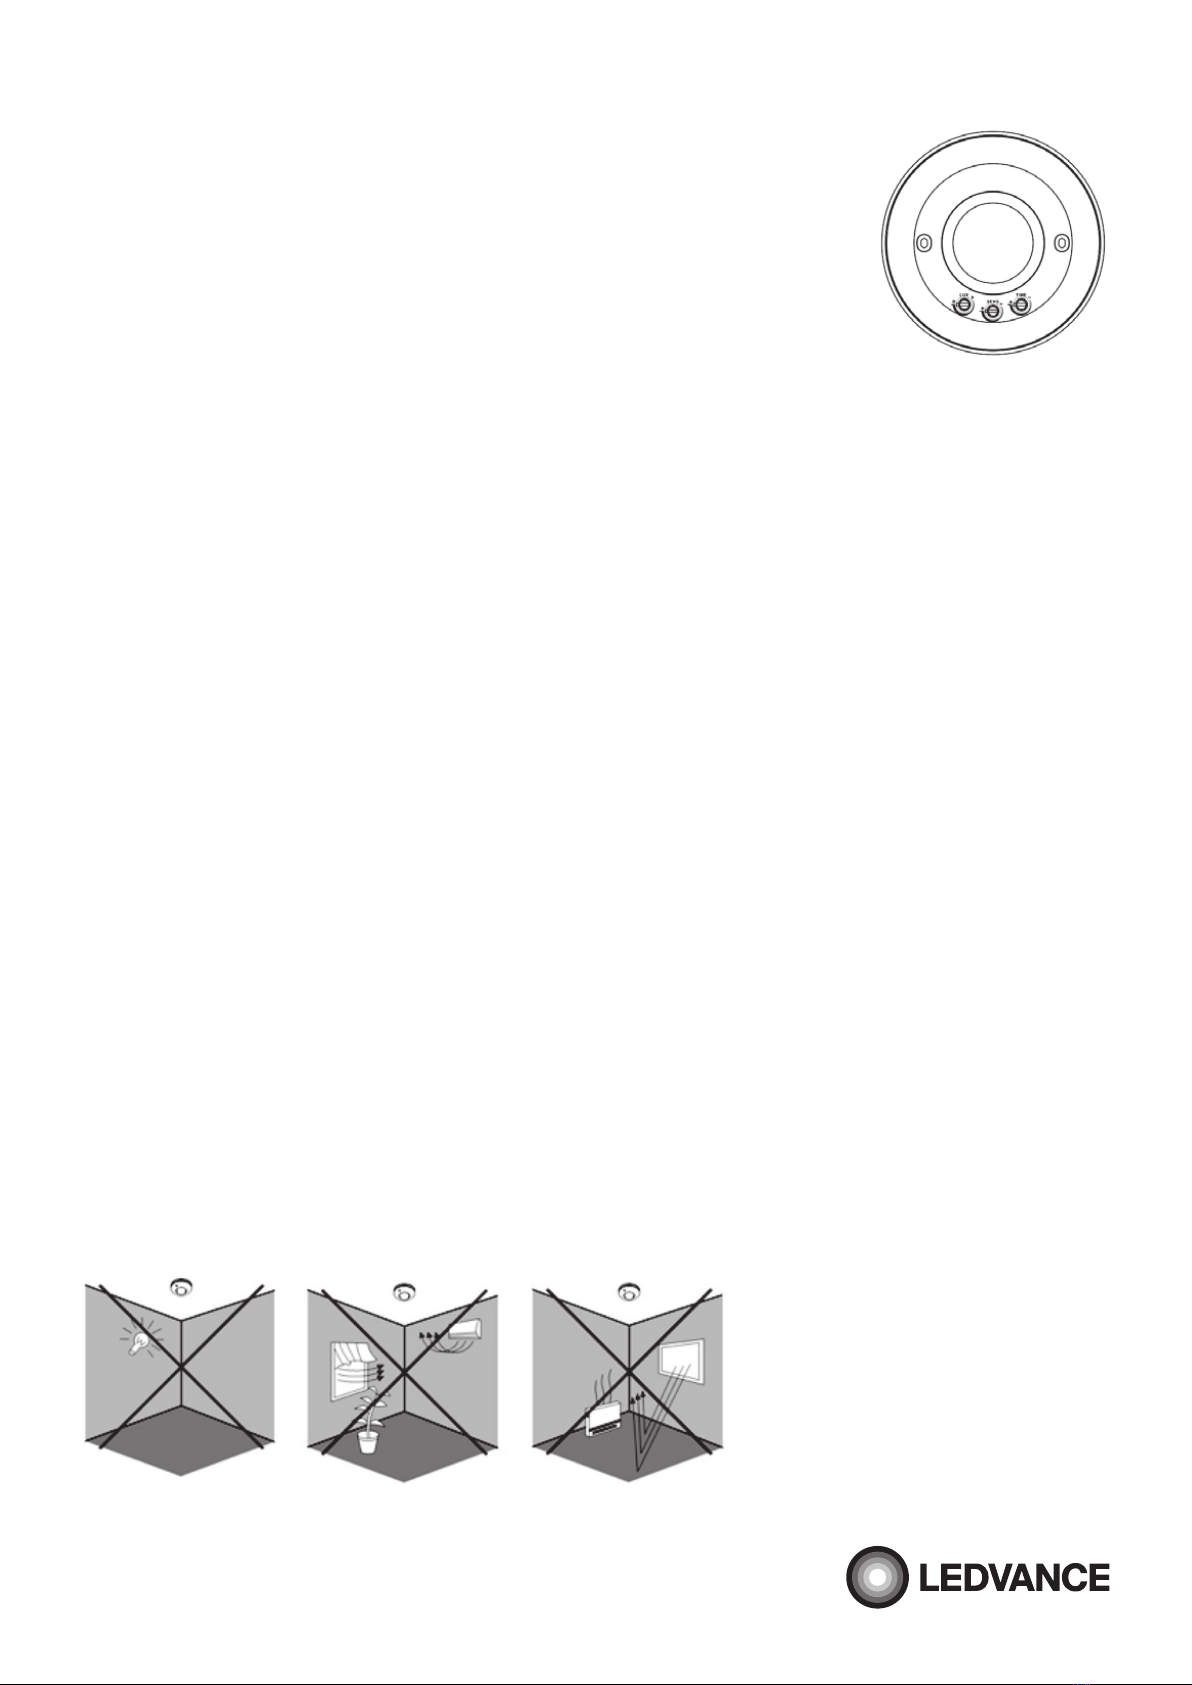
INSTALLATION ADVICE:
As the detector responds to changes of temperature, please avoid the following situations:
a. Avoid directing the detector towards objects with highly reflective surfaces, such as mirrors etc.
b. Avoid mounting the detector near heat sources, such as heating vents, air conditioning units, light etc.
c. Avoid directing the detector towards objects that may move in the wind, such as curtains, tall plants etc.
2.2-4m
3m 3m
Max:3m Max:3m
360°
Height of installation:2.2-4m Detection Distance: Max.6m
11080855 MS-SV-INF-CS-F-360-230V-IP20 UI LEDV v3.indd 3 4/9/2019 4:53 PM