LEDVANCE LMS Sensor Value Microwave
black
score dimension 148 x 210 mm
2
Installation Guide and product diagram
How to Install:
a. Switch off the power.
b. Fix the bottom on the selected position with the inflated screw through the screw holes at the side of the sensor.
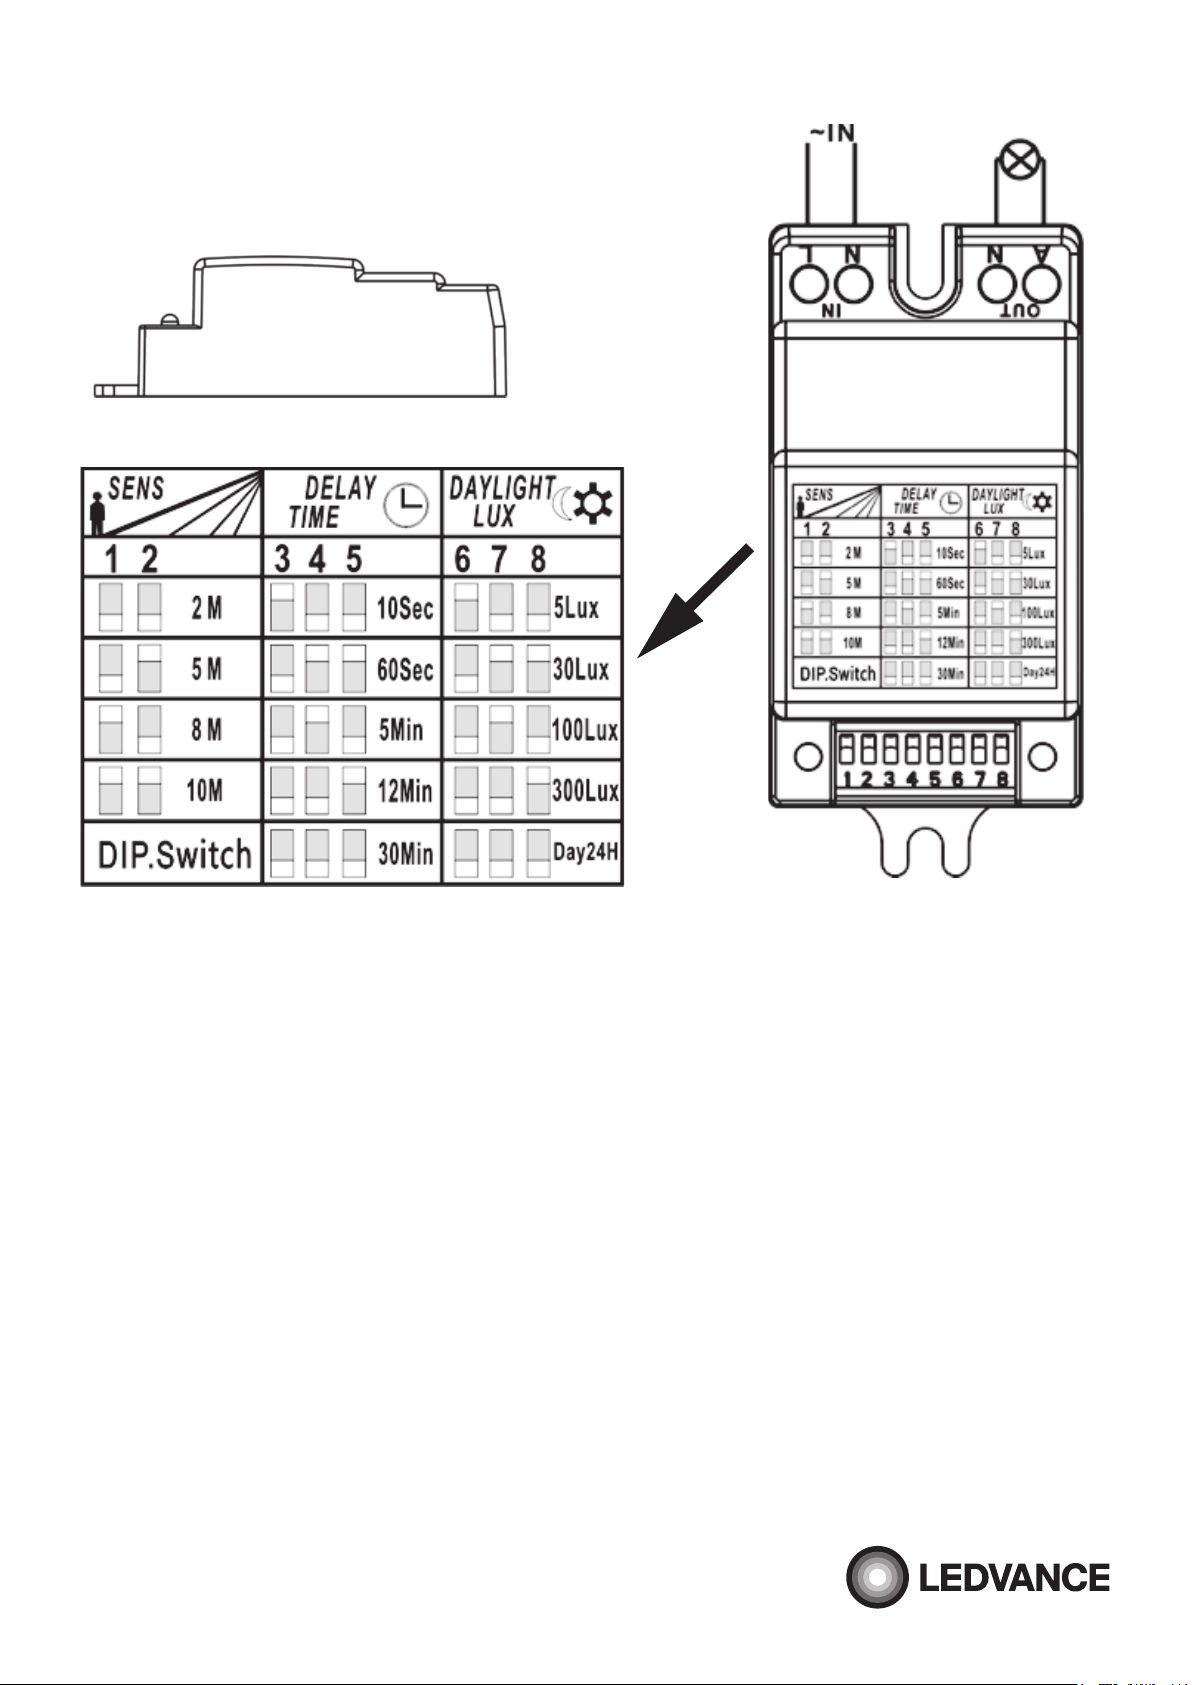
c. Connecting the power and the load to sensor according to the wire connection diagram.
d. Switch on the power and test it according to the testing guide.
Product Features:
a. Microwave motion sensor with integrated photocell sensing function can help to save power consumption via
turn on and turn off the power according to its setting;
b. Selectable detection ranges from 2 meters to 10 meters via dip switch;
c. Selectable time delay period from 10 seconds to 30 minutes via dip switch;
d. Selectable daylight sensing level from 5 lux to 300 lux via dip switch. It is also capable to work for whole day
without notifying any light conditions in the application environment;
e. The sensor can detect the signal passing through the door, glass or thin walls which are not made of metal
material;
Product Specification:
a. Microwave: High-Frequency 5.8GHz CW radar, ISM band
b. Power Input: 220-240V/AC
c. Input Frequency: 50/60Hz
d. Detection Range: 360° Ceiling/180°Wall
e. Installing Height: 1.5~4m
f. Ambient Light (Selectable): 5LUX/30LUX/100LUX/300LUX/ Full DAY
g. Time-Delay (Selectable):10Sec/60Sec/5Min/12Min/15Min
h. Nominal Power Consumption: 0.9W
i. Transmission Power: <10mW
j. Maximum Rated Load:
• 1200W (incandescent lamp)
• 300W (energy-saving /led-lamp)
k. Detection Motion Speed: 0.6~1.5m/s
l. Detection Distance (selectable): 2-10m (radius) (<24°C)
Selectable Functions via Dip Switch:
a. Selectable daylight luminance level: Sensing luminance level can work both in the daytime and at night when
you select the “DAY” position (max) via dip switch. It can work in the environment when the luminance less than
5LUX when it is adjusted on the “5L” position (min). As for the adjustment pattern, please refer to the testing
pattern.
b. Selectable sensitivity (SENS) distance: Sensitivity can be adjusted according to application enquiry. Lowest
sensitivity is with 2m detection diameter and highest sensitivity is with 10m which is suitable for large area.
c. Time-Delay is added continually: When sensor receives the second induction signal after the first induction, it
will perform the time delay period again according to the 2nd induction.
d. Selective time delay period length: It can be set according to the consumer’s desire. The minimum delay period
is 10sec±3sec. The maximum delay period is 15min±3min.
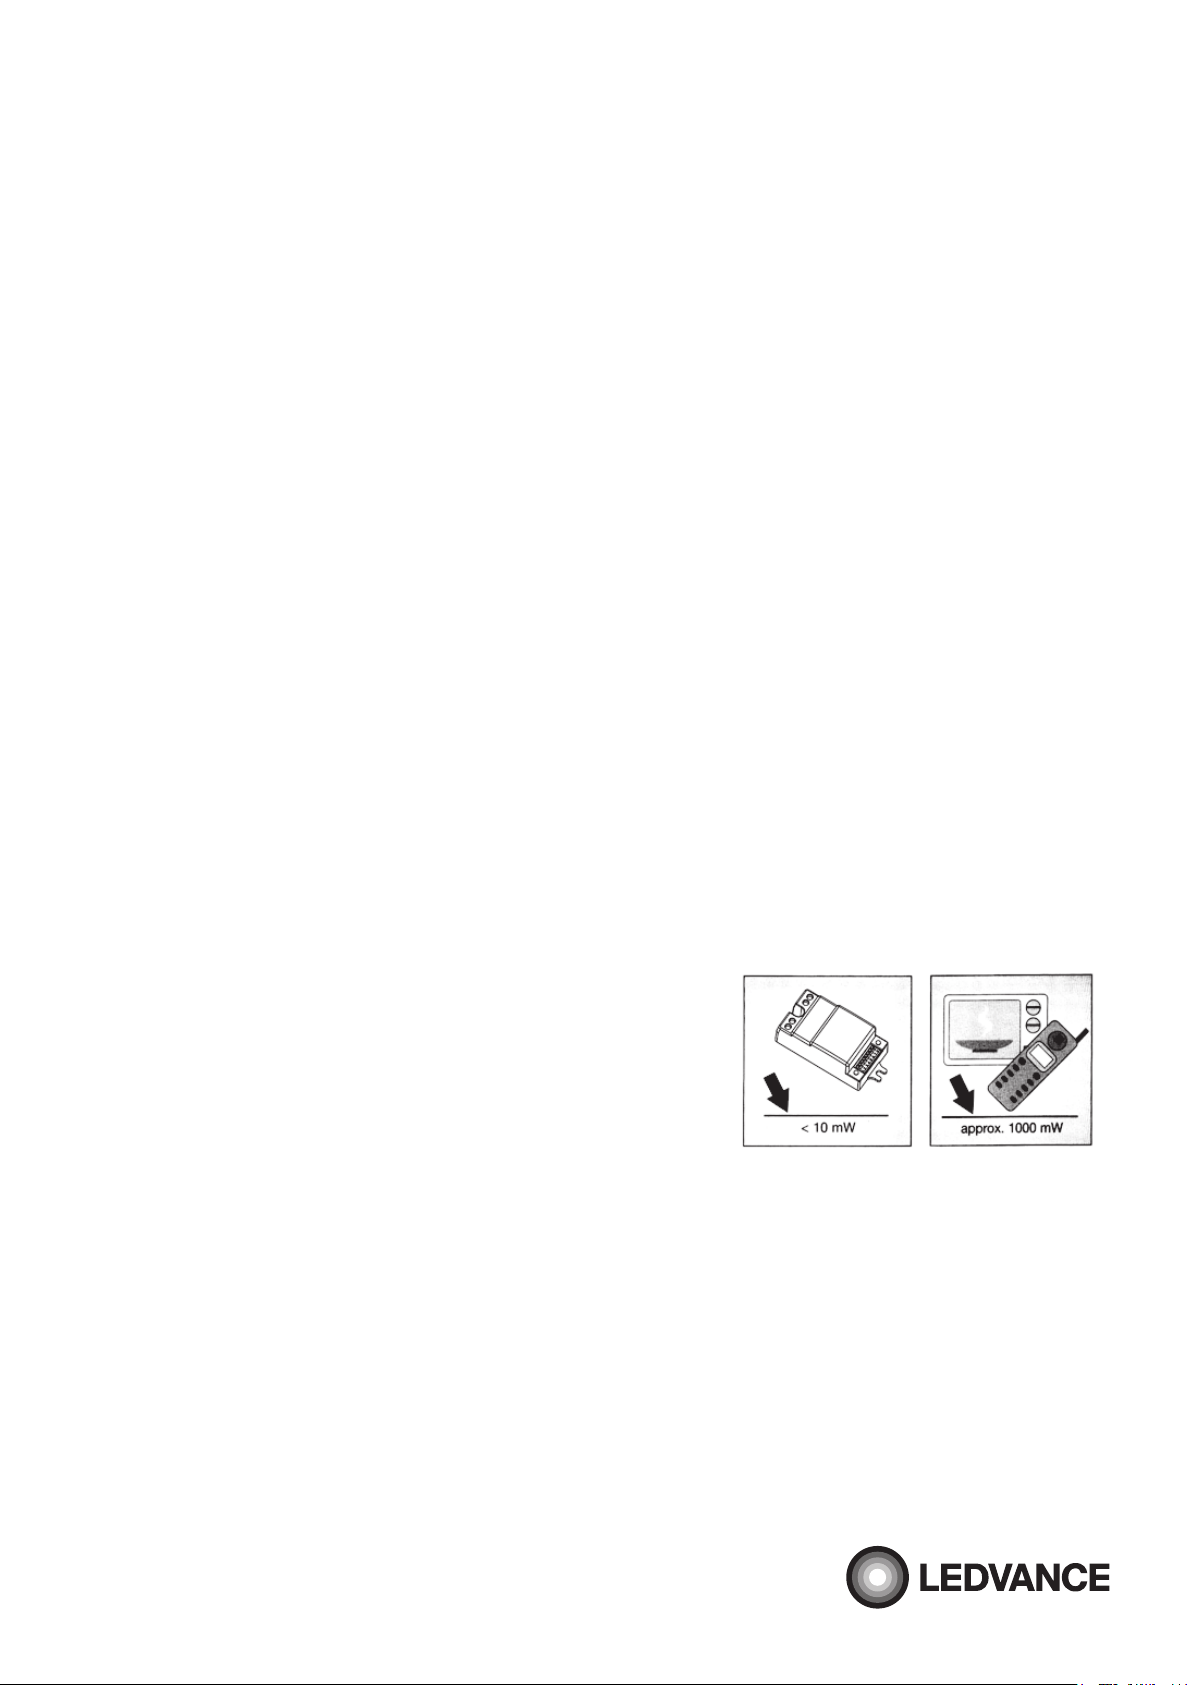
Note: The high-frequency output of this sensor is only <10Mw- which
is just one 100th of the transmission power of a mobile phone or
the output of a microwave oven.
11080858 MS-SV-MIC-IL-360-230V-IP20 UI LEDV v2.indd 2 4/9/2019 4:54 PM