OMEGA Installation Manual Edition Dec. 2004
Omega platform lift page 5of 24
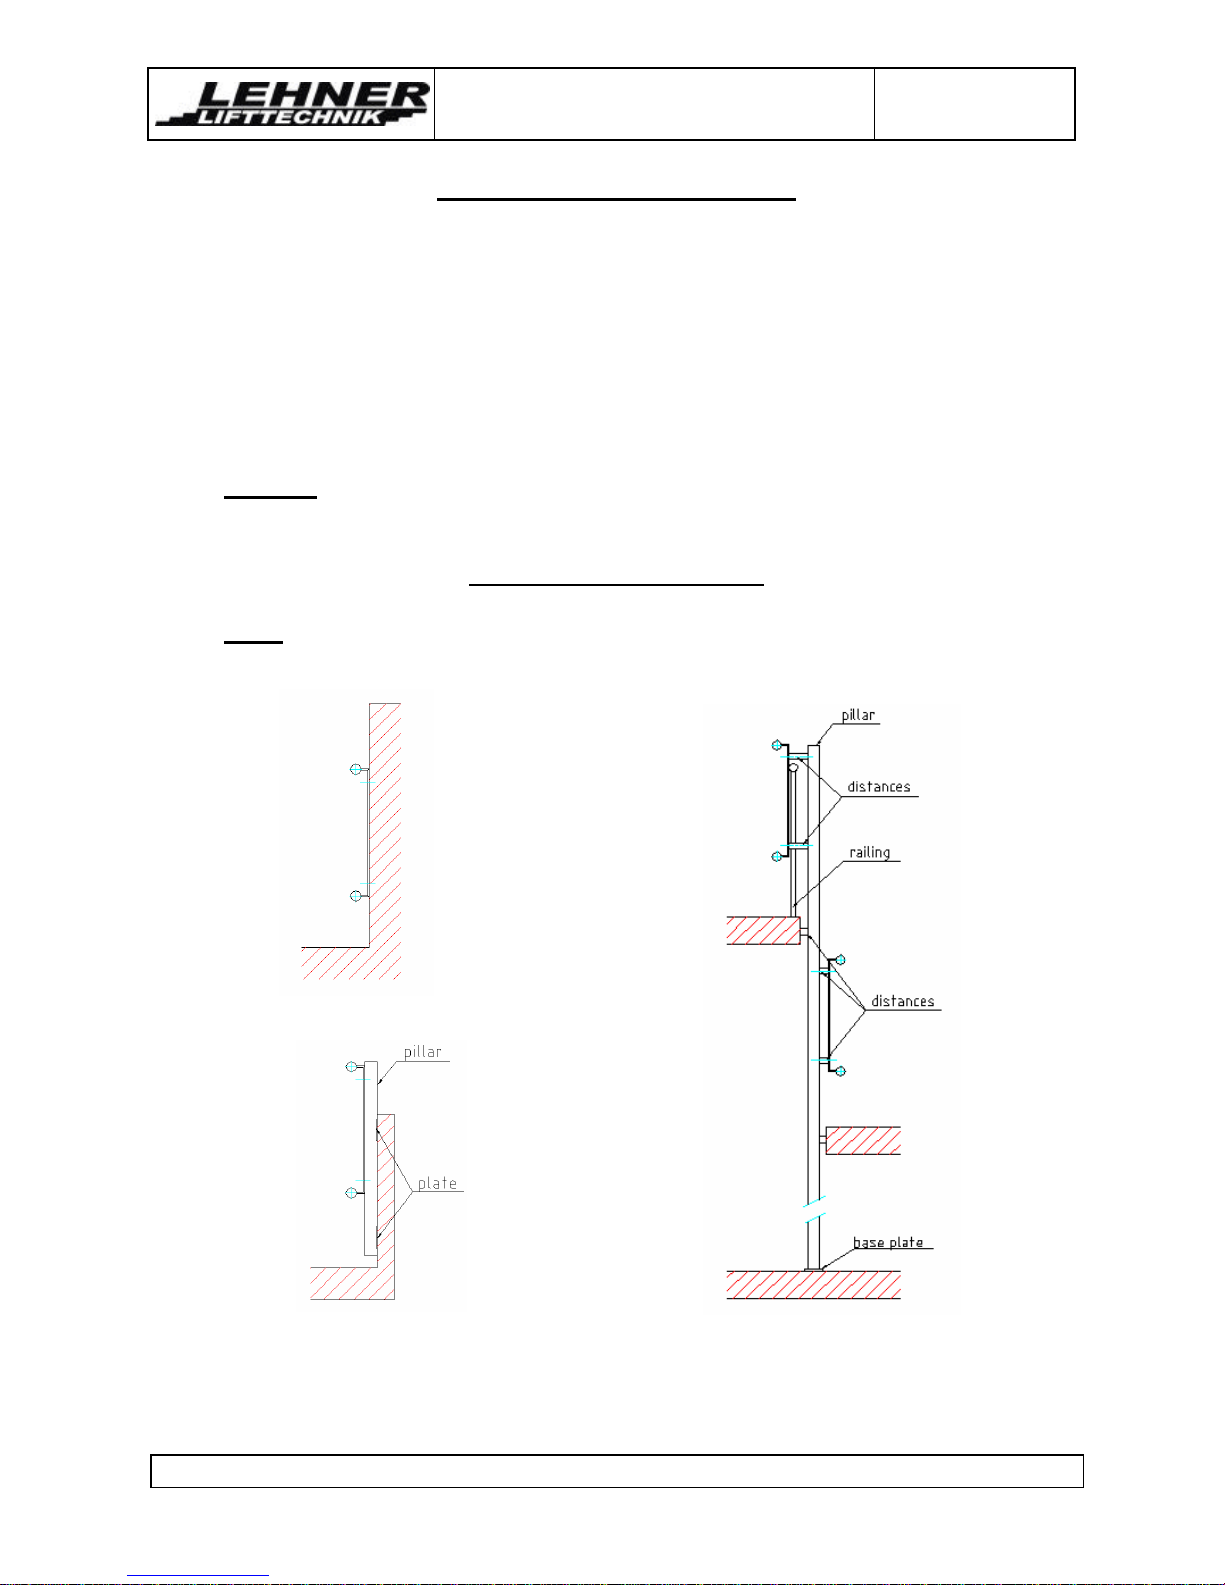
•Note: It is necessary to distinguish between brackets (to bridge the distance to the wall
or pillar) and distances (for unevenness of walls or mounting tolerances). Brackets can
be ordered from Lehner-Lifttechnik, but for distances you must use washers or shims
with 50 mm in outside diameter.
•Drill the mounting holes, starting at the bottom with Pillar A and working up the system. A
good quality hammer drill is useful when drilling into concrete.
•When mounting in concrete, use a 10 mm diameter masonry bit and withdraw the drill
periodically to remove dust from the cutting area. (When using a dowel, drill a 12 mm
hole!). When mounting in wood, use a standard 6 mm wood drill.
•Pass the lag bolt (screw
materials like lag bolts, nuts,
washers, etc., are not included
in Lehner-Lifttechnik delivery-
specification) through a washer,
and screw it into the end of a
plug anchor. The anchor can
then be tapped into position
using a small hammer. Avoid
spilling dust into the hole. Do
not use plug anchors when
mounting
into wood.
Note: Lag bolts used for
mounting into concrete are longer than
those used for wood.
•Drill and fasten each hole in turn; this will prevent the tower from shifting.
•Check each splice for damage and lightly
grease both ends before joining the tube
sections. Fasten the splices with the splice
bolts and nuts provided.
•Check the clearance dimensions. Ensure that
the actual measurements correspond with the
clearance dimensions on the layout drawing. If
they do not meet the required clearances, have
the lift serial number on hand and call Lehner-
Lifttechnik.
•Remember: Vertical clearances are measured from the centreline of the tube (this is
also the lower point of the bows on the railway) to the stair nose or to the floor.