manuals.online logo
Brands
  1. Home
  2. •
  3. Brands
  4. •
  5. Lejonklou
  6. •
  7. Amplifier
  8. •
  9. Lejonklou Tundra Mono 2 User manual

Lejonklou Tundra Mono 2 User manual

Other Lejonklou Amplifier manuals

Lejonklou Tundra Mono Series User manual

Lejonklou

Lejonklou Tundra Mono Series User manual

Lejonklou Slipsik 7 User manual

Lejonklou

Lejonklou Slipsik 7 User manual

Lejonklou KINKI3 User manual

Lejonklou

Lejonklou KINKI3 User manual

Lejonklou KINKI3 User manual

Lejonklou

Lejonklou KINKI3 User manual

Lejonklou Sagatun Mono 1.0 User manual

Lejonklou

Lejonklou Sagatun Mono 1.0 User manual

Lejonklou KINKI3 User manual

Lejonklou

Lejonklou KINKI3 User manual

Lejonklou Tundra 1.1 User manual

Lejonklou

Lejonklou Tundra 1.1 User manual

Lejonklou Boazu 1.1 User manual

Lejonklou

Lejonklou Boazu 1.1 User manual

Lejonklou GIELLA User manual

Lejonklou

Lejonklou GIELLA User manual

Lejonklou Slipsik 5 User manual

Lejonklou

Lejonklou Slipsik 5 User manual

Lejonklou Gaio 2 User manual

Lejonklou

Lejonklou Gaio 2 User manual

Lejonklou Superkikkin User manual

Lejonklou

Lejonklou Superkikkin User manual

Lejonklou Sagatun Mono 1.4 User manual

Lejonklou

Lejonklou Sagatun Mono 1.4 User manual

Lejonklou Gaio User manual

Lejonklou

Lejonklou Gaio User manual

Lejonklou Entity User manual

Lejonklou

Lejonklou Entity User manual

Lejonklou Tundra Mono User manual

Lejonklou

Lejonklou Tundra Mono User manual

Lejonklou Sagatun User manual

Lejonklou

Lejonklou Sagatun User manual

Popular Amplifier manuals by other brands

Magnat Audio EDITION FOUR Owner's manual/warranty document

Magnat Audio

Magnat Audio EDITION FOUR Owner's manual/warranty document

Inter-m PA-2000A Operation manual

Inter-m

Inter-m PA-2000A Operation manual

Yamaha TX6n owner's manual

Yamaha

Yamaha TX6n owner's manual

Peavey TNT 150 user guide

Peavey

Peavey TNT 150 user guide

Bosch LBB 1903/10 Installation and user instructions

Bosch

Bosch LBB 1903/10 Installation and user instructions

Avocent Emerge DA1200D Installer/user guide

Avocent

Avocent Emerge DA1200D Installer/user guide

Redgum RGi35 operating instructions

Redgum

Redgum RGi35 operating instructions

Cambridge Audio AXA25 user manual

Cambridge Audio

Cambridge Audio AXA25 user manual

Alpine MRP-M200 owner's manual

Alpine

Alpine MRP-M200 owner's manual

Technical Pro H1502UrBT user manual

Technical Pro

Technical Pro H1502UrBT user manual

FMS EMGZ307 operating manual

FMS

FMS EMGZ307 operating manual

Racal Instruments 5601 user manual

Racal Instruments

Racal Instruments 5601 user manual

Valcom V-1094A Technical specifications

Valcom

Valcom V-1094A Technical specifications

Cambridge Audio 851D user manual

Cambridge Audio

Cambridge Audio 851D user manual

QSC 3800 Specifications

QSC

QSC 3800 Specifications

NAD C300 owner's manual

NAD

NAD C300 owner's manual

Rotel RMB-1077 owner's manual

Rotel

Rotel RMB-1077 owner's manual

Peavey Monitor 300 Series operating guide

Peavey

Peavey Monitor 300 Series operating guide

manuals.online logo
manuals.online logoBrands
  • About & Mission
  • Contact us
  • Privacy Policy
  • Terms and Conditions

Copyright 2025 Manuals.Online. All Rights Reserved.

Contact information
Lejonklou HiFi AB
Vänortsgatan 57
752 64 Uppsala
Sweden
ebsite: www.lejonklou.com
Email: [email protected]m
Tel: +4670 558 0549
PLEASE READ THIS MANUAL CAREFULLY!
Backgroun
Tundra Mono 2 has a unique feature: It allows you to measure
and trim its main idling current. There is an optimal value that
sounds best and this value is affected by:
• The degree of ventilation around the amplifier
• The surrounding temperature
• Long term drift (years)
This means that you can benefit from using the trimming option:
• hen your Tundra has moved to a new location
• If the room temperature changes by more than 5°C
• Once a year
Before using the trimming option, leave your Tundra Mono 2
switched on for at least 24 hours. You can play music as much as
you like, but not during the actual trimming.
Position your Tundra Mono 2 in the location where it will stay
and let its surroundings be normal. For instance, if a door to the
ventilated compartment where it stays is normally closed when
you’re listening to music, then keep the door closed.
The Status Port
On its rear panel, Tundra Mono 2 has a 3.5 mm stereo jack
marked STATUS PORT. Please make sure you never ever insert
a pair of headphones into this jack! The voltages are not
dangerous but they will most likely destroy your headphones.
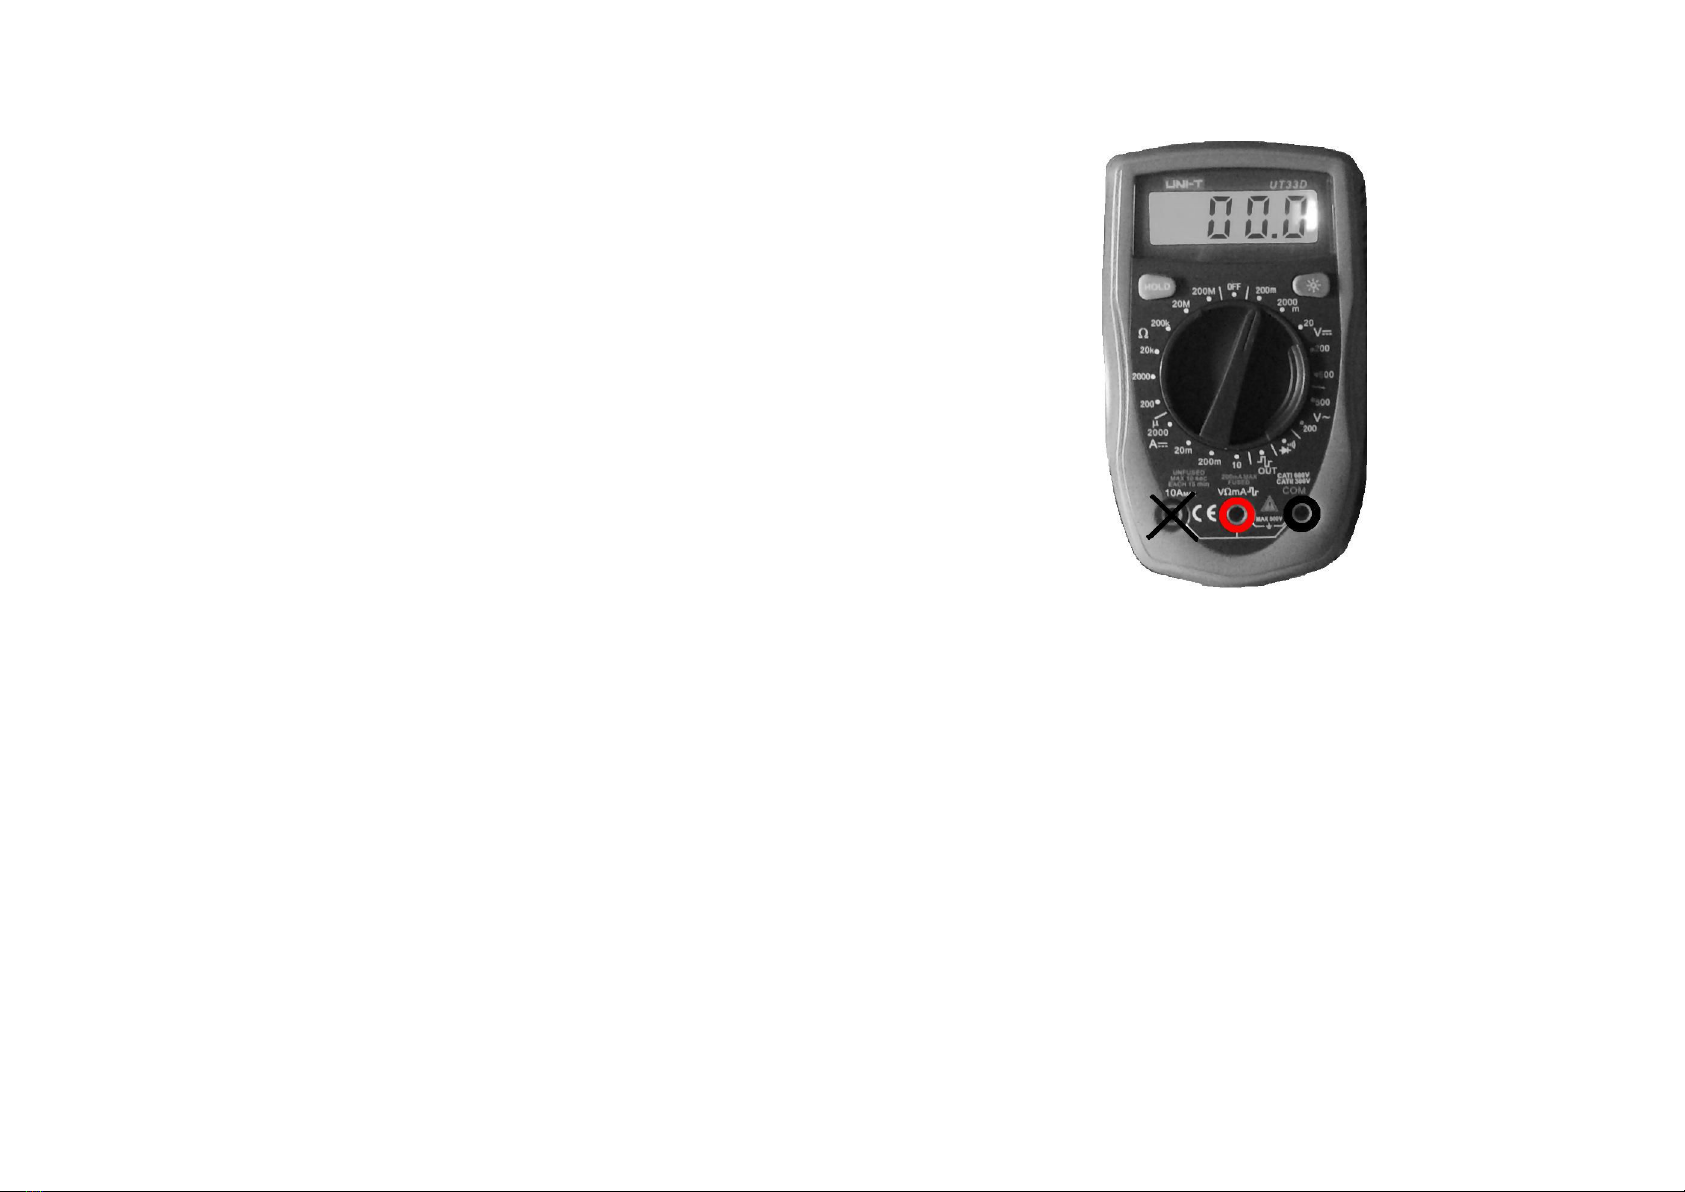
ith each pair of Tundra Mono 2, a calibrated instrument
(a multimeter) and a cable is provided. On the backside of this
instrument, the optimal value for your Tundra Mono 2’s is
written. Plug the two banana plugs of the cable into the
instrument, as the picture on the next page indicates. Make sure
that the HOLD button to the left is not activated. Then plug the
3.5 mm plug into the STATUS PORT of you Tundra Mono 2.
Red banana goes to middle hole, black banana goes to right hole
Trimming
Switch the instrument on by turning the dial one step clockwise, as
in the picture. Mute the music, so that your Tundra Mono 2 is
completely silent. You should now have a steady reading on the
instrument somewhere around 20. Turn the red TRIM dial next to
the STATUS PORT on your Tundra Mono 2 until you arrive at
the optimal value, written on the backside of your instrument.
If your starting value was more than 1.0 away from the optimal
value, you need to repeat the trim procedure after a couple of
hours. Play some music in the meantime. You can leave the
instrument connected but switch it off to save battery.
Please note that after your Tundra Mono 2 has been trimmed, it
will slowly “search” around the optimal value. This is intentional
and will show on the instrument as deviations of about 0.3 from
the optimal value. Don’t try to trim away these small variations.