Previous
No. Description
6
7
9
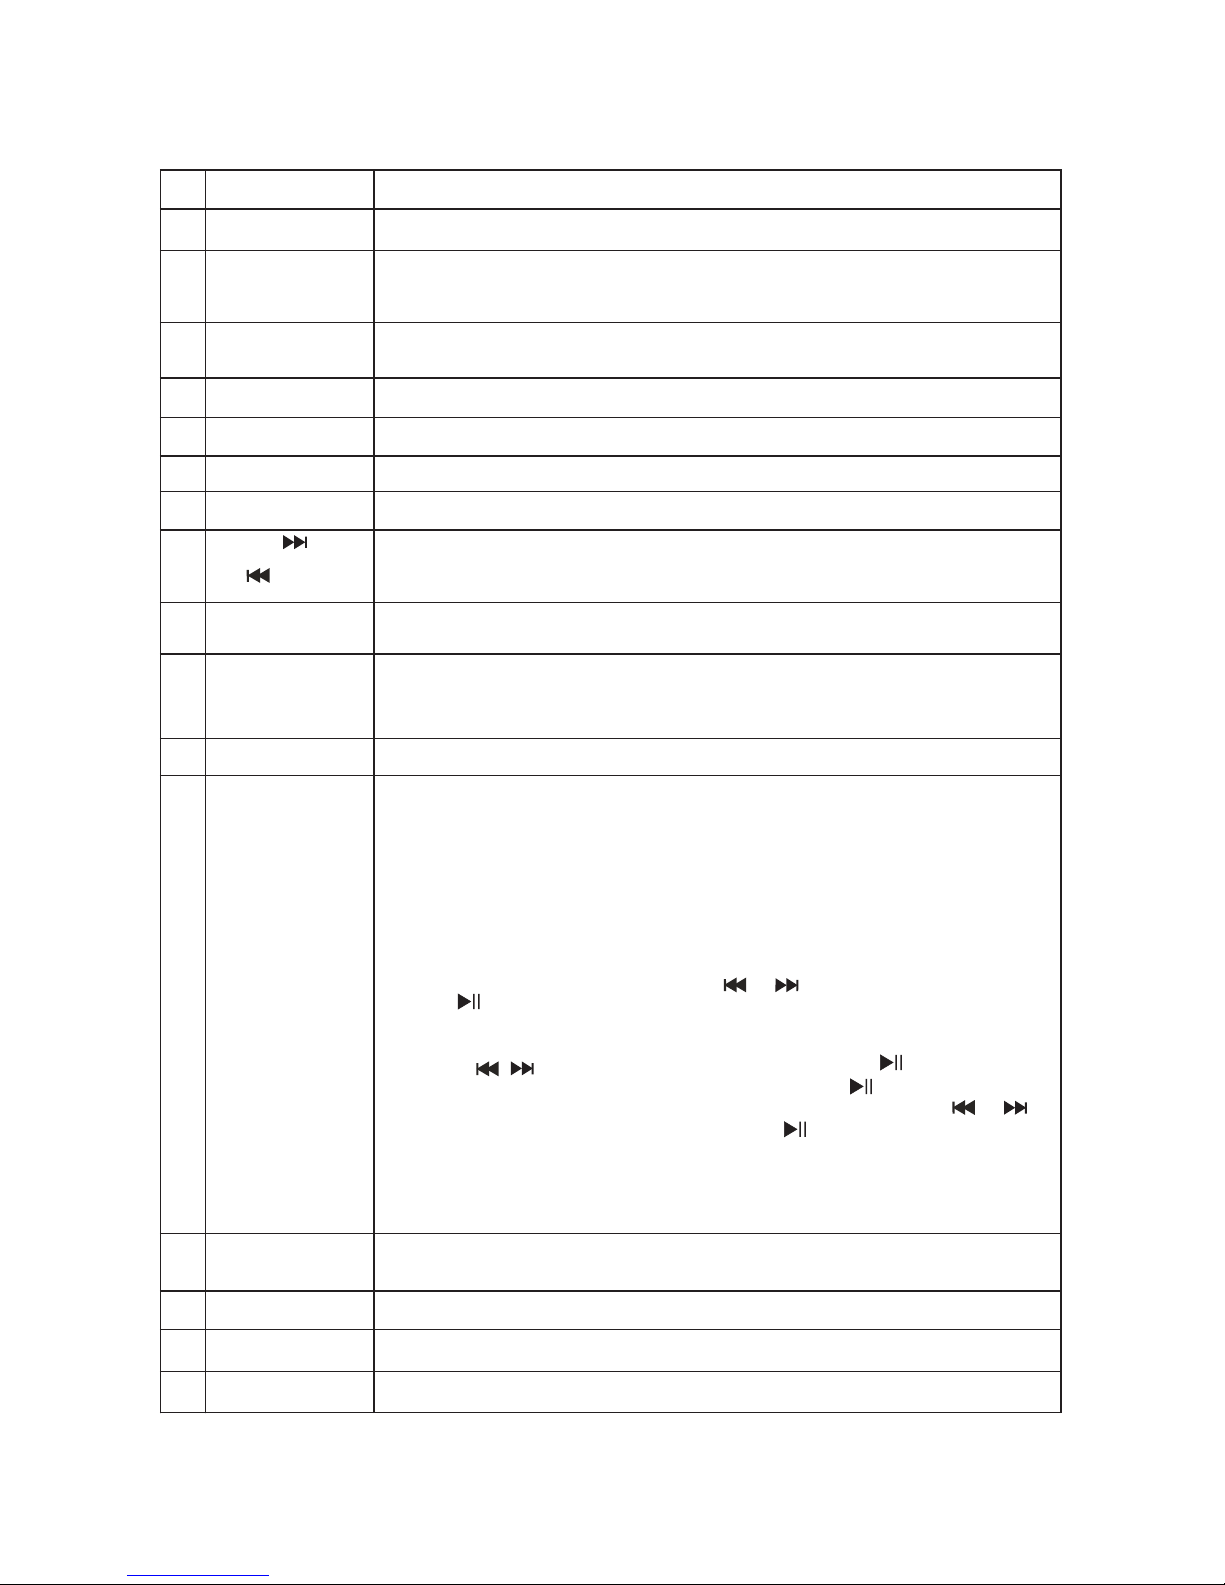
Buttons
8
10
Snooze
Sleep
Standby
Preset
ID3
Alarm
Number buttons
Volume+/-
Stop
Press to set the sleep time: sleep off/10/15/30/45/60/90/120 minutes.
When the time out, the unit will enter sleep mode automatically.
Use number buttons to select tracks/stations/frequency.
Press to turn on the unit; or turn to standby mode.
11
12
13
14
15
16
17
In FM mode, press Preset button to store stations.
Press to adjust the volume to a comfortable level.
In BT mode, press to skip to next or previous track.
In FM mode, press to skip to next or previous stations; press and hold
these buttons to skip to next or previous available frequency.
In BT mode, press STOP button to stop playback, press PLAY/PAUSE
button to re-start.
While playing MP 3 tracks, press ID3 button to display information about
the current track: album, artist, etc. If there is no ID3,it show “NO ID3".
In FM mode, press repeatedly to display the station’s RDS information.
7
Treble Press Treble button and use the Volume+/- button to adjust the treble.
18
19
20
BT Pair
Tune+/-
Dim
In FM mode, press to tune the frequency by step of 0.05MHz.
Press to activate the BT function of the unit to pairing status if unpaired.
In paired status, press to disconnect the devices.
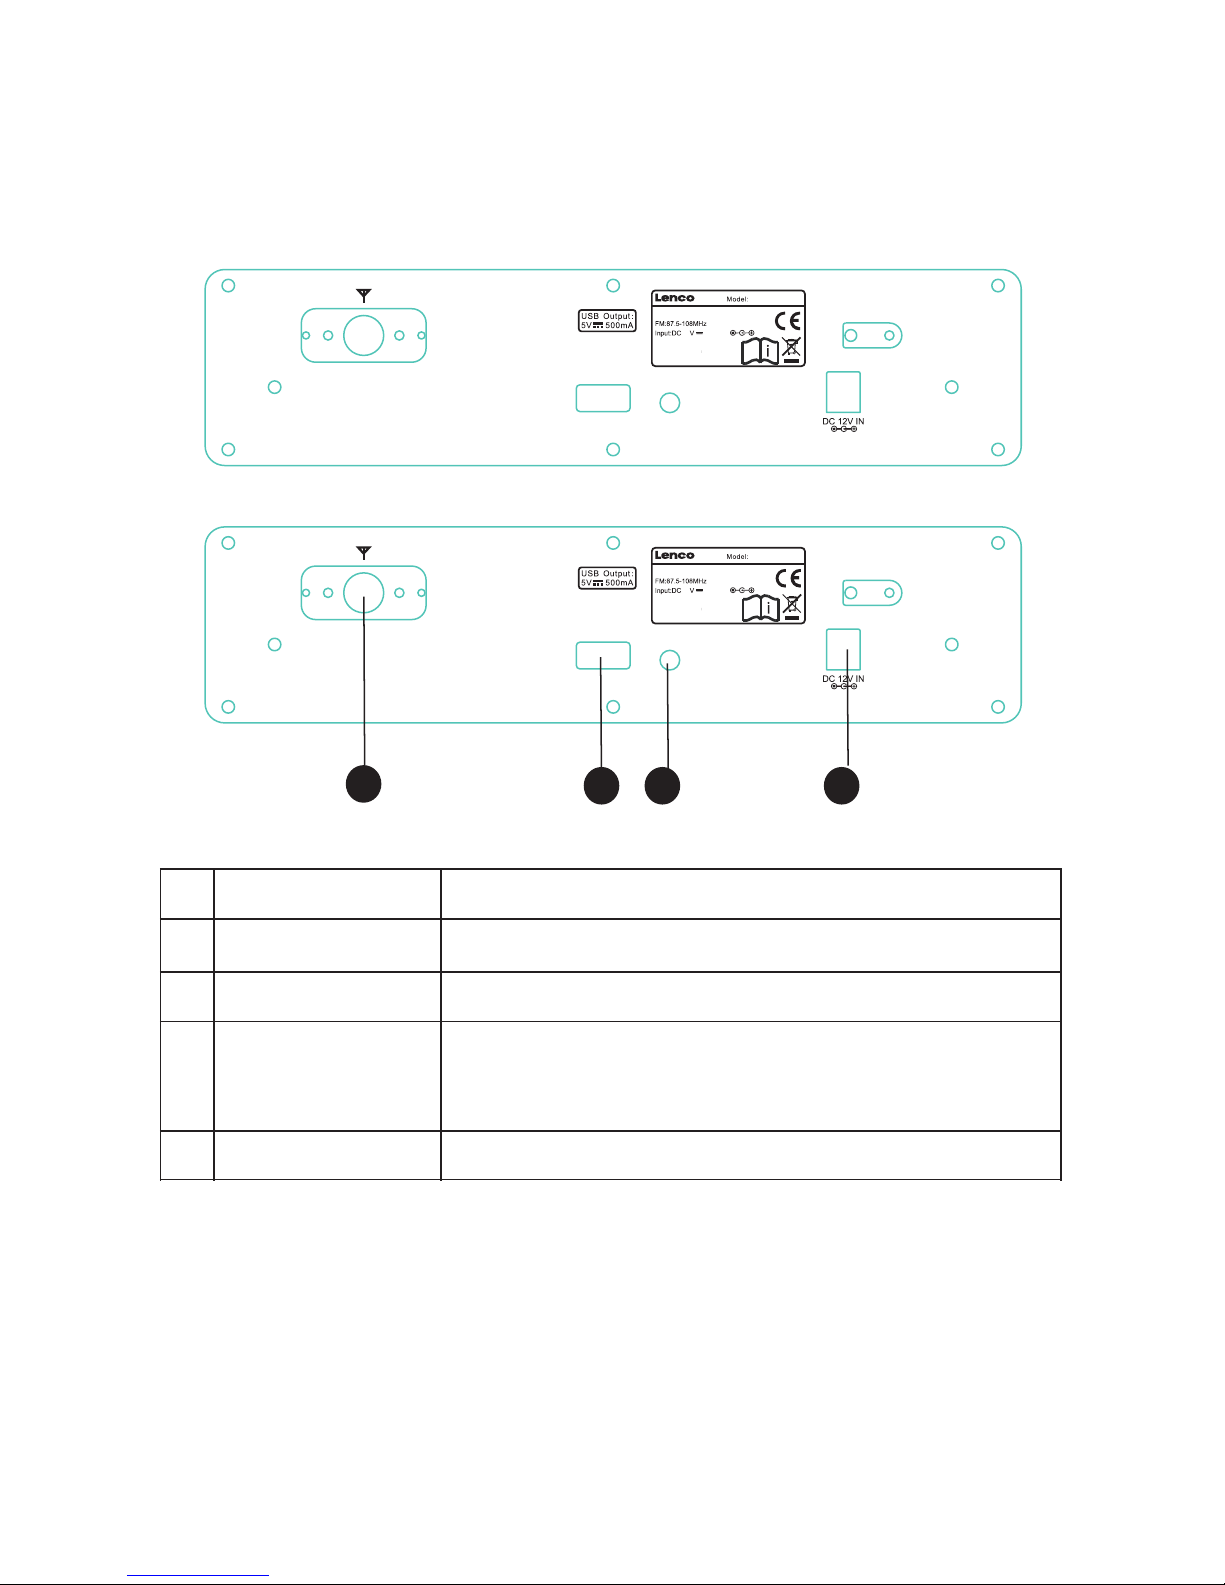
Frequency
21 In FM mode, press F and then press Number buttons to select frequency.
Press to select the 3 levels of display screen.brightness of
Bass Press Bass button and use the Volume+/- button to adjust the bass.
Next
RDS
If the alarm is set to buzzer mode, when the alarm goes on, press the
SNOOZE button to enter the nap mode, the alarm will go on again 5
minutes later.
In STANDBY mode, press ALARM button on remote control once to enter
Time setting status, press twice to enter the Alarm 1 setting status. Press
the third time to enter Alarm 2 setting status.
In STANDBY mode, press NEXT button on the front panel to enter the time
and alarm setting interface, use the tuner knob to select YES/NO, press
ENTER button to confirm selection. In the time setting status, rotate the
tuner knob to select the digits, press ENTER button to confirm and the
system will auto skip to the next digits setting interface. While finish all
the settings, press ENTER button to confirm.
In Time or Alarm
When in time setting interface, the screen display the YYYY/MM/DD.
Use the to select the digits of the date, press and then select
the 24/12 hour, next to set the Hour/Minute, press to finish.
When in alarm setting interface, the words “0:00" flash, press or
to select the digits of the alarm time, press to confirm. Then select
the alarm options: Daily, Weekdays, Weekends, Once. Next to select
the alarm mode: Buzzer/ FM/USB mode. At last to set the Alarm volume
level. When finish setting Alarm 1, you can set Alarm 2.
To cancel the alarm, press ALARM button, then select OFF to cancel.
setting status, use or to select contents, then
press to confirm, and the system will automatically skip to the next
setting status.
/