11
· FAQ
Q: Picture quality is not fluent and stable?
A:1) Please check and make sure all HDMI cables are connected well.
2) Try to connect the source device to display device directly, or change
to another source device for a try to see the picture quality.
Q:Display image black screen, don’t display?
A:1) Please check whether the signal source output resolution is the
supported by the product.
2) Please check whether the HDMI cable is firmly connected and plug the
HDMI cable again.
3) Please check whether the HDMI output is turned off by using RS-232
command.
Q:NO response when using RS-232 control to send instructions to switch
splicing modes?
A:1) Only when the dip switch is set to ‘111’can it be switched by RS-232
instruction.
2) Confirm whether the baud rate of the product is consistent with the
settings of the serial port tool, the default baud rate of the product is
9600.
12
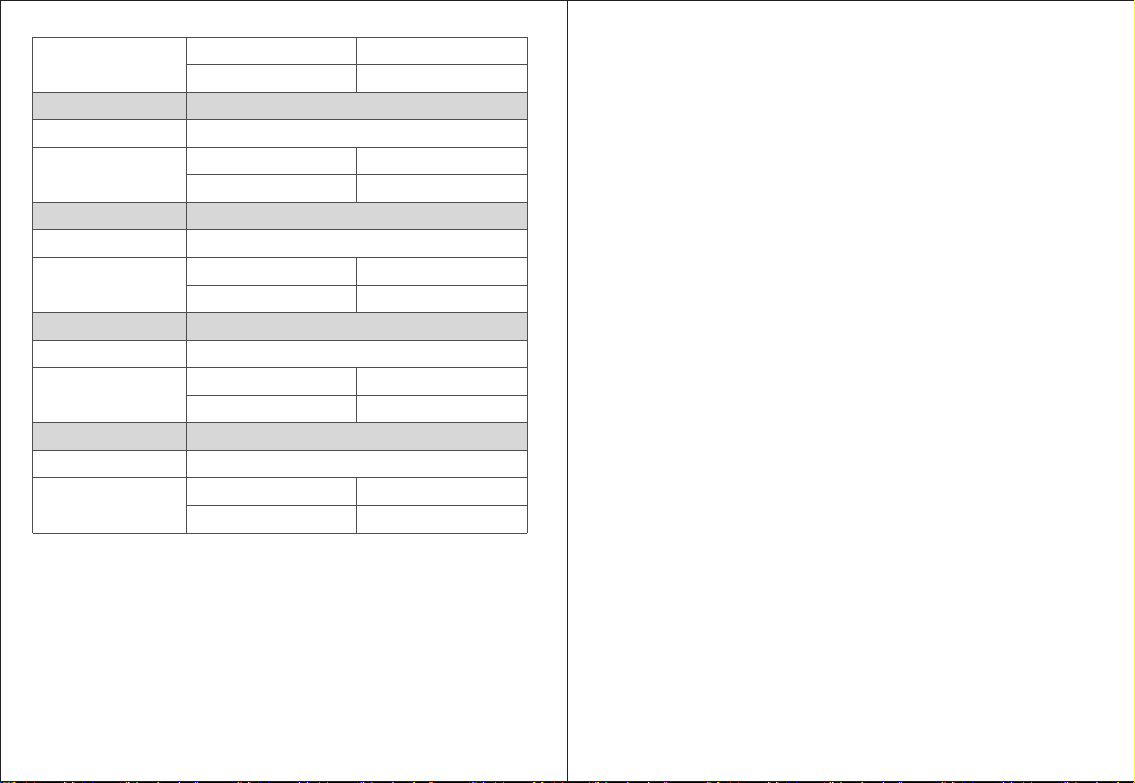
Power
Operating
Environment
Physical
Properties
DC5V/1APower Supply
-20℃~60℃
Working
temperature
-30℃~70℃
Storage
temperature
0~90%RH(No condensation)Humidity
IronHousing
381gWeight
<4W
Power
Consumption
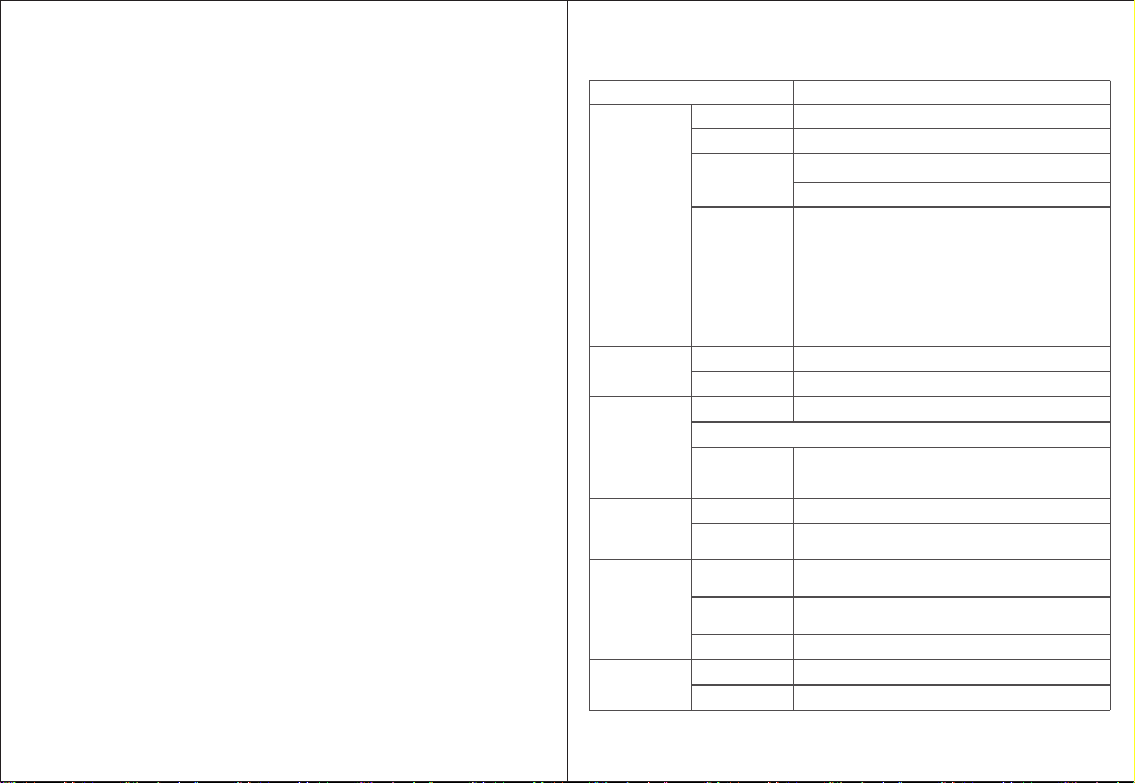
· Specification
Video signal
Video signal
Splice Settings
4x HDMI
1x HDMI
HDMI 1.4
HDCP 1.4
HDMI Output
PCM3.5mm Output
PCMHDMI Output
1x1/2x1/1x2/2x2/3x1/1x3/4x1/1x4Mode
DIP Switch
Default baud rate: 9600
Only when the dip switch is set to ‘111’ can the
splicing mode be switched by RS-232 instruction
RS-232 (GND/
RxD/TxD)
HDMI Input
Compatibility
Resolutions
Items Description
1080P@60/50/30/25/24Hz, 720P@60/50Hz,
576P@50Hz, 480P@60Hz, 1920x1200@60Hz,
1680x1050@60Hz, 1600x900@60Hz,
1600x1200@60Hz, 1440x900@60Hz,
1400x1050@60Hz, 1366x768@60Hz,
1360x768@60Hz, 1280x1024@60Hz,
1280x960@60Hz, 1280x800@60Hz,
1280x768@60Hz, 1024x768@60Hz,
800x600@60Hz, 640x480@60Hz