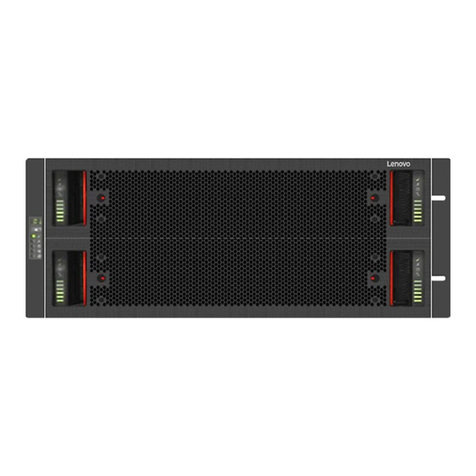
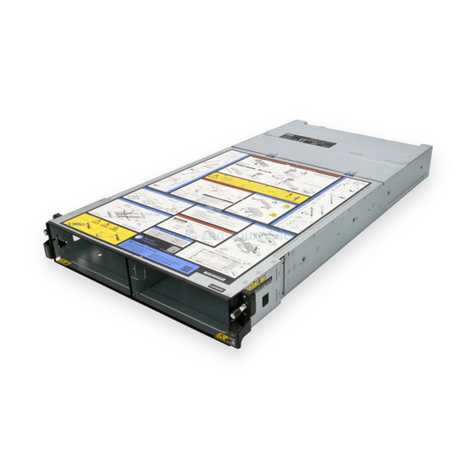
Lenovo ThinkSystem DW612S Neptune DWC User manual

ThinkSystem DW612S Neptune DWC
Enclosure
System Configuration Guide
Machine Types: D1L

Note
Before using this information and the product it supports, be sure to read and understand the safety
information and the safety instructions, which are available at:
http://thinksystem.lenovofiles.com/help/topic/safety_documentation/pdf_files.html
In addition, be sure that you are familiar with the terms and conditions of the Lenovo warranty for your server,
which can be found at:
http://datacentersupport.lenovo.com/warrantylookup
First Edition (December 2022)
© Copyright Leno o 2022.
LIMITED AND RESTRICTED RIGHTS NOTICE: If data or software is delivered pursuant to a General Services
Administration (GSA) contract, use, reproduction, or disclosure is subject to restrictions set forth in Contract No. GS-35F-
05925.

Contents
Contents . . . . . . . . . . . . . . . . . i
Safety . . . . . . . . . . . . . . . . . . iii
Safety inspection checklist . . . . . . . . . . . iv
Chapter 1. Introduction . . . . . . . . . 1
Features. . . . . . . . . . . . . . . . . . . 1
Tech Tips . . . . . . . . . . . . . . . . . . 2
Security advisories . . . . . . . . . . . . . . 2
Specifications . . . . . . . . . . . . . . . . 3
Particulate contamination . . . . . . . . . . 3
Management options. . . . . . . . . . . . . . 4
Chapter 2. Enclosure components . . . 9
System Management Module 2 (SMM 2) . . . . . . 9
PSU slot numbering . . . . . . . . . . . . . . 9
System LEDs and diagnostics display . . . . . . 10
Troubleshooting by system LEDs and diagnostics
display . . . . . . . . . . . . . . . . . . 11
System Management Module 2 (SMM 2)
LEDS . . . . . . . . . . . . . . . . . 11
Power supply LEDs . . . . . . . . . . . 12
DWC power supply LEDs . . . . . . . . . 13
Drip sensor LED . . . . . . . . . . . . . 14
Chapter 3. Parts list . . . . . . . . . . 17
Power cords . . . . . . . . . . . . . . . . 19
Chapter 4. Unboxing and setup . . . . 21
Solution package contents . . . . . . . . . . 21
Identify the solution and access the Lenovo
XClarity Controller . . . . . . . . . . . . . . 21
Solution setup checklist . . . . . . . . . . . 22
Chapter 5. System configuration . . . 25
Set the network connection for the Lenovo XClarity
Controller . . . . . . . . . . . . . . . . . 25
Set front USB port for Lenovo XClarity Controller
connection. . . . . . . . . . . . . . . . . 26
Update the firmware . . . . . . . . . . . . . 2
Configure the firmware . . . . . . . . . . . . 30
Memory module configuration . . . . . . . . . 31
Enable Software Guard Extensions (SGX). . . . . 31
RAID configuration . . . . . . . . . . . . . 32
Deploy the operating system. . . . . . . . . . 32
Back up the server configuration . . . . . . . . 33
Appendix A. Getting help and
technical assistance . . . . . . . . . . 35
Before you call . . . . . . . . . . . . . . . 35
Collecting service data . . . . . . . . . . . . 36
Contacting Support . . . . . . . . . . . . . 3
Appendix B. Documents and
supports . . . . . . . . . . . . . . . . 39
Documents download . . . . . . . . . . . . 39
Support websites . . . . . . . . . . . . . . 39
Appendix C. Notices. . . . . . . . . . 41
Trademarks . . . . . . . . . . . . . . . . 42
Important notes . . . . . . . . . . . . . . . 42
Electronic emission notices . . . . . . . . . . 42
Taiwan Region import and export contact
information . . . . . . . . . . . . . . . . 42
© Copyright Lenovo 2022 i
ii ThinkSystem DW612S Neptune DWC Enclosure System Configuration Guide

Safety
Before installing this product, read the Safety Information.
Antes de instalar este produto, leia as Informações de Segurança.
在安装本产品之前,请仔细阅读 Safety Information (安全信息)。
Læs sikkerhedsforskrifterne, før du installerer dette produkt.
Lees voordat u dit product installeert eerst de veiligheidsvoorschriften.
Ennen kuin asennat tämän tuotteen, lue turvaohjeet kohdasta Safety Information.
Avant d'installer ce produit, lisez les consignes de sécurité.
Vor der Installation dieses Produkts die Sicherheitshinweise lesen.
Prima di installare questo prodotto, leggere le Informazioni sulla Sicurezza.
Les sikkerhetsinformasjonen (Safety Information) før du installerer dette produktet.
Antes de instalar este produto, leia as Informações sobre Segurança.
© Copyright Lenovo 2022 iii

Antes de instalar este producto, lea la información de seguridad.
Läs säkerhetsinformationen innan du installerar den här produkten.
Safety inspection checklist
Use the information in this section to identify potentially unsafe conditions with your server. As each machine
was designed and built, required safety items were installed to protect users and service technicians from
injury.
Note: The product is not suitable for use at visual display workplaces according to §2 of the Workplace
Regulations.
Note: The set-up of the server is made in the server room only.
CAUTION:
This equipment must be installed or ser iced by trained personnel, as defined by the NEC, IEC 62368-
1 & IEC 60950-1, the standard for Safety of Electronic Equipment within the Field of Audio/Video,
Information Technology and Communication Technology. Leno o assumes you are qualified in the
ser icing of equipment and trained in recognizing hazards energy le els in products. Access to the
equipment is by the use of a tool, lock and key, or other means of security, and is controlled by the
authority responsible for the location.
Important: Electrical grounding of the server is required for operator safety and correct system function.
Proper grounding of the electrical outlet can be verified by a certified electrician.
Use the following checklist to verify that there are no potentially unsafe conditions:
1. Make sure that the power is off and the power cord is disconnected.
2. Check the power cord.
• Make sure that the third-wire ground connector is in good condition. Use a meter to measure third-
wire ground continuity for 0.1 ohm or less between the external ground pin and the frame ground.
• Make sure that the power cord is the correct type.
To view the power cords that are available for the server:
a. Go to:
i ThinkSystem DW612S Neptune DWC Enclosure System Configuration Guide

http://dcsc.lenovo.com/#/
b. Click Preconfigured Model or Configure to order.
c. Enter the machine type and model for your server to display the configurator page.
d. Click Power ➙ Power Cables to see all line cords.
• Make sure that the insulation is not frayed or worn.
3. Check for any obvious non-Lenovo alterations. Use good judgment as to the safety of any non-Lenovo
alterations.
4. Check inside the server for any obvious unsafe conditions, such as metal filings, contamination, water or
other liquid, or signs of fire or smoke damage.
5. Check for worn, frayed, or pinched cables.
6. Make sure that the power-supply cover fasteners (screws or rivets) have not been removed or tampered
with.
© Copyright Lenovo 2022

i ThinkSystem DW612S Neptune DWC Enclosure System Configuration Guide
Chapter 1. Introduction
The ThinkSystem DW612S Neptune DWC Solution 6U enclosure designed for high performance computing.
This solution includes a single enclosure that can contain up to six ThinkSystem high-density servers, which
are designed to deliver a dense, scalable platform for distributed enterprise and hyperconverged.
Features
Performance, ease of use, reliability, and expansion capabilities were key considerations in the design of
your solution. These design features make it possible for you to customize the system hardware to meet your
needs today and provide flexible expansion capabilities for the future.
Your solution implements the following features and technologies:
• Features on Demand
If a Features on Demand feature is integrated in the solution or in an optional device that is installed in the
solution, you can purchase an activation key to activate the feature. For information about Features on
Demand, see:
https://fod.lenovo.com/lkms
• Leno o XClarity Controller (XCC)
The Lenovo XClarity Controller is the common management controller for Lenovo ThinkSystem server
hardware. The Lenovo XClarity Controller consolidates multiple management functions in a single chip on
the server system board (system board assembly). Some of the features that are unique to the Lenovo
XClarity Controller are enhanced performance, higher-resolution remote video, and expanded security
options.
The server supports Lenovo XClarity Controller 2 (XCC2). For additional information about Lenovo XClarity
Controller 2 (XCC2), refer to https://sysmgt.lenovofiles.com/help/topic/lxcc_frontend/lxcc_overview.html.
• UEFI-compliant ser er firmware
Lenovo ThinkSystem firmware is Unified Extensible Firmware Interface (UEFI) compliant. UEFI replaces
BIOS and defines a standard interface between the operating system, platform firmware, and external
devices.
Lenovo ThinkSystem solutions are capable of booting UEFI-compliant operating systems, BIOS-based
operating systems, and BIOS-based adapters as well as UEFI-compliant adapters.
Note: The solution does not support Disk Operating System (DOS).
• Acti e Memory
The Active Memory feature improves the reliability of memory through memory mirroring. Memory
mirroring mode replicates and stores data on two pairs of DIMMs within two channels simultaneously. If a
failure occurs, the memory controller switches from the primary pair of memory DIMMs to the backup pair
of DIMMs.
• Large system-memory capacity
The solution supports synchronous dynamic random-access memory (SDRAM) registered dual inline
memory modules (DIMMs) with error correcting code (ECC). For more information about the specific types
and maximum amount of memory, see “Technical Specifications” in the User Guide of each high-density
server..
• Integrated network support
© Copyright Lenovo 2022 1

The tray comes with an integrated 1-port Gigabit Ethernet controller with RJ-45 connector and 2-port
25Gb Ethernet controller with SFP28 connector, which support connection to a 1000 Mbps network.
• Large data-storage capacity
See the “Specifications” section in the User Guide of the high-density server.
• Lightpath Diagnostics
Lightpath Diagnostics provides LEDs to help you diagnose problems. For more information about the
Lightpath Diagnostics, see “Troubleshooting by system LEDs and diagnostics display” on page 11.
• Mobile access to Leno o Ser ice Information website
The solution provides a QR code on the system service label, which is on the cover of the DWC tray cover,
that you can scan using a QR code reader and scanner with a mobile device to get quick access to the
Lenovo Service Information website. The Lenovo Service Information website provides additional
information for parts installation, replacement videos, and error codes for solution support.
• Acti e Energy Manager
Lenovo XClarity Energy Manager is a power and temperature management solution for data centers. You
can monitor and manage the power consumption and temperature of Converged, NeXtScale, System x,
and ThinkServer solutions, and improve energy efficiency using Lenovo XClarity Energy Manager.
• Optional power capabilities
The solution supports a maximum of nine 2400W or 2600W hot-swap power supplies, or three 200W
DWC PSUs.
Note: Do not mix power supplies in the same unit of solution.
• ThinkSystem RAID support
See the “Specifications” section in the User Guide of the high-density server.
Tech Tips
Lenovo continually updates the support website with the latest tips and techniques that you can use to solve
issues that your server might encounter. These Tech Tips (also called retain tips or service bulletins) provide
procedures to work around issues or solve problems related to the operation of your server.
To find the Tech Tips available for your server:
1. Go to http://datacentersupport.lenovo.com and navigate to the support page for your server.
2. Click on the documentation icon How To’s from the navigation pane.
3. Click Article Type ➙ Solution from the drop-down menu.
Follow the on-screen instructions to choose the category for the problem that you are having.
Security ad isories
Lenovo is committed to developing products and services that adhere to the highest security standards in
order to protect our customers and their data. When potential vulnerabilities are reported, it is the
responsibility of the Lenovo Product Security Incident Response Team (PSIRT) to investigate and provide
information to our customers so they may put mitigation plans in place as we work toward providing
solutions.
The list of current advisories is available at the following site:
https://datacentersupport.lenovo.com/product_security/home
2ThinkSystem DW612S Neptune DWC Enclosure System Configuration Guide

Specifications
Summary of the specifications of enclosure. Depending on the model, some features might not be available,
or some specifications might not apply.
Technical specifications
Integrated functions and I/O connectors
• Hot-swappable System Management Module 2 (SMM2)
Note: See https://thinksystem.lenovofiles.com/help/topic/mgt_tools_smm2/r_smm2_users_guide.html for more details
about System Management Module.
Network
10/100/1000 Mb Ethernet port dedicated for System Management Module (SMM2).
Mechanical specifications
Dimension
• Height: 263.3 mm (10.40 inches)
• Depth: 914.5 mm (36.00 inches)
• Width: 44 .0 mm (1 .60 inches)
Weight
• Weight:
– Empty enclosure (with midplane, SMM2, and cables): approximately 25 kg (55 lbs)
Particulate contamination
Attention: Airborne particulates (including metal flakes or particles) and reactive gases acting alone or in
combination with other environmental factors such as humidity or temperature might pose a risk to the
device that is described in this document.
Risks that are posed by the presence of excessive particulate levels or concentrations of harmful gases
include damage that might cause the device to malfunction or cease functioning altogether. This
specification sets forth limits for particulates and gases that are intended to avoid such damage. The limits
must not be viewed or used as definitive limits, because numerous other factors, such as temperature or
moisture content of the air, can influence the impact of particulates or environmental corrosives and gaseous
contaminant transfer. In the absence of specific limits that are set forth in this document, you must
implement practices that maintain particulate and gas levels that are consistent with the protection of human
health and safety. If Lenovo determines that the levels of particulates or gases in your environment have
caused damage to the device, Lenovo may condition provision of repair or replacement of devices or parts
on implementation of appropriate remedial measures to mitigate such environmental contamination.
Implementation of such remedial measures is a customer responsibility.
Chapter 1.Introduction 3

Table 1. Limits for particulates and gases
Contaminant Limits
Reactive gases Severity level G1 as per ANSI/ISA 1.04-19851:
• The copper reactivity level shall be less than 300 Angstroms per month (Å/month ≈ 0.0039 μg/
cm2-hour weight gain).2
• The silver reactivity level shall be less than 200 Å/month (Å/month ≈ 0.0035 μg/cm2-hour
weight gain).3
• The reactive monitoring of gaseous corrosivity must be conducted approximately 5 cm (2 in.) in
front of the rack on the air inlet side at one-quarter and three-quarter frame height off the floor
or where the air velocity is much higher.
Airborne
particulates Data centers must meet the cleanliness level of ISO 14644-1 class 8.
For data centers without airside economizer, the ISO 14644-1 class 8 cleanliness might be met by
choosing one of the following filtration methods:
• The room air might be continuously filtered with MERV 8 filters.
• Air entering a data center might be filtered with MERV 11 or preferably MERV 13 filters.
For data centers with airside economizers, the choice of filters to achieve ISO class 8 cleanliness
depends on the specific conditions present at that data center.
• The deliquescent relative humidity of the particulate contamination should be more than 60%
RH.4
• Data centers must be free of zinc whiskers.5
1 ANSI/ISA- 1.04-1985. Environmental conditions for process measurement and control systems: Airborne
contaminants. Instrument Society of America, Research Triangle Park, North Carolina, U.S.A.
2 The derivation of the equivalence between the rate of copper corrosion growth in the thickness of the corrosion
product in Å/month and the rate of weight gain assumes that Cu2S and Cu2O grow in equal proportions.
3 The derivation of the equivalence between the rate of silver corrosion growth in the thickness of the corrosion
product in Å/month and the rate of weight gain assumes that Ag2S is the only corrosion product.
4 The deliquescent relative humidity of particulate contamination is the relative humidity at which the dust absorbs
enough water to become wet and promote ionic conduction.
5 Surface debris is randomly collected from 10 areas of the data center on a 1.5 cm diameter disk of sticky
electrically conductive tape on a metal stub. If examination of the sticky tape in a scanning electron microscope
reveals no zinc whiskers, the data center is considered free of zinc whiskers.
Management options
The XClarity portfolio and other system management options described in this section are available to help
you manage the servers more conveniently and efficiently.
4ThinkSystem DW612S Neptune DWC Enclosure System Configuration Guide

O er iew
Options Description
Lenovo XClarity Controller
Baseboard management controller. (BMC)
Consolidates the service processor functionality, Super I/O, video controller, and
remote presence capabilities into a single chip on the server system board (system
board assembly).
Interface
• CLI application
• Web GUI interface
• Mobile application
• REST API
Usage and downloads
https://sysmgt.lenovofiles.com/help/topic/lxcc_frontend/lxcc_overview.html
Lenovo XClarity Administrator
Centralized interface for multi-server management.
Interface
• Web GUI interface
• Mobile application
• REST API
Usage and downloads
http://sysmgt.lenovofiles.com/help/topic/com.lenovo.lxca.doc/aug_product_page.html
Lenovo XClarity Essentials
toolset
Portable and light toolset for server configuration, data collection, and firmware
updates. Suitable both for single-server or multi-server management contexts.
Interface
• OneCLI: CLI application
• Bootable Media Creator: CLI application, GUI application
• UpdateXpress: GUI application
Usage and downloads
http://sysmgt.lenovofiles.com/help/topic/xclarity_essentials/overview.html
Chapter 1.Introduction 5

Options Description
Lenovo XClarity Provisioning
Manager
UEFI-based embedded GUI tool on a single server that can simplify management
tasks.
Interface
• Web interface (BMC remote access)
• GUI application
Usage and downloads
https://sysmgt.lenovofiles.com/help/topic/lxpm_frontend/lxpm_product_page.html
Important:
Lenovo XClarity Provisioning Manager (LXPM) supported version varies by product.
All versions of Lenovo XClarity Provisioning Manager are referred to as Lenovo
XClarity Provisioning Manager and LXPM in this document, unless specified
otherwise. To see the LXPM version supported by your server, go to https://
sysmgt.lenovofiles.com/help/topic/lxpm_frontend/lxpm_product_page.html.
Lenovo XClarity Integrator
Series of applications that integrate the management and monitoring functionalities of
the Lenovo physical servers with the software used in a certain deployment
infrastructure, such as VMware vCenter, Microsoft Admin Center, or Microsoft System
Center while delivering additional workload resiliency.
Interface
• GUI application
Usage and downloads
https://sysmgt.lenovofiles.com/help/topic/lxci/lxci_product_page.html
Lenovo XClarity Energy
Manager
Application that can manage and monitor server power and temperature.
Interface
• Web GUI Interface
Usage and downloads
https://datacentersupport.lenovo.com/solutions/lnvo-lxem
6ThinkSystem DW612S Neptune DWC Enclosure System Configuration Guide

Options Description
Lenovo Capacity Planner
Application that supports power consumption planning for a server or rack.
Interface
• Web GUI Interface
Usage and downloads
https://datacentersupport.lenovo.com/solutions/lnvo-lcp
System Management Module
2 (ThinkSystem high-density
servers only)
A hot-swap enclosure management module that helps you easily manage the system
power supplies and fan speeds. It monitors the fan, power and enclosure status with
event logs.
Interface
• Web GUI Interface
Usage and downloads
https://thinksystem.lenovofiles.com/help/topic/mgt_tools_smm2/r_smm2_users_
guide.html
Functions
Options
Functions
Multi-
system
mgmt
OS
deploy-
ment
System
configu-
ration
Firm-
ware
up-
dates1
E ent-
s/alert
moni-
toring
In en-
tory/
logs
Pow-
er
mgmt
Power
planning
Lenovo XClarity Controller √ √2√ √4
Lenovo XClarity
Administrator √ √ √ √2√ √4
Lenovo
XClarity
Essen-
tials
toolset
OneCLI √ √ √2√ √
Bootable Media
Creator √ √2√4
UpdateXpress √ √2
Lenovo XClarity Provisioning
Manager √ √ √3√5
Lenovo XClarity Integrator √ √6√ √ √ √ √
Lenovo XClarity Energy
Manager √ √ √
Lenovo Capacity Planner √8
System Management
Module 2(ThinkSystem high-
density servers only)
√ √ √ √
Notes:
1. Most options can be updated through the Lenovo tools. Some options, such as GPU firmware or Omni-
Path firmware require the use of supplier tools.
Chapter 1.Introduction 7

2. The server UEFI settings for option ROM must be set to Auto or UEFI to update firmware using Lenovo
XClarity Administrator, Lenovo XClarity Essentials, or Lenovo XClarity Controller.
3. Firmware updates are limited to Lenovo XClarity Provisioning Manager, Lenovo XClarity Controller, and
UEFI updates only. Firmware updates for optional devices, such as adapters, are not supported.
4. The server UEFI settings for option ROM must be set to Auto or UEFI for detailed adapter card
information, such as model name and firmware levels, to be displayed in Lenovo XClarity Administrator,
Lenovo XClarity Controller, or Lenovo XClarity Essentials.
5. Limited inventory.
6. The Lenovo XClarity Integrator deployment check for System Center Configuration Manager (SCCM)
supports Windows operating system deployment.
. Power management function is supported only by Lenovo XClarity Integrator for VMware vCenter.
8. It is highly recommended that you check the power summary data for your server using Lenovo
Capacity Planner before purchasing any new parts.
8ThinkSystem DW612S Neptune DWC Enclosure System Configuration Guide

Chapter 2. Enclosure components
This section contains information about each of the components associated with the enclosure.
System Management Module 2 (SMM 2)
The following illustration shows the connectors and buttons on the SMM2 module.
Figure 1. S 2 connectors
Table 2. S 2 connectors and LEDs
1 Reset button hole 4 Ethernet port 2
2 USB port service mode button (FFDC dump) 5 Ethernet port 1
3 USB 2.0 connector
1 Reset button: Press the button for 1 to 4 seconds, SMM2 reboots. Press over 4 seconds, SMM2 reboots
and loads to the default settings.
2 USB port ser ice mode button (FFDC dump): Press this button to collect FFDC logs after inserting the
USB storage device to the USB 2.0 connector.
3 USB 2.0 connector: Insert the USB storage device to this connector and then press the USB port ser ice
mode button to collect FFDC logs.
4 Ethernet port 2: Use this connector to access SMM2 management.
5 Ethernet port 1: Use this connector to access SMM2 management.
PSU slot numbering
Use this information to identify the PSU slot numbering.
© Copyright Lenovo 2022 9

Figure 2. PSU slot numbering with hot-swap PSU
1 Hot-swap power supply 1-3 (from bottom to top) 3 Hot-swap power supply -9 (from bottom to top)
2 Hot-swap power supply 4-6 (from bottom to top)
Figure 3. PSU slot numbering with DWC PSU
1 DWC PSU 1 3 DWC PSU 3
2 DWC PSU 2
System LEDs and diagnostics display
See the following section for information on available enclosure LEDs and diagnostics display.
For more information, refer to “Troubleshooting by system LEDs and diagnostics display” on page 11.
10 ThinkSystem DW612S Neptune DWC Enclosure System Configuration Guide

Troubleshooting by system LEDs and diagnostics display
See the following section for information on available system LEDs and diagnostics display.
System Management Module 2 (SMM 2) LEDS
The following illustration shows the LEDs on the SMM2 module.
Figure 4. S 2 LEDs
Table 3. S 2 connectors and LEDs
1 Identification LED (blue) 5 Ethernet port 2 link (RJ-45) LED (green)
2 Power LED (green) 6 Ethernet port 2 activity (RJ-45) LED (green)
3 Status LED (green) 7 Ethernet port 1 link (RJ-45) LED (green)
4 Check log LED (yellow) 8 Ethernet port 1 activity (RJ-45) LED (green)
1 Identification LED: When this LED is lit (blue), it indicates the enclosure location in a rack.
2 Power-on LED: When this LED is lit (green), it indicates that the SMM2 has power.
3 Status LED: This LED (green) indicates the operating status of the SMM2.
• Continuously on: The SMM2 has encountered one or more problems.
• Off: When the enclosure power is on, it indicates the SMM2 has encountered one or more problems.
• Flashing: The SMM2 is working.
– During the pre-boot process, the LED flashes rapidly.
– Ten times per second: The SMM2 hardware is working and the firmware is ready to initialize.
– Two times per second: The firmware is initializing.
– When the pre-boot process is completed and the SMM2 is working correctly, the LED flashes at a
slower speed (about once every two seconds).
4 Check log LED: When this LED is lit (yellow), it indicates that a system error has occurred. Check the
SMM2 event log for additional information.
5 Ethernet port 2 link (RJ-45) LED: When this LED is lit (green), it indicates that there is an active
connection through the remote management and console (Ethernet) port 2 to the management network.
Chapter 2.Enclosure components 11

6 Ethernet port 2 acti ity (RJ-45) LED: When this LED is flashing (green), it indicates that there is an activity
through the remote management and console (Ethernet) port 2 over the management network.
7 Ethernet port 1 link (RJ-45) LED: When this LED is lit (green), it indicates that there is an active
connection through the remote management and console (Ethernet) port 1 to the management network.
8 Ethernet port 1 acti ity (RJ-45) LED: When this LED is flashing (green), it indicates that there is an activity
through the remote management and console (Ethernet) port 1 over the management network.
Power supply LEDs
This topic provides information about various power supply LED status and corresponding action
suggestions.
See the “Specifications” section in aintenance anual of the high-density server for information on minimal
configuration required to start the solution.
The power supplies get electrical power from a 200 - 240 V ac power source and convert the ac input into 12
V outputs. The power supplies are capable of autoranging within the input voltage range. There is one
common power domain for the enclosure that distributes power to each of the DWC tray and modules
through the system midplane.
AC redundancy is achieved by distributing the ac power cord connections between independent ac circuits.
Each power supply has internal fans and a controller. The power supply controller can be powered by any
installed power supply that is providing power through the midplane.
Attention: The power supplies contain internal cooling fans. Do not obstruct the fan exhaust vents.
You have to install all of nine power supplies regardless of the type of power supply, the enclosure power
load, or selected enclosure power policy.
The enclosure does not support mixing of low input voltage power supplies with high input voltage power
supplies. For example, if you install a power supply with an input voltage of 100 - 12 V ac in a enclosure that
is powered by 200 - 240 V ac power supplies, the 100 - 12 V power supply will not power on. The same
restriction applies to a enclosure that is powered by 100 - 12 V ac power supplies. If you install a 200 - 240
V ac power supply in a enclosure that is powered by 100 - 12 V ac power supplies, the 200 - 240 V ac
power supply will not power on.
The following illustration shows the LEDs on the power supply:
Figure 5. AC power supply LEDs
12 ThinkSystem DW612S Neptune DWC Enclosure System Configuration Guide
Other manuals for ThinkSystem DW612S Neptune DWC
1
This manual suits for next models
1
Table of contents
Other Lenovo Enclosure manuals

Lenovo
Lenovo Legion BoostStation 82CA000GGE User manual

Lenovo
Lenovo NeXtScale n1200 Installation and maintenance instructions

Lenovo
Lenovo ThinkSystem D2 User manual

Lenovo
Lenovo NeXtScale n1200 Installation and maintenance instructions

Lenovo
Lenovo ThinkAgile VX3720 7Y12 User manual

Lenovo
Lenovo ThinkAgile HX User manual

Lenovo
Lenovo D1224 User manual

Lenovo
Lenovo ideacentre 510 Series Owner's manual

Lenovo
Lenovo SE350 User manual

Lenovo
Lenovo ThinkSystem E2 User manual