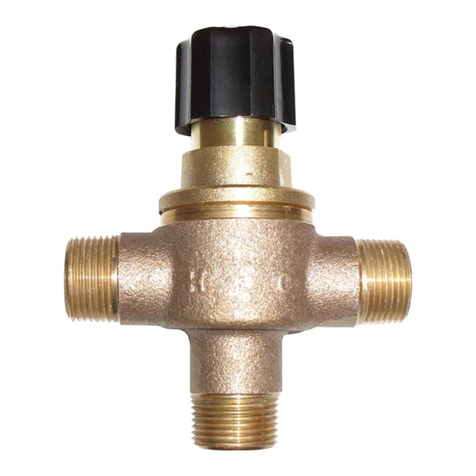
VALVE PARTS LIST
CHECK
CHECK CLIP (MODEL 270/270-LF/370/ 370-LF/470 ONLY)
STEM ASSEMBLY
STEM ASSEMBLY O'RING COVER O'RING
RETAINING CLIP
KNOB
170 - BP ONLY
RETURN SPRING
SCREW
DIAL PLATE
DO NOT REMOVE
SNAP RING ON
STEM - INJURY MAY
OCCUR PACKING
PART # 7539
MODEL170, 170-LF, 270, 270-LF, 270-USW, 370, 370-LF, 470
MODEL 170, 170-LF
MODEL 270, 270-LF
MODEL 270-USW
MODEL 370, 370-LF, 470
SHUTTLE O'RING
COVER
KNOB SET SCREW
Shuttle o’ring
Stem assembly o’ring
Cover o’ring
R/ 170 Rebuild Kit
Return spring
Shuttle assembly
Shuttle o’ring
Shuttle o’ring
Stem assembly o’ring
Cover o’ring
R/ 270/370 Rebuild Kit
Return spring
Shuttle assembly
Shuttle o’ring
Shuttle o’ring
Stem assembly o’ring
Cover o’ring
R/ 270/370 Rebuild Kit
Return spring
Shuttle assembly
Shuttle o’ring
Shuttle o’ring
Stem assembly o’ring
Cover o’ring
R/ 270/370 Rebuild Kit
Return spring
Shuttle assembly
Shuttle o’ring
DISMANTLING & CLEANING TROUBLESHOOTING
Cover o’ring
4/108 Check valve Kit
2 Check valves
Cover o’ring
4/220 Check valve Kit
2 Check valves
2 Check clips
Cover o’ring
4/220USW Check valve Kit
2 Check valves
3 Union gaskets
Cover o’ring
4/320 Check valve Kit
2 Check valves
2 Check clips
1. Shut off hot and cold water to the valve as well as the valve outlet
port.
2. Loosen lock screw on side of knob with 5/64” allen wrench.
3. Remove the knob screw on top of knob.
4. Remove temperature adjustment knob.
5. Remove valve cover, which includes the stem assembly.
6. The shuttle assembly can now be removed, cleaned and inspected. Be
sure to check the condition of the shuttle o-ring and replace if
necessary.
.Lea
ng wate
un
e
no
,or
e
gas
e
t, rep
ace ste
assem
yo-
ring. Remove knob screw and knob, remove retaining clip, thread out
the stem assembly and replace o-ring. Lubricate o-ring, thread stem
into cover, replace retaining ring, knob and screw. Valve temperature
must be reset after any repairs or cleaning!! See page 2.
2. Leaking water between cover and body, order gasket kit,
replace cover o-ring. Remove knob screw and knob and remove valve
cover and replace o-ring. Replace valve cover, knob and knob screw.
Valve temperature must be reset after any repairs or cleaning!! See
7. Lubricate the shuttle o-ring before installing the shuttle assembly.
8. Install the cover assembly including o-ring back onto valve and
tighten.
9. Replace knob and knob screw.
10. Valve temperature must be reset after any repairs or cleaning!!
See Page 2. Temperature Adjustment
.
3. Hot water bypass into cold line, order checkstop kit and replace checks
within inlets of valve.
4. Valve not controlling temperature even after cleaning, order complete
rebuild kit. Remove knob screw and knob and remove valve cover.
Replace shuttle assembly and return spring being sure to lubricate
shuttle o-ring. Replace valve cover, knob and knob screw. Valve
temperature must be reset after any repairs or cleaning!! See page
2.
5. Lea
etween valve
y-pass fitting to the inle
of
ase. Chec
#265
packing, is installed or not split.
1360 Elmwood Avenue, Cranston, RI 02910 USA
Phone: 401.461.1200 Fax: 401.941.5310
WEB: http://www.leonardvalve.com 3
