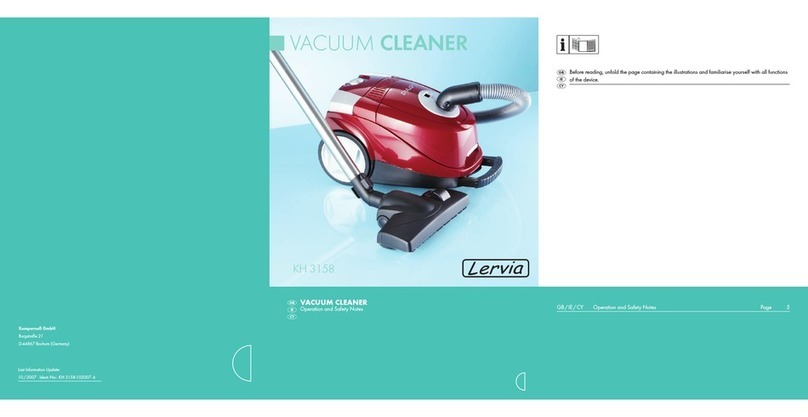
Lervia LERVIA KH 3158 User manual

Kompernaß GmbH
Burgstraße 21
D-44867 Bochum (Germany)
Last Information Update · Informationsstatus
Έκδοση των πληροφοριών · Stand der Informationen:
10 / 2007 · Ident.-No.: KH 3158-102007 - 3
GB / IE / CY Operation and Safety Notes Page 5
SE Bruksanvisning och säkerhetsanvisningar Sidan 13
GR / CY Υποδείξεις χειρισμού και ασφαλείας Σελίδα 21
DE / AT Bedienungs- und Sicherheitshinweise Seite 29
STAUBSAUGER
Bedienungs- und Sicherheitshinweise
VACUUM CLEANER
KH 3158
Klappen Sie vor dem Lesen die Seite mit den Abbildungen aus und machen Sie sich anschließend mit
allen Funktionen des Gerätes vertraut.
Πριν ξεκινήσετε την ανάγνωση, ανοίξτε τη σελίδα με τις εικόνες και εξοικειωθείτε με όλες τις λειτουργίες
της συσκευής.
Before reading, unfold the page containing the illustrations and familiarise yourself with all functions
of the device.
Vik ut bildsidan och ha den till hands när du läser igenom anvisningarna och gör dig bekant med
apparatens/maskinens funktioner.
VACUUM CLEANER
Operation and Safety Notes
ΗΛΕΚΤΡΙΚΗ ΣΚΟΥΠΑ
Υποδείξεις χειρισμού και ασφαλείας
DAMMSUGARE
Bruksanvisning och säkerhetsanvisningar

D E F
BC
2
4
6
5
7
28
10
22
20
19
11
24
25
26272829
21
22
1
2
3
4
6
5
1413
12
11
10 9
8
7
15 16 17 18
19
20
21
23
22
A

5GB/IE/CY
Content
Before reading, unfold the page containing the illustrations
and familiarise yourself with all functions of the device.
Introduction
For Your Safety .....................................................................................Page 6
Description of the Device and Intended Use.......................................Page 6
Controls.................................................................................................Page 6
Technical Details ..................................................................................Page 6
Scope of Delivery..................................................................................Page 7
Safety
Safety Information ...............................................................................Page 7
Initial Use
Assembly...............................................................................................Page 8
Adjusting the Telescopic Suction Tube..............................................Page 8
Using the Suction Nozzles ................................................................Page 8
Operation
Mains Connection.................................................................................Page 9
Switching On and Off ...........................................................................Page 9
Selecting the Suction Power................................................................Page 9
Transportation and Storage.................................................................Page 9
Maintenance and Cleaning
Maintenance.........................................................................................Page 10
Changing the Dust Bag.....................................................................Page 10
Changing the Filter...........................................................................Page 10
Thread Catcher.................................................................................Page 10
Cleaning................................................................................................Page 10
Disposal...................................................................................................Page 11
Information
Service..................................................................................................Page 11
Manufacturer‘s Certificate/Declaration of Conformity ....................Page 11

6GB/IE/CY
Introduction
Lervia KH 3158
Floor Vacuum Cleaner
A Introduction
AFor Your Safety
Please acquaint yourself with the
functions of this vacuum cleaner before
using it for the first time and read
the following instructions. This device should
only be used as described. Please keep these
instructions in a safe place. If you sell or give this
vacuum cleaner to somebody else you should also
provide them with all the associated documents.
ADescription of the Device
and Intended Use
This vacuum cleaner is only suitable for vacu-
uming dry material on dry surfaces in private
households. Any other use or modification to
the device is considered to be inappropriate and
harbours considerable hazards. The manufacturer
will not be liable for any damage caused by
inappropriate use or incorrect operation.
AControls
Illustrations A - F show the individual controls of
the Lervia KH 3158.
QHandle
WManual suction regulator
ESuction hose
RStainless steel telescopic suction tube
TRelease button
YHeight adjuster for telescopic suction tube
UWheel
I
Floor nozzle with brush strip and thread catcher
OChangeover switch for the floor nozzle
PRetractable carrying handle
{Cover release
}Suction hose connector, rotating
qFilling level indicator for the dust bag
wExhaust air opening
eHolder for additional nozzles
rCrevice nozzle
tUpholstery nozzle
yBrush nozzle
uDust bag holder
iDust bag (type KH 99 or Swirl®Y 101®)
oMotor protection filter
pExhaust air filter
[Accessories bag for additional nozzles
]Pedal button for power cord rewind
APower cord with mains plug
SRotating control for suction power
DSuction power scale
FHolder for the floor nozzle
GOn/off switch
Note:
Swirl®and Y 101®are registered trademarks
of the Melitta Group.
ATechnical Details
Nominal voltage: 230V ~ 50 Hz
Power: 1500 W
Protection class: II/&
· Electronic suction power control
· Multiple filter system
· 175 cm suction hose
· Adjustable telescopic suction tube made of
stainless steel

7GB/IE/CY
AScope of Delivery
We supply the Lervia KH 3158 with the following
parts (see illustration A):
- Vacuum cleaner
- Suction hose
- Telescopic suction tube
- Floor nozzle
- Accessories bag
- Holder for additional nozzles
- Crevice nozzle
- Upholstery nozzle
- Brush nozzle
- Dust bags (5 in number: type KH 99)
- Motor protection filter
- Exhaust air filter
- Operating instructions
- Guarantee card
ASafety
The symbols and terms mean the following:
cDanger! You are putting your life and
health in danger if you do not follow these
instructions.
mWarning! You are putting your health and
property in danger if you do not follow
these instructions.
mCaution! You are putting your property in
danger if you do not follow these instructions.
T i p ! You will achieve best results if you
follow these instructions.
ASafety Information
cDanger!
· Do not leave small children un-
supervised with the packaging
material! Otherwise there is a
danger of death by suffocation!
· Do not leave children unsupervised with the
vacuum cleaner!
· Please ensure that no people or animals
are hit by the vacuum cleaner!
· Before connecting the vacuum cleaner to
the mains power supply you should ensure
that the mains supply is 230V ~ 50 Hz and
is correctly equipped with a 16 Ampere fuse.
· The device must only be assembled,
maintained and serviced when it is not
connected to the power supply!
· Do not allow the device to come into
contact with moisture! Otherwise there is a
danger of death by electric shock!
· Do not vacuum up any liquids! Otherwise
there is a danger of electric shock!
· Do not expose the device to the close proxi-
mity of fire, heat or prolonged temperatures
of more than 50°C! Otherwise there is a
danger of explosion!
mWarning!
· Before using the vacuum cleaner for the
first time, please check that all parts have
been assembled in accordance with the
instructions!
Otherwise there is a danger that the
vacuum cleaner will be damaged!
· Do not vacuum up any burning, glowing,
smouldering or hot substances or
materials! Danger of fire!
· Do not vacuum up any easily flammable or
explosive substances, and do not vacuum
in locations in which such substances are
present! Danger of explosion!
Introduction / Safety

8GB/IE/CY
· Do not vacuum up any toner dust!
· Do not cover the vacuum cleaner with other
items! Otherwise it might be damaged by
heat accumulation!
· If you are not using the vacuum cleaner,
please disconnect it from the mains and roll
up the power cord completely! Otherwise
there is a danger of injury if it is tripped
over!
· You should always use the handle when
operating the vacuum cleaner. Vacuuming
up fine dust results in static charges. You
should therefore ensure permanent contact
with the metal insert on the underside of
the handle. This prevents the unpleasant
effects of electrostatic discharge.
· The device should never be used without a
dust bag or filter!
mCaution!
· Please avoid any damage to the power
cord!
· During use the power cord should be
unwound as far as the yellow marking!
Otherwise there is a danger of damage
from overheating!
· During use the power cord should be
unrolled at least as far as the yellow marking,
but not past the red marking!
· The power cord should only be removed
from the socket by pulling the plug!
· Disconnect the vacuum cleaner from the
mains immediately if there are any
malfunctions!
· If the vacuum cleaner/power cord is
damaged or broken it should only be
repaired by authorised and trained
specialists!
AInitial Use
AAssembly
• Press the cover release {of the dust collec-
tion container and then open the cover.
• Remove the dust bag holder utogether with
the dust bag iand ensure that the motor
protection filter oand the exhaust air filter
pare assembled as shown in illustration
B. Then reinsert the dust bag holder u
together with the dust bag i.
• Close the cover and insert the suction hose
connector }into the suction opening of the
floor vacuum cleaner until it locks in place.
• Insert the tapered end of the telescopic suc-
tion tube Rinto the connector of the floor
nozzle Iuntil it locks in place. Insert the
handle Qinto the telescopic suction tube R
until it locks in place.
aAdjusting the Telescopic Suction Tube
• Keep the height adjuster Yheld down in the
direction of the arrow (see illustration D).
• Adjust the telescopic suction tube Rto the
desired length and lock it in place.
aUsing the Suction Nozzles
The floor nozzle Iis suitable for the daily
vacuuming of carpeted and hard floors. The floor
nozzle Ican be changed over manually - the
brush strip is folded in and out.
• Operate the changeover switch Oof the
floor nozzle in order to fold out the brush
strip. This setting allows you to vacuum up
loose dust, fluff and hairs on a smooth and
solid surface, e.g. floor tiles.
Safety / Initial Use

9GB/IE/CY
• Operate the changeover switch Oof the
floor nozzle to fold the brush strip in again.
This setting makes it possible to vacuum
up fluff and hairs on fibre and soft surfaces,
e.g. carpets.
For your individual room cleaning requirements
the vacuum cleaner is supplied with a separate
holder for three additional nozzles e.
• The crevice nozzle ris suitable for vacu-
uming joints, corners and crevices.
• The upholstery nozzle tis suitable for
vacuuming mattresses or upholstery furniture.
• The brush nozzle ywith rotating brush
head is suitable for vacuuming sensitive
fabrics and other sensitive items.
Tip! The additional nozzles can be attached
to the suction tube R, as well as to the
handle Qof the suction hose.
AOperation
AMains Connection
• Pull the power cord Aout of the vacuum
cleaner until the yellow marking appears and
insert the mains plug into the socket.
ASwitching On and Off
• Press the on / off switch Gand turn the
vacuum cleaner on or off.
T i p ! After you have finished vacuuming
up dust you should leave the
Lervia KH 3158 switched on for approxi-
mately 3 more seconds. Otherwise not all
of the last dust that was vacuumed up will
reach the dust bag.
ASelecting the Suction Power
The indentation on the control Spoints to the
selected suction power of the vacuum cleaner
on the scale D(see illustration C).
• Turn the control Sclockwise along the scale
Din order to increase the suction power.
• Turn the control Santiclockwise along the
scale Dto reduce the suction power.
T i p ! Use the manual suction regulator W
on the handle (see illustration D) to reduce
the selected suction power temporarily
without moving the rotating control S.
ATransportation and Storage
• Switch the vacuum cleaner off and remove
the power cord Afrom the power supply.
• Press the pedal button for the power cord
rewind ]; the power cord Ais completely
rewound into the vacuum cleaner.
• The vacuum cleaner should be transported by
means of the retractable carrying handle P.
• Take the vacuum cleaner to the location
where it is to be stored and insert the
telescopic suction tube Rinto one of the
holders F.
T i p ! You can store the Lervia KH 3158
either vertically or horizontally.
• Store the additional nozzles rtyin the
accessories holder eor in the accessories
bag [.
Initial Use / Operation

10 GB/IE/CY
AMaintenance and Cleaning
AMaintenance
aChanging the Dust Bag (TYPE KH 99)
You can see that the dust bag iis completely
full when the filling level indicator qin the
viewing window is 100% RED.
• Turn the vacuum cleaner off and disconnect
the power cord Afrom the mains.
• Press the release button {on the cover of
the dust collection container and open the
cover.
• Remove the full dust bag ifrom the dust
bag holder uby pressing the clamping
lever.
• Insert a new dust bag of TYPE KH 99 or type
Swirl®Y 101®into the dust bag holder.
Note:
If no dust bag is inserted it is not possible to
close the cover!
aChanging the Filter
• Switch the vacuum cleaner off and disconnect
the power cord Afrom the mains.
• Press the release button {on the cover of
the dust collection container and open the
cover.
• Remove the full dust bag ifrom the dust
bag container uby pressing the clamping
lever.
Motor Protection Filter
The motor protection filter oprotects the motor
compartment against dirt (see illustration B).
• Remove the motor protection lter ofrom
the holder.
• Replace the lter insert by another one.
• Then reinsert the motor protection lter oin
the holder.
Exhaust Air Filter
The exhaust air filter pcollects fine dusts
which would otherwise be given off to the
surrounding air. The exhaust air filter should be
changed after a visual check (see illustration F).
If a replacement is needed, this can be
purchased from our service addresses.
• Remove the exhaust air lter p
from the holder.
• Replace the entire exhaust air lter
by a new one.
• Insert the new exhaust air lter pinto the
holder and allow it to click into place.
aThread Catcher
Through the use of the thread catchers on the
underside of the floor nozzle I, threads and
fluff are vacuumed up particularly thoroughly.
Worn thread catchers can be levered out with an
appropriate tool. If a replacement is needed, this
can be bought from our service addresses.
ACleaning
• Switch the vacuum cleaner off and discon-
nect the power cord Afrom the mains.
• Please use a dry cloth for cleaning.
• The device should never be cleaned with
moisture!
• Use a brush or tweezers to remove threads
from the floor nozzle I, or vacuum these off
from time to time with the crevice nozzle r.
Maintenance and Cleaning

11GB/IE/CY
ADisposal
The packaging is wholly composed of
environmentally-friendly materials that
can be disposed of at a local recycling
centre.
Electrical equipment should not be
thrown into the domestic waste!
According to European directive 2002/96/EC
pertaining to old electrical and electronic equip-
ment and its implementation in national law,
worn out electrical equipment must be collected
separately and recycled in an environmentally
friendly manner.
Information on the possibilities that are available
for disposing of worn-out equipment can be
obtained from your local municipal authority.
AInformation
AService
Please see the attached guarantee card for the
respective service address for your country.
AManufacturer‘s Certificate/
Declaration of Conformity
We, Kompernass GmbH, Burgstrasse 21,
44867 Bochum, Germany, hereby declare that
this product conforms to the following
EC directives:
Low Voltage Directive
2006/95 / EC
Electromagnetic Compatibility
2004/108/EC
according to applicable norms, and confirm this
by CE marking.
Type Designation of the Device:
Lervia KH 3158 floor vacuum cleaner
Bochum, 30.11.2007
Hans Kompernass
- Managing Director -
Subject to technical modifications carried out to further develop this
product. These instructions consist of recyclable paper.
Disposal / Information

12

13SE
Innehåll
Vik ut bildsidan och ha den till hands när du läser igenom anvisningarna och
gör dig bekant med apparatens/maskinens funktioner.
Inledning
För din säkerhet........................................................................................Sidan 14
Produktbeskrivning och avsedd användning.........................................Sidan 14
De olika delarna........................................................................................Sidan 14
Tekniska data ...........................................................................................Sidan 14
I leveransen ingår.....................................................................................Sidan 15
Säkerhet
Säkerhetsanvisningar..............................................................................Sidan 15
Användning
Montering..................................................................................................Sidan 16
Ställ i rörets längd................................................................................Sidan 16
Använd sugmunstycken .......................................................................Sidan 16
Handhavande
Elanslutning..............................................................................................Sidan 17
PÅ/AV........................................................................................................Sidan 17
Välja sugeffekt .........................................................................................Sidan 17
Transport och förvaring ...........................................................................Sidan 17
Rengöring och skötsel
Underhåll...................................................................................................Sidan 17
Byta dammpåse...................................................................................Sidan 17
Filterbyte..............................................................................................Sidan 17
Trådfångare..........................................................................................Sidan 18
Rengöring..................................................................................................Sidan 18
Avfallshantering.......................................................................................Sidan 18
Information
Service......................................................................................................Sidan 18
Tillverkarintyg/Konformitetsdeklaration...............................................Sidan 19

14 SE
Inledning
Lervia KH 3158
Dammsugare
AInledning
AFör din säkerhet
Innan du börjar använda dammsuga-
ren: Gör dig förtrogen med de olika
funktionerna och och läs denna
bruksanvisning. Använd alltid dammsugaren
enligt bruksanvisningen. Förvara denna bruks-
anvisning på säker plats. Se till att bruksanvis-
ningen alltid finns tillgänglig även vid vidare
användning av tredje man.
AProduktbeskrivning och
avsedd användning
Dammsugaren är endast avsedd för dammsugning
av torrt damm på torra ytor i privata hushåll.
Varje annan användning gäller som icke avsedd
användning och kan medföra svåra olycksfalls-
risker. Tillverkaren ansvarar inte för skador vilka
kan härledas ur icke avsedd användning eller
felaktig hantering.
ADe olika delarna
Bild A - F visar de olika delarna för Lervia
KH 3158.
QHandgrepp
WLuftventil
EDammsugarslang
RUtdragbart rör i rostfritt stål
TSpärrknapp
YInställning för utdragbart rör
UHjul
IGolvmunstycke med borstar och trådfångare
OOmkopplingsknapp
P Sänkbart bärhandtag
{Lockets spärrknapp
}Sugslangens fäste, vridbart
qDammsugarpåsens nivåindikering
wAvluftsöppning
eHållare för extra munstycke
rElementmunstycke
tMöbelmunstycke
yFinmunstycke
uDammpåshållare
iDammpåse (typ KH 99 eller Swirl®Y 101®)
oMotorskyddsfilter
pAvluftsfilter
[Tillbehörspåse för extra munstycken
]Fotknapp för kabelupprullning
ANätkabel med nätkontakt
SVridreglage för sugeffekt
DSugeffektens skala
FParkeringshållare för golvmunstycke
GPÅ/AV-knapp
Observera:
Swirl®och Y 101®är registrerade
varumärken tillhörande Melitta-gruppen.
ATekniska data
Märkspänning: 230V ~ 50 Hz
Effekt: 1500 W
Skyddsklass: II/&
· Elektronisk sugkraftssäkring
· Multifiltersystem
· Sugslang 175 cm
· Inställbart utdragbart rör i rostfritt stål

15SE
AI leveransen ingår
Vi levererar Lervia KH 3158 med följande delar
(se bild A):
- Dammsugare
- Dammsugarslang
- Utdragbart rör
- Golvmunstycke
- Tillbehörspåse
- Hållare för extra munstycke
- Elementmunstycke
- Möbelmunstycke
- Finmunstycke
- Dammpåsar (5 stk: typ KH 99)
- Motorskyddsfilter
- Avluftsfilter
- Bruksanvisning
- Garantikort
ASäkerhet
Markeringar och begreppsinnebörd:
cFara! Icke beaktande av denna anvisningar
kan medföra livsfarliga skador.
mVarning! Icke beaktande av denna
anvisningar kan medföra hälsorisker och
materialskador.
mVarning! Icke beaktande av denna
anvisningar kan medföra materialskador.
mTips! Dessa anvisningar medföra bästa
resultat.
ASäkerhetsanvisningar
cFara!
· Låt inte småbarn leka med
förpackningsmaterialet.
Kvävningsrisk föreligger.
· Låt inte småbarn leka med dammsugaren.
· Se till att inte människor eller husdjur
fastnar i dammsugaren.
· Kontrollera att nätanslutningen är före-
skriftsmässigt försedd med 230V ~ 50 Hz
och 16 A säkring innan du ansluter.
· Dra alltid ut kabeln innan du monterar eller
rengör dammsugaren.
· Se till att dammsugaren inte blir fuktig. Risk
för stötar föreligger.
· Dammsug inte upp vätskor. Risk för stötar
föreligger.
· Undvik påverkan av eld, värme eller
långvarigt höga temperaturer över 50°C.
Explosionsrisk föreligger!
mVarning!
· Kontrollera före användning att samtliga
delar är monterade enligt bruksanvisningen.
Risk för materialskador.
· Dammsug inte upp brinnande, glödande,
glimmrande eller heta material. Brandrisk!
· Dammsug inte upp lättantändliga eller
explosiva material, resp. använd inte
dammsugaren där sådana material finns.
Explosionsrisk!
· Dammsug inte upp tonerdamm från
kopieringsutrustning.
· Dammsugaren får inte övertäckas. Risk för
skador genom värmeutveckling.
· Dra ut kabeln och rulla upp den helt när
dammsugaren inte används. Risk för
personskador och snubbelrisk.
· Använd alltid handgreppet i första hand. Att
dammsuga upp fint damm medför statisk
Inledning / Säkerhet

16 SE
laddning. På handgreppets undersida finns
en metallinläggning. Undvik längre beröring
med denna. Om elektrostatisk laddning
förekommer kan stötar uppstå, är dock inte
alltid förekommande.
· Använd aldrig dammsugaren utan damm-
påse eller filter.
mVarning!
· Undvik skador på nätsladden.
· Dra ut kabeln till den gula markeringen
syns. Risk för skador genom överhettning.
· Dra ut kabeln till den gula markeringen
syns, dock max till den röda markeringen.
· Dra ut kabeln genom att dra i kontakten,
inte bara i kabeln.
· Dra ut sladden omedelbart om du
upptäcker skador eller driftstörningar.
· Låt endast behörig elektriker reparera
dammsugaren/nätkabeln.
AAnvändning
AMontering
• Tryck på dammpåsbehållarens
spärrknapp {och lyft locket.
• Lyft ur dammpåshållaren uoch dammpåsen
ioch kontroller att motorskyddsfiltret o och
avluftsfiltret pär monterade som i
bild B. Sätt tillbaka dammpåshållaren uoch
dammpåsen i.
• Stäng locket och stick inte sugslangens fäste
}i damsugarens insugsöppning tills den
klickar till.
• Sätt in den smalare änden på röret Ri golv-
munstycket Itill det klickar till. Sätt in
handgreppet Qi röret Rtills det klickar till.
aStäll i rörets längd.
• Tryck höjdinställningen Yi pilens riktning
och håll den intrycket (se bild D).
• Haka i röret Ri önskad längd.
aAnvänd sugmunstycken
Golvmunstycket Iär avsett för daglig damm-
sugning av mattor och golv. Golvmunstycket I
är manuellt omkopplingbart, borstarna kan fällas
in eller ut.
• Tryck omkopplingsknappen Opå
golvmunstycket för att fälla ut borstarna.
Denna inställning möjliggör dammsugning av
löst damm, dammråttor och hår på plana
fasta golv, t.ex. stenplattor.
• Tryck omkopplingsknappen Opå
golvmunstycket för att fälla in borstarna.
Denna inställning möjliggör dammsugning av
dammråttor och hår på mjuka underlag,
t.ex. mattor.
Dammsugaren levereras med en separat hållare
för tre olika extra munstycken e.
• Elementmunstycket ranvänds för
fogar, hörn och springor.
• Möbelmunstycket tanvänds för
madrasser eller möbler.
• Finmunstycket ymed vridbart huvud
används för känsliga tyger och föremål.
Tips! Extramunstyckena kan användas på
röret Reller på handgreppet Q.
Säkerhet / Användning

17SE
AHandhavande
AElanslutning
• Dra ut kabeln Atills den gula markeringen
syns och stick in kontakten i ett vägguttag.
APÅ/ AV
• Tryck PÅ / AV-knappen Gför att starta resp.
stänga av dammsugaren.
Tips! Låt dammsugaren Lervia KH 3158
vara på ca. 3 sekunder efter du slutat att
dammsuga. På det sättet hamnar allt damm
från sugslangen i dammpåsen.
AVälja sugeffekt
Markeringen på reglaget Svrids längs skalan D
på dammsugarens sugeffekt (se bild C).
• Vrid reglaget Smedsols längs skalan Dför
att öka sugeffekten.
• Vrid reglaget Smotsols längs skalan D
för att sänka sugeffekten.
Tips! Använd luftventilen Wpå handgrep-
pet (se bild D) för att sänka vald sugeffekt
utan att justera vridreglaget S.
ATransport och förvaring
• Stäng av dammsugaran och dra ut
kabeln Aur vägguttaget.
• Tryck fotknappen för kabelupprullningen ]
och rulla upp kabeln helt.
• Bär dammsugaren i det utdragbara
bärhandtaget P.
• Ställ undan dammsugaren och stick in
röret Ri en av parkeringshållarna F.
Tips! Du kan förvara dammsugaren
Lervia KH 3158 antingen stående eller
liggande.
• Förvara extramunstyckena rtyi tillbe-
hörshållaren eeller tillbehörspåsen [.
ARengöring och skötsel
AUnderhåll
aByta dammpåse (typ KH 99)
Dammpåsen iär full om indikatorn qvisar
100% RÖTT.
• Stäng av dammsugaran och dra ut
kabeln A ur vägguttaget.
• Tryck på dammpåsbehållarens
spärrknapp { och lyft locket.
• Ta ur den fyllda dammpåsen iur
dammpåshållaren u, tryck på spaken.
• Sätt in en ny dammpåse. typ KH 99 eller Typ
Swirl®Y 101®i dammpåshållaren.
Tips:
Locket kan inte stängas om dammpåse saknas.
aFilterbyte
• Stäng av dammsugaran och dra ut
kabeln Aur vägguttaget.
• Tryck på dammpåsbehållarens
spärrknapp {och lyft locket.
• Ta ur den fyllda dammpåsen iur dammpå-
shållaren u, tryck på spaken.
Handhavande / Rengöring och skötsel

18 SE
Motorskyddsfilter
Motorskyddsfiltret oskyddar motorrummet för
smuts (se bild B).
• Ta ur motorskyddsltret our hållaren.
• Byt ltret och sätt in ett nytt lter.
• Sätt in motorskyddsltret oi hållaren igen.
Avluftsfilter
Avluftsfiltret psamlar fint damm som annars
hamnar i omgivningsluften. Byt avluftsfiltret när
det är smutsigt (se bild F). Filter finns hos vår
kundtjänst.
• Ta ur avluftsltret pur hållaren.
• Byt hela ltret och sätt in ett nytt lter.
• Sätt in det nya avluftsltret pi hållaren och
sätt tillbaka det tills det klickar till.
aTrådfångare
Trådfångaren på golvmunstyckets Iundersida
fångar effetkivt trådar och dammråttor. Slitna
trådfångare kan ersättas med lämpligt verktyg.
Trådfångare finns hos vår kundtjänst.
ARengöring
• Stäng av dammsugaran och dra ut
kabeln A ur vägguttaget.
• Använd alltid en torr luddfri trasa för
rengöring.
• Rengör inte dammsugaren med fuktig
trasa eller vatten.
• Använd en borset eller pincett för att ta bort
trådar i golvmunstycket Ieller sug bort
dem med elementmunstycket r.
AAvfallshantering
Förpackningen består av miljövänligt
material som kan avfallshanteras vid
lokala återvinningsställen.
Kasta inte elverktyg i
hushållssoporna!
Enligt EU-direktiv 2002/96 gällande Begagnad
elektrisk och elektronisk utrustning skall trasiga
eller begagnade elverktyg avfallshanteras
separat och tillföras återvinningen enligt
gällande miljölagstiftning.
Kontakta miljökontoret på din ort för vidare
information om avfallshantering av förbrukad
utrustning.
AInformation
AService
Adressen till ansvarig kundtjänst hittar du
på garantikortet.
Rengöring och skötsel / Avfallshantering / Information

19SE
ATillverkarintyg/
Konformitetsdeklaration
Vi, Kompernaß GmbH, Burgstr. 21,
D-44867 Bochum,Tyskland, förklarar härmed att
denna produkt överensstämmer med följande
EU-riktlinjer:
Lågspänningsdirektiv
2006/95 / EC
Elektromagnetisk kompatibilitet
2004/108/EC
enligt använda normer och bekräftar detta med
CE-märkning
Produktbeteckning:
Dammsugare Lervia KH 3158
Bochum, 30.11.2007
Hans Kompernaß
- Verkställande direktör -
Rätt till tekniska ändringar för fortsatt produktutveckling förbehålles.
Denna bruksanvisning är tryckt på återvinningsbart papper.
Information

20

21GR/CY
Περιεχόμενα
Πριν ξεκινήσετε την ανάγνωση, ανοίξτε τη σελίδα με τις εικόνες
και εξοικειωθείτε με όλες τις λειτουργίες της συσκευής.
Εισαγωγή
Γιατηνασφάλειάσας ......................................................................... Σελίδα 22
Περιγραφήσυσκευήςκαιχρήσησύμφωναμετουςκανονισμούς ... Σελίδα 22
Στοιχείαχειρισμού .............................................................................. Σελίδα 22
Τεχνικάδεδομένα ................................................................................ Σελίδα 23
Περιεχόμεναπαράδοσης .................................................................... Σελίδα 23
Ασφάλεια
Υποδείξειςασφάλειας ........................................................................ Σελίδα 23
Θέσησελειτουργία
Συναρμολόγηση ................................................................................... Σελίδα 24
Ρύθμιση τηλεσκοπικού λάστιχου αναρρόφησης .......................... Σελίδα 25
Χρήση ακροφυσίων αναρρόφησης ............................................... Σελίδα 25
Χειρισμός
Σύνδεσησεδίκτυο .............................................................................. Σελίδα 25
Ενεργοποίηση/απενεργοποίηση ........................................................ Σελίδα 26
Επιλογήισχύοςαναρρόφησης ........................................................... Σελίδα 26
Μεταφοράκαιφύλαξη ........................................................................ Σελίδα 26
Συντήρησηκαικαθαρισμός
Συντήρηση ........................................................................................... Σελίδα 26
Αλλαγή σακούλας σκόνης ............................................................ Σελίδα 26
Αλλαγή φίλτρου ............................................................................ Σελίδα 27
Σιφόνι ινών ..................................................................................... Σελίδα 27
Καθαρισμός .......................................................................................... Σελίδα 27
Απόσυρση ............................................................................................... Σελίδα 27
Πληροφορίες
Σέρβις ................................................................................................... Σελίδα 28
Οδηγίακατασκευαστή/δήλωσησυμμόρφωσης ............................... Σελίδα 28

22 GR/CY
Εισαγωγή
Lervia KH 3158
Ηλεκτρικήσκούπαπατώματος
A Εισαγωγή
A Γιατηνασφάλειάσας
Εξοικειωθείτε με τις λειτουργίες
της συσκευής πριν από την πρώτη
θέση σε λειτουργία και διαβάστε
τις παρακάτω οδηγίες χειρισμού.
Χρησιμοποιήστε τη συσκευή μόνο με τον
τρόπο που περιγράφεται. Φυλάξτε τις οδηγίες
αυτές. Παραδώστε όλα τα έγγραφα κατά τη
μεταβίβαση της συσκευής σε τρίτο.
A Περιγραφήσυσκευήςκαιχρήση
σύμφωναμετουςκανονισμούς
Η ηλεκτρική σκούπα προορίζεται αποκλειστικά
για την αναρρόφηση στεγνών προϊόντων
αναρρόφησης πάνω σε στεγνές επιφάνειες
σε ιδιωτικά νοικοκυριά. Οποιαδήποτε άλλη
χρήση ή τροποποίηση της συσκευής θεωρείται
ως αντικανονική και εγκυμονεί σοβαρούς
κινδύνους ατυχημάτων. Ο κατασκευαστής
δεν φέρει ευθύνη για τις φθορές, οι οποίες
προκαλούνται από αντικανονική χρήση ή
εσφαλμένο χειρισμό.
A Στοιχείαχειρισμού
Οι εικόνες Α – F δείχνουν τα μεμονωμένα
στοιχεία χειρισμού της Lervia KH 3158.
Q
Χειρολαβή
W
Ρυθμιστής αέρα
E
Σωλήνας αναρρόφησης
R
Λάστιχο αναρρόφησης τηλεσκοπικό από
ανοξείδωτο ατσάλι
T
Πλήκτρο απομανδάλωσης
Y
Ρύθμιση ύψους για τηλεσκοπικό λάστιχο
αναρρόφησης
U
Τροχός
I
Ακροφύσιο εδάφους με τριχωτή στεφάνη
και σιφόνι ινών
O
Πλήκτρο αλλαγής ακροφυσίου εδάφους
P
Ανυψούμενη λαβή μεταφοράς
{
Απομανδάλωση καλύμματος
}
Περιστρεφόμενο στόμιο σωλήνα
αναρρόφησης
q
Ενδειξη στάθμης πλήρωσης σακούλας
σκόνης
w
Ανοιγμα αέρα εξαγωγής
e
Συγκράτηση για πρόσθετα ακροφύσια
r
Ακροφύσιο αρμών
t
Ακροφύσιο ινών
y
Ακροφύσιο πινέλο
u
Συγκράτηση σακούλας σκόνης
i
Σακούλα σκόνης
(τύπος KH 99 ή Swirl
® Y 101
®)
o
Προστατευτικό φίλτρο μοτέρ
p
Φίλτρο αέρα εξαγωγής
[
Σακούλα εξαρτήματος για πρόσθετα
ακροφύσια
]
Πλήκτρο ποδιού για ξετύλιγμα καλωδίου
δικτύου
A
Καλώδιο δικτύου με βύσμα δικτύου
S
Περιστρεφόμενος ρυθμιστής για ισχύ
αναρρόφησης
D
Κλίμακα ισχύος αναρρόφησης
F
Συγκράτηση αποθήκευσης για ακροφύσιο
πατώματος
G
Πλήκτρο ενεργοποίησης /
απενεργοποίησης
Other manuals for LERVIA KH 3158
3
Table of contents
Languages:
Other Lervia Vacuum Cleaner manuals

Lervia
Lervia KH 280 Quick guide

Lervia
Lervia LERVIA KH 3158 User manual

Lervia
Lervia LERVIA KH 4421 User manual

Lervia
Lervia LERVIA KH 4421 User manual

Lervia
Lervia LERVIA KH 4421 User manual

Lervia
Lervia LERVIA KH 4421 User manual

Lervia
Lervia KH 4425 User manual

Lervia
Lervia LERVIA KH 94 User manual

Lervia
Lervia LERVIA KH 3158 User manual

Lervia
Lervia LERVIA KH 1410 User manual