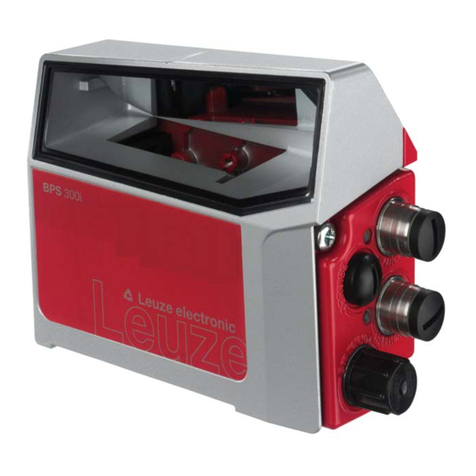
Leuze BPS 8 Parts list manual

Leuze electronic
Barcode Positioning System BPS 8
Technical Description

© All rights reserved, especially the right of reproduction and translation. This document may not be dupli-
cated or reproduced in any form without the written permission of Leuze electronic GmbH + Co. KG
It is subject to changes due to technical progress.

Leuze electronic BPS 8 1
Leuze electronic Table of contents
1 General information........................................................................................................... 3
1.1 Explanation of symbols ........................................................................................................ 3
1.2 Declaration of conformity ..................................................................................................... 3
1.3 Description of the BPS 8 functions ...................................................................................... 4
2 Safety notices..................................................................................................................... 5
2.1 General safety notices ......................................................................................................... 5
2.2 Safety standards .................................................................................................................. 5
2.3 Intended use ........................................................................................................................ 5
2.4 Working safely ..................................................................................................................... 6
3 Commissioning steps at a glance .................................................................................... 8
4 Specifications BPS 8 ....................................................................................................... 11
4.1 General specifications BPS 8 ............................................................................................ 11
4.2 Dimensioned drawings....................................................................................................... 13
4.3 Electrical connection .......................................................................................................... 15
4.3.1 BPS 8 - PWR IN - Voltage supply, RS 232, Switching input/output ............................................ 17
4.3.2 MA 8-01 - PWR IN HOST/RS485 - Voltage supply and RS 485 ................................................. 17
4.3.3 MA 8-01 - SW IN/OUT - Switching input and switching output.................................................... 18
4.3.4 MA 8-01 - BPS - Connecting the BPS 8 to the MA 8-01.............................................................. 19
4.3.5 Connecting the RS 485 interface................................................................................................. 20
4.4 Description of the LED states ............................................................................................ 21
4.5 Reading field curves .......................................................................................................... 22
5 Connector unit .................................................................................................................23
5.1 Modular connector unit MA 8-01........................................................................................ 23
5.1.1 General information ..................................................................................................................... 23
5.1.2 Specifications of the connector unit ............................................................................................. 23
5.1.3 Dimensioned drawings ................................................................................................................ 24
5.1.4 Electrical connection.................................................................................................................... 25
5.1.5 Termination of the RS 485 interface ............................................................................................ 25
6 Barcode tape .................................................................................................................... 26
6.1 General information ........................................................................................................... 26
6.2 Specifications of the barcode tape..................................................................................... 27
6.3 Mounting the barcode tape ................................................................................................ 28
6.4 Control barcodes................................................................................................................ 31
6.4.1 Controllable functions .................................................................................................................. 32
6.5 Repair kit............................................................................................................................ 34
7 Mounting........................................................................................................................... 36
7.1 Mounting the BPS 8 ........................................................................................................... 36
7.2 Device arrangement...........................................................................................................39
7.3 Mounting the barcode tape ................................................................................................ 40

2 BPS 8 Leuze electronic
Table of contents Leuze electronic
8 Device parameters and interfaces.................................................................................. 41
8.1 RS 232/RS 485 interface ................................................................................................... 41
8.1.1 General information......................................................................................................................41
8.1.2 Electrical connection ....................................................................................................................41
8.1.3 BPS Configuration Tool software .................................................................................................43
8.1.4 Service operating mode ...............................................................................................................48
8.1.5 Overview of the parameter structure............................................................................................51
8.1.6 Detailed description of the tabs....................................................................................................52
9 Protocol types for position value output....................................................................... 64
9.1 Binary protocol type 1 ........................................................................................................64
9.1.1 Data format ..................................................................................................................................64
9.1.2 Telegram structure .......................................................................................................................64
9.2 Binary protocol type 2 ........................................................................................................73
9.2.1 Data format ..................................................................................................................................73
9.2.2 Telegram structure .......................................................................................................................73
9.3 Binary protocol type 3 ........................................................................................................81
9.3.1 Data format ..................................................................................................................................81
9.3.2 Telegram structure .......................................................................................................................81
10 Diagnostics and troubleshooting................................................................................... 85
10.1 General causes of errors ................................................................................................... 85
10.2 Error on interface ............................................................................................................... 85
11 Type overview and accessories ..................................................................................... 87
11.1 Type overview: BPS 8........................................................................................................ 87
11.2 Accessory: Modular connector unit.................................................................................... 87
11.3 Accessory: Cables ............................................................................................................. 87
11.3.1 Contact assignment of PWR IN connection cable........................................................................88
11.4 Accessory: Configuration software .................................................................................... 88
11.5 Accessory: Mounting device .............................................................................................. 88
11.6 Type overview: Barcode tape ............................................................................................ 88
12 Maintenance ..................................................................................................................... 89
12.1 General Maintenance Information...................................................................................... 89
12.2 Repairs, servicing .............................................................................................................. 89
12.3 Disassembling, packing, disposing .................................................................................... 89
13 Appendix........................................................................................................................... 90
13.1 EU Declaration of Conformity ............................................................................................ 90

Leuze electronic General information
Leuze electronic BPS 8 3
TNT 35/7-24V
1 General information
1.1 Explanation of symbols
The symbols used in this operating manual are explained below.
Attention!
This symbol appears before text passages which must absolutely be observed. Failure to
heed this information can lead to injuries to personnel or damage to the equipment.
Attention Laser!
This symbol warns of possible danger through hazardous laser radiation.
Notice!
This symbol indicates text passages containing important information.
1.2 Declaration of conformity
The barcode positioning system BPS 8 and the optional connector unit MA 8 have been
developed and manufactured under observation of the applicable European standards and
directives.
Notice!
A copy of all declarations of conformity available for the product can be found in the appen-
dix of this manual (see chapter 13.1 "EU Declaration of Conformity" on page 90).
The manufacturer of the product, Leuze electronic GmbH + Co. KG in D-73277 Owen/Teck,
possesses a certified quality assurance system in accordance with ISO 9001.
ISO
9001

General information Leuze electronic
4 BPS 8 Leuze electronic
1.3 Description of the BPS 8 functions
The BPS 8 uses visible red laser light to determine its position relative to the barcode tape.
This essentially takes place in three steps:
1. Reading a code on the barcode tape
2. Determining the position of the read code in the scanning area of the scanning beam
3. Calculating the position to within a millimetre using the code information and the code
position relative to the device's centre.
The position value is then output via the interface.

Leuze electronic Safety notices
Leuze electronic BPS 8 5
TNT 35/7-24V
2 Safety notices
2.1 General safety notices
Documentation
All entries in this technical description must be heeded, in particular those in section "Safety
notices". Keep this technical description in a safe place. It should be accessible at all times.
Safety regulations
Observe the locally applicable legal regulations and the rules of the employer's liability insur-
ance association.
Repair
Repairs must only be carried out by the manufacturer or an authorised representative.
2.2 Safety standards
The BPS 8 series was developed, manufactured and tested in accordance with the appli-
cable safety standards. It corresponds to the state of the art.
2.3 Intended use
The barcode positioning system of the BPS 8 device series is an optical measuring system
which uses visible red laser light to determine the position of the BPS relative to a perma-
nently mounted barcode tape.
The optional connector and interface unit MA 8-01 is intended for the easy connection of
barcode positioning systems of type BPS 8.
In particular, unauthorised uses include:
• rooms with explosive atmospheres
• operation for medical purposes
Attention!
The protection of personnel and the device is guaranteed only if the device is operated in a
manner corresponding to its intended use.
Areas of application
The barcode positioning system BPS 8 has been developed for positioning tasks in the
following areas of application:
• Crane bridges and trolleys
• Side-tracking skates
• Telpher lines
• Lifts

Safety notices Leuze electronic
6 BPS 8 Leuze electronic
2.4 Working safely
Attention!
Access to or changes on the device, except where expressly described in this operating
manual, are not authorised.
Safety regulations
Observe the locally applicable legal regulations and the rules of the employer's liability insur-
ance association.
Qualified personnel
Mounting, commissioning and maintenance of the device may only be carried out by quali-
fied personnel.
Electrical work must be carried out by a certified electrician.
Attention, laser radiation!
Warning: The barcode positioning system BPS 8 operates with a red light laser of
class 2 acc. to EN 60825-1. If you look into the beam path over a longer time period,
the retina of your eye may be damaged!
Never look directly into the beam path!
Do not point the laser beam of the BPS 8 at persons!
When mounting and aligning the BPS 8, avoid reflections of the laser beam off reflec-
tive surfaces!
Heed the laser safety regulations according to DIN EN 60825-1 in their most current
version! The output power of the laser beam at the reading window is at most 1.3mW
acc. to EN 60825-1.
The BPS 8 uses a laser diode with low power in the visible red light range with an
emitted wavelength of 650nm.
Attention!
CAUTION! The use of operating and adjusting devices other than those specified here
or carrying out of differing procedures may lead to dangerous exposure to radiation!
Notice!
It is important that you attach the stick-on labels supplied to the device (notice signs and la-
ser emission symbol)! If the signs would be covered due to the installation situation of the
BPS 8, attach them close to the BPS 8 such that reading the notices cannot lead to looking
into the laser beam!

Leuze electronic Safety notices
Leuze electronic BPS 8 7
TNT 35/7-24V
The barcode positioning system BPS 8 is provided with the following warning notices on the
housing, as well as below and next to the reading window:
Figure 2.1: Attachment of the sticky labels with warning notices at the BPS 8

Commissioning steps at a glance Leuze electronic
8 BPS 8 Leuze electronic
3 Commissioning steps at a glance
Notice!
Below you will find a short description for the initial commissioning of the barcode po-
sitioning system BPS 8. Detailed explanations for all listed points can be found throughout
the manual.
Mechanical design
Mounting the barcode tape
The barcode tape is to be affixed without tension to a dust- and grease-free mounting
surface.
➔chapter 6.3 on page 28
Mounting the BPS 8 device
There are two different types of mounting arrangements for the BPS 8:
1. Directly, using the two through holes in the housing.
2. Using a mounting device (BT 8-01) on the through holes.
Notice!
The installation dimensions listed in figure 3.1 and figure 3.2 must absolutely be adhered to.
Optically, it must be ensured that the scanner has an unobstructed view of the barcode tape
at all times.
➔chapter 7.2 on page 39
Figure 3.1: Beam exit and device arrangement for the BPS 8 SM 102
Notice!
When mounting, consider the angle of inclination
α
of
10° for a barcode tape height of 47mm,
5° for a barcode tape height of 30mm, or 25mm
in the vertical direction, and the working range of the reading field curve.
➀
10˚
40 mm
α
Read distance
Reference plane
Barcode tape
BPS 8 SM 102
Pitch of scanning beam
BT 8-01
Pitch of scanning beam:
α= 10° for a tape height of 47mm
α= 5° for a tape height of 30mm or 25mm

Leuze electronic Commissioning steps at a glance
Leuze electronic BPS 8 9
TNT 35/7-24V
Figure 3.2: Beam exit and device arrangement for the BPS 8 SM 100
Notice!
When mounting, consider the angle of inclination
α
of
10° for a barcode tape height of 47mm,
5° for a barcode tape height of 30mm, or 25mm
in the vertical direction, and the working range of the reading field curve.
➔chapter 7.1 on page 36
Attention!
For the position calculation, the scanning beam of the BPS 8 must be incident on the bar-
code tape without interruption. Ensure that the scanning beam is always incident on the bar-
code tape when the system is moving.
Connecting voltage supply and interface
Connecting the voltage supply/RS 232 directly at the BPS 8
The voltage supply and the RS 232 interface are connected via the M12 connection PWR IN
at the BPS 8.
Figure 3.3: BPS 8 - assignment M12 connector PWR IN
15˚
α
17,4
51
X
Read distance
Reference plane
Barcode tape
BPS 8 SM 100
Pitch of scanning beam
Pitch of scanning beam:
α= 10° for a tape height of 47mm
α= 5° for a tape height of 30mm or 25mm
Read distance 60 70 80 90 100 110 120
Height X 16 19 21 24 27 29 32
➁
3
21
4
5
RXD GND
VIN
SWIN/SWOUT
TXD
PWR IN
Plug
(A-coded)

Commissioning steps at a glance Leuze electronic
10 BPS 8 Leuze electronic
Connecting the voltage supply/RS 485 at the MA 8-01
The BPS 8 is connected to the MA 8-01 via the connection cable KB 008-1000AA. The
voltage supply and the RS 485 interface are connected to the MA 8-01 via the M12
connector PWR IN HOST/RS485.
Figure 3.4: BPS 8 - Connection of voltage supply and RS 485 at the MA 8-01
Connecting the switching input / switching output at the MA 8-01
The switching input and the switching output are connected via the M12 connection SW IN/
OUT at the MA 8-01.
Figure 3.5: BPS 8 - Connection of switching input/output at the MA 8-01
Connecting the BPS 8 to the MA 8-01
The BPS 8 is connected to the MA 8-01 via the connection cable KB 008-1000AA. The
connection to the MA 8-01 is made via the M12 connector BPS.
Figure 3.6: BPS 8 - Connection to the MA 8-01
➂
1
23
4
5
RXD VIN
GND
SWIN/SWOUT
TXD
1
23
4
5
SWIN VOUT
GND
FE
SWOUT
3
21
4
5
A (P) GND
VIN
FE
B (N)
BPS SW IN/OUT PWR IN
HOST/RS485
Socket
(A-coded)
Socket
(A-coded)
Plug
(A-coded)
➃
1
23
4
5
RXD VIN
GND
SWIN/SWOUT
TXD
BPS
3
21
4
5
A (P) GND
VIN
FE
B (N)
PWR IN
HOST/RS485
1
23
4
5
SWIN VOUT
GND
FE
SWOUT
SW IN/OUT
Socket
(A-coded)
Socket
(A-coded)
Plug
(A-coded)
➄
1
23
4
5
SWIN VOUT
GND
FE
SWOUT
3
21
4
5
A (P) GND
VIN
FE
B (N)
SW IN/OUT PWR IN
HOST/RS485
1
23
4
5
RXD VIN
GND
SWIN/SWOUT
TXD
BPS
Socket
(A-coded)
Socket
(A-coded)
Plug
(A-coded)

Leuze electronic Specifications BPS 8
Leuze electronic BPS 8 11
TNT 35/7-24V
4 Specifications BPS 8
4.1 General specifications BPS 8
Optical data
Light source laser diode 650nm
Beam deflection by means of rotating polygon mirror wheel
Reading distance see reading field (figure 4.12 and figure 4.13 on page 22)
Optical window glass with scratch-resistant Indium coating
Laser safety class 2 acc. to EN 60825-1,
II acc. to CDRH (U.S. 21 CFR 1040.10 and 1040.11)
Measurement data
Reproducible accuracy ±1 (2)mm
Integration time 26.6 (13.3)ms
Measurement value output 3.3ms (300 values/s)
Working range BPS 8 SM 102: 80 … 140mm
BPS 8 SM 100: 60 … 120mm
Max. traverse rate 4m/s
Electrical data
Interface type RS 232, RS 485 in combination with MA 8-01
Service interface RS 232 directly at the BPS 8, RS 485 via MA 8-01,
with default data format,
9600Bd, 8 data bits, no parity, 1 stop bit
Switching input / output 1 switching input, 1 switching output, both programmable,
in combination with MA 8-01 only
LED green device ready (Power On)
Operating voltage BPS 8: 4.9 … 5.4VDC
with MA 8-01: 10 … 30VDC
Power consumption BPS 8: 1.5W
with MA 8-01: max. 2W
Mechanical data
Protection class IP 67
Weight 70g
Dimensions (W x H x D) 48 x 40.3 x 15mm
Housing diecast zinc
Environmental data
Operating temperature range 0°C … +40°C
Storage temperature range -20°C … +60°C
Air humidity max. 90% rel. humidity, non-condensing
Vibration IEC 60068-2-6, test FC
Shock IEC 60068-2-27, test Ea
Continuous shock IEC 60068-2-29, test Eb
Electromagnetic compatibility EN 55022, EN 55024, EN 61000-4-2, -3, -4 and -6,
EN 61000-6-2 and -3)

Specifications BPS 8 Leuze electronic
12 BPS 8 Leuze electronic
Table 4.1: General specifications
Barcode tape
Max. length
(measurement length)
10'000m1)
Ambient temperature -40°C … +120°C
Mech. properties scratch and wipe resistant, UV resistant,
moisture resistant, partly chemical resistant
1) Depends on the transmission protocol and on the configured resolution.

Leuze electronic Specifications BPS 8
Leuze electronic BPS 8 13
TNT 35/7-24V
4.2 Dimensioned drawings
BPS 8 SM 102-01 with beam exit at the front
Figure 4.2: Dimensioned drawing BPS 8 SM 102-01
B1 B2
ATurning connector, 90°
BIndicator LEDs (B1: status LED, B2: decode LED)
CScanning beam
DOptical axis
Thread depth:
3mm
Thread depth:
3mm

Specifications BPS 8 Leuze electronic
14 BPS 8 Leuze electronic
BPS 8 SM 100-01 with lateral beam exit
Figure 4.3: Dimensioned drawing BPS 8 SM 100-01
B1 B2
ATurning connector, 90°
BIndicator LEDs (B1: status LED, B2: decode LED)
CScanning beam
DOptical axis
Thread depth:
3mm
Thread depth:
3mm

Leuze electronic Specifications BPS 8
Leuze electronic BPS 8 15
TNT 35/7-24V
4.3 Electrical connection
The BPS 8 is connected to the MA 8-01 via the M12 cable KB 008-… . For the locations of
the individual device connections, please refer to the device detail shown in figure 4.4.
The corresponding mating connectors and ready-made cables are available as accessories
for all connections. For additional information, refer to chapter 11 starting on page 87.
Attention!
Connection of the device and cleaning must only be carried out by a qualified electrician.
If faults cannot be corrected, the device should be removed from operation and protected
against possible use.
Before connecting the device, be sure that the supply voltage agrees with the respective val-
ues printed on the name plates of the BPS 8 or the MA 8-01.
The power supply unit for the generation of the supply voltage for the BPS 8 and the respec-
tive connector units must have a secure electrical insulation through double insulation and
safety transformers according to EN 60742 (corresponds to IEC 60742).
Be sure that the functional earth is connected correctly. Error-free operation is only guaran-
teed if the device is connected to functional earth.

Specifications BPS 8 Leuze electronic
16 BPS 8 Leuze electronic
Figure 4.4: Connection assignment MA 8-01
Attention!
Protection class IP 67 is achieved only if the connectors and caps are screwed into place!
PWR IN HOST/RS485 = Voltage supply/RS 485 host interface
SW IN/OUT = Switching input/output
BPS = Connection to BPS 8
Notice!
The SW IN/OUT connection is sealed with a thread plug upon delivery.
All dimensions in mm
1
23
4
5
RXD VIN
GND
SWIN/SWOUT
TXD
1
23
4
5
SWIN VOUT
GND
FE
SWOUT
3
21
4
5
A (P) GND
VIN
FE
B (N)
BPS SW IN/OUT PWR IN
HOST/RS485
Socket
(A-coded)
Socket
(A-coded)
Plug
(A-coded)

Leuze electronic Specifications BPS 8
Leuze electronic BPS 8 17
TNT 35/7-24V
4.3.1 BPS 8 - PWR IN - Voltage supply, RS 232, Switching input/output
Figure 4.5: BPS 8 - Connection assignment PWR IN
Notice!
The switching input/switching output are programmed via the parameters in the configura-
tion software BPS Configuration Tool in the tabs Sensor and Switch. For more information
see chapter 8.1.6.4 and chapter 8.1.6.5, from page 60 onwards.
Attention!
Protection class IP 67 is achieved only if the connectors and caps are screwed into place!
4.3.2 MA 8-01 - PWR IN HOST/RS485 - Voltage supply and RS 485
Figure 4.6: MA 8-01 - Connection assignment PWR IN HOST/RS485
Attention!
Protection class IP 67 is achieved only if the connectors and caps are screwed into place!
PWR IN (5-pin plug, A-coded)
Pin Name Remark
1 VIN Positive supply voltage: +4.9 … +5.4VDC
2 TXD Transmission line RS 232
3 GND Supply voltage 0VDC
4 RXD Receiving line RS 232
5SWIN/
SWOUT Programmable switching input/output
Thread FE Functional earth (housing)
3
21
4
5
RXD GND
VIN
SWIN/SWOUT
TXD
PWR IN
M12 plug
(A-coded)
PWR IN HOST/RS485 (5-pin plug, A-coded)
Pin Name Remark
1VINPositive supply voltage: +10 … +30VDC
2B(N)RS 485 Receive/transmit data B-line (N)
3GNDSupply voltage 0VDC
4A(P)Receive/transmit data A-line (P)
5FEFunctional earth
Thread FE Functional earth (housing)
3
21
4
5
A (P) GND
VIN
FE
B (N)
PWR IN
HOST/RS485
M12 plug
(A-coded)

Specifications BPS 8 Leuze electronic
18 BPS 8 Leuze electronic
4.3.3 MA 8-01 - SW IN/OUT - Switching input and switching output
Figure 4.7: MA 8-01 - Connection assignment SW IN/OUT
Attention!
Protection class IP 67 is achieved only if the connectors and caps are screwed into place!
Notice!
The switching input/switching output are programmed via the parameters in the configura-
tion software BPS Configuration Tool in the tabs Sensor and Switch. For more information
see chapter 8.1.6.4 and chapter 8.1.6.5, from page 60 onwards.
Attention!
If you use a sensor with a standard M12 connector, then please note the following:
Use only sensors on which the switching output does not lie on pin 2 or sensor cables
on which pin 2 is not assigned. Otherwise, the switching output is not protected against
feedback on the switching input. If the inverted sensor output lies on pin 2, erroneous be-
haviour of the switching output will result.
SW IN/OUT (5-pin socket, A-coded)
Pin Name Remark
1VOUT
Voltage supply for sensors
(VOUT identical to VIN at PWR IN)
2SWOUTSwitching output
3GNDGND for the sensors
4SWINSwitching input
5FEFunctional earth
Thread FE Functional earth (housing)
1
23
4
5
SWIN VOUT
GND
FE
SWOUT
SW IN/OUT
M12 socket
(A-coded)
Other manuals for BPS 8
2
Table of contents
Other Leuze Valve Positioner manuals
Popular Valve Positioner manuals by other brands

rotork
rotork YT-2600 Series product manual

Aircraft Extras
Aircraft Extras FPS-Plus-nt installation manual

Aerotech
Aerotech ANT95L Series Hardware manual

CONFLOW
CONFLOW Power Genex PPR Series Installation and maintenance manual

Dwyer Instruments
Dwyer Instruments PROXIMITY 185 Series Specifications-installation and operating instructions

Flowserve
Flowserve D20 Series Installation operation & maintenance