Vector TCY-MZ User manual

OPERATIONS MANUAL TIME PROGRAMING FOR TCY-MZ
Doc: 70-00-0989A, 20220920 © Vector Controls GmbH, Switzerland Page 1-6
Subjects to alteration www.vectorcontrols.com
VECTOR
Operating instructions Time Programing
1Overview
The following instructions describe how to set the clock and how to program the time programs of the TCY-MZ for daily,
weekly repeated action/function.
These operating instructions apply to devices that support time schedules that is devices with an integrated real-time
clock.
For additional information, refer to the TCY-MZ operating instructions.
2Display and Operation
2.1 User Interface
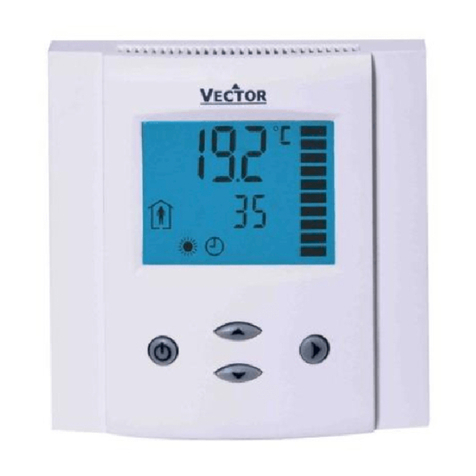
Figure 1: TCY-MZ
Figure 2: TCY-MZ-U
Button
Symbol
Function
Description
Operating mode
(Back)
Operating mode selection (On / Off, Occupied / Unoccupied mode)
Menu navigation: Back to the previous menu
Long press: Off if occupation mode is configured
Right
(Confirm)
Menu navigation: Next menu point
Alarms: Confirm the alarm
Up
(+)
Adjust temperature set points and control parameters
Down
(-)
Adjust temperature set points and control parameters

OPERATIONS MANUAL TIME PROGRAMING FOR TCY-MZ
Doc: 70-00-0989A, 20220920 © Vector Controls GmbH, Switzerland Page 2-6
Subjects to alteration www.vectorcontrols.com
VECTOR
2.2 LCD Display
Overview
This section explains the meaning of the symbols on the LCD Display.
Some of the symbols shown have no meaning depending on the type and version of the device used.
1
Control loop indication
2
3
Large digits
Small digits
4
Operating Mode
5
Controlling Mode
Alarm
Fan is active / fan auto mode
6
Triangle indication
7
Indication side bar
2.3 Operating Modes
Display
Mode
Description
Occupied
(Comfort)
The device maintains the occupied (comfort) temperature set points defined within each
control loop.
In occupied mode, the fan can be set to auto or manual fan speed.
Unoccupied
(ECO)
The device maintains the unoccupied (ECO, economy) temperature set points defined within
each control loop.
OFF
Protection
(Holiday)
The device runs in standby. The system is protected against overheating and frost if
enabled. Inputs are monitored for alarms.
2.4 Controlling Modes
Display
Mode
Description
Cooling
Cooling mode activates cooling equipment for temperatures above the set point.
Heating
Heating mode activates heater for temperatures below set point.
Manual
Manual override mode
Clock /
Schedules
Set clock, change time schedules or indication of set time schedules
Fan
The side bars show the fan speed.
2.5 Operation Status
Display
Status
Description
Alarm
Alarm / Error active.
1
2
3
6
4
5
7

OPERATIONS MANUAL TIME PROGRAMING FOR TCY-MZ
Doc: 70-00-0989A, 20220920 © Vector Controls GmbH, Switzerland Page 3-6
Subjects to alteration www.vectorcontrols.com
VECTOR
3Time Programming
3.1 Clock Operation
Overview
This section gives an overview of the clock and the available timed functions of the device.
Note on Accuracy
Warning: Devices with a "D" addition (e.g. TCY-MZ2-D) have a real-time clock. This clock is accurate to two
seconds a day.
Time Programs
Up to 8 time and weekday programs can be programmed (Pr01 to Pr08). Time schedules can change the setpoint of the
controller.
Devices with a "D" addition (e.g. TCY-MZ-D) have a real-time clock with a maintenance-free power backup.
A flashing clock time “00:00” indicates that the time has not been set or that the device has been without power for
more than 48 hours. The time must be set for the schedules to work.
3.2 Clock Setting
3.2.1 Setting time and date of clock
Overview
This section describes how to set the time and date of the system clock.
Procedure
1. Press the ( / ) button longer than 3 seconds.
➔SEL and the actual Time is displayed.
2. Press the ( / ) button briefly to start changing the time and date:
Minutes flashes: ( ) ( ) button for adjustment, ( / ) button to
save.
Hours flashes: ( ) ( ) button for adjustment, ( / ) button to
save.
Day of the week flashes: ( ) ( ) button for adjustment, ( / )
button to save.
Note: Monday is day 1 of the week.
Set Minutes
Set Hours
Set Day of Week
Press the ( ) button (1x) to go back.

OPERATIONS MANUAL TIME PROGRAMING FOR TCY-MZ
Doc: 70-00-0989A, 20220920 © Vector Controls GmbH, Switzerland Page 4-6
Subjects to alteration www.vectorcontrols.com
VECTOR
3.3 Set Time Schedules
Overview
Up to 8 time and weekday programs can be programmed (Pr01 to Pr08).
3.3.1 Time schedule enable/disable
Overview
This section describes how to generally enable/disable timed events (schedules) on the device.
Procedure
1. Press the ( / ) button briefly to enable / disable time schedule.
➔When schedule is enabled, is displayed on the home menu (idle
display).
Time schedule is on
Time schedule is off
Alternate Procedure
1. Press the ( / ) button longer than 3 seconds.
➔SEL and the actual Time are displayed.
2. Press the ( ) button briefly to go to the scheduler submenu.
➔SEL and PRO is displayed and the clock symbol flashes.
3. Press the ( / ) button: Schedule status indicates whether it is
OFF or ON.
4. Press the ( / ) button: Actual status flashes.
5. Press the ( ) ( ) button to change the status.
6. Press the ( / ) button to save the status.
➔When schedule is ON, is displayed on the main display.
Press the ( ) button (1x) to go back to the previous submenu.
3.3.2 Set daily/weekly time schedules
Overview
This section describes how to set a daily, weekly repeated action/function.
Up to 8 time and weekday programs can be programmed (Pr01 to Pr08).
Requirements
Time schedule is enabled (see chapter 3.3.1).
Procedure
1. Press the ( / ) button longer than 3 seconds.
➔SEL and the actual Time is displayed.
2. Press the ( ) button briefly to go to the scheduler submenu.
➔SEL and PRO is displayed and the clock symbol flashes.
3. Press the ( / ) button: Schedule status indicates whether it is
OFF or ON.
4. Press the ( / ) button: Actual status flashes.
5. Press the ( ) ( ) button to change the status.
6. Press the ( / ) button to save the status.
➔When schedule is ON, is displayed on the main display.

OPERATIONS MANUAL TIME PROGRAMING FOR TCY-MZ
Doc: 70-00-0989A, 20220920 © Vector Controls GmbH, Switzerland Page 5-6
Subjects to alteration www.vectorcontrols.com
VECTOR
7. Press the ( ) or ( ) button to select between programs
Pr 01…Pr 08
8. Press the ( / ) button to set the time the program will execute.
Press the ( ) ( ) button to adjust the time from 00:00…23:45 in
15 minutes steps.
➔1 bar indicate setting step 1 is executed.
9. Press the ( / ) button to select Monday (Day 1).
Note: Monday is day 1 of the week.
10. Press the ( ) button to execute the program on Monday (Day 1).
➔The first triangle symbol is displayed.
11. Press the ( ) button to not execute the program on Monday
(Day 1).
➔The first triangle symbol disappears.
12. Press the ( / ) button to go to the next day.
➔Pr01 (Program 1) and DAY1 (Day 1) is displayed in this example.
➔2 bars indicate setting step 2 is executed.
Execute on day 1
No execute on day 1
13. Repeat this process to set DAY2 to DAY7 (Tuesday to Sunday).
➔Triangle symbol indicate the days of the week the program will be
executed.
Day of the week, Monday is day 1
14. Press the ( / ) button to select the setpoint adjustment.
15. Press the ( ) ( ) button to change the setpoint.
➔3 bars indicate setting step 3 is executed.
16. Press ( / ) to complete the setting of a timed event.
17. Now you are back in menu "program selection" (instruction No. 7).
Start creating the next weekly schedules for program 2 to 8 as
required.
To go back to the previous submenu, press the ( ) button (1x).
Default preprogrammed weekly time schedules
These switching times are preprogrammed:
Program Id
Day of the Week
Activation Time
Setpoint Value
PRO1
Monday to Sunday (Day 1 to Day 7)
07:00
50%
PRO2
Monday to Sunday (Day 1 to Day 7)
17:00
100%
PRO3
Monday to Sunday (Day 1 to Day 7)
20:00
25%
Table of contents
Other Vector Valve Positioner manuals
Popular Valve Positioner manuals by other brands

halstrup-walcher
halstrup-walcher PS*3**DP series instruction manual

Siemens
Siemens SIPART PS2 6DR50xx manual

ABB
ABB TZIDC manual

Festo
Festo CMSX-P-S-C-U-F1-D-130-A operating instructions

OMC
OMC R99P Installation, operation and maintenance instructions

Burkert
Burkert 8692 Supplement to operating instructions