manuals.online logo
Brands
  1. Home
  2. •
  3. Brands
  4. •
  5. Leviton
  6. •
  7. Accessories
  8. •
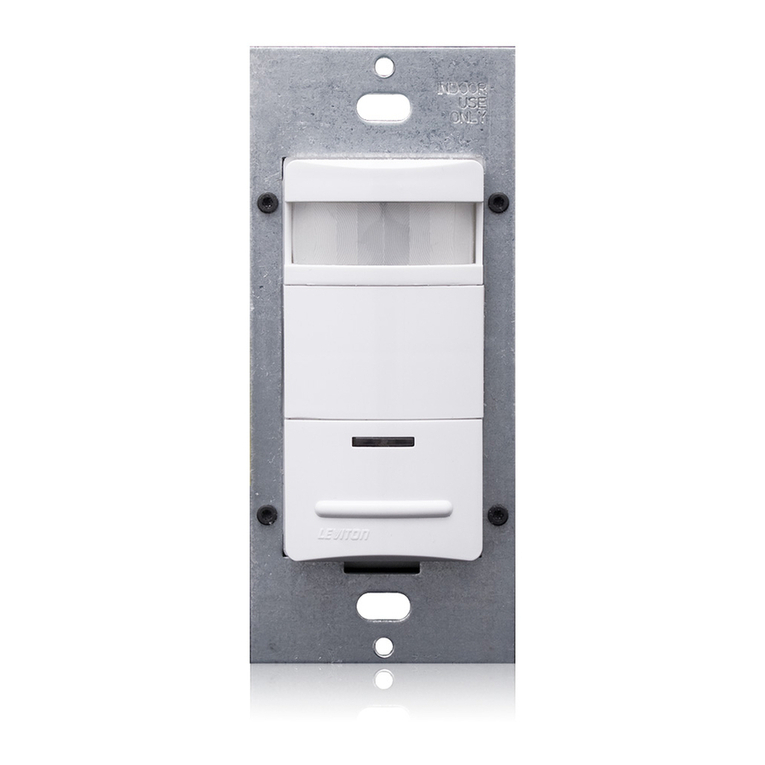
  9. Leviton OSS10-IDx User manual

Leviton OSS10-IDx User manual

Single Pole (One Location) or Multi-Location
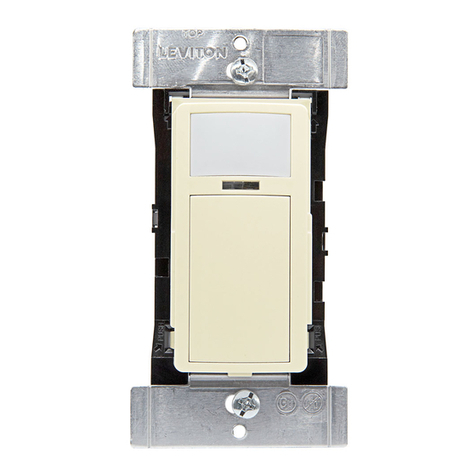
Designer Wall Switch Occupancy Sensor with LED NightLight
California Title 24 2005 Compliant
Cat. No. OSSNL/OSS10-IDx
No Minimum Load Required
Compatible with incandescent lamps, electronic and magnetic low-voltage ballasts, electronic and magnetic ballasts, and fans
INSTALLATION INSTRUCTIONS
Incandescent: 800W @ 120V Fluorescent: 1200VA @ 120V Fluorescent: 2700VA @ 277V Supplemental: 1/4hp @ 120V
PK-93369-10-00-0A-X3
WARNINGS AND CAUTIONS:
• To be installed and/or used in accordance with appropriate electrical codes and regulations.
• If you are unsure about any part of these instructions, consult a qualified electrician.
• Controlling a load in excess of the specified ratings will damage the unit and pose risk of fire, electric shock, personal injury or death.
Check your load ratings to determine suitability for your application.
• Do not install this unit to control a receptacle.
WARNINGS AND CAUTIONS:
• The OSSNL/OSS10-IDx Occupancy Sensor is intended to replace a standard light switch.
• Do not touch the surface of the lens. Clean outer surface with a damp cloth only.
• Disconnect power at circuit breaker or fuse when servicing, installing or removing fixture.
• Use this device only with copper or copper clad wire. With aluminum wire use only devices marked CO/ALR or CU/AL.
WARNING: TO AVOID FIRE, SHOCK, OR DEATH;
TURN OFF POWER at circuit breaker or fuse and test that
power is off before wiring!
Step 1
/./&&
/./&&
/./&&
/./&&
/./&&
/./&&
/./&&/./&&
/./&&
/./&&
/./&&
/./&&
1- #12 w/ 1 to 3 #14, #16 or #18
2- #12 w/ 1 or 2 #16 or #18
1- #14 w/ 1 to 4 #16 or #18
2- #14 w/ 1 to 3 #16 or #18
WIRE NUT / # OF COND.
COMBINATION CHART
For non-standard wiring applications, refer
to Wire Nut and Conductor Size Chart
• Pull off pre-cut insulation from sensor leads.
• Make sure that the ends of the wires from the wall box are straight
(cut if necessary).
• Remove insulation from each wire in the wall box as shown.
Preparing and connecting wires:
5/8"
(1.6 cm)
Strip Gage
(measure bare
wire here)
Cut
(if necessary)
Step 3
Features
DESCRIPTION
Leviton Cat. No. OSSNL/OSS10-IDx, Designer Wall Switch
Occupancy Sensor with LED NightLight, is designed to detect
motion from a heat-emitting source (such as a person entering
a room) within its field-of-view (monitored space) and either
automatically or manually switches lights ON and OFF (OSSNL)
or manually switches lights ON and automatically switches lights
OFF (OSS10). The controlled lights will remain ON until no motion
is detected and the scheduled time-delay has expired. The LED
NightLight operates separately from controlled room lights and
will turn ON via a photocell when the ambient light in the space
is approximately less than 1 footcandle and turn OFF when the
ambient light exceeds 5 footcandles. The LED NightLight is
adjustable for continuous mode or a dim mode. In the dim mode
the LED dims to approximately 5% of full brightness after 2 minutes
of no occupancy. When in the manual ON switch mode, the LED
NightLight will fade up and return to the adjustable setting when
occupancy is detected and the ambient light level present to the
photocell is less than 1 footcandle. The LED NightLight consumes
less than one half of a watt providing energy savings and guide
lighting when room lights are off. The LED NightLight output is fully
adjustable with a simple dial setting.
OSSNL-IDx is perfect for use in hospitality and health care
facilities with either auto ON or manual ON settings with adjustable
time-delay settings of 30 seconds to 2 hours with LED NightLight.
The OSS10 works well anywhere a manual ON only occupancy
sensor with LED NightLight is desired and has a maximum of
30 minute time-delay setting to conform to California Title 24
requirements. Both sensors are UL listed and have a limited 5-year
warranty.
PASSIVE INFRARED (PIR) TECHNOLOGY DESCRIPTION
The Occupancy Sensor senses motion within its coverage area of
1200 sq. ft maximum and controls the connected lighting. This is
a self-contained device which provides sensing and light control.
The Occupancy Sensor will turn the lights ON when motion is
initially detected (OSSNL Only), and keep the lights ON for as long
as motion is detected. The OSS10 is a manual ON device with
automatic OFF when no occupancy is detected.
The Occupancy Sensor uses a small semiconductor heat detector
that resides behind a multi-zone optical lens. This Fresnel lens
establishes dozens of zones of detection. The Sensor is sensitive
to the heat emitted by the human body. In order to trigger the
Sensor, the source of heat must move from one zone of detection
to another. The device is most effective in sensing motion across
its field-of-view, and less effective sensing motion towards or away
from its field-of-view (refer to Field-of View diagrams). Keep this
in mind when selecting the installation location.
NOTE: Dress wires with a bend as shown in diagram to relieve
stress when mounting device.
•
Position all wires to provide room in outlet wall box for device.
• Partially secure device using long mounting screws provided.
• Restore power at circuit breaker or fuse.
• The LED indicator will flash after power is applied. Allow
approximtely 30 seconds for charge-up. After 30 seconds the
lights will turn ON. If the lights turn ON and the LED blinks
when a hand is waved in front of the lens, then the Sensor was
installed properly.
If lights do not turn ON, refer to the TROUBLESHOOTING
section.
NOTE: Cat. No. OSSNL/OSS10-IDx is factory preset to work
without any adjustments. If you desire to change the factory
settings, refer to FEATURES AND SETTINGS section).
NOTE: To avoid PERMANENT DAMAGE to the unit, be careful
NOT TO OVERTURN the control knobs or levers when setting
the Sensor. The controls can be accessed by removing the
wallplate (if applicable) and control panel cover (refer to Sensor
Features Diagram). Use a small straight blade screwdriver to
adjust knobs and blinder levers.
NOTE: DO NOT press in on blinder levers or use excessive
force (refer to Sensor Features Diagram).
• Attach the Control Panel cover when the desired settings are
complete.
FEATURES AND SETTINGS:
BLINDERS: The blinders can narrow the field-of-view of the device
to prevent unwanted activation from traffic in adjacent space. There
are two blinders, and each operate independently. To operate the
blinders, use a finger or small screwdriver to move the blinder
adjustment levers toward or away from the center of the device.
The blinder levers are found above the control knobs and below the
text ‘BLINDERS’ on the control panel. With both levers moved fully
towards the center, the field-of-view is narrowed to 32°. With both
levers moved fully away from the center, the field-of-view is at a
maximum 180° (refer to Sensor Features Diagram).
WIRING SENSOR:
Connect wires per WIRING DIAGRAM as follows:
Screw wire connector on clockwise making sure there are no bare
conductors below the wire connectors. Secure each connector with
electrical tape.
• Green or bare copper wire in wall box to Green lead.
• Line Hot wall box wire to Black lead.
• Load wall box wire to Blue lead.
• Line Neutral wall box wire to White lead.
NOTE: Allow approximately 30 seconds for warm-up after connected.
Black (Hot)
Neutral (White)
Load
Sensor
Black Black
White
White
Blue
Green
Ground
Line
120/277VAC, 60Hz
2
1
Sensor
Black
White
Blue
Green
4
3
Installing your Sensor -
Single-Pole Application:
NOTE: Sensor requires a neutral connection in order
to operate. Use the ground wire in the electricl box for
ground connection. If there is no ground wire, ensure
electrical box is grounded and attach ground wire to box
with a screw.
Step 4
INSTALLING YOUR SENSOR
NOTE: Use check boxes when Steps are completed.
Sensor 1
2
Black
White
Blue
Green
2
Sensor 2
Black
White
Blue
Green
1
4
5
3
5
1
4
3
Installing your Sensor -
3-Way Wiring Application:
NOTE: Sensor requires a neutral connection in order
to operate. Use the ground wire in the electrical box for
ground connection. If there is no ground wire, ensure
electrical box is grounded and attach ground wire to box
with a screw.
Step 5
Step 2
2
4
1
3
2
4
1
5
3
3-Way
1. Line or Load
(See *IMPORTANT instruction)
2. Neutral
3. Ground
4. First Traveler – note color
5. Second Traveler – note color
Single-Pole
1. Line (Hot)
2. Neutral
3. Ground
4. Load
Identifying your wiring application
(most common):
NOTE: If the wiring in the wall box does not resemble this
configuration, consult a qualified electrician.
*IMPORTANT: For 3-Way applications, note that one of the screw
terminals from the old switch being removed will usually be a different
color (Black) or labeled Common. Tag that wire with electrical tape and
identify as the common (Line or Load) in both switch wall boxes.
NOTE: Sensor 1 must be installed in a wall box that has both a LINE
Hot and a Neutral connection. Sensor 2 must be installed in a wall box
that has both a Load and a Neutral connection.
If you are unsure about any part of these instructions, consult a
qualified electrician.
WIRING SENSOR 1:
Connect wires per WIRING DIAGRAM as follows:
Screw wire connector on clockwise making sure there are no bare
conductors below the wire connectors. Secure each connector with
electrical tape.
• Green or bare copper wire in wall box to Sensor 1 Green lead.
• Line Hot (common) wall box wire identified (tagged) when removing
old switch and First Traveler from Sensor 2 to Sensor 1 Black lead.
• Second Traveler wall box wire from Sensor 2 to Sensor 1 Blue lead.
• Line Neutral wall box wire to Sensor 1 White lead.
WIRING SENSOR 2:
Connect wires per WIRING DIAGRAM as follows:
Screw wire connector on clockwise making sure there are no bare
conductors below the wire connectors. Secure each connector with
electrical tape.
• Green or bare copper wire in wall box to Sensor 2 Green lead.
• Load wall box wire identified (tagged) when removing old switch
and Second Traveler from Sensor 1 to Sensor 2 Blue lead.
• First Traveler Line Hot from Sensor 1 to Sensor 2 Black lead.
• Second Traveler wall box wire from Sensor 2 to Sensor 1 Blue lead.
• Line Neutral wall box wire to Sensor 2 White lead.
NOTE: Allow approximately 30 seconds for warm-up after connected.
Black (Hot)
Neutral (White)
Load
Sensor 2Sensor 1
Black Black
Black
White
White
Blue
White
Blue
Green
Ground
Green
Ground
Line
120/277VAC, 60Hz
Wall surface
Sensor
Mounting
screws
(2 places)
Testing your Sensor prior to completely
mounting in wall box:
Step 6
• Leviton’s Decora® style design
• White LED NightLight function with Occupancy Sensor
• NightLight Activates when Low Ambient Light Present
• Adjustable NightLight Levels
• Auto ON/OFF (OSSNL) and Manual ON/Auto OFF (OSS10)
DESCRIPTION cont'd
Note that occupancy sensors respond to rapid changes in
temperature, so care should be taken not to mount the device
near a climate control source (i.e. radiators, air exchanges, and air
conditioners). Hot or cold drafts will look like body motion to the device
and will trigger it if the unit is mounted too close. It is recommended
to mount the Occupancy Sensor at least 6 ft. away from the climate
control source. The device can be mounted in a single gang wall box.
In addition, it is also recommended NOT to mount the Occupancy
Sensor directly under a large light source. Large wattage bulbs
(greater than 100W incandescent) give off a lot of heat and switching
the bulb causes a temperature change that can be detected by the
device. Mount the Occupancy Sensor at least 6 ft. away from large
bulbs. If it is necessary to mount the device closer, lower the wattage
of the bulb directly overhead.
Slotted/Phillips Screwdriver Electrical Tape Pliers
Pencil Cutters Ruler
Tools needed to install your Sensor
Insert wires
straight
then twist
clockwise
Electrical
Tape
Insert wires
straight
then twist
clockwise
Electrical
Tape
OPERATION
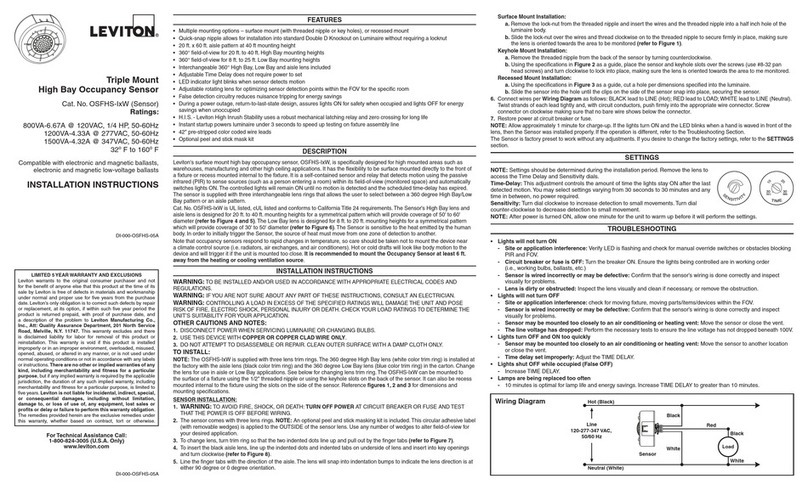
PUSH-BUTTON: Cat. No. OSSNL/OSS10-IDx has a push-button
switch that toggles the lights (refer to figure). If the lights are OFF,
the lights will turn ON when the button is pressed, and remain ON in
the presence of motion. In the absence of motion, the Sensor Unit will
time-out and turn the lights OFF.
If the lights are ON, the lights will turn OFF when the button is pressed.
The lights will stay OFF regardless of motion detected, until the time-
out expires. After the time-out expires, the lights will turn ON (Auto-ON
Mode only) with the next detected motion. This is useful for slide or
film presentations.
NOTES:
• The Motion Indicator LED will blink every 2 seconds while motion is
detected.
• In Manual-ON mode, the button must be pressed to turn the
lights ON.
PRODUCT INFORMATION
• For technical assistance contact us at 1-800-824-3005
• Visit our website at www.leviton.com
FCC COMPLIANCE STATEMENT
This equipment has been tested and found to comply with the limits
for a Class B Digital Device, pursuant to Part 15 of the FCC Rules.
These limits are designed to provide reasonable protection against
harmful interference in a residential installation. This equipment
generates, uses, and can radiate radio frequency energy and, if
not installed and used in accordance with the instructions, may
cause harmful interference to radio communications. However,
there is no guarantee that interference will not occur in a particular
installation. If this equipment does cause harmful interference to
radio or television reception, which can be determined by turning
the equipment OFF an ON, the user is encouraged to try to correct
the interference by one or more of the following measures:
• Reorient or relocate the receiving Antenna.
• Increase the separation between the equipment and the receiver.
• Connect the equipment into an outlet on a circuit different from
that to which the receiver is connected.
• Consult the dealer or an experienced radio/tv technician for help.
PK-93369-10-00-0A-X3
Field-of-View (Horizontal)
20 ft (6.1 m)
small motion
30 ft (9.1 m)
20 ft (6.1 m)
small motion
40 ft
(12.2 m)
Side (Vertical) Field-of-View
27 ft.
(8.2 m)
38 ft.
(11.7 m)
4 ft.
(1.2 m)
4.5 ft.
(1.4 m)
1
0
8.3
0
Sensor Unit
LIMITED 5 YEAR WARRANTY AND EXCLUSIONS
Leviton warrants to the original consumer purchaser and not for the benefit of anyone else that this product at the time of its sale by Leviton is free of defects in materials and workmanship under normal and proper use for five years from the purchase date. Leviton’s only obligation is to correct such defects by repair or replacement, at its option, if within such five year period the product is returned prepaid, with proof
of purchase date, and a description of the problem to Leviton Manufacturing Co., Inc., Att: Quality Assurance Department, 59-25 Little Neck Parkway, Little Neck, New York 11362-2591. This warranty excludes and there is disclaimed liability for labor for removal of this product or reinstallation. This warranty is void if this product is installed improperly or in an improper environment, overloaded,
misused, opened, abused, or altered in any manner, or is not used under normal operating conditions or not in accordance with any labels or instructions. There are no other or implied warranties of any kind, including merchantability and fitness for a particular purpose, but if any implied warranty is required by the applicable jurisdiction, the duration of any such implied warranty, including merchantability and
fitness for a particular purpose, is limited to five years. Leviton is not liable for incidental, indirect, special, or consequential damages, including without limitation, damage to, or loss of use of, any equipment, lost sales or profits or delay or failure to perform this warranty obligation. The remedies provided herein are the exclusive remedies under this warranty, whether based on contract, tort or otherwise.
• Secure device by firmly tightening mounting screws.
• Install Decora®style wallplate (sold separately).
Sensor and Wallplate Mounting:
Step 7
Wall surface
Device mounting screw
(2 places)
Wallplate
Wallplate
mounting
screw
(2 places)
Sensor Features Diagram
Lens with
PIR and LED
NightLight
Blinders
Control Panel
Cover
Push Button
LED
Indicator
Step 6 cont’d Testing your Sensor prior to
completely mounting in wall box:
FEATURES AND SETTINGS:
TIME-DELAY: Cat. No. OSSNL/OSS10-IDx will turn lights ON when
motion is detected. When motion is no longer detected, the Sensor
Unit will wait a certain amount of time and then turn the lights OFF.
This wait time is called ‘time-out’.
The “time-out” is selected from four (4) preset values. Pointing the
arrow at one of the markings on the face chooses the value of time.
The button LED indicator light will flash twice when the time setting
has changed. The following selections are available:
OSSNL-IDx: Face Marking Value of Time
NOTE: The “time-out” is factory preset to thirty (30) minutes
(refer to Sensor Features Diagram).
NOTE: All time durations mentioned in the instructions are
approximate within 10 seconds.
OSS10-IDx: Face Marking Value of Time
NOTE: The “time-out” is factory preset to ten (10) minutes
(refer to Sensor Features Diagram).
NOTE: All time durations mentioned in the instructions are
approximate within 10 seconds.
RANGE: To decrease detection range and sensitivity, rotate the
knob counter-clockwise (refer to Sensor Features Diagram). The
detections range can be adjusted from 100% down to 35%.
MANUAL-ON MODE (OSSNL ONLY): The factory default
setting for the OSSNL is Manual-ON. To change this setting to
Auto-ON/OFF, turn the dial marked “ON MODE/NL DIM” clockwise
anywhere into the area that indicates “AUTO”. To return to
Manual-ON, turn the dial counter-clockwise anywhere into the area
that indicates “MAN”.
NOTE: OSS10 is a Manual-ON setting only.
NIGHTLIGHT: The OSSNL/OSS10-IDx responds to the ambient
light level present in a room. The OSSNL/OSS10-IDx uses
an internal photocell to detect when the ambient light level is
approximately less than 1 foot candle activating the LED NightLight.
Further, the internal photocell will turn OFF the LED NightLight
when it detects an ambient light level over 5 foot candles. The LED
NightLight has adjustable light output to meet the needs of the
space and can be set to for continuous mode or dim mode which
will automatically dim to 5% of full brightness after 2 minutes of no
occupancy.
NIGHTLIGHT DIM: To adjust the LED NightLight output, turn the
dial marked “ON MODE/NL DIM” (OSSNL) or “NITELITE DIM”
(OSS10) counter-clockwise to decrease and clockwise to increase
light output.
NIGHTLIGHT MODE: The factory default setting for the
NightLight Mode is dimmed mode. This means the LED NightLight
automatically dims to 5% of full brightness after 2 minutes of no
occupancy when activated by the internal photocell. To change the
NightLight Mode perform the following procedure:
1. Press and hold the push button for 2 seconds to determine the
current mode.
a. NightLight flashes once every 1 second for Continuous Mode
until the button is released.
b. NightLight flashes twice every 1 second for Dim Mode until
the button is released.
2. To change, hold the push button for 10 seconds and the Mode
will toggle. This will be indicated by a change in the flash pattern
as described above.
TROUBLESHOOTING
1. If there is no response from the unit (the light never turns ON and
the LED never blinks) 1 1/2 minutes after power is applied, then
uninstall device and verify there is a ground connection at the
wallbox. If there is a ground connection, verify wiring.
2. If the lights never turn ON, but the LED blinks, check if the Manual-
ON setting (OSSNL only). See Manual-ON Mode setting for
adjustments.
3. If the lights constantly stay ON, even when the room is unoccupied:
A. Check the Time setting. See how this time compares to how
long the lights stay ON.
B. Try lowering the Range Control. Rotate the knob counter-
clockwise about 30°.
C. If the problem persists, try reducing again.
NOTE: Do Not reduce so much that Cat. No. OSSNL/OSS10-
IDx cannot see normal occupancy.
D. Be sure to use the Blinders to block any unwanted
hallway traffic.
E. Check for reflected heat/motion as Sensor Unit may be seeing
motion through a window.
F. Check for adjacent HVAC and/or heater ducts.
NOTES
Cat. No. OSSNL
TIME
ON MODE/NL DIM
MAN
AUTO
RANGE
4 7
10
4
Blinder adjustment levers
BLINDERS
Control Panel Cover
30M
30S
1H
2H
Cat. No. OSS10
TIME
NITELITE DIM
MIN MAX
Blinder adjustment levers
BLINDERS
Control Panel Cover
10M
30S
20M
30M
RANGE
47
10
30S
30M
1H
2H
30 second fixed time-out for performing a walk test
30 minute time-out
1 hour time-out
2 hour time-out
Value of Time
Face Marking
30S
10M
20M
30M
30 second fixed time-out for performing a walk test
10 minute time-out
20 minute time-out
30 minute time-out
Value of Time
Face Marking

This manual suits for next models

1

Other Leviton Accessories manuals

Leviton OSC04-I User manual

Leviton

Leviton OSC04-I User manual

Leviton Acenti QuickPort AC642 User manual

Leviton

Leviton Acenti QuickPort AC642 User manual

Leviton Provolt ODC05-MDW User manual

Leviton

Leviton Provolt ODC05-MDW User manual

Leviton 5249-FBA Service manual

Leviton

Leviton 5249-FBA Service manual

Leviton OSC05-U0W User manual

Leviton

Leviton OSC05-U0W User manual

Leviton Decora ODS15-IDx User manual

Leviton

Leviton Decora ODS15-IDx User manual

Leviton AEHTK User manual

Leviton

Leviton AEHTK User manual

Leviton CR15 User manual

Leviton

Leviton CR15 User manual

Leviton Decora ODS0D-TDx User manual

Leviton

Leviton Decora ODS0D-TDx User manual

Leviton 9864-LED User manual

Leviton

Leviton 9864-LED User manual

Leviton GreenMax User manual

Leviton

Leviton GreenMax User manual

Leviton Provolt ODC05-UDW User manual

Leviton

Leviton Provolt ODC05-UDW User manual

Leviton Decora ODS10-IDx User manual

Leviton

Leviton Decora ODS10-IDx User manual

Leviton MDS10-ID Series User manual

Leviton

Leviton MDS10-ID Series User manual

Leviton OSFHS-IxW User manual

Leviton

Leviton OSFHS-IxW User manual

Leviton DMX-512 User manual

Leviton

Leviton DMX-512 User manual

Leviton Decora ODS10-IQ User manual

Leviton

Leviton Decora ODS10-IQ User manual

Leviton ODC10-MDW User manual

Leviton

Leviton ODC10-MDW User manual

Leviton ODD10-ID User manual

Leviton

Leviton ODD10-ID User manual

Leviton OSFHP-ITW User manual

Leviton

Leviton OSFHP-ITW User manual

Leviton ZC015 User manual

Leviton

Leviton ZC015 User manual

Leviton Decora ODS06 Operation manual

Leviton

Leviton Decora ODS06 Operation manual

Leviton Acenti ACP10 User manual

Leviton

Leviton Acenti ACP10 User manual

Leviton T6525 User manual

Leviton

Leviton T6525 User manual

Popular Accessories manuals by other brands

VOUNOT 6563095805975 manual

VOUNOT

VOUNOT 6563095805975 manual

CARLO GAVAZZI M18 Series Product description

CARLO GAVAZZI

CARLO GAVAZZI M18 Series Product description

Baumer OM70T-11175113 Mounting instructions

Baumer

Baumer OM70T-11175113 Mounting instructions

Vega VEGAFLEX 81 operating instructions

Vega

Vega VEGAFLEX 81 operating instructions

Aervoe Sierra Wave Spirit operating instructions

Aervoe

Aervoe Sierra Wave Spirit operating instructions

Atos Medical PROVOX Plug instructions

Atos Medical

Atos Medical PROVOX Plug instructions

Panasonic MA26P07 Specification sheet

Panasonic

Panasonic MA26P07 Specification sheet

Telcoma Automations ILB sincro installation instructions

Telcoma Automations

Telcoma Automations ILB sincro installation instructions

GE 19297 installation guide

GE

GE 19297 installation guide

Craftsman 316.792410 Operator's manual

Craftsman

Craftsman 316.792410 Operator's manual

Fender 62 Custom Telecaster Assembly

Fender

Fender 62 Custom Telecaster Assembly

Avery Weigh-Tronix ZM605 User instructions

Avery Weigh-Tronix

Avery Weigh-Tronix ZM605 User instructions

Allstar ALL80085 instructions

Allstar

Allstar ALL80085 instructions

Lorex LNWDB1 Series quick start guide

Lorex

Lorex LNWDB1 Series quick start guide

BW SENSING BW-VG225 Technical manual

BW SENSING

BW SENSING BW-VG225 Technical manual

Manning AirScan IR-F9 Instruction and installation manual

Manning

Manning AirScan IR-F9 Instruction and installation manual

Infineon XENSIV BGT60TR13C user guide

Infineon

Infineon XENSIV BGT60TR13C user guide

Bticino Living Now BMS04001 manual

Bticino

Bticino Living Now BMS04001 manual

manuals.online logo
manuals.online logoBrands
  • About & Mission
  • Contact us
  • Privacy Policy
  • Terms and Conditions

Copyright 2025 Manuals.Online. All Rights Reserved.