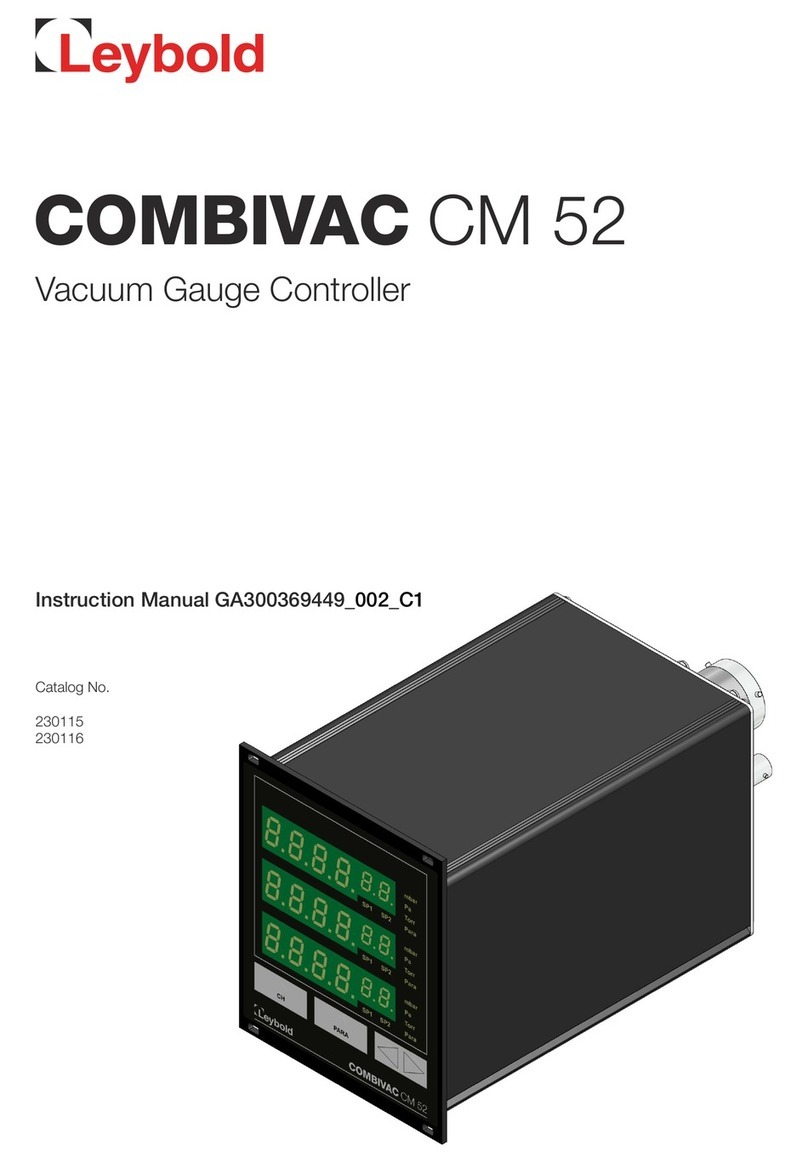
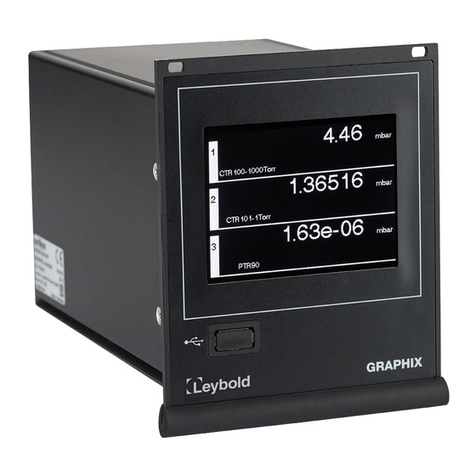
LEYBOLD GRAPHIX ONE User manual

Catalog No.
230680V01
230681V01
230682V01
GRAPHIX
ONE
GRAPHIX
TWO
GRAPHIX
THREE
Vacuum Gauge Controller
Operation Manual GA300553102_002_C2


GA300553102_002_C2 –04/2017
3
0. Table of Contents
0. Table of Contents 3
1. Legal Notices 4
1.1 Validity 4
1.2 Conforming Utilisation 4
1.3 Responsibility and Warranty 5
1.4 Shipping Damage 5
2. Safety 6
2.1 General Information 6
2.2 Key to Symbols 6
2.3 Basic Safety Information 6
3. Installation 7
3.1 Mechanical Installation 7
3.2 Connections 7
4. Operation 8
4.1 Switching ON and Switching OFF 8
4.2 Display 8
4.3 Controls 9
4.4 Symbols 10
4.4.1 Symbols for the Controls 10
4.4.2 Symbols for the Language Selection 11
4.4.3 Status and Warning Symbols 11
4.5 Measuring Mode 12
5. Maintenance and Service 13
5.1 Maintenance 13
5.2 Configuration 13
5.2.1 Save Data 13
5.2.2 Restore Data 13
5.2.3 Factory Setup 14
5.3 Update Function 14
5.3.1 Preparations 14
5.3.2 Updating 15
6. Troubleshooting 16
6.1 Indication of Errors 16
6.1.1Sensor Errors 16
6.1.2 System Errors 17
6.2 Error Log 17
6.3 Help in Case of Malfunctions 18
6.4 Replacing the Built-in Fuses 18
6.5 Repair 18
7. Storing and Waste Disposal 19
7.1 Packaging 19
7.2 Shelving 19
7.3 Waste Disposal 19

4
GA300553102_002_C2 –04/2017
1. Legal Notices
1.1 Validity
The GRAPHIX controller is available in three different versions which differ as to their
number of measurement channels, power consumption and weight. These Brief Instructions
apply to all three versions. A label is located on the left-hand side of the instrument. When
communicating with the Leybold GmbH, the information given on this label is important.
Item No.
Product
Version
Serial No.
Label
230680V01
GRAPHIX ONE Controller
Single channel measuring instrument
for active vacuum sensors
1.11.00
et seq.
1 et seq.
230681V01
GRAPHIX TWO Controller
Two channel measuring instrument
for active vacuum sensors
1.11.00
et seq.
1 et seq.
230682V01
GRAPHIX THREE Controller
Three channel measuring instrument
for active vacuum sensors
1.11.00
et seq.
1 et seq.
Table 1 –Validity
1.2 Conforming Utilisation
The GRAPHIX controller is a display and operating unit with a graphic user interface for
sensors with an analogue or digital interface of the company Leybold GmbH or from other
manufacturers. Depending on the version, the unit offers one or several channels and is
used in combination with sensors from the series THERMOVAC, IONIVAC, PENNINGVAC
and CERAVAC as well as DU sensors for the measurement of pressures above and below
atmospheric pressures (vacuum). It is also possible to use sensors made by other
manufacturers by entering a variable analogue logarithmic or analogue linear characteristic
ranging from 0 to 10 Volt. Operate all connected sensors in agreement with the information
given in the corresponding Operating Instructions.
The following sensors can be operated with the GRAPHIX controller:
Sensor
Type
Display
THERMOVAC
TTR81N
TTR90 / TTR91 / TTR91N
TTR96S / TTR96SN
TTR211 / TTR216S
TTR911 / TTR911N
TTR916 / TTR916N
TTR…(TTR?)
TTR911N (RS232)
TTR911_D
THERMOVAC
TTR100 / TTR100S2
TTR101 / TTR101N
TTR101S2 / TTR101S2N
TTR…(TTR10X)
TTR101N (RS232)
TTR101N_D
TTR200N (RS232)
TTR200N

GA300553102_002_C2 –04/2017
5
Sensor
(continued)
Type
Display
IONIVAC
ITR90 / ITR90N
ITR200S / ITR200SN
ITR200SL / ITR200SLN
ITR…
PENNINGVAC
PTR81N
PTR225 / PTR225N
PTR225S / PTR225SN
PTR237 / PTR237N
PTR… (PTR?)
PTR225N (RS232)
PTR225N_D
PENNINGVAC
PTR82N
PTR90 / PTR90N
PTR… (PTR90?)
PTR90N (RS232)
PTR90N_D
PTR200N (RS232)
PTR200N
CERAVAC
CTR90 / CTR91
CTR100 / CTR100N
CTR101 / CTR101N
CTR… (CTR?)
DU sensor
DU200 / DU201
DU2000 / DU2001
DU…
DU relative pressure sensor
DU2001 rel.
DUrel
Further sensors
Corresponding to characteristics
CUSTOM
Table 2 –Approved sensors
NOTICE:
Based on the technical data please check first whether your measuring
instrument suits your kind of application.
1.3 Responsibility and Warranty
Leybold GmbH will not assume any responsibility or warranty in case the operator or third
persons
•do not observe the information given in this document.
•do not use the product as intended.
•modify the product in any way (conversions, repair work etc).
•operate the product with accessories not listed in the corresponding product
documentation.
Subject to technical alterations without prior notice. The figures are not binding.
1.4 Shipping Damage
•Examine the shipping package as to any external damage
•In case any damage is determined file a damage report to the forwarding agent and the
insurer
•Retain the packaging material since damages can only be claimed when returning the
instrument in the original packaging of the manufacturer
•Examine the delivery to ensure that it is complete
•Examine the instrument as to any visually apparent damage
DANGER: Damaged Product.
Commissioning or operating a damaged product is dangerous to life.

6
GA300553102_002_C2 –04/2017
2. Safety
2.1 General Information
The GRAPHIX is supplied readyfor immediate operation. These Operating Instructions shall
assist you during commissioning of the instrument. For further informations please refer to
the detailed Operating Instructions on the supplied USB stick.
2.2 Key to Symbols
Important instructions relating to technical safety and safe operation are emphasised by
symbols.
DANGER or WARNING:
Information designed to prevent any kind of injury to persons.
DANGER:
Information designed to prevent injury to persons and damage to equipment
in connection with electricity.
NOTICE:
General information pointing to further information, respectively reference
sections.
2.3 Basic Safety Information
•During all work like installation, maintenance and repair activities, comply with the
pertinent safety regulations.
DANGER: Mains Voltage
Coming into contact with components at mains voltage level within the
instrument can be dangerous to life when inserting objects or allowing liquids
to enter the instrument
WARNING: Improper Utilisation
Improper utilisation of the instrument can damage it. For this reason operate,
respectively use the instrument only in agreement with the manufacturer’s
specifications.
WARNING: Wrong Connection and Operating Data.
Wrong connection and operating data can damage the instrument. Comply
with all specified connection and operating data.

GA300553102_002_C2 –04/2017
7
3. Installation
3.1 Mechanical Installation
The GRAPHIX CONTROLLER can be used as follows:
•Rack installation
•Front panel cut-out installation
•Benchtop instrument
WARNING: Powering down
Install the instrument or place it so that you are in a position to operate the
mains power switch at any time or to ensure that the instrument can be
deenergised at any time.
3.2 Connections
Figure 1, page 7 depicts the connection options on the rear of the GRAPHIX controller.
Figure 1 –Rear of the instrument
A Mains power connection with mains switch
and instrument fuses
B Earth connection
C1/C2 Connection of measurement channel 1 for
sensors (CH1 A und CH1 B)
D1/D2 Connection of measurement channel 2 (for
GRAPHIX TWO and THREE only) for
sensors (CH2 A and CH2 B)
E1/E2 Connection of measurement channel 3 (for
GRAPHIX THREE only) for sensors (CH3 A
and CH3 B)
F Relay output connection (Relay Output)
G Analogue output, chart recorder output and
external control connection (Control)
H RS232 or RS485 interface connection
(RS232 / RS485)
CAUTION: Impermissible Sensors.
Connecting sensors which have not been designed to be operated in
connection with the GRAPHIX controller or which do not comply with current
EMC guidelines can impair operation of the instrument or even damage it.
Always operate the GRAPHIX controller with approved sensors.
Chapter 1.2 –Conforming Utilisation, page 4.
CAUTION: Multiple Sensors.
Only a single sensor may be connected to each measurement channel.
Otherwise the connected sensors will suffer damage. Connect to each
measurement channel precisely one sensor only.
8
GA300553102_002_C2 –04/2017
4. Operation
4.1 Switching ON and Switching OFF
•Switch the instrument on through its main switch.
After switching on, the GRAPHIX controller will run the following:
•Display of the start screen with the version number
•Re-establishing of the most recently setup parameters
•Identification of the connected measuring instruments
•Enabling of the measurement mode with measurement display mode Normal,
Big or Chart (depending on the most recent setting)
•Switch the instrument off through its main switch.
CAUTION: Waiting Time
Wait for at least five seconds before switching the instrument on again.
4.2 Display
The GRAPHIX controller makes different display modes possible. You may select between
the following display modes:
Normal
Default display mode, which provides all important information on the connected sensors.
Chart
Graphic display of the pressure history of the connected sensors. Besides the pressure
history, also the measured values for the individual channels are displayed.
Big
The display is limited to displaying the measured values of the connected sensors using a
large font.
Speedo
Pressure reading for the connected sensor of one selected channel is in the shape of a
speedometer. The mantissa is displayed as a round progress, whereas the exponent is
displayed centrally.
Leak Test
Display mode for the Leak Test function. Besides the leak rate, current pressure, total time
and remaining time are displayed.
The selection is made using the channel menu button or the parameter Display Mode in
the parameter group Display of the main menu.

GA300553102_002_C2 –04/2017
9
4.3 Controls
The GRAPHIX controller is operated through the buttons displayed through the graphic TFT
touch display. Since this is a resistive type of touchpanel, entries are possible even when
using gloves.
Main Menu Buttons
Pressing the touchscreen for a duration of approximately 1 second displays the main menu
( Figure 2 and Figure 3, page 9). You can also use the display mode selection window.
Here you may access different parameters and instrument functions. These have been
arranged by way of parameter groups within which you can view or change the
corresponding parameters or enable functions. In this way you may configure your
GRAPHIX controller and also utilise further functions offered by the instrument.
Channel Menu Buttons
Briefly touching the desired channel invokes the channel menu ( Figure 4, page 9) of
the respective channel. Here you can control the sensor connected to the respective
channel. The available setup options depend on the connected type of sensor. Moreover,
you can change in the channel menu the display mode from measured values to graphic.
Figure 2 –Main Menu 1/2
Figure 3 –Main Menu 2/2
Figure 4 –Channel Menu (example)
•To select, tap the centre of the buttons or symbols.
NOTICE:
The touchscreen is capable of processing only one input signal at a time. It is
not permissible to simultaneously tap the touchscreen at several points since
then no defined control will be possible.

10
GA300553102_002_C2 –04/2017
4.4 Symbols
4.4.1 Symbols for the Controls
Symbol
Designation
Explanation
Next
Next menu page
Previous
Previous menu page
Up
Scroll upward in the selection list
Down
Scroll downward in the selection list
Return
Return to the previous display
OK
Accept / confirm
Configuration
Start the main menu
Display Mode
Change display mode
Normal
Enabling display mode Normal
Big
Enabling display mode Big
Chart
Enabling display mode Chart
Leak Test
Enabling display mode Leak Test
Speedo Channel 1
Enabling display mode Speedo for channel 1
Speedo Channel 2
Enabling display mode Speedo for channel 2
Speedo Channel 3
Enabling display mode Speedo for channel 3
Scale up
Zoom out time scale
Scale down
Zoom in time scale
Start
Start a function
■
Stop
Stop a function
HV On
Switch high vacuum sensor ON
HV Off
Switch high vacuum sensor OFF
HV On/Off n.a.
It is not possible to turn on or off the high vacuum measurement circuit
manually because of parameter settings.
Degas On
Switch degas ON
Degas Off
Switch degas OFF
Help
Start help for current function or operation of the instrument
Table 3 –Symbols for the controls

GA300553102_002_C2 –04/2017
11
4.4.2 Symbols for the Language Selection
Symbol
Designation
Explanation
Language selection
Start language selection menu
English
Select menu language EN (English)
German
Select menu language DE (German)
Chinese
Select menu language CN (Chinese)
French
Select menu language FR (French)
Italian
Select menu language IT (Italian)
Japanese
Select menu language JP (Japanese)
Spanish
Select menu language ES (Spanish)
Korean
Select menu language KN (Korean)
Russian
Select menu language RU (Russian)
Polish
Select menu language PL (Polish)
Turkish
Select menu language TR (Turkish)
Table 4 –Symbols for language selection
4.4.3 Status and Warning Symbols
Symbol
Designation
Explanation
Status Calibration
Factor
Gas type correction factor differs from 1
Status Offset
Offset differs from 0
Status HV On
PENNINGVAC sensor is ON
Status HV 1 On
Filament 1 of the IONIVAC sensor is ON
Status HV 2 On
Filament 2 of the IONIVAC sensor is ON
Status Degas
Degassing is active
Notice
Sensor status indicates “Notice”
Error
Sensor status indicates “Error”
SP Off
Switching threshold disabled (pressure high)
SP On
Switching threshold enabled (pressure low)
Table 5 –Status indicating and warning symbols

12
GA300553102_002_C2 –04/2017
4.5 Measuring Mode
The measuring mode is the standard mode of operation. Here the measured values of the
sensors in the display modes Normal, Big or Chart are shown. Additionally status messages
( Table 6, page 12) and/or error messages ( Table 7, page 16) can be displayed.
Display
Description
....
No sensor connected.
FS?
Full Scale? Connected analogue CERAVAC sensor
has not been specified. Make a selection, in order to
specify the sensor.
S-OFF
High vacuum measurement circuit of the
PENNINGVAC sensors PTR81N, PTR225, TR225N,
PTR225S, PTR225SN, PTR237 or PTR237N has
been switched off.
Measuring value
Connected sensor is identified and in specified
measuring range.
Measuring value and additional warning symbol
in the display mode Normal and Speedo
or
Measuring value displayed by a yellow font in the
display modes Chart, Big and Leak Test as well as
for the other channels in the display mode Speedo
Description depends on the connected sensor:
•Pirani adjustment of the connected IONIVAC
sensor of ITR90 series is insufficient.
•Filament 1 of the connected IONIVAC sensor of
ITR200 series is defective.
•Connected CERAVAC sensor of CTR101 series is
in the heating phase.
Table 6 –Status messages measured values display
After switching on, the GRAPHIX controller will automatically resume the last measurement
display mode, which was selected. When running the main menu and not making an entry
for more than 60 seconds, then the instrument will revert back to the measured values
display.

GA300553102_002_C2 –04/2017
13
5. Maintenance and Service
5.1 Maintenance
The GRAPHIX controller does not require any special maintenance work.
5.2 Configuration
With the help of this parameter group they have the possibility of securing and of restoring
your system parameters. In addition a suitable memory at the USB interface must be.
Further resetting of the system parameters is possible on factory-installed settings.
5.2.1 Save Data
To save the configuration parameters of your GRAPHIX controller proceed as follows:
•Connect the USB stick with the USB socket at the front side of the equipment.
•In the measurement mode, tap the touchscreen for approximately 1 second.
oThe main menu with an overview of the parameter groups is displayed.
•To scroll, use the button .
oOn the next page, main menu page 2/2 is displayed. The current page number is
displayed in the upper section of the display.
•In the main menu 2/2, tap on the parameter group Configuration.
•In the parameter group Configuration, tap on the button Save Data.
oThe rest process starts.
oOn the memory at the USB interface the folder RECOVERY is installed.
oConfiguration data are stored in a file with the format rescue.txt on the USB stick in
the folder RECOVERY.
oAfter the reset process has been completed the instrument will automatically restart
with the default parameters.
oThe GRAPHIX controller will now be ready for operation again.
•When not wanting to run the reset, tap the button to cancel the reset process.
oThe main menu is then displayed again.
5.2.2 Restore Data
To restore the saved configuration parameters secured on an USB stick in the listing
RECOVERY in the file rescue.txt proceed as follows:
•Connect the USB stick with the USB socket at the front side of the equipment.
•In the measurement mode, tap the touchscreen for approximately 1 second.
oThe main menu with an overview of the parameter groups is displayed.
•To scroll, use the button .
oOn the next page, main menu page 2/2 is displayed. The current page number is
displayed in the upper section of the display.
•In the main menu 2/2, tap on the parameter group Configuration.
•In the parameter group Configuration, tap on the button Restore Data.
oThe question „Are you sure?” is displayed to ensure that you really want to run the
reset.
•When not wanting to run the reset, tap the button to cancel the reset process.
oThe main menu is then displayed again.
•To run the process, tap the button Restore now.
oThe rest process starts.
oAfter the reset process has been completed the instrument will automatically restart
with the default parameters.

14
GA300553102_002_C2 –04/2017
5.2.3 Factory Setup
Use it this function, in order to put the equipment back to default parameters.
NOTICE:
Any parameters, which you have set up, will no longer be available after the
reset. Therefore before updating save the parameters you have specifically
set up ( Chapter 5.2.1 Save Data, page 13).
To reset your GRAPHIX controller proceed as follows:
•In the measurement mode, tap the touchscreen for approximately 1 second.
oThe main menu with an overview of the parameter groups is displayed.
•To scroll, use the button .
oOn the next page, main menu page 2/2 is displayed. The current page number is
displayed in the upper section of the display.
•In the main menu 2/2, tap on the parameter group Configuration.
•In the parameter group Configuration, tap on the button Factory Setup.
oThe question „Are you sure?” is displayed to ensure that you really want to run the
reset.
•When not wanting to run the reset, tap the button to cancel the reset process.
oThe main menu is then displayed again.
•To run the update, tap the button Reset now.
oThe rest process starts.
oAfter the reset process has been completed the instrument will automatically restart
with the default parameters.
oThe GRAPHIX controller will now be ready for operation again.
5.3 Update Function
Should your GRAPHIX controller require a more current firmware, for example, in order to
utilise new functions or sensors, please contact your next service office of Leybold GmbH
or inform yourself through the Leybold homepage.
5.3.1 Preparations
The firmware for the GRAPHIX controller is made available by way of a compressed *.zip
file on the Leybold homepage.
•Unpack the file to the root directory of a suitable USB stick.
•Connect the USB stick to the USB socket provided for it on the front side of the
instrument.

GA300553102_002_C2 –04/2017
15
5.3.2 Updating
To update your GRAPHIX controller proceed as follows:
•In the measurement mode, tap the touchscreen for approximately 1 second.
oThe main menu with an overview of the parameter groups is displayed.
•To scroll, use the button .
oOn the next page, main menu page 2/2 is displayed. The current page number is
displayed in the upper section of the display.
•In the main menu 2/2, tap on the parameter group Update.
•In the parameter group Update, tap on the button Start update.
oThe question „Are you sure?” is displayed to ensure that you really want to run the
update.
•When not wanting to run the update, tap the button to cancel the update process.
oThe main menu is then displayed again.
•To run the update, tap the button Start update.
oOn the memory at the USB interface is installed the folder RECOVERY.
oConfiguration data are stored in a file with the format rescue.txt on the USB memory
in the folder RECOVERY.
oThe update process starts.
oAfter the update process has been completed the instrument will automatically
restart.
oThe GRAPHIX controller will now be ready for operation again.
NOTICE:
Wait for the instrument to restart automatically after the update process has
run. While the update process is running do not switch the instrument off.
Avoid an interruption of the voltage supply of the system. Avoid powering
down the instrument while updating is in progress.
After having run the update, all parameter settings will have been reset to their factory
defaults. Restore configuration data stored automatically with the update procedure (
Chapter 5.2.2 Restore Data, page 13).

16
GA300553102_002_C2 –04/2017
6. Troubleshooting
6.1 Indication of Errors
A malfunction in the GRAPHIX Controller is displayed by an error message on the screen
or issued by an error number via the serial interface. Additionally, an entry is made into the
error memory list, from which the 20 most recently registered errors can be displayed on the
screen ( Chapter 6.2 Error Log, page 17) as well as read out via serial interface. The
following tables give a survey on all recognisable sensor errors ( Table 7, page 16) and
device errors ( Table 8, page 17).
6.1.1 Sensor Errors
Error description
(Error Log)
Display
(TFT display)
Error number
(Interface)
Cause and remedy
no error
Measuring
value
0
Attached sensor is recognized and
in the specified measuring range.
Sensor-ID short circuit
….
1
Error in the electric circuit of sensor
identification.
Sensor-ID unknown or not
available
….
2
Identification resistor of sensor
identification unknown or missing.
No sensor signal
Error-S1
3
Fault affecting the connection to the
sensor. The message will only be
displayed in the display field of the
affected measurement channel.
Acknowledge this message by
selecting and terminating the
channel menu at the corresponding
channel.
Analog sensor signal out of range -
too high
Error-H1
4
The measurement signal from the
sensor is significantly above the
permissible range.
Analog sensor signal out of range -
too low
Error-L1
5
The measurement signal from the
sensor is significantly below the
permissible range.
Communication error digital sensor
signal
Error-001
6
Communication error. Failure in the
data transfer to IONIVAC sensors of
ITR90, ITR200 and CTR-N series.
Error electronic/eeprom
Error-401
7
Electronics/EEPROM error with
IONIVAC sensors of ITR200 series.
Error pirani
Error-042
8
Pirani error with IONIVAC sensors
of ITR90 series.
Both filaments broken
Error-101
9
Hot cathode error (both filaments
defectively) with IONIVAC sensors
of ITR200 series.
One filament broken
Error-202
10
Hot cathode error (filament 1
defectively) with IONIVAC sensors
of ITR200 series.
Error pirani
Error-901
11
Pirani error with IONIVAC sensors
of ITR90 series.
Pirani adjustment out of range
Error-502
12
Pirani adjustment deficient with
IONIVAC sensors of ITR90 series.
Error ion gauge
Error-801
13
Hot cathode error (filament
defectively) with IONIVAC sensors
of ITR90 series.
Table 7 –Sensor errors

GA300553102_002_C2 –04/2017
17
1In addition to display of the error in place of the measured value, the warning symbol blinks in display
modes Normal or Speedo. The error message is displayed in red font for the display modes Chart, Big and
Leak Test as well as for the other channels in display mode Speedo. The error signal relay toggles according
to the settings.
2In addition to the measured value, the warning symbol glows in display modes Normal or Speedo. The
error message is displayed in yellow font for the display modes Chart, Big and Leak Test as well as for the
other channels in display mode Speedo.
6.1.2 System Errors
Error description
(Error Log)
Display
(TFT display)
Error number
(Interface)
Cause and remedy
no errror
none
0
System works error-free.
Error usb file open
none
1
File on USB stick cannot be
opened. Check the attached USB
memory stick.
Error usb folder open
none
2
Folder on USB stick cannot be
opened. Check the attached USB
memory stick.
Error usb file closing
none
3
File on USB stick cannot be stored.
Check the attached USB memory
stick.
Error usb write
none
4
USB stick not recordably. Check
the attached USB memory stick.
Error usb read
none
5
USB stick not readably. Check the
attached USB memory stick.
Error read eeprom
none
6
EEPROM of the equipment not
readably. Contact your next
Leybold GmbH service office.
Error write eeprom
none
7
EEPROM of system not recordably.
Contact your next Leybold GmbH
service office.
Error init eeprom
none
8
EEPROM error of system.
Contact your next Leybold GmbH
service office.
Table 8 –System errors
6.2 Error Log
The GRAPHIX Controller stores the errors recognized by the system. They have the
possibility of being able to be been noticeable the last 20 errors. Important information on
the display area is represented ( Fig. 5, page 17).
Fig. 5 –Error log
AError number 1 –20
(1 = freshest error)
B Date of displayed error
C Time of displayed error
D Error source:
Channel 1 = Sensor error at channel 1
Channel 2 = Sensor error at channel 2
Channel 3 = Sensor error at channel 3
Device = System error
E Error description
( Table 7, page 16 and Table 8,
page 17)

18
GA300553102_002_C2 –04/2017
To select the error log of your GRAPHIX controller proceed as follows:
•In the measurement mode, tap the touchscreen for approximately 1 second.
oThe main menu with an overview of the parameter groups is displayed.
•To scroll, use the button .
oOn the next page, main menu page 2/2 is displayed. The current page number is
displayed in the upper section of the display.
•In the main menu 2/2, tap on the parameter group Error Log.
oThe display with error number 1 (last error) is opened.
•To select from the list, use the buttons and or enter the value for the desired
sensor directly.
oThe in each case selected value is displayed with a green background.
•To save, tap the button .
•The setup value is saved.
•To exit, tap the button .
oThe parameter selection display is displayed again.
6.3 Help in Case of Malfunctions
If the malfunction persists even after having exchanged the sensor or there is an error, which
you cannot do according to the specifications in Table 7, page 16 or Table 8, page 17,please
contact your next Leybold service office.
6.4 Replacing the Built-in Fuses
To replace blown instrument fuses use only the type of fuse 1.6 A H as printed on the rear
of the instrument. The two instrument fuses are located in the fuse insert at the mains filter
( Figure 1, page 7). The fuse insert can be prised out with a small screwdriver.
6.5 Repair
Send any defective products for repair to the next Leybold service office. The Leybold GmbH
will not assume any responsibility or warranty in case of repair work done by the operator or
third persons on the GRAPHIX controller.

GA300553102_002_C2 –04/2017
19
7. Storing and Waste Disposal
7.1 Packaging
Please retain the original packaging. You will need this packaging when storing your
GRAPHIX controller or shipping it back to Leybold GmbH.
7.2 Shelving
The multichannel gauge must only be stored in dry room. During storage, the following
ambient conditions need to be maintained:
•Ambient temperature: -20 –+60 °C
•Humidity of the air: As low as possible.
Preferably in a sealed plastic bag with desiccant.
7.3 Waste Disposal
As to waste disposal of the instrument, the branch specific and local waste disposal and
environmental regulations for systems and electronic components apply.
When returning the instrument, proper waste separation and waste disposal is ensured by
Leybold GmbH.

Headquarter
Leybold GmbH
Bonner Strasse 498
D-50968 Cologne
T: +49-(0)221-347-0
F: +49-(0)221-347-1250
Germany
Leybold GmbH
Sales, Service, Support Center (3SC)
Bonner Strasse 498
D-50968 Cologne
T: +49-(0)221-347 1234
F: +49-(0)221-347 31234
www.leybold.com
Leybold GmbH
Sales Area North
Branch Office Berlin
Industriestrasse 10b
D-12099 Berlin
T: +49-(0)30-435 609 0
F: +49-(0)30-435 609 10
Leybold GmbH
Sales Office South
Branch Office Munich
Karl-Hammerschmidt-Strasse 34
D-85609 Aschheim-Dornach
T: +49-(0)89-357 33 9-10
F: +49-(0)89-357 33 9-33
Leybold Dresden GmbH
Service Competence Center
Zur Wetterwarte 50, Haus 304
D-01109 Dresden
Service:
T: +49-(0)351-88 55 00
F: +49-(0)351-88 55 041
Europe
Belgium
Leybold Nederland B.V.
Belgisch bijkantoor
Leuvensesteenweg 542-9A
B-1930 Zaventem
Sales:
T: +32-2-711 00 83
F: +32-2-720 83 38
Service:
T: +32-2-711 00 82
F: +32-2-720 83 38
France
Leybold France S.A.S.
Parc du Technopolis, Bâtiment Beta
3, Avenue du Canada
F-91940 Les Ulis cedex
Sales and Service:
T: +33-1-69 82 48 00
F: +33-1-69 07 57 38
Leybold France S.A.S.
Valence Factory
640, Rue A. Bergès
B.P. 107
F-26501 Bourg-lès-Valence Cedex
T: +33-4-75 82 33 00
F: +33-4-75 82 92 69
Great Britain
Leybold UK LTD.
Unit 9
Silverglade Business Park
Leatherhead Road
Chessington
Surrey (London)
KT9 2QL
Sales:
T: +44-13-7273 7300
F: +44-13-7273 7301
Service:
T: +44-13-7273 7320
F: +44-13-7273 7303
Italy
Leybold Italia S.r.l.
Via Trasimeno 8
I-20128 Mailand
Sales:
T: +39-02-27 22 31
F: +39-02-27 20 96 41
Service:
T: +39-02-27 22 31
F: +39-02-27 22 32 17
Netherlands
Leybold Nederland B.V.
Floridadreef 102
NL-3565 AM Utrecht
Sales and Service:
T: +31-(30) 242 63 30
F: +31-(30) 242 63 31
Switzerland
Leybold Schweiz AG, Pfäffikon
Churerstrasse 120
CH-8808 Pfäffikon
Warehouse and shipping address:
Riedthofstrasse 214
CH-8105 Regensdorf
Sales:
T: +41-44-308 40 50
F: +41-44-302 43 73
Service:
T: +41-44-308 40 62
F: +41-44-308 40 60
Spain
Leybold Spain, S.A.
C/. Huelva, 7
E-08940 Cornellà de Llobregat
(Barcelona)
Sales:
T: +34-93-666 43 11
F: +34-93-666 43 70
Service:
T: +34-93-666 46 11
F: +34-93-685 43 70
America
USA
Leybold USA Inc.
5700 Mellon Road
USA-Export, PA 15632
T: +1-724-327-5700
F: +1-724-325-3577
Sales:
T: +1-724-327-5700
F: +1-724-333-1217
Service:
T: +1-724-327-5700
F: +1-724-325-3577
Brazil
Leybold do Brasil
Rod. Vice-Prefeito Hermenegildo Tonolli,
nº. 4413 - 6B
Distrito Industrial
Jundiaí - SP
CEP 13.213-086
Sales and Service:
T: +55 11 3395 3180
F: +55 11 99467 5934
Asia
P. R. China
Leybold (Tianjin)
International Trade Co. Ltd.
Beichen Economic
Development Area (BEDA),
No. 8 Western Shuangchen Road
Tianjin 300400
China
Sales and Service:
T: +86-22-2697 0808
F: +86-22-2697 4061
F: +86-22-2697 2017
India
Leybold India Pvt Ltd.
No. 82(P), 4th Phase
K.I.A.D.B. Plot
Bommasandra Industrial Area
Bangalore - 560 099
Indien
Sales and Service:
T: +91-80-2783 9925
F: +91-80-2783 9926
Japan
Leybold Japan Co., Ltd.
Headquarters
Shin-Yokohama A.K.Bldg., 4th floor
3-23-3, Shin-Yokohama
Kohoku-ku, Yokohama-shi
Kanawaga 222-0033
Japan
Sales:
T: +81-45-471-3330
F: +81-45-471-3323
Leybold Japan Co., Ltd.
Tsukuba Technical Service Center
1959, Kami-yokoba
Tsukuba-shi, Ibaraki-shi 305-0854
Japan
Service:
T: +81-29 839 5480
F: +81-29 839 5485
Malaysia
Leybold Malaysia
Leybold Singapore Pte Ltd.
No. 1 Jalan Hi-Tech 2/6
Kulim Hi-Tech Park
Kulim, Kedah Darul
Aman 09000
Malaysia
Sales and Service:
T: +604 4020 222
F: +604 4020 221
South Korea
Leybold Korea Ltd.
3F. Jellzone 2 Tower
Jeongja-dong 159-4
Bundang-gu Sungnam-si
Gyeonggi-do
Bundang 463-384, Korea
Sales:
T: +82-31 785 1367
F: +82-31 785 1359
Service:
623-7, Upsung-Dong
Cheonan-Si
Chungcheongnam-Do
Korea 330-290
T: +82-41 589 3035
F: +82-41 588 0166
Singapore
Leybold Singapore Pte Ltd.
8 Commonwealth Lane #01-01
Singapore 149555
Singapore
Sales and Service:
T: +65-6303 7030
F: +65-6773 0039
Taiwan
Leybold Taiwan Ltd.
No 416-1, Sec. 3
Chunghsin Rd., Chutung
Hsinchu County 310
Taiwan, R.O.C.
Sales and Service:
T: +886-3-500 1688
F: +886-3-583 3999
Sales and Service
Other manuals for GRAPHIX ONE
1
This manual suits for next models
5
Table of contents
Other LEYBOLD Controllers manuals