manuals.online logo
Brands
  1. Home
  2. •
  3. Brands
  4. •
  5. LEYBOLD
  6. •
  7. Water Pump
  8. •
  9. LEYBOLD 666 420 User manual

LEYBOLD 666 420 User manual

Physik Chemie ⋅Biologie Technik LEYBOLD DIDACTIC GMBH
11/96-Ba/Ra-
Gebrauchsanweisung 666 420
Instruction Sheet
The CPS-peristaltic pump (666 420) is a hose pump designed
for transporting liquids. It is used for example to achieve conti-
nuous circulation of liquids in a CPS flow-through reactor
(666 418) or for metering nutrient solutions in a CPS-biological
reactor (666 410).
The flow volume is regulated by means of silicone tubing of dif-
ferent diameters.
Literature: Biotechnology (668 082)
1 Safety notes
2 Scope of supply / description
1 Peristaltic pump on chemistry panel, consisting of:
11
On-off switch
22
Miniature fuse T 0.125 A
33
Chemistry panel
44
2 Knurled screws for securing plastic cover
9
55
Outlet connection
66
Inlet connection
77
3 Silicone tubes with different diameters
88
Transport shaft
99
Plastic cover
AA
Mains connection on rear of device
Die CPS-Peristaltikpumpe (666 420) ist eine Schlauchpumpe
und dient der Förderung von Flüssigkeiten. Anwendungsbei-
spiele sind die kontinuierliche Umwälzung von Flüssigkeiten in
einem Durchflußreaktor (666 418) oder die Zudosierung von
Nährlösungen in einen CPS-Bioreaktor (666 410).
Die Einstellung des Durchflußvolumens erfolgt durch den Ein-
satz von Silikonschläuchen mit unterschiedlichen Durchmes-
sern.
Literatur: Biotechnologie im Schulunterricht (668 081)
1 Sicherheitshinweise
2 Lieferumfang / Beschreibung
1 Peristaltikpumpe auf Experimentierplatte, bestehend aus:
11
Ein-Aus-Schalter
22
Feinsicherung T 0,125 A
33
Experimentierplatte
44
2 Rändelschrauben zur Sicherung des Kunststoffdeckels
9
55
Auslaßanschluß
66
Einlaßanschluß
77
3 Silikonschläuche mit verschiedenen Durchmessern
88
Transportwelle
99
Kunststoffdeckel
AA
Netzanschluß auf der Gehäuserückseite
CPS-Peristaltikpumpe
CPS-Peristaltic Pump
Fig. 1
CPS-Peristaltikpumpe (666 420)
CPS-peristaltic pump (666 420)
Use caution when experimenting with water and aggressive
liquids.
Use only silicone tubing to transport liquids: rubber tubing
can become porous!
Toensurea securestandatalltimes,onlyusetheCPS-peristal-
tic pump (666 420) in a CPS-panel frame!
Assemble the experiment setup completely before plugging
in the mains plug
A
do not switch on the CPS-peristaltic
pump (666 420) before plugging it in!
Vorsicht beim Experimentieren mit Wasser und aggressiven
Flüssigkeiten.
Nur Silikonschläuche zum Flüssigkeitstransport verwenden,
Gummischläuche können porös werden!
Aus Gründen der Standsicherheit die CPS-Peristaltikpumpe
(666 420) nur in einem CPS-Profilrahmen benutzen!
Erst am Ende des Versuchsaufbaus den Netzstecker
A
ein-
stecken und erst dann die CPS-Peristaltikpumpe (666 420)
einschalten!
LEYBOLD DIDACTIC GMBH ⋅Leyboldstrasse 1 ⋅D-50354 Hürth ⋅Phone (02233) 604-0 ⋅Telefax (02233) 604-222 ⋅ Telex 17 223 332 LHPCGN D
©by LeyboldDidacticGmbH, PrintedintheFederalRepublicofGermany
Technical alterations reserved
3 Technische Daten
Spannungsversorgung: 230 V AC / 50 Hz
Sicherung: Feinsicherung T 0,125 A
Fördermenge: 0,75 ml / min; 2,0 ml / min;
4,0 ml / min
Schlauchdurchmesser, innen: 1,0 mm ; 2,5 mm ; 5,0 mm
Schlauchmaterial: Silikon
Maximaler Gegendruck: 0,036 bar
Abmessungen (gesamt): 100 x 297 x 85 mm
Experimentierplatte: 100 x 297 mm
Gewicht: 0,7 kg
Für den Betrieb zusätzlich benötigte Geräte
1 Silikonschlauch, Ø = 2mm 667 198
1 CPS-Profilrahmen, C 50, zweizeilig 666 425
4Montage
Den CPS-Profilrahmen (z.B. 666 425) gemäß beiliegender
Montageanleitung zusammenbauen.
Die Peristaltikpumpe (666 420) auf gleicher Höhe wie das Ge-
fäß, in das gefördert werden soll, in den CPS-Rahmen einset-
zen, da die maximal zu überwindende Höhendifferenz lediglich
35 cm beträgt.
Die beiden Rändelschrauben
4
abschrauben und den Kunst-
stoffdeckel
9
abnehmen.
Je nach gewünschter Fördermenge einen der drei beiliegenden
Silikonschläuche
7
um die Transportwelle
8
legen und die En-
den auf den Einlaßanschluß
6
und Auslaßanschluß
5
stecken.
Ø = 1 mm ≈0,75 ml / min
Ø = 2,5 mm ≈2 ml / min
Ø = 5 mm ≈4 ml / min
Dann den Deckel
9
wieder aufsetzen und die Rändelschrau-
ben
4
festschrauben.
Die Peristaltikpumpe (666 420) durch Aufstecken von geeigne-
ten Silikonschläuchen (667 198) mit dem restlichen Versuchs-
aufbau verbinden. Dabei auf festen Sitz der Schläuche achten.
5 Inbetriebnahme
Den Ein-Aus-Schalter
1
der Peristaltikpumpe (666 420) aus-
schalten. Den Netzstecker
A
an das Stromnetz anschließen.
Die Peristaltikpumpe (666 420) am Ein-Aus-Schalter
1
ein-
schalten (Kippschalter leuchtet).
6 Wechsel der Sicherung
Die Sicherung kann defekt sein, wenn trotz eingesteckten Netz-
steckers und eingeschalteter Pumpe weder der Ein-Aus-Schal-
ter
1
leuchtet noch sich die Transportwelle
8
dreht.
Zum Wechseln der Sicherung zunächst unbedingt den Netz-
stecker aus der Steckdose herausziehen!
Erst dann den schwarzen Deckel
9
mit einem Schraubendre-
her eine halbe Umdrehung nach links drehen (Bajonettver-
schluß). Die defekte Sicherung gegen eine intakte austau-
schen. Den Deckel
9
wieder aufsetzen und mit einer halben
Umdrehung nach rechts festschrauben.
Nur Sicherungen mit den oben genannten Spezifikationen be-
nutzen.
Ausführliche Hinweise zu Versuchsvorbereitungen und zur
Durchführung sind in dem Buch: "Biotechnologie im Schulun-
terricht" (668 081) enthalten.
3 Technical data
Voltage supply: 230 V AC / 50 Hz
Protection: Miniature fuse T 0.125 A
Output rate: 0.75 ml / min; 2.0 ml / min;
4.0 ml / min
Tubing diameters, internal: 1.0 mm ; 2.5 mm ; 5.0 mm
Tubing material: Silicone
Maximum back-pressure: 0.036 bar
Dimensions (overall): 100 x 297 x 85 mm
Panel: 100 x 297 mm
Weight: 0.7 kg
Additionally required for operation
1 Silicone tubing, dia. = 2 mm 667 198
1 CPS-panel frame, C 50, two-level 666 425
4 Assembly
Assemble the CPS-panel frame (e.g. 666 425) as described in
the enclosed assembly instructions.
Insert the peristaltic pump (666 420) in the CPS-panel frame on
the same level as the vessel into which the liquid is to be pum-
ped, as the maximum surmountable height difference is only 35
cm.
Unscrew the two knurled screws
4
and remove the plastic
cover
9
.
Depending on the desired output volume, place one of the three
supplied silicone tubes
7
around the transport shaft
8
and
push the ends onto the inlet connection
6
and the outlet con-
nection
5
.
Dia. = 1 mm ≈0.75 ml / min
Dia. = 2.5 mm ≈2 ml / min
Dia. = 5 mm ≈4 ml / min
Then replace the cover
9
and tighten the knurled screws
4
.
Connect the peristaltic pump (666 420) with the rest of the ex-
periment setup using the appropriate silicone tubing (667 198).
Check to make sure that the tubes are seated securely.
5 Putting into operation
Switch off the on-off switch
1
of the peristaltic pump (666 420).
Plug in the mains plug
A
. Then switch on the peristaltic pump
(666 420) using the on-off switch
1
(toggle switch lights up).
6 Changing the fuse
If the on-off switch
1
does not light up and the transport shaft
8
does not turn even though the unit is plugged in, the fuse
may be blown.
Before changing the fuse, always make sure that you unplug
the unit from the mains!
Then turn the black cap
9
one-half turn to the left using a scre-
wdriver (bayonet connector). Remove the defective fuse and
replace it with a good one which has been checked for the cor-
rect polarity. Then put the cap
9
back and screw it intoplace by
turning it one-half turn to the right.
Use only fuses which conform to the above specifications.
For detailed information on preparing and carrying out experi-
ments, please see the manual "Biotechnology" (668 082).
Other LEYBOLD Water Pump manuals

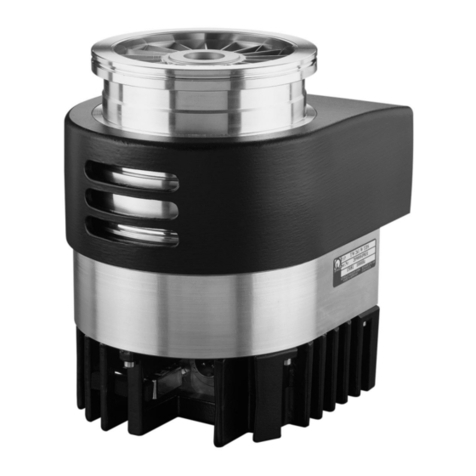
LEYBOLD VARODRY VD65 User manual

LEYBOLD

LEYBOLD VARODRY VD65 User manual

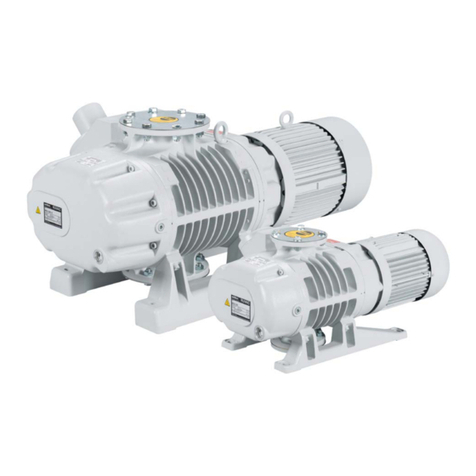
LEYBOLD DRYVAC B Series User manual

LEYBOLD

LEYBOLD DRYVAC B Series User manual

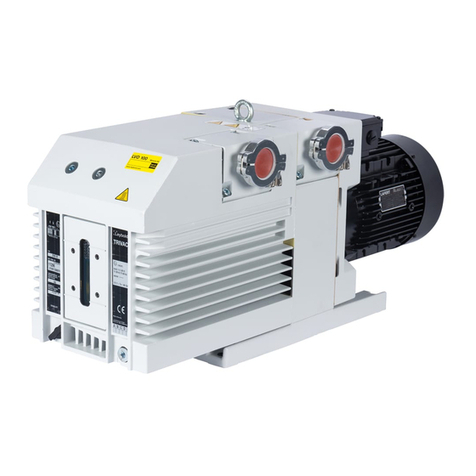
LEYBOLD TRIVAC E2 User manual

LEYBOLD

LEYBOLD TRIVAC E2 User manual

LEYBOLD SOGEVAC SV10B User manual

LEYBOLD

LEYBOLD SOGEVAC SV10B User manual

LEYBOLD RUVAC WS 251 User manual

LEYBOLD

LEYBOLD RUVAC WS 251 User manual

LEYBOLD TRIVAC B SERIES User manual

LEYBOLD

LEYBOLD TRIVAC B SERIES User manual

LEYBOLD Trivac D8A User manual

LEYBOLD

LEYBOLD Trivac D8A User manual

LEYBOLD RUVAC WS 251 User manual

LEYBOLD

LEYBOLD RUVAC WS 251 User manual

LEYBOLD SOGEVAC SV160B User manual

LEYBOLD

LEYBOLD SOGEVAC SV160B User manual

LEYBOLD SOGEVAC SV300 B User manual

LEYBOLD

LEYBOLD SOGEVAC SV300 B User manual

LEYBOLD SOGEVAC SV25 FP User manual

LEYBOLD

LEYBOLD SOGEVAC SV25 FP User manual

LEYBOLD SCREWLINE SP 630 F User manual

LEYBOLD

LEYBOLD SCREWLINE SP 630 F User manual

LEYBOLD TRIVAC D 16 B Ex 140091 User manual

LEYBOLD

LEYBOLD TRIVAC D 16 B Ex 140091 User manual

LEYBOLD TRIVAC T Series User manual

LEYBOLD

LEYBOLD TRIVAC T Series User manual

LEYBOLD TURBOVAC 340 M User manual

LEYBOLD

LEYBOLD TURBOVAC 340 M User manual

LEYBOLD TRIVAC B SERIES User manual

LEYBOLD

LEYBOLD TRIVAC B SERIES User manual

LEYBOLD TURBOVAC 151 User manual

LEYBOLD

LEYBOLD TURBOVAC 151 User manual

LEYBOLD Turbovac TW 70 H User manual

LEYBOLD

LEYBOLD Turbovac TW 70 H User manual

LEYBOLD SOGEVAC SV300 FP User manual

LEYBOLD

LEYBOLD SOGEVAC SV300 FP User manual

LEYBOLD DRYVAC DV 200 User manual

LEYBOLD

LEYBOLD DRYVAC DV 200 User manual

LEYBOLD SOGEVAC SV40 BI FC User manual

LEYBOLD

LEYBOLD SOGEVAC SV40 BI FC User manual

LEYBOLD 312 31T User manual

LEYBOLD

LEYBOLD 312 31T User manual

LEYBOLD TRIVAC S 16 B User manual

LEYBOLD

LEYBOLD TRIVAC S 16 B User manual

LEYBOLD SOGEVAC SV630 B User manual

LEYBOLD

LEYBOLD SOGEVAC SV630 B User manual

Popular Water Pump manuals by other brands

Bluefin SUP Electric iSUP Air Pump instruction manual

Bluefin SUP

Bluefin SUP Electric iSUP Air Pump instruction manual

Becker VT 4.8 DC operating instructions

Becker

Becker VT 4.8 DC operating instructions

Alemlube 801A Owner technical manual

Alemlube

Alemlube 801A Owner technical manual

Grundfos MAGNA 2000 Series Installation and operating instructions

Grundfos

Grundfos MAGNA 2000 Series Installation and operating instructions

Homa SaniQ Plus Series instructions

Homa

Homa SaniQ Plus Series instructions

Lorentz S1-200 manual

Lorentz

Lorentz S1-200 manual

BOC Edwards E1M18 instruction manual

BOC Edwards

BOC Edwards E1M18 instruction manual

Pentair BERKELEY HN Series owner's manual

Pentair

Pentair BERKELEY HN Series owner's manual

Graco G-JR Instructions-parts list

Graco

Graco G-JR Instructions-parts list

Stuart Turner CH 3-30 CI Installation, operation & maintenance instructions

Stuart Turner

Stuart Turner CH 3-30 CI Installation, operation & maintenance instructions

TOHATSU VC85BS Quick start up guide

TOHATSU

TOHATSU VC85BS Quick start up guide

Graco 206405 Instructions and parts list

Graco

Graco 206405 Instructions and parts list

Craftsman HYDROGLASS 390.2511 owner's manual

Craftsman

Craftsman HYDROGLASS 390.2511 owner's manual

Resol FlowSol S manual

Resol

Resol FlowSol S manual

salmson SHS Installation and starting instructions

salmson

salmson SHS Installation and starting instructions

Stuart Turner ST NH PUMP 18TN Installation, operation & maintenance instructions

Stuart Turner

Stuart Turner ST NH PUMP 18TN Installation, operation & maintenance instructions

Dekker VMAX SERIES Installation, operation & maintenance manual

Dekker

Dekker VMAX SERIES Installation, operation & maintenance manual

GEA NOVALOBE 10 Operating	 instruction

GEA

GEA NOVALOBE 10 Operating instruction

manuals.online logo
manuals.online logoBrands
  • About & Mission
  • Contact us
  • Privacy Policy
  • Terms and Conditions

Copyright 2025 Manuals.Online. All Rights Reserved.