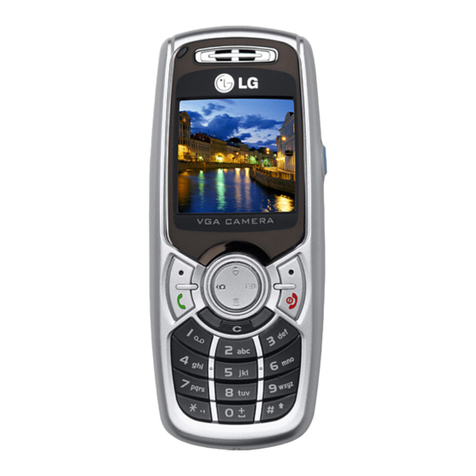
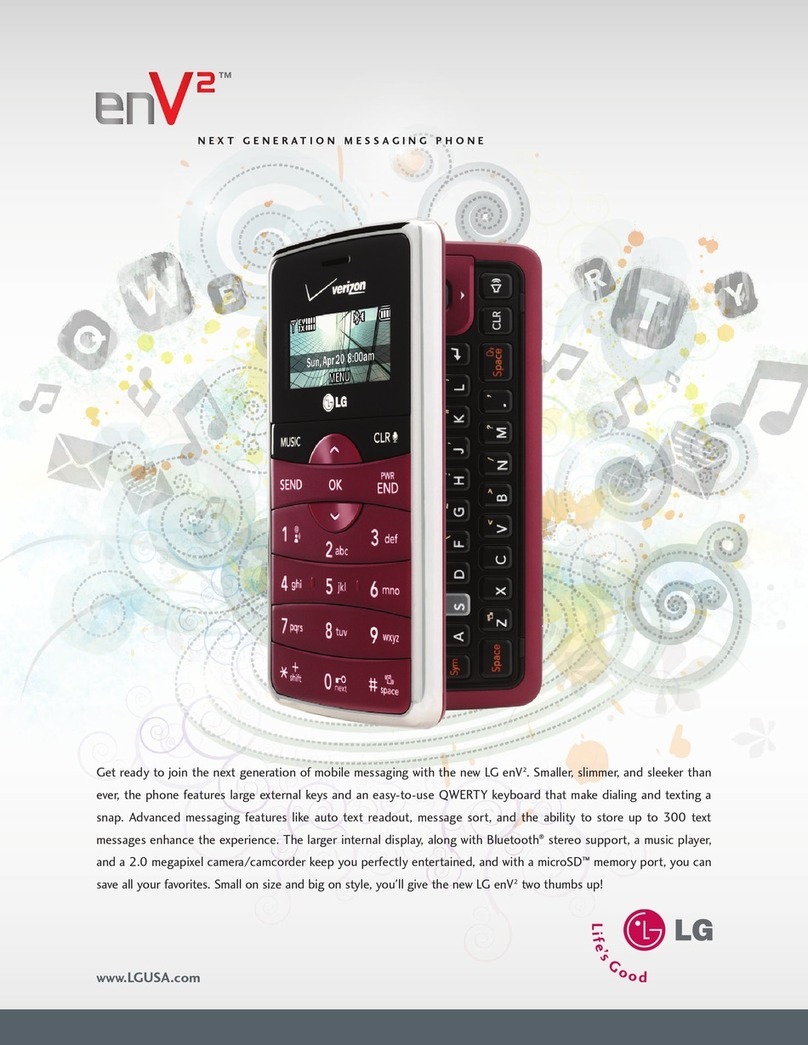
LG AX310 User manual

USER GUIDE AX310
Please read this manual carefully before operating your mobile
phone. Retain it for future reference.
Copyright 200
ⓒ
9 LG Electronics, Inc. All rights reserved.
LG and the LG logo are registered trademarks of LG
Group and its related entities. All other trademarks are the
property of their respective owners.

Part 15.21 statement
" Change or Modifications that are not expressly approved by the manufacturer could void
the user's authority to operate the equipment. “
Part 15.105 statement
This equipment has been tested and found to comply with the limits for a class B digital
device, pursuant to Part 15 of the FCC Rules.
These limits are designed to provide reasonable protection against harmful interference in
a residential installation. This equipment generates uses and can radiate radio frequency
energy and, if not installed and used in accordance with the instructions, may cause harmful
interference to radio communications. However, there is no guarantee that interference will
not occur in a particular installation. If this equipment does cause harmful interference or
television reception, which can be determined by turning the equipment off and on, the user
is encouraged to try to correct the interference by one or more of the following measures:
- Reorient or relocate the receiving antenna.
- Increase the separation between the equipment and receiver.
- Connect the equipment into an outlet on a circuit different from that to
which the receiver is connected.
- Consult the dealer or an experienced radio/TV technician for help.

Part 15 Class B Compliance
This device and its accessories comply with part15 of FCC rules.
Operation is subject to the following two conditions:
(1) This device & its accessories may not cause harmful interference.
(2) This device & its accessories must accept any interference received,
including interference that may cause undesired operation.
Body-worn Operation
This device has been tested for typical body-worn operations
with the distance of 0.79inches (2.0cm) from the user’s body.
To comply with FCC RF exposure requirements, a minimum separation distance
of 0.79inches(2.0cm) must be maintained from the user's body.
Additionally, Belt clips, holsters & other body-worn accessories may not contain
metallic components.

Installing the Battery
Remove the battery cover by sliding it downward followed by the arrow indicator. Align the
battery with the terminals near the top of the phone. Align the battery cover then slide it to the
right side until it clicks into place.
Removing the Battery
Turn the phone off. Slide the battery cover to left side and remove it. Use the opening near the
bottom of the battery to lift the battery out.
Charging the Battery
To use the charger provided with your phone:
Warning! Use only the charger provided with the phone. Using any charger other than the one
included with the AX310 may damage your phone or battery.
Note
It is important to fully charge the battery before initial use of the phone.
Notice
Please make sure that the LG logo faces down before inserting a charger, data cable, etc into the charger port
of your phone.
1. Plug the end of the adapter into the phone’s charger port and the other end into an
electrical outlet.
2. The charge time varies depending upon the battery level.
Battery Charge Level
The battery charge level is shown at the top right of the LCD screen. When the battery charge
level becomes low, the low battery sensor alerts you in three ways: sounding an audible tone,
blinking the battery icon, and displaying a warning message. If the battery charge level
becomes exceedingly low, the phone automatically switches off and any function in progress
is not saved.
Turning the Phone On and Off
Turning the Phone On
1. Install a charged battery or connect the phone to an external power source.
2. Press END for about 3 seconds until the LCD screen lights up.
Turning the Phone Off
1. Press END and hold until the display turns off.
Signal Strength
Call quality depends on the
Getting Star ted with Your Phone signal strength in your area. The signal strength is indicated
on the screen as the number of bars next to the signal strength icon
-- the more bars, the better the signal strength. If the signal quality is poor, move to an open
area. If you are in a building, the reception may be better near a window. Screen Icons To
see the icon glossary, go to Menu -> Settings -> Phone Info. -> Icon Glossary on your phone.

Making Calls
1. Make sure the phone is turned on. If not, press END for about 3 seconds.
2. Enter the phone number (include the area code if needed).
3. Press .lf the phone is locked, enter the lock code (the last 4 digits of your phone number by
default and it's changeable in Settings menu).
Note The call quality is also affected by the places where you are and weather conditions with RF
emission changes.
Note
If the phone is restricted, you can only dial phone numbers saved in the Emergency Numbers or
your Contact List. To turn off this function: Menu -> 9. Settings -> 3. Security -> Lock Code -> OK
-> 2. Restrictions -> 1. Calls -> 4. None -> OK
4. Press END to end the call.
Correcting Dialing Mistakes If you make a mistake while dialing a number, press BACK
once to erase the last digit entered, or hold down BACK for at least 2 seconds to go to the
standby mode.
Redialing Calls
1. Press TALK twice to redial the last number you dialed. The last 120 numbers (missed,
received, dialed) are stored in the call history list and you can also select any of these to redial.
Receiving Calls
1. When the phone rings or vibrates, press TALK to answer.
2. Press twice to end the call.
Tip
To choose answer options: Menu -> 9. Settings -> 4. Call Settings -> 1. Answer Options. Choose
from the
following options:
Flip Open/ Any Key/ Send Key
Only/ Auto Answer
Note
If you press or (the side keys), while the phone is ringing, the ringing or vibration is muted for that
call.
Quick Access to Convenient Features
Lock Mode
Sets your phone to require a 4-digit password in order to use the phone.
To quickly lock your phone press for three seconds. To cancel, press Left Soft Key Unlock,
enter the password and press .
Mute Function
The Mute Function is used during a phone call. To quickly activate Mute press Left Soft Key
Mute, then to cancel press Left Soft Key Unmute.
Volume Quick Adjustment
Use the side keys to adjust the ringer volume while in standby mode, and the earpiece volume

during a phone call. The upper key increases the volume and the lower key decreases the
volume.
Call Waiting
Your cellular service may offer call waiting. While a call is in progress, two beeps indicate
another incoming call. When call waiting is enabled, you may put the active call on hold while
you answer the other incoming call. Check with your cellular service provider for information
about this function.
Note
Until you change it, the default lock code/password is the last 4
digits of your phone number.
Note
Keypad Volume is adjusted through the Sound Volume menu:
Menu -> 9. Settings -> 1. Sound -> 2. Volume -> 2. Keypad
Quick Acces s to Convenient Features
1. Press TALK to receive a waiting call.
2. Press TALK again to switch between calls.
Caller ID
Caller ID displays the phone number or name of the incoming call. If the caller’s
identity is stored in Contacts, the name will appear along with the phone number.
Check with your service provider to ensure they offer this feature.
Speed Dialing
Speed dialing is a convenient feature that allows you to make phone calls quickly. A
number key can be assigned to a specific phone number. By pressing and holding
down a number key, your phone will recall the phone number associated from the
Contact List and display it briefly while simultaneously dialing that phone number for
you. Speed Dial Number 1 is set to Voice Mailbox by default and is unchangeable.
Dialing Single Digit Speed Dials (from 2 to 9)
Press and hold the Speed Dial number. OR Enter the Speed Dial number and press .
Dialing Double Digit Speed Dials (from 10 to 99)
Press the first digit and then press and hold the key of the second digit.
OR
Enter the first and second digits and press .
Entering and Editing Information
Text Input
You can input and edit your Banner, Calendar, Contacts, Alarm Clock, Notepad, and
Messages.
Key Functions

Left Soft Key:
Press to scroll through the following text input modes:
T9Word(T9WORD/T9Word/T9word) -> Abc(ABC/Abc/abc) -> 123 -> Symbols
“*” Shift: Press to change capitalization T9 text : T9Word -> T9WORD -> T9word
Abc text : Abc -> ABC -> abc
“0” Next: In T9 mode, press to display other matching words.
“#” Space: Press to complete a word and insert a space.
“BACK” Clear: Press to delete a single space or character. Hold to delete the whole
message.
“1” Punctuation: In T9 mode, press to insert punctuation in a word and complete a
sentence.
Contacts in Your Phone’s Memory
The Basics of Storing Contacts Entries
1. From standby mode enter the phone number you want to save (up to 48 digits).
2. Press Left Soft Key Save.
3. Select either Save New or Update Existing.
4. Use to highlight a Label and press OK . Mobile 1/ Home/ Work/ Mobile 2/ Fax
5. Enter a name for the phone number (up to 22 characters) and press OK . A confirmation
message is displayed briefly.
Phone Numbers With
Pauses
When you call automated systems, such as voice mail or credit billing numbers, you
often have to enter a series of numbers to navigate through the system. Instead of
entering these numbers by hand, you can store the numbers in your Contacts
separated by special pause characters (W, P). There are two different types of
pauses you can use when storing a number: Wait (W) The phone stops dialing until
you press Left Soft Key Release to advance to the next number. Pause (P) The phone
waits 2 seconds before sending the next string of digits.
Note
Use Update Existing to add another phone number to a contact already stored in memory.
Contacts in Your Phone’s Memory
Storing a Number with Pauses
1. Press OK Menu.
2. Press 1 Contacts.
3. Press 1 New Contact.
4. Enter a name (up to 22 characters) and enter a number.
5. Press Right Soft Key Options.
6. Press 3 Wait or 4 Pause.
7. Enter additional number(s) then press OK .

Adding a Pause to an Existing Number
1. Press Right Soft Key Contacts to display your Contacts alphabetically.
2. Use to highlight the Contact entry to edit, then press OK.
3. Press Left Soft Key Edit.
4. Use to highlight the number.
5. Press Right Soft Key Options.
6. Press 3 Wait or 4 Pause.
7. Enter additional number(s), then press OK.
Searching Your Phone’s Memory
The AX310 phone is able to perform a dynamic search of the contents in your phone’s
memory. A dynamic search compares entered letters or numbers against the entries in your
Contacts. A matching list is displayed in descending order. You can then select a number
from the list to call or edit.
Scrolling Through Your Contacts
1. Press Contacts to display your Contacts alphabetically.
2. Use to scroll through the list.
Searching by Letter
1. Press Contacts to display your Contacts alphabetically.
2. Press (or press repeatedly) the key on the keypad that corresponds with the search letter.
Accessing Options
1. Press Right Soft Key Contacts.
2. Press Right Soft Key Options.
3. Select an option (use then press OK ,or press the corresponding number on the
keypad):
“1” Send Message: Send a text message or picture message to the selected contact.
“2” Delete: Delete the selected entry in your Contacts.
“3” Edit: Edit the selected contact information.
“4” Delete Multiple: Choose from Selective/ All to delete multiple entries at one time.
“5” Send via Bluetooth: Send a contact(vCard) via Bluetooth. In case Bluetooth power is not
on, a notice pops up to turn Bluetoothon.
“6” Set Speed Dial/ Remove
Speed Dial: Set a speed dial or remove the speed dial.
Making a Call From Your Phone’s Memory
Once you have stored phone numbers in your Contacts, you can place calls to those numbers
quickly and easily.
_ By pressing Send Key TALK after searching for a phone number in Contacts or Recent Calls
and highlighting it.
_ By using Speed Dialing. From Contacts
1. Press Right Soft KeyContacts to display your Contacts.
2. Use to highlight the Contact entry, then press OK.
3. Use to highlight the phone number.

4. Press TALK to place the call.
From Call History
1. Press Left Soft Key Menu.
2. Press “3” Call History.
3. Use to highlight the type of recent call, then press OK.
Missed Calls/Received Calls/Dialed Calls/All Calls
4. Use to highlight the phone number.
5. Press TALK to place the call.
Speed Dialing For a single-digit Speed Dial, press and hold the digit or press the digit, then
press TALK. For a double-digit Speed Dial, press the first digit and hold the second digit or
press the first and second digits, then press TALK.
.
Using Phone Menus
Contacts
The Contacts Menu allows you to store names, phone numbers and other information in your
phone’s memory. When you access your Contacts, the number in parentheses represents the
number of entries you have stored (up to 1000).
1. New Contact
Allows you to add a new contact to your Contact List.
1. Press OK ,1 ,1.
2. Enter the name, then press .
3. Highlight the field you wish to store the contact information in.
4. Enter the phone number or e-mail address.
5. Continue adding the desired contact information to the entry.
6. When you are finished entering the desired contact information, press OK Save to save the
entry into your Contact List.
2. Contact List
Allows you to view your Contact List.
1. Press OK ,1 ,2 .
2. Choose from the following options:
Note
Using this submenu, the number is saved as a new Contact. To save the number into an existing
Contact, edit the Contact entry.
_ Press to scroll through your Contacts alphabetically.
_ Press Right Soft Key Options to select one of the following:
Send Message/ Delete/Edit/ Delete Multiple/Send via Bluetooth/ Set Speed Dial
_ Press OK View to view the contact's information.

_ Press Left Soft Key
New to store new contact information.
3. Groups
Allows you to view your grouped Contacts, add a new group, change the name of a group, or
delete a whole group.
1. Press OK ,1 ,3.
2. Choose from the following options:
_ Use to highlight a group, then press OK View to view the contacts in the selected group.
_ Press Left Soft Key
New to add a new member to the group.
_ Use to highlight a group, then press Right Soft Key Options to choose from the following
options: Delete/ Send Message/Rename Group/ Set Ringtone/Delete All
4. Speed Dials
Allows you to view your Speed Dials list, designate new Speed Dials, or remove Speed Dial
designations entered in your Contacts.
1. Press OK, 1,4.
2. Use to highlight the desired Speed Dial location (or enter the Speed Dial digit), and
press OK Assign.
3. Use to highlight the Contact.
4. Use to highlight the number, then press OK . A confirmation message is displayed.
5. My Name Card
Allows you to view all of your personal Contact information including name and phone numbers.
1. Press OK, 1, 5.
2. Use to highlight the feature you wish to edit, and press Left Soft Key Edit.
3. Edit the information as desired and press OK .
Note
You cannot edit phone number, but you can add an additional phone number.
Messaging
The phone can store up to 435 messages. The AX310 supports up to 1000 characters. The
information stored in the message is determined by phone model and service capability.
Other limits such as available characters per message may exist, please check with your
service provider for system features and capabilities.
1. New Text Message
Allows you to send text messages, pages, and e-mail transmissions. Each message will

be formatted and sent according to the destination address.
The Basics of Sending a Text Message
1. Press OK, 2, 1.
2. Enter the recipient's address.
3. Press OK to access the message screen.
4. Type your message (text or e-mail).
5. Press OK Send.
A confirmation message is displayed.
Select Recipient(s) Using Options
1. Press OK, 2, 1.
2. Press Right Soft Key Options.
3. Use to highlight an option and press OK.
Contacts To select a recipient from your Contact List.
Recent Calls To select a recipient from your Recent Calls.
Recent Messages Choose
Inbox/ Sent to select a recipient from your Recent Messages.
Groups Select a recipient from your Groups.
General/ Family/ Friends/Colleagues/ Business/ School
Cancel Cancels editing your message.
4. Complete your message and send or save it.
Customize Your Text Message Using Options
While you are composing the text of a message you can insert customized text.
1. Press OK, 2, 1.
2. Enter the recipient's address.
3. Use or press OK to highlight the Message window.
4. Press Right Soft Key Options.
5. Use to highlight an option and press OK.
Add Templates/ Signature
Save As Draft/ Templates
Priority Level Normal/ High
Callback # On/ Off
Delivery Notice Enhanced/ Normal
Cancel Cancels editing your message.
6. Complete your message and send or save it.
Message Icon Reference
Inbox
New/Unread Text/Picture Message
Opened/Read Text/Picture Message
New/Unread Notification Message
Opened/Read Notification Message
Priority High
MMS New/Read Priority High
Sent
Failed Text/Picture Message
Failed Multiple Text/Picture
Messages

Sent Message Pending
Multi Messages Pending
Sent Text/Picture Message
Multiple Text/Picture Messages in transfer
Text/Picture Message delivered
Multiple Messages delivered
Drafts
Draft Text Message
Draft Picture Message
2. New Picture Message
Allows you send messages with Text, Image and Audio.
1. Press OK, 2, 2.
2. Enter the recipient's address, or press Right Soft Key Options to search Contacts, and
press OK to select the desired contact.
3. Press OKto access the message screen.
4. Type your message.
5. With the highlight on Image, press Left Soft Key Add, and press OK to select:
Image / Take Photo
6. Use to highlight a picture, then press Left Soft Key Set.
7. With the highlight on Audio, press Left Soft Key Add, highlight an option, and press OK to
select: My Audios/ Default
8. Use to highlight a sound, then press Left Soft Key Set.
9. Use to highlight a subject, then enter subject.
10. Use Right Soft Key Options.
11. Use to highlight an option and press OK.
* Editing the Receiver Contacts/ Recent Calls/Recent Messages/Groups/Online Album/
Cancel
* Editing the Text Preview Shows your message before sending.
Add Templates/ Signature/Slide
Go to Previous Slide/ Next Slide
Save As Draft/ Templates
Priority Level Normal/ High
Delivery Notice Informs you that the message has been successfully delivered to the
recipient.
Enhanced/ Normal
Remove Image/ Audio/ Slide
Cancel Cancels the contents of message field.
* Editing the Image Preview/ Add Slide/ Go to/ Save As Draft/ Priority Level/Delivery
Notice/ Remove/Cancel
* Editing the Audio Preview/ Add Slide/ Go to/ Save As Draft/ Priority Level/ Messaging
Delivery Notice/ Remove/ Cancel
* Editing the Subject Preview/ Add/ Go to/ Save As/ Priority Level/ Delivery Notice/
Remove/ Cancel
12. Press OK to send.

3. Inbox
The phone alerts you in 2 ways when you receive a new message by:
_ Displaying a notification message on the screen.
_ Displaying the message icon (It blinks when the message is urgent).
The phone will also ring or vibrate when you receive a new message.
Received text messages, page messages, picture messages and e-mail lists may be searched
and the contents viewed. Received messages are displayed from newest to oldest.
Viewing Your Inbox Up to 300 received messages can be stored in the Inbox.
1. Press OK, 2, 3.
2. Use to highlight an inbox message.
3. Press Left Soft Key Reply to reply, or Right Soft Key Options . Press OK to view the
message.
Access additional options.
For text messages: Delete/
Forward/ Save Contact/ Lock/ Message Info/ Delete Multiple
For picture messages:
Delete/ Forward/ Save
Contact/ Lock/ Message
Info/ Delete Multiple
4. While viewing the selected message, press Left Soft Key Reply to reply, or Right Soft Key
Options to view additional options.
Delete Deletes the selected message.
Forward Forwards a received message to other destination address(es).
Save Contact Stores the callback number, e-mail address, and numbers in the received
message into your Contacts.
Save as Template Stores the message as a template for future messages.
Call Back Calls the number in the received message.
Lock/Unlock Locks or unlocks the selected message.
Message Info Shows the message type, priority, and status.
Note
For picture messages:
Play Again/ Delete/ Forward/ Save Contact/ Save Media/ Lock/ Message Info
4. Sent
Up to 100 sent text messages or picture messages can be stored in the Sent. Access the Sent
message list to view contents of sent messages and verify whether the transmission was
successful or not.
1. Press OK, 2, 4.
2. Use to highlight a sent message. Press Left Soft Key Resend to resend the message to
the recipient, OK View to view the message, or Right Soft Key Options to access additional
options.
Delete/ Forward/ Save
Contact/ Lock/ Message

Info/ Delete Multiple
3. While viewing the selected sent message, press Left Soft Key Resend to resend the
message to the recipient, or Right Soft Key Options to access additional options.
Delete Deletes the selected message.
Forward Forwards a received message to other destination address(es).
Save Contact Stores the callback number, e-mail address, and numbers in the
received message into your Contacts.
Save as Templates Stores the message as a template for future messages.
Lock/Unlock Locks or unlocks the selected message.
Message Info Shows the message type priority and status.
Note
For picture messages:
Play Again/ Delete/ Forward/
Save Contact/ Save Media/ Lock/
Message Info
5. Drafts
Displays saved messages and draft messages.
1. Press OK, 2, 5.
2. Use to highlight a Saved message.
_ Press OK Edit.
_ Press Right Soft Key Options.
Delete Deletes the selected message from the Drafts.
Save Contact Select Save New/ Update Existing to store the callback number, e-mail
address,and numbers in the received message into your Contacts or update
an existing contact already stored in memory.
Lock/Unlock Locks a message so that it is not erased if the Erase Saved or Erase All feature
is used.
Delete Multiple Select Selective/ All to delete multiple messages at one time.
6. Voicemail
Allows you to view new voice messages recorded in your voice mail box. Your phone will alert
you when you receive a new voice message.
Checking Your Voicemail Box
1. Press OK, 2, 6.
2. Choose from the following
options:
_ Press Left Soft Key Clear to clear the voicemail counter.
_ Press TALK to listen to the message(s).
_ Press Right Soft Key Exit to return to the Messaging menu.
7. Templates
Allows you to display, edit, and add text phrases. These text strings allow you to reduce

manual text input into messages.
1. Press OK, 2, 7.
2. Press Left Soft Key New to create a new template. Enter text and press OK to save the
template.
3. Use to highlight a template and press Right Soft Key Options, then highlight an option
and press OK to select: Delete/Edit
8. Settings
Allows you to configure 10 settings for messages.
1. Press OK, 2, 8.
2. Use to highlight All Messages/ Text Message/ Picture Message/ Edit Voicemail # then
press OK.
3. Use to highlight one of the settings and press OK to select it.
Message Settings Sub-Menu Descriptions All Messages
1. Auto Save (Auto Save/Prompt/ Do Not Save)
With this feature on, messages are automatically saved in Sent when transmitted.
2. Auto Delete (On/ Off) With this feature on, read messages are automatically deleted when
you exceed the storage limit.
3. Entry Mode
Allows you to select the default input method including T9Word, Abc and 123.
4. Signature (On/ Off/ Edit)
Allows you to make/edit a signature to automatically send with your messages.
For example:
1. Assign the number 2 as a speed dial for one of your contacts.
2. Compose a new text or picture message. In the destination address window,
hold down the number 2 key instead of entering the address, and the message will
be automatically sent to that contact.
Text Message
1. Auto View (On/ Off) When set to On, new messages will automatically display on your
screen when they are received.
2. Auto Play (On/ Off) Allows the display to automatically scroll down while viewing messages.
3. Callback # (On/ Off/ Edit) With this feature on, you can input the callback number that will
be automatically included when you send a message.
Picture Message
1. Auto Receive (On/ Off) With this set to On, attached content will automatically download
when a new picture message is received.
Edit Voicemail #
Allows you to manually enter the access number for Voicemail Service. This feature should
only be used when a VMS (Voicemail
Call History Service) access number is not provided from the network.
9. Delete All
Allows you to erase the messages stored in your Inbox, Sent, or Saved message folders. You
can also erase all messages at the same time.

1. Press OK, 2, 9.
2. Use to highlight an
option: Delete Inbox/ Delete
Sent/ Delete Drafts/ Delete
All Messages then press OK.
3. Use to highlight Yes/ No and press OK.
Call History
The Recent Calls Menu is a list of the last phone numbers or Contacts entries for calls you
placed, accepted, or missed. It is continually updated as new numbers are added to the
beginning of the list and the oldest entries are removed from the bottom of the list.
1. Missed Calls
Allows you to view the list of missed calls; up to 40 entries.
1. Press OK, 3, 1.
2. Use to highlight an entry.
Note
To view a quick list of all your recent calls, press TALK Key from standby mode.
2. Received Calls
Allows you to view the list of incoming calls; up to 40 entries.
1. Press OK, 3, 2.
2. Use to highlight an entry.
3. Dialed Calls
Allows you to view the list of outgoing calls; up to 40 entries.
1. Press OK, 3, 3.
2. Use to highlight an entry.
4. All Calls
Allows you to view the list of missed, received and dialed calls; up to 120 entries.
1. Press OK, 3, 4.
2. The history of all calls are displayed.
5. Call Timer
Allows you to view the duration of selected calls.
1. Press OK, 3, 5.
2. Use to highlight a call list, then press OK.
Last Call/ Home Calls/ Roam
Calls/ All Calls
6. Data Counter
Allows you to view the list of received and transmitted data calls.

1. Press OK, 3, 6.
2. Use to highlight a data call list, then press OK.
Received Data/ Sent Data/
All Data
Multimedia
View, take, and trade your digital pictures right from your wireless phone.
1. Take Photo
1. Press OK, 4, 1.
2. Set the brightness , zoom and press Right Soft Key Options to change other
settings.
_ Use to highlight an option and press OK.
View Mode Fit to Screen/ Landscape
Resolution 640X480/ 320X240/ 176X144/ 160X120
Quality Fine/ Normal/ Economy
Zoom
Brightness
Night Mode On/ Off
Self Timer Off/ 3 Seconds/ 5 Seconds/ 10 Seconds
White Balance Auto/ Sunny/ Cloudy/ Tungsten/ Fluorescent
Color Effects Color, Sepia,Mono, Negative
Template On/ Off
Shutter Sound None/ Sound
1/ Sound 2/ Sound 3/ Say Cheese
Multishot Off/ 3 shots/ 6 shots
3. Take a picture by pressing OK.
4. Press Right Soft Key Delete OK, Send, or Left Soft Key Save. Choose from the following
save options:
_ Save
_ Set As
1. Main Screen
2. Front Screen
3. Picture ID
The picture is stored in Gallery.
2. Record Voice
Allows you to add, listen to, and erase short verbal reminders.
1. Press OK, 4, 2.
2. Press OK Record to record a new voice memo.
3. Talk into the microphone, then press OK Stop.
4. While the highlight is still on the recording, press Right Soft Key Options to access the
following:
Set as/ Rename/ Delete
5. Press Left Soft Key to save.
The default memo title is the date and time of recording.

3. Images
Allows you to select images to customize your phone's Main Screen, Front Screen, or Picture
ID.
1. Press OK, 4, 3.
2. Use to highlight My Images/ Default then press .
3. Use to highlight the image you want to display.
_ Press Right Soft Key
Options to access additional options. Use to highlight an option and press OK.
Set as/ Take Photo/ Delete/ Rename/ Lock/ List View/ Information/ Delete Multiple/ Sort by/
Send via Bluetooth
_ Press OK View to view the selected image.
_ Press Left Soft Key
Send to send the selected image to somebody else.
(This option is only available in My Images).
4. Audios
Allows you to choose audio clips.
1. Press OK, 4, 4.
2. Press Left Soft Key Voice to record an audio clip.
_ Press Left Soft Key Audio to access My Audios list.
_ Press OK Record to begin recording.
_ While recording, press Left Soft Key Pause to pause, or OK Stop to stop recording.
_ When you are finished recording, press Left Soft Key Save to save the audio clip, OK Send
to send the audio clip to somebody else, or Right Soft Key Options to access additional options.
Use to highlight Set as / Rename/ Delete and press OK.
3. Use to highlight My Audios/ Default and press OK.
4. Use to highlight the audio clip.
_ Press Left Soft Key
Send to send the selected audio clip to somebody else.
_ Press OK Play to play the selected audio clip.
_ Press Right Soft Key Options to access additional options. Use to highlight an option
and press OK.
For My Audios: Set as/ Record Voice/ Delete/ Rename/ Lock/ Information / Delete Multiple/
Sort By/ Send Via Bluetooth
For Default: Set as/ Information
5. Shuffle
Allows you to set your wallpaper and ringtone to change randomly. If you turn off the phone,
the setting is deactivated.
1. Press OK, 4, 5.
2. Use to highlight Ringtone List/ Wallpaper List then press OK.
3. Press Left Soft Key Add to begin adding ringtones or wallpapers to the Shuffle list.
4. Use to highlight the desired ringtones or wallpapers and press OK to select them.
5. Press Left Soft Key Done when you are finished selecting the ringtones or wallpapers you
wish to add.

easyedgeSM
easyedgeSM allows you to do more than just talk on your phone. easyedge is a technology and
service that allows you to download and use applications on your phone. With easyedge, it is
quick and easy to personalize your phone to suit your lifestyle and tastes. Just download the
applications that appeal to you. From ringtones and wallpapers to games and productivity tools,
you can be assured you will find something useful, practical, or down right entertaining. There
are new applications constantly available for your use. Downloading Applications You can
download applications and use easyedgeSM where service is available.
Incoming Calls While downloading an application, incoming calls will automatically be sent to
your voice mail, if available. If you do not have voice mail, downloading will not be interrupted
by an incoming call, and the caller will receive a busy signal. When using applications, an
incoming call will automatically pause the application and allow you to answer the call. When
you complete your call, you can resume using the application.
1. easyedge
1. Press OK, 5, 1.
Shortcut
Pressing the right arrow key will start easyedgeSM.
2. easyedge Info
Allows you to choose whether or not the Data Charges Warning message will pop up when
starting easyedge.
1. Press OK, 5, 2.
Managing Your easyedgeSM
Applications
Add new applications and remove old ones at any time.
Removing Applications Only removing an application deletes it completely from the memory
of the phone. To restore an application once it has been removed, you will be charged to
download it again.
1. Access easyedge.
2. Go to my stuff tab.
3. Use to to highlight an application.
4. Press Left Soft Key OPTIONS.
5. Use to highlight Delete, then press OK.
6. Press Left Soft Key YES.
My Schedule
1. Alarm Clock
Allows you to set up to five alarms. At the alarm time, any set alarm will sound the tone of your
choice, and an alarm message will be displayed on the LCD screen.
1. Press OK, 6, 1.
2. Use to highlight the alarm you wish to set, then press OK to select it.
3. Press Left Soft Key Set to set the alarm time.
4. Use to highlight Repeat (recurrence setting).
5. Press to select one of the following.
Once/ Daily/ Mon - Fri/Weekends

6. Use to highlight Ringtones, press Left Soft Key Set and select a ringtone.
7. Press OK Save.
2. Calendar
Allows you to store and access your agenda(s). Simply enter your appointments in the
Calendar, and your phone will alert you with a reminder.
1. Press OK, 6, 2.
2. Use to highlight the scheduled day.
Moves cursor to the left.
Moves cursor to the right.
Moves to the previous week.
Moves to the next week.
3. Press Left Soft Key New.
4. Use to highlight the field you wish to edit, then press Left Soft Key Set to edit your
schedule information:
_ Set Time _ Subject
_ Reminder _ Repeat
_ Repeat End _ Ringtone
5. Press OK Save.
3. Notepad
Allows you to add, read, edit, and erase notes to yourself.
1. Press OK, 6, 3.
2. Press Left Soft Key New to write a new note.
3. Type the note, then press OK.
A confirmation message displays briefly, then displays your list of notes.
Viewing a Notepad Entry
1. Access Notepad and highlight the entry.
2. To erase, press Right Soft Key Options.
_ “1” Delete _ “2” Edit
_ “3” Delete All
To edit a note, highlight the entry, then press OK View and press Left Soft Key Edit. Or press
Right Soft Key Delete.
Note
The Bluetooth features available on this handset may not be compatible with all Bluetooth enabled
devices. Your service provider or handset manufacturer cannot be held responsible for compatibility
issues with devices not sold by the service provider or handset manufacturer.
Note
Read user guide of each Bluetooth accessory that you are trying to pair with your phone because
the instructions may be different.
Bluetooth®
The AX310 is compatible with devices that support the Bluetooth headset and handsfree
profile(s). You may create and store 20 pairings within the AX310 and connect to one device at
Other manuals for AX310
3
Table of contents
Other LG Cell Phone manuals