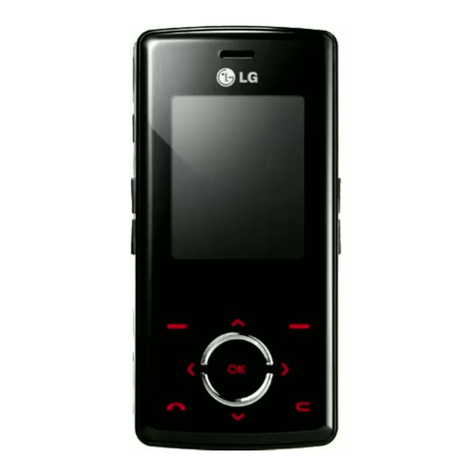
LG BL20 Chocolate User manual

BL20 User Guide
Some of the contents in this manual may
differ from your phone depending on the
software of the phone or your service
provider.

Congratulations on your purchase of the
advanced and compact BL20 phone by LG,
designed to operate with the latest digital
mobile communication technology.
Disposal of your old appliance
1When this crossed-out wheeled bin symbol is attached to a product it
means the product is covered by the European Directive 2002/96/EC.
2All electrical and electronic products should be disposed of separately
from the municipal waste stream via designated collection facilities
appointed by the government or the local authorities.
3The correct disposal of your old appliance will help prevent potential
negative consequences for the environment and human health.
4For more detailed information about disposal of your old appliance,
please contact your city office, waste disposal service or the shop
where you purchased the product.

3
Getting to know your phone .................. 6
Open view.............................................. 7
Installing the SIM and battery................8
Memory card ......................................... 9
Installing a memory card....................... 9
Removing the memory card...................9
Formatting the memory card ................. 9
Your standby screen ............................10
The quick keys ................................... 10
The main menu .................................. 10
The status bar .................................... 11
Calls ............................................... 12
Making a call...................................... 12
Making a call from your contacts .........12
Answering and rejecting a call............. 12
Adjusting the call volume ....................13
Speed dialling..................................... 13
Viewing your call logs ......................... 13
Using call divert.................................. 14
Using call barring................................ 14
Contacts............................................... 15
Searching for a contact.......................15
Adding a new contact ......................... 15
Contact options .................................. 15
Adding a contact to a group ................ 16
Renaming a group .............................. 16
Messaging ........................................... 17
Messaging ......................................... 17
Sending a message ............................17
Entering text....................................... 18
Setting up your email..........................19
Sending an email using your
new account ...................................... 20
Message folders................................. 20
Managing your messages ...................21
Using templates.................................. 21
Changing your email settings .............. 22
Changing your other settings...............22
Camera ............................................... 23
Taking a quick photo........................... 23
After you’ve taken your photo.............. 23
Getting to know the viewfinder............. 24
Viewing your saved photos.................. 24
Setting a photo as Wallpaper or
Picture ID........................................... 24
Contents

LG BL20 | User Guide
4
Video camera.......................................25
Shooting a quick video........................25
After you’ve shot your video ................25
Watching your saved videos ................ 26
Adjusting the volume when viewing a
video ................................................. 26
MP3 player........................................... 27
MP3 player ........................................ 27
Transferring music onto your phone ..... 27
Playing a song.................................... 27
Creating a playlist...............................28
Playing a playlist................................. 28
Editing a playlist .................................28
Deleting a playlist ............................... 29
My stuff ............................................... 30
Images............................................... 30
Images options menu.......................... 30
Sending a photo ................................. 31
Organising your images ......................31
Deleting an image ..............................31
Deleting multiple images..................... 31
Creating a slide show.......................... 32
Sounds .............................................. 32
Using a sound .................................... 32
Videos ............................................... 32
Watching a video................................32
Using options while video is paused.....33
Sending a video clip............................ 33
Video options menu ............................ 33
External memory ................................ 34
Using your phone as a mass storage
device................................................ 34
Transferring a file to your phone .......... 35
Sending and receiving your files using
Bluetooth ........................................... 35
Games and Apps.................................. 37
Games and Apps ................................ 37
Playing a game................................... 37
Viewing applications ........................... 37
Browser ...............................................38
Accessing the web..............................38
Adding and accessing your bookmarks 38
Saving a page ....................................39
Viewing your browser history............... 39
Changing the web browser settings ..... 39
Contents

5
Settings ............................................... 40
Changing your display settings ............ 40
Changing your security settings........... 40
Resetting your phone.......................... 41
Viewing memory status.......................41
Changing your Bluetooth settings.........41
Changing your connectivity settings ..... 41
Pairing with another Bluetooth device . 42
Using a Bluetooth headset................... 42
Accessories ......................................... 43
Network service .................................. 44
Technical data...................................... 44
Guidelines for safe and efficient use... 46

LG BL20 | User Guide
6
Camera
Charger, cable,
handsfree connector
Call key
Dials a phone
number and answers
incoming calls.
Clear key
Deletes a character
with each press.
Use this key to
go back to the
previous screen.
End/Power key
Ends or rejects a call.
Turns the phone on/off.
Returns to the standby screen when
you use the menu.
Main screen
Getting to know your phone
Volume key

7
Battery cover
Battery
Memory card slot
Flash
Open view
Camera lens

LG BL20 | User Guide
8
1 Remove the battery cover and the
battery
Slide down the battery cover and pull out
the battery.
WARNING: Do not remove the battery
when the phone is switched on, as this may
damage the phone.
WARNING: Do not remove the battery
cover when using Wi-Fi or Bluetooth. The
antenna is mounted on the battery cover.
2 Install the USIM card
Slide the USIM card into the USIM card
holder. Make sure the gold contact area on
the card is facing downwards. To remove
the USIM card, gently pull it outwards.
3 Install the battery
Insert the top of the battery into the top
edge of the battery compartment first.
Ensure that the battery contacts align with
the phone’s terminals. Press the bottom of
the battery down until it clips into place.
Installing the SIM and battery

9
Installing a memory card
You can expand the memory space available
on your phone using a memory card. The
BL20 will support a memory card of up to
16 GB.
TIP! A memory card is an optional accessory.
Open the slide covering the memory card
slot. Slide the memory card into the slot, until
it clicks into place. Make sure that the gold
contact area is facing downwards.
Removing the memory card
Open the slide and carefully remove the
memory card by gently pushing it as shown
in the following diagram:
Formatting the memory card
If your memory card is not already formatted,
you will need to do so before you can begin
using it.
1From the standby screen press Menu and
select Settings.
2Choose Memory status and select
External memory.
3Press Format and enter the password,
which is set to 0000 as default. Your card
will be formatted and ready to use.
4To view the new formatted folders on your
BL20 press Menu and select My stuff.
Choose External memory.
WARNING: When you format your memory
card, all the content will be wiped. If you do not
want to lose the data on your memory card,
back it up first.
Memory card

LG BL20 | User Guide
10
Advice to the customer
In order to allow better antenna sensitivity LG suggest that you hold the handset as shown
in the figure below.
0X
Please do not cover the antenna area with your hand during a call or when using a
Bluetooth connection. It may interfere and degrade signal quality.
The quick keys
The quick keys provide easy, one-press
access to your most used functions.
Select to open your message editor.
Select to choose a sound profile for
your phone.
Select to open the quick menu.
Select to open contacts.
The main menu
The main menu provides twelve menu
options. To open the main menu:
1Select Menu.
2The main menu will appear on the screen.
3Move the highlighted image onto your
desired position. And select center key to
open.
Your standby screen

11
The status bar
The status bar uses various icons to indicate
things like signal strength, new messages
and battery life, as well as telling you whether
your Bluetooth is active.
Below is a table explaining the meaning of
icons you’re likely to see in the status bar.
Icon Description
Network signal strength
(number of bars will vary)
No network signal
GPRS available
EDGE available
Flight mode is activated
Calls are diverted
Roaming service
Bluetooth®is activated
WAP service is connected
An alarm is set
Schedule
Icon Description
New message
New voice message
General profile in use
Silent profile in use
Vibrate profile in use
Outdoor profile in use
Headset profile in use
Remaining battery life
Battery empty
Your standby screen

LG BL20 | User Guide
12
Making a call
1Key in the number using the keypad. To
delete a digit press .
2Press to initiate the call.
3To end the call, press .
TIP! To enter + when making an international
call, press and hold 0.
Making a call from your contacts
1Select Contacts from the Standby screen.
2Using the keypad, enter the first letter of
the contact you want to call. For example,
for Office, press 6three times.
3Select Call or press to initiate the
call.
Answering and rejecting a call
When your phone rings, press Accept or
press to answer the call.
While your phone is ringing, press the lock
key, then select Silent to mute the ringing.
This is great if you have forgotten to change
your profile to Silent for a meeting.
Press or select Reject to reject the
incoming call.
TIP! You can change the settings on your phone
to answer your calls in different ways.
Press Menu, select Settings and choose Call
and choose Common settings. Select Answer
mode and choose from Slide open, Any key or
Send key only.
Calls

13
Adjusting the call volume
To adjust the volume during a call, press the
lock key, then press the volume key on the
right hand side of your phone.
Speed dialling
You can assign a speed dial number to a
contact you call frequently.
1Press Contacts and press menu, then
select Speed dials.
2Your voicemail is set to speed dial 1 and
you cannot change this. Select any other
number either by using the navigation
key arrows and selecting Assign or by
pressing the hard key number.
3Your address book will open. Select the
contact you’d like to assign to that number
using the navigation arrows, then select
OK.
To call a speed dial number, press and
hold the assigned number until the contact
appears on screen. The call will initiate
automatically; there’s no need to press .
Viewing your call logs
Press Menu, select Calls. Choose to view:
All calls - View a complete list of all your
dialled, received and missed calls.
Missed calls - View a list of any calls you
have missed.
Dialled calls - View a list of all the numbers
you have called.
Received calls - View a list of all the
numbers that have called you.
Call duration - View details of how long
you have spent on your calls; received and
dialled.
Call costs - View the charges applied to your
Last call or All calls. This service is network
dependent, some operators are unable to
support this.
Data volume - View the amount of all your
received and sent data in kilobytes.
TIP! From any call log select Options and
choose Delete to delete selected or all of the
recorded items.
TIP! Using the navigation key arrows, highlight
any single call entry to view the date and time of
the call. To view the call duration select View.

LG BL20 | User Guide
14
Using call divert
1Select Menu, select Settings and choose
Call.
2Select Call divert.
3Choose whether to divert all calls, when
there is not answered, when you are out of
reach.
4Choose Activate and select whether to
divert to another number or your favourite
number.
5Enter your divert number or select Search
to browse Contacts for your divert
number.
Note: Charges are incurred for diverting
calls. Please contact your network provider
for details.
TIP! To turn off all call diverts, choose
Deactivate all from the Call divert menu.
Using call barring
1Select Menu, select Settings and choose
Call.
2Select Call barring and choose Voice
calls.
3Choose options:
4 Select Activate and enter the call barring
password. Please check with your network
operator for this service.
TIP! Select Fixed dial number from the Call
menu to turn on and compile a list of numbers
which can be called from your phone. You’ll
need your PIN2 code from your operator. When
activated, only numbers included in the fixed dial
list can be called from your phone.
Calls

15
Searching for a contact
1Select Contacts from the standby screen,
and choose Search.
2Using the keypad enter the first letter of
the contact you want to call. For example,
for Office, press 6 three times.
3To scroll through the contacts and their
different numbers use the navigation
arrows.
Adding a new contact
1Select Contacts and choose Create new
contact.
2Choose whether to store your new contact
on your Phone or SIM card.
3Enter all the information you have in the
fields provided and select Save.
Or, using the slightly quicker method…
1Enter the number you wish to store on the
standby screen and select Options.
2Choose Save or Add to existing
contact.
3Enter the relevant information as above
and select Save.
Note: When you are storing a contact’s email
address, press to enter a symbol and
scroll with the navigation arrows until you
see @.
Contact options
There are many things you can do when
viewing a contact. Here’s how to access and
use the Options menu:
1Open the contact you’d like to use. See
Searching contacts above.
2Select Options to open the list of options.
From here you can:
Edit - Change any of the contact’s details.
New message - Send a message to
the contact. If the contact has an email
address, select whether you’d like to send
a Message or Email.
Send via - Send the contact’s details
to another person as a business card.
Choose to send as a Text message,
Multimedia message,via Bluetooth or
by Email.
Delete - Delete the contact. Select Yes if
you are sure.
Contacts

LG BL20 | User Guide
16
New contact - Add a new contact.
Multi delete - Mark multiple contacts to
delete.
Copy to SIM/phone - Choose to move or
copy to the SIM card or phone (depending
on where you originally saved the contact).
Adding a contact to a group
You can save your contacts into groups, for
example, keeping your work colleagues and
family separate.
1Select Contacts and choose Groups.
2Scroll to the group you wish to add a
contact to and select View then select
Add.
3Your contacts will open. Scroll to any
contacts you would like to add to the
group and press , then select Done.
4Select Yes if you are sure.
TIP! You can assign a ringtone or icon to a
group. Select the group you wish to assign the
ringtone or icon to and select Options and
choose an item you want.
Renaming a group
You can rename any of the groups to fit your
lifestyle.
1Select Contacts and choose Groups.
2Select a group you want to rename.
3Choose Options, select Rename and
enter your new group name.
4Select Save.
Note: You can only assign a contact to a
group or add a picture to a contact that is
saved in your phone (not SIM) memory.
Contacts

17
Messaging
Your BL20 includes functions related to SMS
(Short Message Service), MMS (Multimedia
Message Service) and email, as well as the
network’s service messages. Simply press
Menu and select Messaging.
Sending a message
1Press Menu, select Messaging and
choose Create new message.
2Choose Message to send an SMS or
MMS.
3A new message editor will open.
Message editor combines SMS and MMS
into one intuitive and easy to switch
between mode. The default setting of the
message editor is SMS mode.
4Enter your message using either the T9
predictive mode or Abc manual mode.
See Entering text to see how to switch
between the different text entry modes.
5Select Options and choose Insert to add
an Image, Sound, Video,Symbol, Text
template, Emoticon, Name & Number,
New slide, Subject or More (Contact/
My business card/Schedule).
6Press the centre key Send to.
7Enter the phone number or press Options
and select Contacts or Recent list
to open your contacts list. You can add
multiple contacts.
8Select Send.
WARNING: If an Image,Sound,Video,
New slide or Subject is added to the message
editor, it will be automatically converted to MMS
mode and you will be charged accordingly.
Messaging

LG BL20 | User Guide
18
Entering text
You can enter alphanumeric characters using
the phone’s keypad. For example, storing
names in Contacts, writing a message and
creating scheduling events in the calendar
all require entering text. The following text
input methods are available in the phone:
T9 predictive mode, ABC manual mode and
123 mode.
Note: Some fields may allow only one
text input mode (e.g. telephone number in
address book fields).
To turn on T9 mode in the text entry field,
choose Options, select Set T9 and choose
On or simply press and hold for several
seconds. With T9 on, you can switch text
input mode by pressing . You will notice
the text input mode indicator in the upper left
corner of the display.
To input a symbol in the text entry field, press
the key and select a symbol, then
select OK.
Complete each word with a space by
pressing 0.
To delete a character, press key.
T9 predictive mode
T9 predictive mode uses a built-in dictionary
to recognise words you’re writing based on
the key sequences you press. Simply press
the number key associated with the letter
you want to enter, and the dictionary will
recognise the word once all the letters are
entered. For example, press 8,3,5,3,7,4,
6,6,3 to write ‘telephone’.
If the word you want doesn’t appear, select
Options and select New T9 word, then you
can enter the word using ABC manual mode.
Your word will be added to the dictionary.
Note: You can select a different T9 language
by pressing Options and select Writing
language.
ABC manual mode
In ABC manual mode you may need to
press the key repeatedly to enter a letter.
For example, to write ‘hello’, press 4twice,
3twice, 5three times, 5 three times again,
then 6three times.
123 mode
Type numbers using one keystroke per
number. You can also add numbers whilst
in letter modes by pressing and holding the
desired key.
Messaging

19
Setting up your email
You can stay in press on the move using
email on your BL20. It’s quick and simple to
set up a POP3 or IMAP4 email account.
1Press Menu, select Messaging and
choose Settings.
2Select Email then Email account.
3Select New.
4You can now choose how your account
works:
Account name - Enter a name for this
account.
Email address - Enter the account email
address.
My name - Enter your name.
Incoming mail server - Enter the
account details.
User name - Enter the account user
name.
Password - Enter the account password.
Outgoing mail server - Enter the
account details.
Outgoing mail authentication - Select
on or off.
Outgoing server ID - Enter the account
details.
Outgoing server password - Enter the
account details.
To enter the following information, choose
Options and select Advanced settings.
Protocol type - Select the mailbox type,
POP3 or IMAP4.
Maximum receive size - Choose the
size limit of your emails, the maximum is
300KB.
Save to server - Choose whether to
save your emails to the server. For IMAP4
accounts copies are always saved.
APOP secure login - Choose whether
to save your emails to the server of the
phone (only for IMAP4).
Insert signature - Choose whether to
automatically insert a signature in your
emails.
Reply email address - Enter the “reply
to” email address.
Incoming port number - Normally,
this is 110 for POP3 and 143 for IMAP4
accounts.
Outgoing port number - Normally this
is 25.
Auto retrieving - Select to automatically
retrieve your emails.

LG BL20 | User Guide
20
Retrieve download - Select Headers
only, Headers + body (only for IMAP4)
or All.
Now your account is set up, it will appear
in the list of accounts in your Email folder.
Sending an email using your new
account
To send/receive an email, you should set up
an email account.
1Select Menu, select Messaging and
choose Create new message.
2Choose Email and a new email will open.
3 Write a subject then press OK.
4Enter your message using T9 predictive
mode or ABC manual mode. See Entering
text to see how to switch between the
different text entry modes.
5 Select Options and choose an attachment
to add: Image, Sound, Video,
Document, Contact, My business card
or Schedule.
6 Press Send and enter the recipient’s
address or press Options and select
Contacts to open your contacts list.
7 Press Send and your email will be sent.
Message folders
Press Menu, select Messaging. The folder
structure used on your BL20 is fairly self-
explanatory.
Inbox - All the messages you receive are
placed into your Inbox. From here you can
reply, forward and more, see below for
details.
Email box - Contains all your email
messages. Select the account you want to
use then select Retrieve.Your BL20 will
connect to your email account and retrieve
your new messages.
Drafts - If you don’t have time to finish
writing a message, you can save what you
have done so far here.
Outbox - This is a temporary storage folder
while messages are being sent.
Sent - All the messages you send are placed
into your Sent folder.
Templates - A list of useful messages,
already written for a quick reply.
Messaging
Other manuals for BL20 Chocolate
2
Table of contents
Other LG Cell Phone manuals