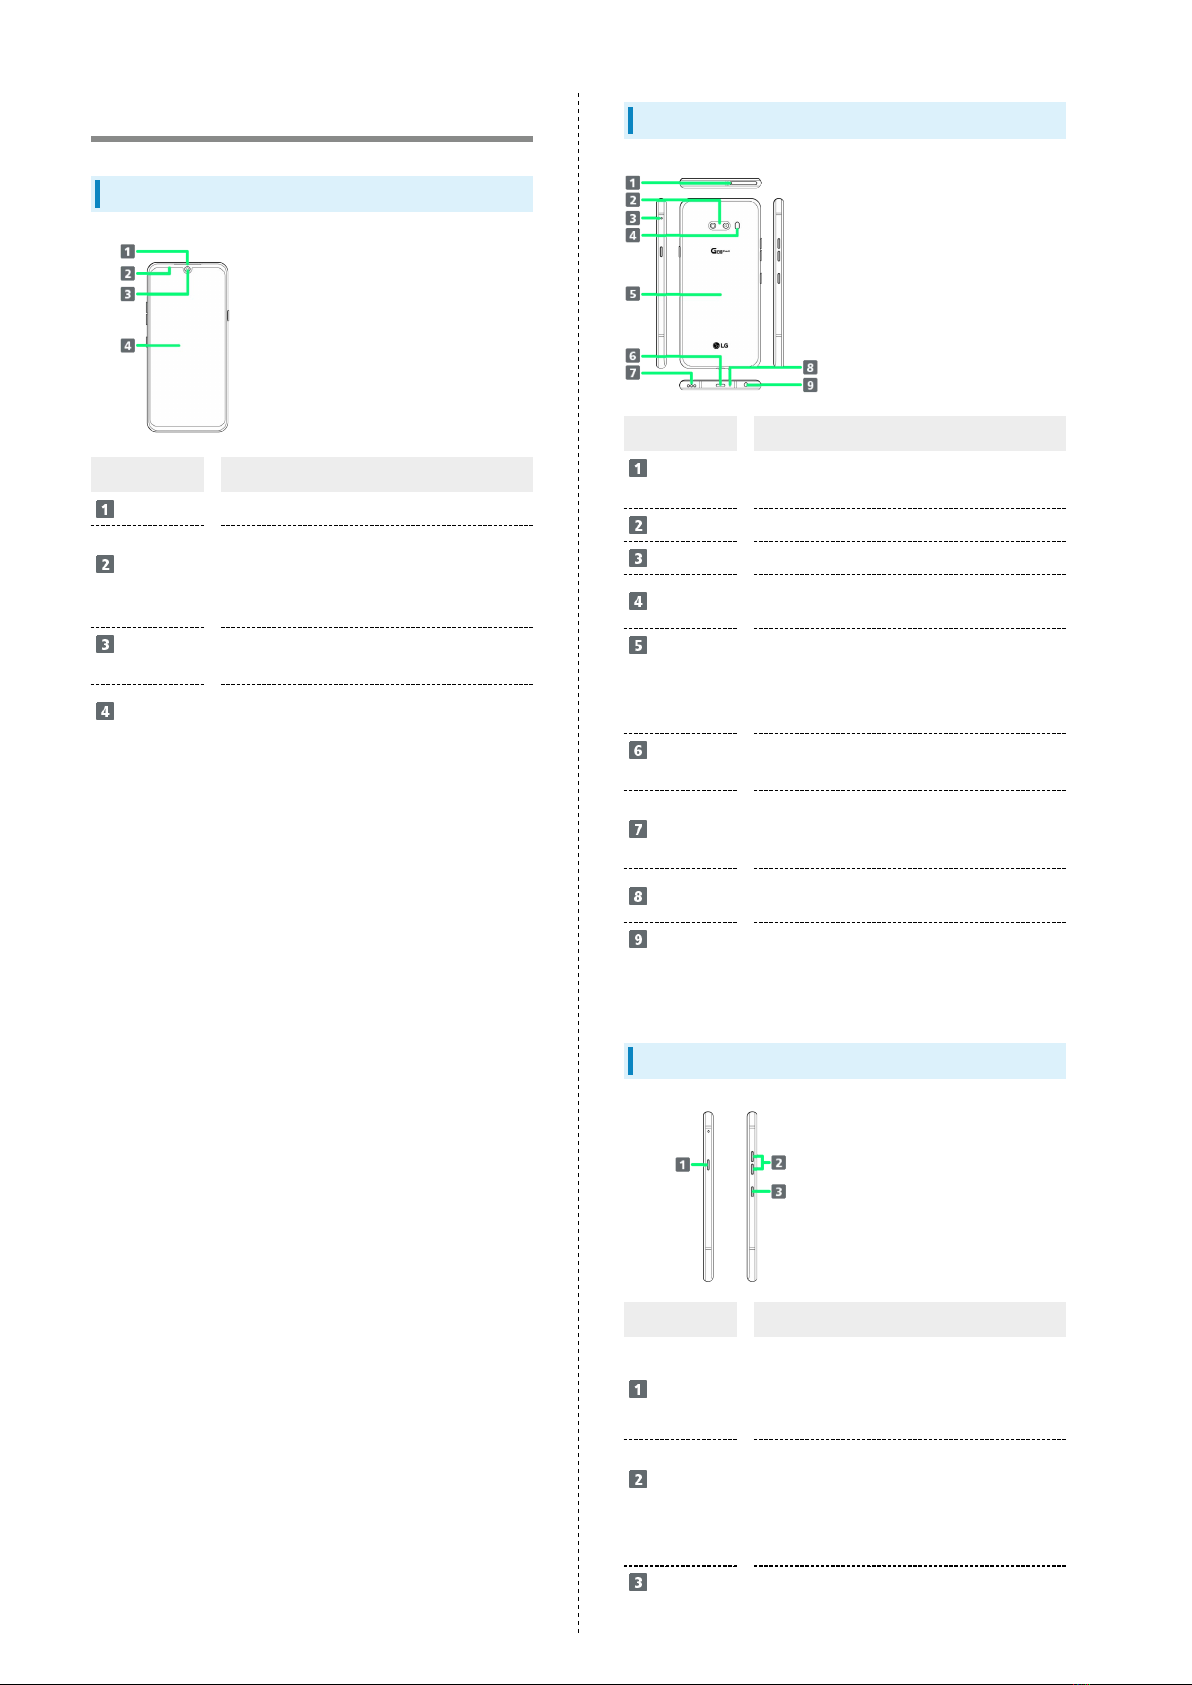
8
Removing USIM Card
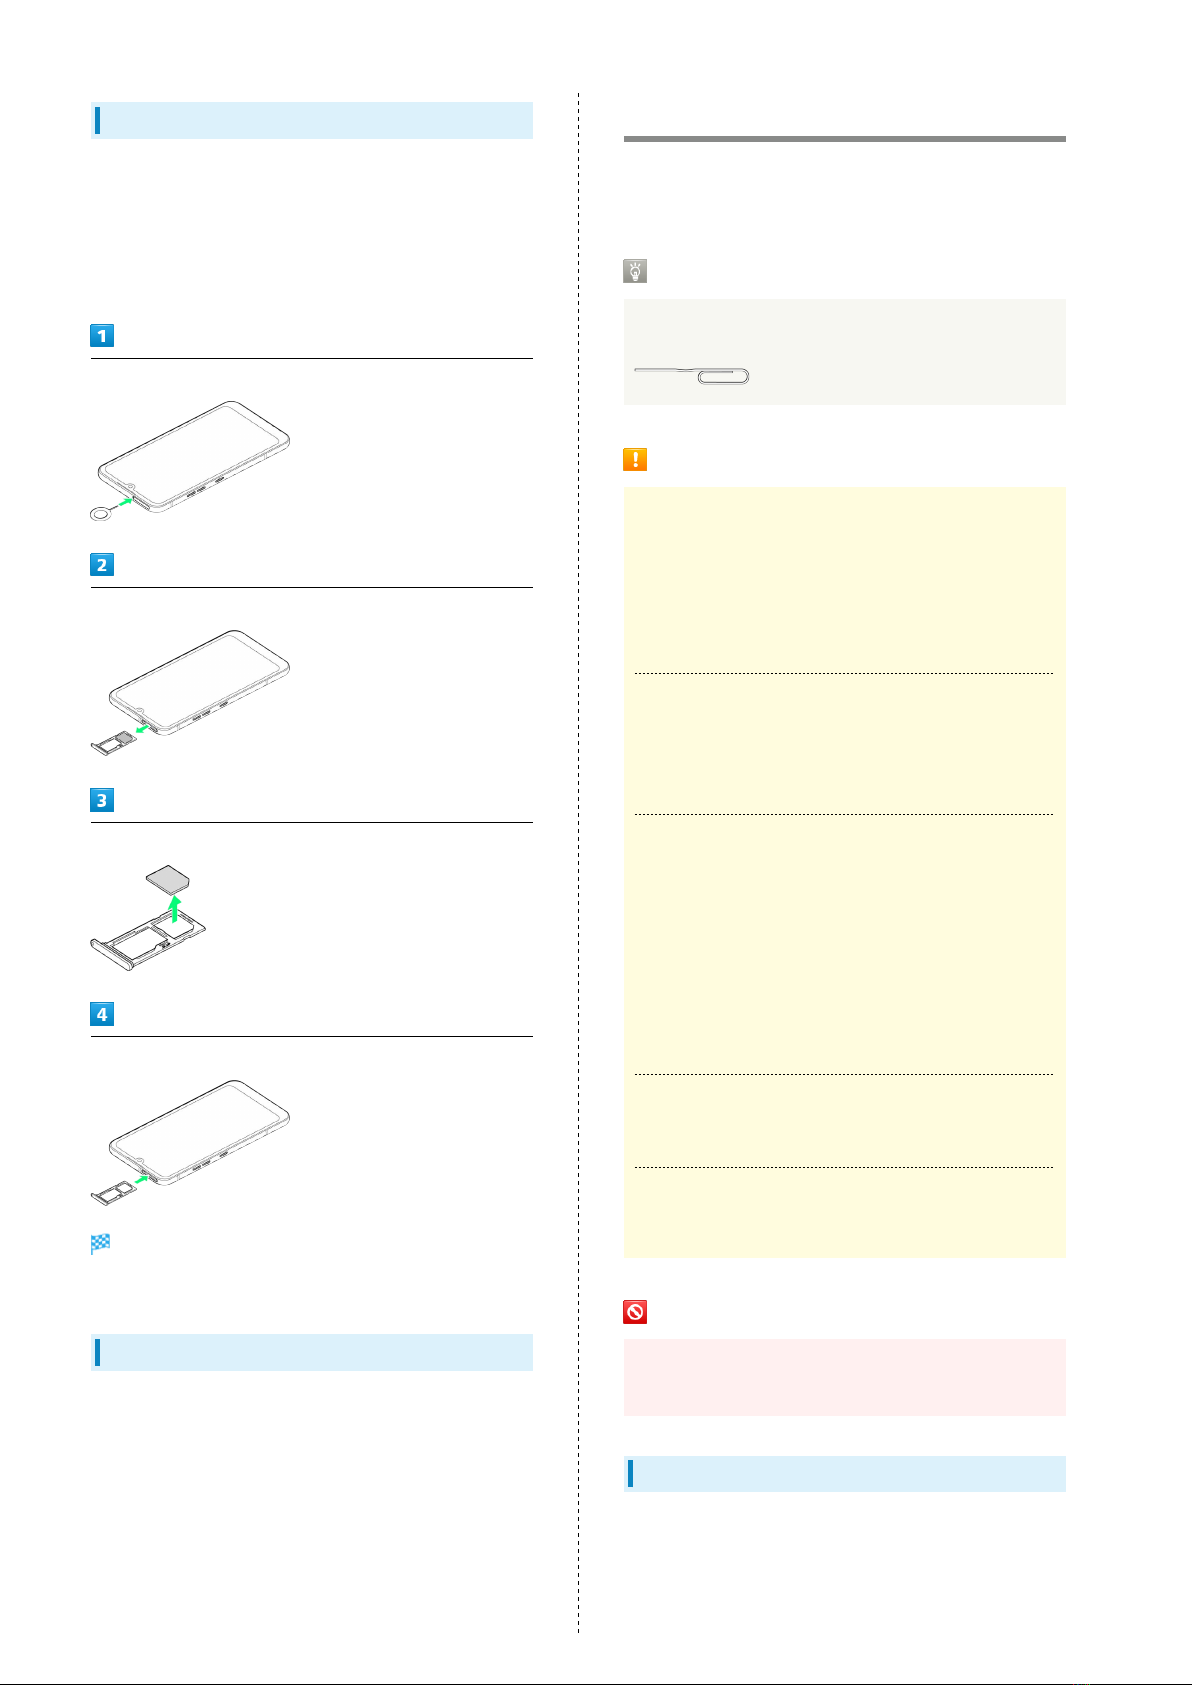
Always power off beforehand.
・The bundled USIM Card Opener (sample) is necessary to
attach/remove Tray.
・Attach/remove USIM Card after unmounting SD Card if SD
Card is mounted. For details, see "Unmounting SD Card."
Insert USIM Card Opener horizontally in Tray Eject Hole
Pull Tray out straight and remove Tray from handset
Remove USIM Card from Tray
Insert Tray in handset straight all the way
USIM Card is removed.
・Make sure there is no gap between handset and Tray.
SIM-Unlocking Handset
Handset can be SIM-unlocked. SIM-unlocking handset permits
other-carrier SIM cards to be used with it.
・Some services, functions, etc. may have restrictions when
an other-carrier SIM card is used. SoftBank Corp. does not
guarantee operation whatsoever.
・For details, see SoftBank Website.
Internal Storage/SD Card
Internal storage and SD Card can be used for saving data.
Handset supports SD Cards up to 512 GB. Some SD Cards may
not operate properly.
Handling USIM Card Opener
Use a paper clip if USIM Card Opener is lost. Do not use a
sharp object (pin, etc.) instead of using USIM Card Opener.
SD Card Cautions
Data
Information stored on SD Card can be lost or changed
accidentally or as a result of damage. It is recommended
that you keep a separate copy of important data. SoftBank
Corp. is not responsible for damages from data that is lost
or changed.
microSDXC Card
Handset supports microSDXC Cards (SDXC-compatible SD
Cards). microSDXC Cards are supported by SDXC-compatible
devices only.
Exchanging Data with Non-SDXC-Compatible
Devices
Inserting microSDXC Card used on handset in a non-
SDXC-compatible device may corrupt card data. To use
a corrupted microSDXC Card, format it on an SDXC-
compatible device. Formatting deletes all microSDXC Card
data. To exchange data between handset and non-SDXC-
compatible devices, use SD Cards (microSDHC/microSD
Cards) supported by handset and those devices.
Reading/Writing Data
Never power off while reading or writing data.
Battery Level
A low battery charge may prevent reading/writing data.
Handling SD Card
Use/keep SD Cards away from the reach of infants. May
cause choking if swallowed.
Inserting SD Card
Always power off beforehand.
・The bundled USIM Card Opener (sample) is necessary to
attach/remove Tray.