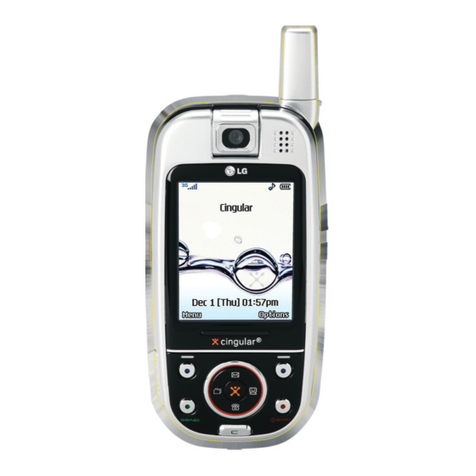
LG KF755d User manual

KF755d User Guide
- English
Disposal of your old appliance
1. When this crossed-out wheeled bin symbol is attached to a product it means
the product is covered by the European Directive 2002/96/CE.
2. All electrical and electronic products should be disposed of separately from the
municipal waste stream via designated collection facilities appointed by the
government or the local authorities.
3. The correct disposal of your old appliance will help prevent potential negative
consequences for the environment and human health.
4. For more detailed information about disposal of your old appliance, please
contact your city office, waste disposal service or the shop where you purchased
the product.
This document is the user guide for the KF755d Mobile Phone.
All rights for this document are reserved by LG Electronics. Copying, modifying and
distributing this document without the consent of LG Electronics are prohibited.

Part 15.21 statement
" Change or Modifications that are not expressly approved by the manufacturer could void
the user's authority to operate the equipment. "
Part 15.105 statement
This equipment has been tested and found to comply with the limits for a class B digital device,
pursuant to Part 15 of the FCC Rules.
These limits are designed to provide reasonable protection against harmful interference in a
residential installation.
This equipment generates uses and can radiate radio frequency energy and, if not installed and used
in accordance with the instructions, may cause harmful interference to radio communications.
However, there is no guarantee that interference will not occur in a particular installation. if this
equipment does cause harmful interference or television reception, which can be determined by
turning the equipment off and on, the user is encouraged to try to correct the interference by one or
more of the following measures:
- Reorient or relocate the receiving antenna.
- Increase the separation between the equipment and receiver.
- Connect the equipment into an outlet on a circuit different from that to
which the receiver is connected
- Consult the dealer or an experienced radio/TV technician for help.

LIMITED WARRANTY STATEMENT
1. WHAT THIS WARRANTY COVERS:
LG offers you a limited warranty that the enclosed subscriber unit and its enclosed accessories will be
free from defects in material and workmanship, according to the following terms and conditions:
(1) The limited warranty for the product extends for ONE (1) year beginning on the data of purchase
of the product.
(2) The limited warranty extends on to the original purchaser of the product and is not assignable or
transferable to any subsequent purchaser/end user.
(3) This warranty is good only to the original purchaser of the product during the warranty period as
long as it is in the U.S., including Alaska, Hawaii, U.S. Territories and Canada.
(4) The external housing and cosmetic parts shall not be covered under these limited warranty terms.
(5) Upon request from LG, the consumer must provide information to reasonably prove the date of
purchase.
(6) The customer shall bear the cost of shipping the product to the Customer Service Department of
LG. LG shall bear the cost of shipping the product back to the consumer after the completion of
service under this limited warranty.
2. WHAT THIS WARRANTY DOES NOT COVER:
(1) Defects or damages resulting from use of the product in other than its normal and customary
manner.
(2) Defects or damages from abnormal use, abnormal conditions, improper storage, exposure to
moisture or dampness, unauthorized modifications, unauthorized connections, unauthorized repair,
misuse, neglect, abuse, accident, alteration, improper installation, or other acts which are not the
fault of LG, including damage caused by shipping blown fuses spills of food or liquid.
(3) Breakage or damage to antennas unless caused directly by defects in material or workmanship.
(4) That the Customer Service Department at LG was net notified by consumer of the alleged defect
or malfunction of the product during the applicable limited warranty period.
(5) Products which have had the serial number removed or made illegible.
(6) The limited warranty is in lieu of all other warranties, express or implied either in fact or by
operations law, statutory or otherwise, including, but limited to any implied warranty of
marketability or fitness for a particular use.
(7) Damage resulting from use of non-LG approved accessories.
(8) All plastic surfaces and all other externally exposed parts that are scratched or damaged due to
normal customer use.
(9) Products operated outside published maximum ratings.
3
(10) Products used or obtained in a rental program.
(11) Consumables (such as fuses).
3. STATE LAW RIGHTS:
No other express warranty is applicable to this product. THE DURATION OF ANY IMPLIED
WARRANTIES, INCLUDING THE IMPLIED WARRANTY OF MARKETABILITY, IS LIMITED
TO THE DURATION OF THE EXPRESS WARRANTY HEREIN. LG INFOCOMM INC. SHALL
NOT BE LIABLE FOR THE LOSS OF THE USE OF THE PRODUCT, INCONVENIENCE, LOSS
OR ANY OTHER DAMAGES, DIRECT OR CONSEQUENTIAL, RISING OUT OF THE USE OF,
OR INABILITY TO USE, THIS PRODUCT OR FOR ANY BREACH OF ANY EXPRESS OR
IMPLIED WARRANTY, INCLUDING THE IMPLIED WARRANTY OF MARKETABILITY
APPLICABLE TO THIS PRODUCT. Some states do not allow the exclusive of imitation of incidental
or consequential damages or limitations on how long an implied warranty lasts; so these limitations or
exclusions may not apply to you. This warranty gives you specific legal rights and you may also have
other rights which vary from state to state.
4. HOW TO GET WARRANTY SERVICE:
To obtain warranty service, please call the following web address:
www.lgeservice.com

8
For Your Safety
Important Information
This user guide contains important information on the use and
operation of this phone. Please read all the information
carefully for optimal performance and to prevent any damage
to or misuse of the phone. Any changes or modifications not
expressly approved in this user guide could void your warranty
for this equipment.
Before You Start
Safety Instructions
WARNING! To reduce the possibility of electric shock, do not
expose your phone to high humidity areas, such as the
bathroom, swimming pool, etc.
Always store your phone away from heat. Never store your
phone in settings that may expose it to temperatures less than
32°F or greater than 104°F, such as outside during extreme
weather conditions or in your car on a hot day. Exposure to
excessive cold or heat will result in malfunction, damage
and/or catastrophic failure.
Be careful when using your phone near other electronic
devices. RF emissions from your mobile phone may affect
nearby in adequately shielded electronic equipment. You
should consult with manufacturers of any personal medical
devices such as pacemakers and hearing aides to determine if
they are susceptible to interference from your mobile phone.
Turn off your phone in a medical facility or at a gas station.
Never place your phone in a microwave oven as this will
cause the battery to explode.
IMPORTANT! Please read the TIA SAFETY INFORMATION on
page 78 before using your phone.
Safety Information
Read these simple guidelines. Breaking the rules may be
dangerous or illegal. Further detailed information is given in this
user guide.
]Never use an unapproved battery since this could damage
the phone and/or battery and could cause the battery to
explode.
]Never place your phone in a microwave oven as it will
cause the battery to explode.
]Do not dispose of your battery by fire or with hazardous or
flammable materials.
]Make sure that no sharp-edged items come into contact
with the battery. There is a risk of this causing a fire.
]Store the battery in a place out of reach of children.
]Be careful that children do not swallow any parts such as
rubber plugs (earphone, connection parts of the phone,
etc.). This could cause asphyxiation or suffocation.

9
For Your Safety
]Unplug the power cord and charger during lightning storms
to avoid electric shock or fire.
]When riding in a car, do not leave your phone or set up the
hands-free kit near to the air bag. If wireless equipment is
improperly installed and the air bag is activated, you may be
seriously injured.
]Do not use a hand-held phone while driving.
]Do not use the phone in areas where its use is prohibited.
(For example: aircraft).
]Do not expose the battery charger or adapter to direct
sunlight or use it in places with high humidity, such as a
bathroom.
]Never store your phone in temperatures less than- 4°F or
greater than 122°F.
]Do not use harsh chemicals (such as alcohol, benzene,
thinners, etc.) or detergents to clean your phone. There is a
risk of this causing a fire.
]Do not drop, strike, or shake your phone severely. Such
actions may harm the internal circuit boards of the phone.
]Do not use your phone in high explosive areas as the phone
may generate sparks.
]Do not damage the power cord by bending, twisting, pulling,
or heating. Do not use the plug if it is loose as it may cause
a fire or electric shock.
]Do not place any heavy items on the power cord. Do not
allow the power cord to be crimped as it may cause fire or
electric shock.
]Do not handle the phone with wet hands while it is being
charged. It may cause an electric shock or seriously
damage your phone.
]Do not disassemble the phone.
]Do not place or answer calls while charging the phone as it
may short-circuit the phone and/or cause electric shock or
fire.
]Only use the batteries, antennas, and chargers provided by
LG. The warranty will not be applied to products provided by
other suppliers.
]Only authorized personnel should service the phone and its
accessories. Faulty installation or service may result in
accidents and consequently invalidate the warranty.
]Do not hold or let the antenna come in contact with your
body during a call.
]An emergency call can be made only within a service area.
For an emergency call, make sure that you are within a
service area and that the phone is turned on.

10
For Your Safety
FCC RF Exposure Information
WARNING! Read this information before operating the phone.
In August 1996, the Federal Communications (FCC) of he United
States, with its action in Report and Order FCC 96-326, adopted
an updated safety standard for human exposure to radio
frequency (RF) electromagnetic energy emitted by FCC
regulated transmitters. Those guidelines are consistent with
the safety standard previously set by both U.S. and
international standards bodies.
The design of this phone complies with the FCC guidelines and
these international standards.
CAUTION
Use only the supplied and approved antenna. Use of
unauthorized antennas or modifications could impair call
quality, damage the phone, void your warranty and/or result in
violation of FCC regulations. Do not use the phone with a
damaged antenna. If a damaged antenna comes into contact
with skin, a minor burn may result. Contact your local dealer
for a replacement antenna.
Body-worn Operation
This device was tested for typical body-worn operations with
the back of the phone kept 0.79 inches (2cm) between the
user’s body and the back of the phone. To comply with FCC RF
exposure requirements, a minimum separation distance of 0.79
inches(2cm) must be maintained between the user's body
and the back of the phone. Third-party belt-clips, holsters, and
similar accessories containing metallic components should not
be used. Body-worn accessories that cannot maintain 0.79
inches(2cm) separation distance between the user's body
and the back of the phone, and have not been tested for typical
body-worn operations may not comply with FCC RF exposure
limits and should be avoided.

11
For Your Safety
Vehicle Mounted External Antenna
(optional, if available)
A minimum separation distance of 8 inches (20cm) must be
maintained between the user/bystander and the vehicle
mounted external antenna to satisfy FCC RF exposure
requirements. For more information about RF exposure, visit
the FCC website at www.fcc.gov
FCC Part 15 Class B Compliance
This device and its accessories comply with part 15 of FCC
rules. Operation is subject to the following two conditions:
(1) This device and its accessories may not cause harmful
interference, and (2) this device and its accessories must
accept any interference received, including interference that
may cause undesired operation.
Cautions for Battery
]Do not disassemble.
]Do not short-circuit.
]Do not expose to high temperature: 60°C (140°F).]
]Do not incinerate.
Battery Disposal
]Please dispose of your battery properly or bring to your
local wireless carrier for recycling.
]Do not dispose in fire or with hazardous or flammable
materials.
Adapter (Charger) Cautions
]Using the wrong battery charger could damage your phone
and void your warranty.
]The adapter or battery charger is intended for indoor use
only.
Do not expose the adapter or battery charger to direct sunlight
or use it in places with high humidity, such as the bathroom.

14
How to Use Touch Keys
Cautions for Touch Keys
1. Make sure your hands are clean and dry.
- Remove all moisture from the surface of
your hands or the touch keys in a humid
environment.
2.
You do not need to press hard on the
touch keys to make them work normally.
Do not subject the product to severe
impact, as this may damage the touch key
sensors.
3. Use the tip of your finger to press exactly
on the touch key you want, being careful
not to touch the keys for other functions.
4. When both the home screen and touch
key lights are off, pressing a touch key will
not turn on the home screen light. Press
Eand the home screen light will turn back
on(touch keys do not work when the
touch key lights are off).
5. If the slide is closed and the Touch
Protection function is on, during calls the
Touch key Lock function is automatically
enabled. (For details, see “Touch Key
Status When Using Mobile Phone”.)
]This product’s keys on the slide are touch keys.
]Be sure to read “Cautions for Touch Keys” before using touch keys.

How to Use Touch Keys
15
6.
Touch keys may not work normally if a
mobile phone case or plastic cover is
covering them. Also, touch keys may not
work normally if you are wearing gloves.
7.
Keep metal and other conductive materials
away from the surface of the touch keys, as
contact with them may result in an error.
Touch Key Status When
Using Mobile Phone
When the slide is closed, to prevent
indiscreet action of the touch keys whilst
using the phone or during calls, the Touch
Protection function is automatically enabled.
(In this case, the touch keys will not work
even if they are pressed)
1. When slide is closed
- When the slide is closed, the Touch
Protection function is automatically
enabled. (Opening the slide will
automatically disable it.)
- To disable Touch protection when the slide
is closed, press OK key on displaying
Unlock key. And then, press OK key again.
2. During calls
- During calls, regardless of slide status, the
Touch Protection function is automatically
enabled.
- To disable the Touch Protection, press OK
key twice.
- After disabling the Touch key Lock,
if there is no key action for a certain
duration (User defined), the Touch
Protection function is enabled again.
Note
]
For user convenience, the touch key
image with the functions of each
touch key is shown on the home
screen when purchasing products.

Getting Started
16
Getting Started
Installing the SIM card
and battery
1. Installing the SIM card.
Your SIM card contains your phone number,
service details and contacts and must be
inserted into your handset. If your SIM card
is removed then your handset becomes
unusable (except for emergency calls) until a
valid one is inserted. Always disconnect the
charger and other accessories from your
handset before inserting and removing your
SIM card. Slide the SIM card into the SIM
card holder. Make sure that the SIM card is
properly inserted and the gold contact area
on the card is facing downwards. To remove
the SIM card, press down lightly and pull it in
the reverse direction.
To insert the SIM card To remove the SIM card
2. Installing the battery.
Slide the battery upwards until it snaps back
into place.
Note
]
The metal contact of the SIM card can
easily be damaged by scratches. Pay
special attention to the SIM card while
handling. Follow the instructions
supplied with the SIM card.

To remove the battery.
Turn the power off. (If the power is left on,
there is a chance you could lose the stored
telephone numbers and messages.)
Press and hold down the battery release
button and slide the battery down.
Charging the Battery
Before connecting the travel adapter to the
phone you must first install the battery.
1. With the arrow facing you as shown in the
diagram push the plug on the battery
adapter into the socket on the left side of
the phone until it clicks into place.
2. Connect the other end of the travel
adapter to the mains socket.
3. The moving bars on the battery icon will
stop after charging is complete.
4. Ensure the battery is fully charged before
using the phone for the first time.
Getting Started
17
Note
]
Only use the charger included in the box
.
CAUTION!
• Do not force the connector as this may
damage the phone and/or the travel adapter.
• If you use the battery pack charger when
abroad, use an attachment plug adaptor for
the proper configuration.
• Do not remove your battery or the SIM card
while charging.

Getting Started
18
Getting Started
How to use a microSD
memory card
<How to insert a microSD memory card>
1. Turn the phone off. Inserting or removing
the microSD when the phone is on may
damage the files stored in the memory
card.
2. Lift the plastic cover which protects the
microSD slot.
WARNING!
• Unplug the power cord and charger during
lightning storms to avoid electric shock or
fire.
• Make sure that no sharp-edged items such as
animal teeth or nails, come into contact with
the battery.
This may cause a fire.
<MicroSD memory card>

3. Insert the memory card into the slot.
The gold contacts must be kept on the
back of the microSD. Don’t push the
microSD too much. If it doesn't go into
the slot easily, you may be trying to insert
it in the wrong way or there could be a
foreign object in the slot.
4. Once inserted, push the memory card until
you hear a Click, meaning that the
microSD has been correctly engaged.
5. Close the plastic slot protection.
6. To remove the memory card, turn the
phone off, open the slot protection and
push the microSD to unlock it. Carefully
extract the memory card.
Attention:
]
Avoid using the Flash Memory Card when
the battery is low.
]
When writing to the card, wait for the
operation to complete before removing
the card.
]
The card is designed to fit easily into the
system one way only.
]
Do not bend the card or force it into the slot.
]
Do not insert any memory cards other
than those made by microSD.
]
If the microSD has been formatted using
FAT32, format the microSD using FAT16
again.
For more information on the microSD, please
refer to the memory card instruction manual.
Memory card formatting
Before you start to use the memory card you
have to format it. After you insert the
memory card, select Menu >Settings >
Phone settings >Memory manager >
External memory, then press - the left
soft key.
Getting Started
19

Getting Started
20
Getting Started
This operation should only be done when
you insert the memory card for the first time.
During formatting various folders will be
created for different data types.
Turning the handset
on/off
Turning your handset on
Ensure that your SIM card is in your handset
and the battery is charged. Press and hold E
until the power comes on. Enter the SIM PIN
code that was supplied with your SIM card if
the PIN code request is set to On. (Note:
Please refer to page 79)
After a few seconds you will be registered on
the network.
Turning your handset off
Press and hold Euntil the power goes off.
There may be a few seconds delay while the
handset powers down.
Do not turn the handset on again during this
time.
Access codes
You can use the access codes described in
this section to avoid unauthorised use of your
phone. The access codes (except the PUK
and PUK2 codes) can be changed by using
the Change codes feature [Menu #.2.6.3].
PIN code (4 to 8 digits)
The PIN (Personal Identification Number)
code protects your SIM card against
unauthorised use. The PIN code is usually
supplied with the SIM card. When the PIN
code request is set to On, your phone will
request the PIN code every time it is
switched on. When the PIN code request is
set to Off, your phone connects to the
network directly without the PIN code.
PIN2 code (4 to 8 digits)
The PIN2 code, supplied with some SIM
cards, is required to access functions such as
Fixed dial number. These functions are only
available if supported by your SIM card.

PUK code (8 digits)
The PUK (PIN Unblocking Key) code is
required to unblock a blocked PIN code. The
PUK code may be supplied with the SIM
card. If not, contact your network operator’s
customer service department for the code. If
you lose the code, contact your network
operator’s customer service department.
PUK2 code (8 digits)
The PUK2 code, supplied with some SIM
cards, is required to unblock a blocked PIN2
code. If you lose the code, contact your
network operator’s customer service
department.
Security code (4 digits)
The security code prevents unauthorised use
of your phone. The default security code is
set to ‘0000’ and the security code is
required to delete all phone entries and to
restore the handset to the factory settings.
Display information
No SIM idle screen
This is the initial screen of the phone that
appears when there is no SIM card installed
in the phone, or the installed SIM card is
invalid. In this screen, users can only make
emergency calls, and turn the phone off. To
turn the phone off, press and hold down E
for a few seconds.
Screen structure
If there is no SIM card installed, an animation
telling you to insert a SIM card appears. If
the SIM card inserted into the phone is
invalid, an animation telling you that the SIM
card is locked appears.
Emergency call function
The right soft key is represented by
“Emergency” on the screen. Press the right
soft key or dial your emergency number
using the number keys, and then press Oto
make an emergency call.
Getting Started
21

Getting Started
22
Getting Started
Idle screen
The idle screen appears when you have
installed a proper SIM card and turned the
phone on.
Screen structure
Idle screen consists of the operator's name,
indicators, date and time on a background
image. You can change the wallpaper in the
Display settings menu.
Numbering screen
The numbering screen appears when a
number key is pressed in the idle screen.
Screen structure
The numbering screen consists of status
indicators, dialled number and soft menu.
Status indicators are the same as those of
the idle screen. You can change the size and
colour of the dialling font in the Display
settings menu. You can make a call while
dialling a phone number by pressing S.
Soft key
You can use the soft keys for several
functions while dialling a number. Using the
left soft key, you can make a video call, send
a message to the number, save the number to
Contacts, search contacts.
Handset lock screen
When the Handset lock function is selected,
you can only make an emergency call, release
the lock, and turn off the phone in this
screen. As always, you can turn the phone off
by pressing and holding Efor a few seconds.
Screen structure
The screen structure of the Handset lock
screen is the same as that of the idle screen.
Emergency call function
You can make an emergency call using the
right soft key. As with the No SIM idle
screen, only emergency numbers can be
dialled.

Unlock function
If you press key except right soft key and
number key, a popup screen appears asking
you to input the Security code to unlock the
phone. The Security code is configured in the
Change codes (#. Settings >2. Phone
settings >6. Security >3. Change codes).
If you key in an incorrect Security Code, the
phone will remain in Handset lock status. If
you key in the correct Security code, the
phone will be unlocked, and the idle screen
will be displayed. If you have turned the
phone off in the Handset lock status, you
will find the phone remains in Handset lock
status when you turn it on.
Barring password
This service obstructs calling service in some
conditions. This condition can be edited
using the Call barring feature (#. Settings
>4. Call settings >2. Call barring). The
barring password is required when you use
the call barring function. The password is
obtained from your network operator's
customer service when you subscribe to this
service. While this service is activated, the
caller will hear the information message that
the call is not connected because of the call
barring.
Getting Started
23

General Functions
24
General Functions
Making and answering calls
Making a voice call
1. Enter the number including the full area
code.
]
To delete a digit press C.
To delete all digits press and hold C.
2. Press Sto make the call.
3. Press Eto finish the call, or close the
handset.
Making a call from the call logs
1. In standby mode, press Sand the
latest incoming, outgoing and missed
phone numbers will be displayed.
2. Select the desired number by using D/
U.
3. Press Sto call the number.
Making a voice call from
Contacts
It is easy to call anyone whose number you
have stored in your Contacts.
1. Press Dto access the contacts list.
2. Scroll to the contact to make a call.
3. Press Sto make a voice call. Press the
left soft key and select Make video call to
make a video call.
4. Press Eto finish the call.
Making international calls
1. Press and hold
0
for the international
prefix. The ‘+’ character prefixes the
international access code.
2. Enter the country code, area code, and
the phone number.
3. Press S.
Note
]
To activate the speakerphone during a
call, activate the touch keys and press
O
.

General Functions
25
Adjusting the volume
During a call, if you want to adjust the
earpiece volume, use
A
on the left side of the
phone. In idle mode, you can adjust the key
volume using
A
.
Answering a call
When you receive a call, the phone rings and
the flashing phone icon appears on the
screen. If the caller can be identified, the
caller’s phone number (or name if stored in
your Contacts) is displayed.
1. Open the slider to answer an incoming
call.
Note
]
To reject an incoming call, press Eor
the right soft key twice.
]
If you set
Answer mode
as
Press send
key
(Menu #.5.0.4), you can answer
the call by pressing Safter opening
the slider.
]
If the answer mode is set to Press any
key, any key will answer a call except for
E.
2. End the call by closing the handset or
pressing E.
Note
]
You can answer a call while using the
Contacts or other menu features.
]
When the compatible headset is
connected, you can also answer a call
using the headset key, as well as using
the phone. To reject an incoming call,
press E
.
]
You can mute the ringtone when a call
comes in by pressing and holding the
volume down side key.

General Functions
26
General Functions
T9 mode
This mode lets you enter words with only
one keystroke per letter. Each key on the
keypad has more than one letter. The T9
mode automatically compares your
keystrokes with an internal dictionary to
determine the correct word, thus requiring
far fewer keystrokes than the traditional
ABC mode. This is sometimes known as
predictive text. If you press #key for a
long time, you can activate or cancel T9
mode.
ABC mode
This mode lets you enter letters by
pressing the key labelled with the required
letter once, twice, three or four times until
the letter is displayed.
123 mode (Number mode)
Type numbers using one keystroke per
number.
Shortcut to activate vibrate
mode
You can activate the vibrate only mode by
pressing and holding down #after
opening the phone.
Signal strength
You can check the strength of your signal by
the signal indicator on the LCD screen of
your phone. Signal strength can vary,
particularly inside buildings. Moving close to
a window may improve reception.
Entering text
You can enter alphanumeric characters
using the keypad.
For example, storing names in Contacts,
writing a message, creating a personal
greeting or scheduling events in the calendar
all require entering text.
The following text input methods are
available with the handset.
Table of contents
Other LG Cell Phone manuals