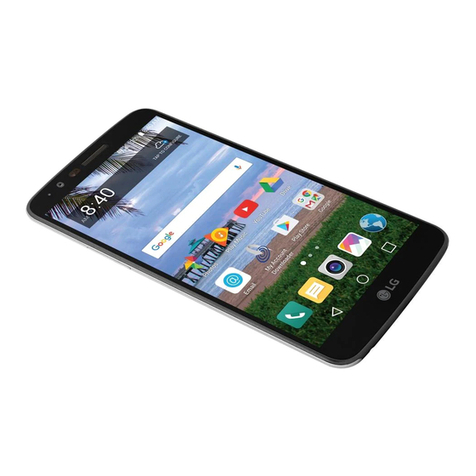
LG X Style User manual

LOCATE THE ACTIVATION CARD
INSIDE YOUR PACKAGE FIRST
Once you receive confirmation that the service has been
Activated, follow the instructions below to complete
your Activation.
2. SET UP YOUR PHONE
1. Turn your phone OFF and back ON.
2. Make a call.
3. If your call is successful, you are finished. If the call fails,
wait a few minutes and repeat these steps.
Questions?
Visit TracFone.com or call 1-800-867-7183
START HERE
1. ACTIVATEYOUR SERVICE
Go to TracFone.com or call 1-800-867-7183 to Activate your
service. Be ready to provide the following:
• Service Plan PIN. You may also purchase one during
Activation using a credit or debit card.
• IMEI for this device (shown below)
• If you transfer your number from a different company,
provide the accurate:
• ACTIVE phone number to transfer
• Current Service Account Number, Name and Address
• Current Service Account Password or PIN
• Alternate contact phone number
®
PLEASE READ THE TERMS AND CONDITIONS OF SERVICE IN THIS
PACKAGE (or at TracFone.com) BEFORE ACTIVATING YOUR PHONE
ORANY SERVICE PLANS.
®
CREATE AN ACCOUNT
Create an account at TracFone.com to maximize
your TracFone experience. Benefits Include:
• TracFone Programs • Promotions
• Offers • And much more...
KEEP YOUR SERVICE ACTIVE
Add Airtime BEFORE your Service End Date to keep your
service active.
Set Up Auto-Refill: Enroll in Auto-Refill at TracFone.com with
a credit card or debit card and we will add your Minutes and
Service Days automatically on your Service End Date. This
service includes pre-charge reminders, payment receipts and
credit card expiration alerts.
Buy an Airtime Card: There are several ways to buy an airtime card:
•Go to
TracFone.com
or call 1-800-867-7183
•Shop at local retailers (find store locations at TracFone.com)
Add an Airtime Card: There are several ways to add an Airtime
card directly from your phone:
•
Download* the TracFone
My Account
App and select the
Add Card option. Standard data rates may apply.
• Go to TracFone.com and select Add Airtime.
• Call 1-800-867-7183.
CHECK YOUR BALANCE AND SERVICE END DATE
Download* the free TracFone My Account App on Google Play to
check your Minutes or, visit TracFone.com and click on the Check
Your Balance tab.
®
*Standarddata rates may apply.
For more information and the
latest Terms and Conditions
of Service, visit TracFone.com
SERVICES
GUIDE
®
PLEASE RECYCLE
Printed in the U.S.A.
QUAG-TFL56VC

THANK YOU FOR BUYING A TRACFONE! YOU MADE THE RIGHT CHOICE.
1. VOLUME
While the screen is dark press the Volume Up key twice to launch the
QuickMemo+ application. While the screen is dark press the Volume
Down key twice to launch the Camera.
2. BACK
Press to go back to the previous screen, menu or option.
3. HOME
Press to access the Home screen. Press and hold to open Google Search.
4. HEADSET JACK
5. POWER/LOCK
Press to lock or wake up the screen. To turn your phone ON, press and
hold until your screen lights up. To turn your phone OFF, press and hold
until the power options screen appears. Tap Power off. Tap POWER
OFF to turn your phone off.
6. RECENT APPS
Press to open the recently-used applications. Press and hold to access
the phone´s Main Menu.
7. CHARGER/USB DOCK
For an interactive tutorial of your phone, please visit TracFone.com. Hold
your cursor over Support. Select Learn About Your Phone, then click on
the phone model.
1
2
3
47
5
6

TABLE OF CONTENTS
1. GET STARTED
1.1 What’s in Your Package
1.2 Activate Your TracFone
1.3 Set up Your TracFone Account
2. ABOUT YOUR TRACFONE SERVICE
2.1 Keep Your Service Active
2.2 Service Plans
2.3 Know Your Service Enrollment Options
3. HOW TO USE YOUR TRACFONE
3.1 Unlock Your Screen
3.2 Find Your Serial Number
3.3 Find Your SIM Number
3.4 Find Your Phone Number
3.5 Make and Receive Calls
3.6 Make International Calls
3.7 Set Up Your Google™ Account
3.8 Set Up Your Voicemail
3.9 Send Text Messages
3.10 Set Up Your Bluetooth®
3.11 Take and Share Your Pictures
3.12 Personalize With Ringtones and More
3.13 Manage Applications
3.14 Use the Mobile Internet Services
3.15 Security Settings
3.16 Additional Features and Apps
3.17 Tips
HEALTH AND SAFETY INFORMATION
1. GET STARTED
1.1 WHAT’S IN YOUR PACKAGE
1.2 ACTIVATE YOUR TRACFONE
1.3 SET UP YOUR TRACFONE ACCOUNT
08/2016

Once you receive confirmation that the service has been
Activated, follow the instructions below to complete
your Activation.
2. SET UP YOUR PHONE
1. Turn your phone OFF and back ON.
2. Make a call.
3. If your call is successful, you are finished. If the call fails,
wait a few minutes and repeat these steps.
Questions?
Visit TracFone.com or call 1-800-867-7183
START HERE
1. ACTIVATE YOUR SERVICE
Go to TracFone.com or call 1-800-867-7183 to Activate your
service. Be ready to provide the following:
• Service Plan PIN. You may also purchase one during
Activation using a credit or debit card.
• IMEI for this device (shown below)
• If you transfer your number from a different company,
provide the accurate:
• ACTIVE phone number to transfer
• Current Service Account Number, Name and Address
• Current Service Account Password or PIN
• Alternate contact phone number
®
PLEASE READ THE TERMS AND CONDITIONS OF SERVICE IN THIS
PACKAGE (or at TracFone.com) BEFORE ACTIVATING YOUR PHONE
OR ANY SERVICE PLANS.
®
CREATE AN ACCOUNT
Create an account at TracFone.com to maximize
your TracFone experience. Benefits Include:
• TracFone Programs • Promotions
• Offers • And much more...
KEEP YOUR SERVICE ACTIVE
Add Airtime BEFORE your Service End Date to keep your
service active.
Set Up Auto-Refill: Enroll in Auto-Refill at TracFone.com with
a credit card or debit card and we will add your Minutes and
Service Days automatically on your Service End Date. This
service includes pre-charge reminders, payment receipts and
credit card expiration alerts.
Buy an Airtime Card: There are several ways to buy an airtime card:
• Go to
TracFone.com
or call 1-800-867-7183
• Shop at local retailers (find store locations at TracFone.com)
Add an Airtime Card: There are several ways to add an Airtime
card directly from your phone:
•
Download* the TracFone
My Account
App and select the
Add Card option. Standard data rates may apply.
• Go to TracFone.com and select Add Airtime.
• Call 1-800-867-7183.
CHECK YOUR BALANCE AND SERVICE END DATE
Download* the free TracFone My Account App on Google Play to
check your Minutes or, visit TracFone.com and click on the Check
Your Balance tab.
®
*Standard data rates may apply.
TRACFONE BACK COVER CHARGER/
USB CABLE
BATTERY ACTIVATION CARD SERVICES GUIDE
1.1 WHAT’S IN YOUR PACKAGE
LOCATE THE ACTIVATION CARD
INSIDE YOUR PACKAGE FIRST
STARTHERE
1.ACTIVATEYOURSERVICE
Go to TracFone.com or call 1-800-867-7183 to Activate your
service.Bereadytoprovide the following:
• ServicePlanPIN. You may also purchase one during
Activationusingacreditor debit card.
• IMEIforthis device (shown below)
•Ifyou transfer your number from a different company,
providetheaccurate:
• ACTIVEphonenumber to transfer
• CurrentServiceAccountNumber, Name and Address
• CurrentServiceAccountPassword or PIN
• Alternatecontactphonenumber
®
PLEASEREADTHE TERMS AND CONDITIONS OF SERVICE IN THIS
PACKAGE(oratTracFone.com) BEFORE ACTIVATING YOUR PHONE
ORANYSERVICEPLANS.
®
For more information and the
latest Terms and Conditions
of Service, visit TracFone.com
SERVICES
GUIDE
®
PLEASE RECYCLE
Printed in the U.S.A.
QUAG-TFL56VC
Once you receive confirmation that the service has been
Activated, follow the instructions below to complete
your Activation.
2. PROGRAM YOUR PHONE
1. Call *22890 from your phone. Make sure to include the
* (star) key.
2. If the Activation is successful, you will receive a
confirmation message.
3. Make a test call to complete the Activation process.
4. If you do not receive a successful confirmation message,
wait a few minutes and call *22890 again.
Questions?
Visit TracFone.com or call 1-800-867-7183
START HERE
1. ACTIVATE YOUR SERVICE
Go to TracFone.com or call 1-800-867-7183 to Activate your
service. Be ready to provide the following:
• Service Plan PIN. You may also purchase one during
Activation using a credit or debit card.
• MEID DEC for this device (shown below)
• If you transfer your number from a different company,
provide the accurate:
• ACTIVE phone number to transfer
• Current Service Account Number, Name and Address
• Current Service Account Password or PIN
• Alternate contact phone number
®
PLEASE READ THE TERMS AND CONDITIONS OF SERVICE IN THIS
PACKAGE (or at TracFone.com) BEFORE ACTIVATING YOUR PHONE
OR ANY SERVICE PLANS.
®
CREATE AN ACCOUNT
Create an account at TracFone.com to maximize
your TracFone experience. Benefits Include:
• TracFone Programs
• Offers
• Promotions
• And much more...
KEEP YOUR SERVICE ACTIVE
Add Airtime BEFORE your Service End Date to keep your
service active.
Enroll in a Plan: Enroll in one of our Value Plans at TracFone.com
by using a credit or debit card and we will add your Minutes and
Service Days automatically. This service includes pre-charge
reminders, payment receipts and credit card expiration alerts.
Buy an Airtime Card: There are several ways to buy an airtime card:
• Go to
TracFone.com
or call 1-800-867-7183
• Shop at local retailers (find store locations at TracFone.com)
Add an Airtime Card: There are several ways to add an Airtime
card directly from your phone:
•
Download the TracFone My Account App and select the
Add Card option. Standard data rates may apply. Or
• Go to TracFone.com and select Add Airtime. Or
• Call 1-800-867-7183.
CHECK YOUR BALANCE AND SERVICE END DATE
• To check your balance, call
*777*1#
from your phone.
• To check your Service End Date, download* the free
TracFone My Account app from Google Play.
®
*Standard data rates may apply.
1.2 ACTIVATE YOUR TRACFONE
A. Locate the ACTIVATION CARD inside the package. This Card has the
Serial and SIM Numbers you need to Activate your phone.
B. To Activate your Service, go to TracFone.com or call 1-800-867-7183
from another phone. You will need a TracFone Service Plan or a credit
or debit card to purchase one during Activation.

1.3 SET UP YOUR TRACFONE ACCOUNT
A. Set up
My Account
My Account
can be created upon activation of your phone at
TracFone.com. This is where you will create and update your
personal prole information, update credit/billing information,
view your Service End Date, and more.
My Account
is the best place to:
• See TracFone Programs
• Access Special Offers and Promotions
• Buy or Add a Service Plan
• Enroll in Monthly Value Plans
• Check Balance/Service End Date
• Update Personal Prole and Manage Credit Card Info
• Get International Calling Information
• View TracFone Support Forum
• View FAQs
B. TracFone My Account App
TracFone provides easy options to help you keep track
of your Minutes, Text, and Data balances, as well as to
view your Service End Date. Simply download* the free
TracFone My Account app from Google Play™.
*Standard Data rates may apply.
2. ABOUT YOUR
TRACFONE SERVICE
2.1 KEEP YOUR SERVICE ACTIVE
2.2
SERVICE PLANS
2.3 KNOW YOUR SERVICE ENROLLMENT OPTIONS

2.1 KEEP YOUR SERVICE ACTIVE
IMPORTANT
To keep your Service Active, you must refill your
Service Plan BEFORE your Service End Date.
TracFone Airtime Plans add Minutes and Service Days to your phone. To nd
your Service End Date, go to our website at
TracFone.com
and log into your
Account or you can call our Customer Care Center at
1-800-867-7183
.
Keep your Service Active with a variety of Airtime Plan cards
and Monthly Plans. Choose the option that best ts your needs.
You can change or add plans at any time without penalties or fees.
2.2 SERVICE PLANS
Your phone will only work with TracFone Wireless Service Plans for
cellular phones. You can purchase the plan that best ts your needs at:
• Participating retailers nationwide
• TracFone.com
• Customer Care Center 1-800-867-7183
see back panel for PIN number
card has no value until purchased and scanned
this
card adds
Data-Only
Card
for web
NEW
NEW
300M B
for Android™
-powered
phones only
DATA
ONLY
(no service days)
NO CONTRACTS
NO BILLS
NO FEES
NO SURPRISES
DO EVERYTHING
FOR LESS™
DATA
ONLY
(no service days)
NO CONTRACTS
NO BILLS
NO FEES
NO SURPRISES
DO EVERYTHING
FOR LESS™
see back panel for PIN number
card has no value until purchased and scanned
this
card adds
Data-Only
Card
for web
NEW
NEW
750MB
for Android™
-powered
phones only
DATA
ONLY
(no service days)
NO CONTRACTS
NO BILLS
NO FEES
NO SURPRISES
DO EVERYTHING
FOR LESS™
see back panel for PIN number
card has no value until purchased and scanned
this
card adds
for web
NEW
NEW
2GB
for Android™
-powered
phones only
see back panel for PIN number
card has no value until purchased and scanned
this
card adds
Airtime/
Refill Card
for talk, text
& web
NEW
LOOK!
NEW
LOOK!
Same Great Service
Same Great Service
90 DAY
SERVICE PLAN
NO CONTRACTS
NO BILLS
NO FEES
NO SURPRISES
DO EVERYTHING
FOR LESS™
120
90 DAY
SERVICE PLAN
NO CONTRACTS
NO BILLS
NO FEES
NO SURPRISES
DO EVERYTHING
FOR LESS™
see back panel for PIN number
card has no value until purchased and scanned
this
card adds
Airtime/
Refill Card
for talk, text
& web
NEW
LOOK!
NEW
LOOK!
Same Great Service
Same Great Service
60
see back panel for PIN number
card has no value until purchased and scanned
this
card adds
Airtime/
Refill Card
for talk, text
& web
NEW
LOOK!
NEW
LOOK!
Same Great Service
Same Great Service
200
90 DAY
SERVICE PLAN
NO CONTRACTS
NO BILLS
NO FEES
NO SURPRISES
DO EVERYTHING
FOR LESS™
see back panel for PIN number
card has no value until purchased and scanned
this
card adds
for talk, text
& web
NEW
LOOK!
NEW
LOOK!
Same Great Service
Same Great Service
450
90 DAY
SERVICE PLAN
NO CONTRACTS
NO BILLS
NO FEES
NO SURPRISES
DO EVERYTHING
FOR LESS™
this
card adds
for talk, text
& web
NEW
LOOK!
NEW
LOOK!
Same Great Service
Same Great Service
1Ye ar
SERVICE PLAN
DO EVERYTHING
FOR LESS™
this
card adds
for talk, text
& web
1Ye ar
this
card adds
for talk, text
& web
1Ye ar
this
card adds
for talk, text
& web
1Ye ar
this
card adds
for talk, text
& web
1Ye ar
this
card adds
for talk, text
& web
1Ye ar
DO EVERYTHING
FOR LESS™
see back panel for PIN number
card has no value until purchased and scanned
this
card adds
Airtime/
Refill Card
for talk, text
& web
NEW
LOOK!
NEW
LOOK!
Same Great Service
Same Great Service
90 DAY
SERVICE PLAN
NO CONTRACTS
NO BILLS
NO FEES
NO SURPRISES
DO EVERYTHING
FOR LESS™
120
90 DAY
SERVICE PLAN
NO CONTRACTS
NO BILLS
NO FEES
NO SURPRISES
DO EVERYTHING
FOR LESS™
see back panel for PIN number
card has no value until purchased and scanned
this
card adds
Airtime/
Refill Card
for talk, text
& web
NEW
LOOK!
NEW
LOOK!
Same Great Service
Same Great Service
60
see back panel for PIN number
card has no value until purchased and scanned
this
card adds
Airtime/
Refill Card
for talk, text
& web
NEW
LOOK!
NEW
LOOK!
Same Great Service
Same Great Service
200
90 DAY
SERVICE PLAN
NO CONTRACTS
NO BILLS
NO FEES
NO SURPRISES
DO EVERYTHING
FOR LESS™
see back panel for PIN number
card has no value until purchased and scanned
this
card adds
for talk, text
& web
NEW
LOOK!
NEW
LOOK!
Same Great Service
Same Great Service
450
90 DAY
SERVICE PLAN
NO CONTRACTS
NO BILLS
NO FEES
NO SURPRISES
DO EVERYTHING
FOR LESS™
this
card adds
for talk, text
& web
NEW
LOOK!
NEW
LOOK!
Same Great Service
Same Great Service
1Ye ar
SERVICE PLAN
DO EVERYTHING
FOR LESS™
this
card adds
for talk, text
& web
1Ye ar
this
card adds
for talk, text
& web
1Ye ar
this
card adds
for talk, text
& web
1Ye ar
this
card adds
for talk, text
& web
1Ye ar
this
card adds
for talk, text
& web
1Ye ar
DO EVERYTHING
FOR LESS™
VISIT TRACFONE.COM
FOR THE LATEST SERVICE PLANS
AND SPECIAL OFFERS

2.3 KNOW YOUR SERVICE
ENROLLMENT OPTIONS
A. Monthly Airtime Plans
TracFone offers the same conveniences as contract plans, but without
the contract! Choose the Airtime Plan that works best for you:
Individual Plan
Family Value Plan
TracFone Service Protection Plan
Enroll your TracFone in an Airtime Plan and enjoy these benets:
Automatically receive Minutes and Service Days on your
TracFone every month.
Airtime Plans start at $9.99/month.
No contracts or cancellation fees.
B. Where To Enroll
In order to enroll in a Monthly Airtime Plan you must have a valid
credit or debit card.
To enroll:
Go to TracFone.com/valueplans
OR
Call us at 1-800-867-7183
3. HOW TO USE YOUR TRACFONE
3.1 UNLOCK YOUR SCREEN
3.2 FIND YOUR SERIAL NUMBER
3.3 FIND YOUR SIM NUMBER
3.4 FIND YOUR PHONE NUMBER
3.5 MAKE AND RECEIVE CALLS
3.6 MAKE INTERNATIONAL CALLS
3.7 SET UP YOUR GOOGLE™ ACCOUNT
3.8 SET UP YOUR VOICEMAIL
3.9 SEND TEXT MESSAGES
3.10 SET UP YOUR BLUETOOTH®
3.11 TAKE AND SHARE YOUR PICTURES
3.12 PERSONALIZE WITH RINGTONES AND MORE
3.13 MANAGE APPLICATIONS
3.14 USE THE MOBILE INTERNET SERVICES
3.15 SECURITY SETTINGS
3.16 ADDITIONAL FEATURES AND APPS
3.17 TIPS

3.1 UNLOCK YOUR SCREEN
To unlock your screen, swipe your nger across
the screen in any direction.
If the screen is
dark, simply press the POWER/LOCK key to
enable it.
KnockON
You can turn the screen on and off by simply
double tapping on it:
• To unlock the screen: When the screen is off,
double-tap anywhere on the screen.
• To lock the screen: Double-tap the Status Bar in
any screen (except on the camera viewnder) or
an empty area on the Home screen.
3.2 FIND YOUR SERIAL NUMBER
1. Press the HOME key.
2. Slide your nger to the left across the screen. Tap Settings.
3. Slide your nger upwards along the screen to access additional
options. Tap About phone.
4. Tap Status. Your Serial Number will appear under IMEI.
5. To return to the main screen, press the HOME key.
See inside front cover for help locating your phone keys.
3.3 FIND YOUR SIM NUMBER
Your SIM number can be found on the front of the red Activation Card
that came with your phone. If you do not have your Activation Card,
you can also nd your SIM number as follows:
1. Press the HOME key.
2. Slide your nger to the left across the screen. Tap Settings.
3. Slide your nger upwards along the screen and tap About phone.
4. Tap Status. Your SIM Number will appear under ICCID.
5. To return to the main screen, press the HOME key.
3.4 FIND YOUR PHONE NUMBER
1. Press the HOME key.
2. Slide your nger to the left across the screen. Tap Settings.
3. Slide your nger upwards along the screen to access additional options.
Tap About phone.
4. Tap Status. Your Phone Number will appear under My phone number.
5. To return to the main screen, press the HOME key.

3.5 MAKE AND RECEIVE CALLS
Make a Call
1. Press the HOME key.
2. Tap the Phone icon located at the bottom of the screen.
If the
dialpad does not appear on the screen, tap the Dial tab located at
the top of the screen.
3. Enter the phone number you wish to call, including the 3-digit area code.
Entering a 1 before the area code may be necessary in some areas.
4. To place the call, tap the Phone icon located at the bottom of
the screen.
5. To end the call, tap End.
Receive a Call
1. To answer an incoming call, slide the
Answer
icon in any direction
across the screen.
2. To end the call, tap
End
.
3.6 MAKE INTERNATIONAL CALLS
You can call over 100 international destinations from your TracFone at
no additional cost. Please wait 2 business days after your TracFone is
Activated to make international calls.
A. From your TracFone, dial 1-800-706-3839. If you are in Alaska,
Hawaii and the U.S. Virgin Islands please dial 1-305-938-5673. We
suggest
that you add these numbers to your contacts for easy dialing.
B. Select your language: 1 for English, 2 for Spanish. Listen to dialing
instructions. After selecting a language, dialing instructions can be
interrupted at any time and you can skip to step C.
C. Dial 011 + Country Code + City Code + Telephone Number. For calls
to the Bahamas, Bermuda, Canada and Dominican Republic just dial
1 + City Code + Telephone Number.
AVAILABLE INTERNATIONAL DESTINATIONS
Calls to cellular phones are not included unless the word “Cellular” is
specically listed next to the country name. Numbers in parentheses
indicate the Country Code.
Albania - Tirana (355)
Andorra (376)
Argentina (54)
Australia (61)
Austria (43)
Bahamas - Cellular (1)
Bahamas (1)
Bangladesh - Cellular (880)
Bangladesh - Chittagong (880)
Bangladesh - Dhaka (880)
Bangladesh - Sylhet (880)
Belgium (32)
Bermuda - Cellular (1)
Bermuda (1)
Bolivia - La Paz (591)
Bolivia - Santa Cruz (591)
Brazil (55)
Brunei - Cellular (673)
Brunei (673)
Bulgaria (359)
Canada - Cellular (1)
Canada (1)
Chile (56)
China - Cellular (86)
China (86)
Colombia - Cellular (57)
Colombia (57)
Costa Rica (506)
Croatia (385)
Cyprus - Cellular (357)
Cyprus (357)
Czech Republic (420)
Denmark (45)
Dominican Republic (1)
Estonia (372)
Finland (358)
France (33)
French Antilles (596)
French Guiana - Cellular (594)
French Guiana (594)
Georgia (995)
Germany (49)
Gibraltar (350)
Greece (30)
Guadeloupe (590)
Guatemala - Telgua (502)
Hong Kong - Cellular (852)
Hong Kong (852)
Hungary (36)
Iceland (354)
India - Cellular (91)
India (91)

Indonesia - Cellular (62)
Indonesia - Jakarta (62)
Indonesia - Surabaya (62)
Iraq - Baghdad (964)
Ireland (353)
Israel (972)
Italy (39)
Japan (81)
Jordan (962)
Kazakhstan (7)
Kenya - Nairobi (254)
Lithuania (370)
Luxembourg - Cellular (352)
Luxembourg (352)
Macao - Cellular (853)
Macao (853)
Malaysia - Cellular (60)
Malaysia (60)
Malta (356)
Mexico (52)
Monaco (377)
Netherlands (31)
New Zealand (64)
Norway (47)
Panama (507)
Paraguay (595)
Peru (51)
Poland (48)
Portugal (351)
Romania (40)
Russia - Cellular (7)
Russia (7)
San Marino - Cellular (378)
San Marino (378)
Saudi Arabia - Riyadh (966)
Singapore - Cellular (65)
Singapore (65)
Slovakia (421)
Slovenia (386)
South Korea - Cellular (82)
South Korea (82)
Spain (34)
Sweden (46)
Switzerland (41)
Taiwan - Cellular (886)
Taiwan (886)
Thailand (66)
Turkey (90)
United Kingdom (44)
Uzbekistan (7)
Venezuela (58)
Vietnam - Ho Chi Minh (84)
Zambia (260)
Note: Please wait to be connected; DO NOT press any other key on your TracFone or your call
might be disconnected.
D. TracFone Frequent Numbers Service
With TracFone, making international calls is really easy! Our Frequent
Numbers Service offers you up to ten U.S. 800 numbers, which you
can link to your most frequently dialed international numbers in any
of our available international destinations (with this service, you do
not need to follow steps A, B and C from section 3.6).
Just dial any of the ten U.S. 800 numbers that you can program through
our website or by calling TracFone, and you will be quickly connected
with the international destination you want at no additional cost.
Visit our International Long Distance website at
TracFone.com
or call our
Customer Care Center at 1-800-867-7183 to set up this service for free.
E. TracFone International Neighbors Service (Available only for Mexico)
With our International Neighbors Service, your family and friends
living in Mexico can call your TracFone directly without paying for
an international long distance call, and your TracFone will deduct
the same number of Minutes as if it were a local call. No international
long distance charges for anyone!
With Active service, TracFone will assign you a Mexican phone number
that will be linked to your TracFone for free. Your family and friends
can dial this local phone number and you will receive the call on your
TracFone here in the U.S. To register for International Neighbors Service
,
and to assign specic phone numbers, register at TracFone.com.
TIP:
To enjoy this unique service, make sure you keep your service Active.
If your Service Days Remaining end and your phone is deactivated, you
will lose your Mexican phone number. Should this happen, you can get
a new Mexican phone number when you re-activate your TracFone.

3.7 SET UP YOUR GOOGLE™ACCOUNT
To access Google Play™ as well as other applications on your phone,
you will need to add or create a free Google Account (i.e. Gmail Account).
1. Press the HOME key.
2. Tap the Google folder.
3. Tap the Gmail icon. Follow the tutorial on your screen to add your
Google Account.
4. To return to the main screen, press the HOME key.
The rst Google account that you register to your phone will be your
Primary Google account. Once you register a Google Account to your
phone, your contacts, calendar entries, and Gmail will sync with your
primary Google Account. It can take up to 15 minutes for your phone
to sync with the Google server.
3.8 SET UP YOUR VOICEMAIL
1. Press the HOME key.
2. Tap the Phone icon located at the bottom of the screen.
If the keypad
does not appear on the screen, tap the Dial tab located at the top of
the screen.
3. Press and hold the 1key for several seconds. Your phone will
automatically call Voicemail. Once the call is connected, follow the
voicemail prompts.
4. To end the call, tap End.
3.9 SEND TEXT MESSAGES
1. Press the HOME key.
2. Tap the Messaging icon located at the bottom of the screen.
3. To compose a new message, tap the plus (+) icon located at the
bottom of the screen.
4. Enter the contact name or the mobile number of the desired recipient
in the To eld.
If entering the name or mobile number of an existing
contact, tap the name when it appears.
5.
Tap on the Enter message eld, and enter the message you wish to send.
6. When nished, tap Send.
7. To return to the main screen, press the HOME key.
3.10 SET UP YOUR BLUETOOTH®
To pair your phone with a Bluetooth device, make sure that both are fully
charged. Have the devices within a range of 30 feet from each other. Make
sure the device is ON and in Pairing or Bonding Mode. Please remember
that you can connect to only one device at a time.
1. Press the HOME key.
2. Slide your nger to the left across the screen. Tap Settings.
3. Tap the ON/OFF button to the right of Bluetooth to turn it ON.
4. Tap Bluetooth. A list of the available devices will be populated.
5. Tap the name of the desired Bluetooth device and wait for the devices
to pair.
6. Follow the prompts on the phone screen to complete the pairing
process.
7. To return to the main screen, press the HOME key.
IMPORTANT: If you are prompted for a PIN, please refer to your headset’s
user guide. A commonly used PIN for headsets is 0000. Enter the PIN into
your phone and follow the prompts to complete the pairing process.

3.11 TAKE AND SHARE YOUR PICTURES
Take a Picture
1. Press the HOME key.
2. Tap the Camera icon at the bottom of the screen.
3. To take a picture, tap the camera icon at the bottom of the screen.
The picture will be automatically saved in your Gallery.
If the Camera
icon does not appear, tap the three vertical dots located on the
upper corner of the screen.
Note: You can also take a picture by tapping on the screen when
the camera icon is not present on the screen.
Front-facing camera
1. Press the HOME key.
2. Tap the Camera icon at the bottom of the screen.
3. Tap the front-facing camera icon at the top of the screen.
If the
front-facing camera icon doesn’t appear, tap the three vertical dots
located on the upper corner of the screen.
4. To take a picture, tap the Camera icon on your screen. The picture
will be automatically saved in your Gallery.
Note: You can access the Camera directly from the Lock screen. While the
screen is dark press the Volume Down key twice to launch the Camera.
Gesture shot
The Gesture shot feature allows you to take a picture with a hand
gesture using the front facing camera. There are two methods for
using this feature:
• Raise your hand, with an open palm, until the front camera detects it
and a box appears on the screen. Then close your hand into a st to
start the timer, allowing you time to get ready.
• Raise your hand, in a clenched st, until the front camera detects it
and a box appears on the screen. Then unclench your st to start the
timer, allowing you time to get ready.
Share the Picture
1. Tap the picture thumbnail located in the lower part of the screen. Your
phone will display the last image captured.
2. Complete action using will appear on the screen. Choose the option of
your preference and tap OK.
3. The Share icon will appear at the top of your screen, if not, simply tap
the screen.
4. Tap the Share icon. All available sharing options will appear on
the screen.
5. Tap Messaging.
6. Enter the contact name or the mobile number of the desired recipient
in the To eld.
If entering the name or mobile number of an existing
contact, tap the name when it appears.
7. Tap the space under or next to the picture and enter the message you
wish to send.
8. When nished, tap Send MMS.
9. To return to the main screen, press the HOME key.

3.12 PERSONALIZE WITH
RINGTONES AND MORE
A. Personalize with Ringtones
1. Press the HOME key.
2. Slide your nger to the left across the screen. Tap Settings.
3. Tap Sound ¬ication.
4. Tap Ringtone.
5. Tap the ringtone of your preference to listen to it. Slide your nger
along the screen to access additional options.
6. Once you have selected the ringtone you wish to use, tap OK.
7. To return to the main screen, press the HOME key.
B. Personalize with Graphics
1. Press the HOME key.
2. Slide your nger to the left across the screen. Tap Settings.
3. Tap Home screen.
4. Tap Wallpaper.
5. Select the option that contains the graphic you wish to use.
6. Thumbnails of the available images will be displayed. Tap the one you
want to use.
You may need to size and frame the image.
7. Tap OK or SET WALLPAPER.
C. Download Applications and Content
From the main screen, tap the
Play Store
icon to access Google Play™.
Browse thousands of apps, games, music and more.
The Play Store
With phones powered by Android™, you can access over 1,000,000 free
and pay-for apps that are available at the Play Store. To purchase content
or an app from the Play Store, you will need a Gmail account and a credit
or debit card. The purchases you make are a transaction between you
and Google and/or the Application Developer. Customer Care will not be
able to provide technical assistance or refunds/credits for your purchases
.
We suggest that before you purchase any apps, that you look at the
reviews about those that you are interested in purchasing. The Play Store
may allow app orders to be cancelled within 15 minutes. Please refer to
the Play Store website for details. If you receive an error code during the
purchase process, visit google.com/support/googleplay.

3.13 MANAGE APPLICATIONS
1. Press the HOME key.
2. Slide your nger to the left across the screen. Tap Settings.
3. Slide your nger upwards along the screen and tap Apps.
4. The applications that are currently running will appear on the screen.
Slide your nger upwards along the screen, tap the application that you
would like to manage and choose what you would like to do.
5. To return to the main screen, press the HOME key.
Applications running in the background can drain the battery and slow
down the processing speed of your phone.
3.14 USE THE MOBILE INTERNET SERVICES
The Mobile Web allows you access to news, sports, weather, entertainment,
and more directly from your phone. To access the Mobile Web, press the
Home
key, then tap the
Internet
icon, located at the bottom of the screen.
Your phone will then connect to the Mobile Web.
Access and Data consumption begins when your phone makes a data
connection and ends when the data connection terminates. Total Access
and Data Consumption Charges will depend on the size of the content and
the actual time it takes to download or transmit the content or multimedia
message, and to access or view the Information Service. For additional
information about Data consumption charges, refer to the latest TracFone
Wireless Terms and Conditions of Service at
TracFone.com
.
IMPORTANT:
After your phone is Active, it may take up to 1 hour to access
Mobile Web Services.
3.15 SECURITY SETTINGS
Set your Screen Lock options
There are several security options that will protect your data and limit
access to your phone. To set up your preferences:
1. Press the Home key > Settings > Lock screen > Select screen lock.
Select the screen lock that you prefer.
2. Follow the on-screen prompts to set up the security option of
your choice.
Forgot your security setting?
If your attempts to unlock your screen are unsuccessful, please follow
the prompts on the screen. Once you have unlocked your screen, you
will need to create a new screen lock.
If you are still unable to unlock your screen, please call the Customer
Care Center at 1-800-867-7183 to reset your phone. Be aware that this
erases all data from the internal memory of your phone and restores
the phone to the original factory settings. Once your phone is reset,
you can recover your synced information by logging into your primary
Gmail account.

3.16 ADDITIONAL FEATURES AND APPS
A. Access or Replace a Memory Card
Your phone accepts a memory card of up to 32GB.
To access the card:
Locate the memory card compartment
1. Power your phone OFF.
2. Remove the back cover by lifting it using the notch located on the
left side of the phone.
3. The Memory card compartment is located below the camera lens,
stacked above the SIM card slot.
Insert the card
1. Arrange the memory card so that the gold bars on the card are facing
down and gently slide it all the way in.
2. Replace the back cover and power your phone ON.
Remove the card
1. Slide the memory card out.
We recommend that you have your
phone turned OFF.
2. Replace the back cover and power your phone ON.
B. Your Music
Play and Access Your Music Files
• You can play a variety of sound les and access music les on
your phone.
• You can listen to the music stored in your phone via Bluetooth.
• You can separate your music by Genres, Albums, Artists and Songs.
Transfer Your Music Files
To transfer music les to a computer you will need the USB Cable
provided with the phone. Refer to your computer’s user guide for
instructions on how to transfer content. Your phone does not
support DRM protected music les*.
*The unauthorized copying of copyrighted materials is contrary to the provisions of the Copyright laws
in the United States and in other countries. This device is intended solely for copying non-copyrighted
material, material for which you own the copyright, or material which you are legally permitted to copy.
If you are uncertain about your right to copy any material, please contact your legal advisor.

C. Features
Battery & power saving: Displays the current battery status including
the percentage of remaining charge and charging state. To access this
function: Home screen > Settings >Battery & power saving.
Knock Code: The Knock Code feature allows you to instantly access
your Home screen by tapping a customized pattern anywhere on the
screen. To enable this function: Home screen > Settings > Lock screen >
Select screen lock >Knock code > Follow the prompts on your screen.
Home touch button combination: Drag an icon to rearrange Home
touch buttons. You have up to 5 Home touch buttons. To access this
function: Home screen > Settings > Display >Home touch button
combination > Follow the instructions on the screen.
Management: You can manage and monitor the used and available
memory in the device, the battery usage and the internal storage of your
phone. To access this function: Home screen > Management folder.
D. Apps
Capture+: You can easily and efciently create memos during a call,
with a saved picture or on the current device screen. To access this
function: From any screen, slide the status bar down from the top of
the screen > Tap Capture+.
File Manager: Displays all data stored on the phone, including
applications, videos, pictures or audios you have captured and other
data transferred via Bluetooth, USB cable, etc. It also displays media
les downloaded from Google Play, YouTube or other locations.
To access this function: To access this function: Home screen >
Productivity folder > File Manager.
Wi-Fi Utility: Manages your Wi-Fi settings to provide free, high-speed
data by automatically connecting to Wi-Fi hotspots. To access this
function: Home screen > Tools folder >Wi-Fi Utility.
QuickMemo+: Allows you to create memos and capture screenshots.
You can easily and efciently create memos during a call, with a saved
picture or on the current phone screen. To access this feature: Home
screen > Tools folder > QuickMemo+.
For additional information about your phone, you can view or download
the manufacturer’s manual at TracFone.com.

3.17 TIPS
This is an unlockable device. For more information, please refer to the
Terms and Conditions of Service in your package or at TracFone.com.
To access notications, slide your finger down from the top of the screen.
All new messages and notifications will be displayed; tap the message or
notification you wish to access.
You can also easily access your phone’s Settings by tapping the
Settings icon located at the top of the Notification screen.
Your phone has several customizable screens
that give you easier
access to your most commonly used content and applications.
• Slide your nger across the screen in either direction to access the
different home screens.
• To move an icon to a particular screen, go to the screen where you
want the icon to be, tap the Apps icon, then tap and hold the icon of
the application you wish to move until it appears on the desired screen.
• You can easily organize all your apps by rearranging them on the
Home screen or by grouping them into folders: Home screen > Press
and hold the icon you want to move > Drag the icon to another
location or drag it over another app to create a folder.
For increased data speeds, use a secure Wi-Fi®connection
where available.
Your phone will automatically back up to your Gmail account.
In order
for your contacts, paid apps, calendar, and Gmail to be restored when
you set up an Android phone using the same primary Gmail account:
1. Press the Home key > Settings > Accounts & Sync > ADD ACCOUNT
> Google.
2. Select your primary Gmail account and then tap to select the
features you would like automatically backed up/synced.
Don’t wait until it’s too late to back up your phone! To back up data,
passwords and other settings to Google servers:
1. Press the HOME key.
2. Slide your nger to the left across the screen. Tap Settings.
3. Tap Backup & reset. Select from the options listed
Multimedia and other les will need to be backed up manually. To back
up les such as photos and videos, search on Google Play to nd the app
that ts your needs.
A Master or Factory Data Reset
erases everything on the internal memory
of your phone including the Gmail account access. You should remembe
r
your Gmail account’s user name and password before performing a
factory reset. After a reset is performed, you can sync your information
to your phone again by logging in to your primary Gmail account from
your phone.
To extend your battery life, follow some of the tips listed below:
• Check Running Services and close any unnecessary applications.
• Use the Apps feature to end/shutdown applications that are running
in the background.
• Turn off Bluetooth®and GPS when not in use.
• Turn off automatic application sync.
• Set Screen Timeout to the lowest setting
(factory default is 30 seconds).
• Reduce your data usage.
• Reduce use of the Live Wallpapers.
• Use the factory charger provided to avoid battery damage.

Data Managing Tips
Wi-Fi®: Use a secure Wi-Fi connection at home or other locations where
it may be available. You can use a Wi-Fi nder app to help you locate
available Wi-Fi networks. Connect to Wi-Fi before you stream music,
video, and other data heavy content.
AUTO UPDATES: Turn off auto updates on your apps or change your
settings to update using Wi-Fi only.
PHOTOS: Turn off automatic photo uploading or change your settings
to upload using Wi-Fi only.
EMAIL: Turn off push e-mail or set e-mail accounts to sync every hour
or greater. You can also set e-mail accounts to update manually and get
email only when you want it.
MOBILE WEBSITES: Access the mobile website version of your choice
since full websites require more data to view and browse them.
BACKGROUND APPS: Turn off Apps running in the background. They
constantly use data and can also slow down the processing speed of
your phone.
USAGE ALERTS: Download a Data Usage App to help you keep track
of your data usage. With Android™ version 4.0 and later you can set a
mobile data limit reminder.
For additional information about your phone, you can view or download
the manufacturer’s manual at Tracfone.com.
HEALTH AND SAFETY
INFORMATION

Violation of the instructions may cause serious injury or death.
WARNING: This product contains chemicals known to the State of California to cause cancer and birth defects
or other reproductive harm. Wash hands after handling.
• Never place your phone in a microwave oven as it will cause the battery to explode.
•
When riding in a car, do not leave your phone or set up the hands-free kit near the air bag. If wireless
equipment is improperly installed and the air bag is deployed, you may be seriously injured.
• Do not dispose of your phone near fire or with hazardous or flammable waste. You should
dispose of your phone in accordance with all applicable laws.
• Do not use the phone in areas where its use is prohibited. (For example: aircraft)
• Do not expose the battery charger or adapter to direct sunlight or use it in places with high
humidity, such as a bathroom.
• Do not use harsh chemicals (such as alcohol, benzene, thinners, etc.) or detergents to clean
your phone. This could cause a fire.
• Do not drop, strike, or shake your phone severely. It may harm the internal circuit boards of
the phone.
• Do not use your phone in high explosive areas as the phone may generate sparks.
• Do not damage the power cord by bending, twisting, pulling, or heating. Do not use the plug
if it is loose as it may cause electric shock or fire.
• Do not place any heavy items on the power cord. Do not allow the power cord to be crimped
as it may cause electric shock or fire.
• Do not handle the phone with wet hands while it is being charged. It may cause an electric
shock or seriously damage your phone.
• Do not disassemble the phone.
• Do not place or answer calls while charging the phone as it may short-circuit the phone and/
or cause electric shock or fire.
• Do not attempt to repair or modify the device yourself.
• You should never attempt to open or disassemble this device yourself and doing so may
cause damage that voids your warranty.
• Make sure that no sharp-edged items, such as animal’s teeth or nails, come into contact with
the battery. This could cause a fire.
• Be careful that children do not swallow any parts (such as earphone, connection parts of the
phone, etc.) This could cause asphyxiation or suffocation resulting in serious injury or death.
• Unplug the power cord and charger during lightning storms to avoid electric shock or fire.
• Only use chargers provided by LG. The warranty will not be applied to products provided by
other suppliers.
• Only authorized personnel should service the phone and its accessories. Faulty installation
or service may result in accidents and consequently invalidate the warranty.
• An emergency call can be made only within a service area. For an emergency call, make sure
that you are within a service area and that the phone is turned on.
•
Your phone is an electronic device that generates heat during normal operation. Extremely
prolonged, direct skin contact in the absence of adequate ventilation may result in discomfort or
minor burns. Therefore, use care when handling your phone during or immediately after operation.
• Use and store your phone in temperatures between 0°C/32°F and 45°C/113°F, if possible.
Exposing your phone to extremely low or high temperatures may result in damage,
malfunction, or even explosion.
HAC statement
This phone has been tested and rated for use with hearing aids for some of the wireless technologies that it
uses. However, there may be some newer wireless technologies used in this phone that have not been tested
yet for use with hearing aids. It is important to try the different features of this phone thoroughly and in
different locations, using your hearing aid or cochlear implant, to determine if you hear any interfering noise.
Consult your service provider or the manufacturer of this phone for information on hearing aid compatibility.
If you have questions about return or exchange policies, consult your service provider or phone retailer.
This mobile phone has a Hearing Aid Mode that, when activated, may reduce interference with some hearing
aid models.
FCC RF Exposure Information
WARNING! Read this information before operating the phone. In August 1996, the Federal Communications
Commission (FCC) of the United States, with its action in Report and Order FCC 96-326, adopted an updated
safety standard for human exposure to Radio Frequency (RF) electromagnetic energy emitted by FCC
regulated transmitters. Those guidelines are consistent with the safety standard previously set by both U.S.
and international standards bodies. The design of this phone complies with the FCC guidelines and these
international standards.
Body-worn Operation
This device was tested for typical bodyworn operations with the back of the phone kept 0.39 inches (1.0
cm) between the user’s body and the back of the phone. To comply with FCC/ IC exposure requirements, a
minimum separation distance of 0.39 inches (1.0 cm) must be maintained between the user’s body and the

back of the phone. Any belt-clips, holsters, and similar accessories containing metallic components may not
be used. Body-worn accessories that cannot maintain 0.39 inches (1.0 cm) distance between the user’s body
and the back of the phone and have not been tested for typical body-worn operations may not comply with
FCC/IC RF exposure limits and should be avoided.
Consumer Information About Radio Frequency Emissions
Your wireless phone, which contains a radio transmitter and receiver, emits radio frequency energy during
use. The following consumer information addresses commonly asked questions about the health effects of
wireless phones.
Are wireless phones safe?
Scientific research on the subject of wireless phones and radio frequency (“RF”) energy has been conducted
worldwide for many years, and continues. In the United States, the Food and Drug Administration (“FDA”)
and the Federal Communications Commission (“FCC”) set policies and procedures for wireless phones.
The FDA issued a website publication on health issues related to cell phone usage where it states, “The
scientific community at large … believes that the weight of scientific evidence does not show an association
between exposure to radiofrequency (RF) from cell phones and adverse health outcomes. Still the scientific
community does recommend conducting additional research to address gaps in knowledge. That research
is being conducted around the world and FDA continues to monitor developments in this field. You can
access the joint FDA/FCC website at http://www.fda.gov (under “c” in the subject index, select Cell Phones
> Research). You can also contact the FDA toll-free at (888) 463-6332 or (888) INFO-FDA. In June 2000,
the FDA entered into a cooperative research and development agreement through which additional scientific
research is being conducted. The FCC issued its own website publication stating that “there is no scientific
evidence that proves that wireless phone usage can lead to cancer or a variety of other problems, including
headaches, dizziness or memory loss.” This publication is available at http://www.fcc.gov/cgb/ cellular.html
or through the FCC at (888) 225-5322 or (888) CALL- FCC.
What does “SAR” mean?
In 1996, the FCC, working with the FDA, the U.S. Environmental Protection Agency, and other agencies,
established RF exposure safety guidelines for wireless phones in the United States. Before a wireless phone
model is available for sale to the public, it must be tested by the manufacturer and certified to the FCC that
it does not exceed limits established by the FCC. One of these limits is expressed as a Specific Absorption
Rate, or “SAR.” SAR is a measure of the rate of absorption of RF energy in the body. Tests for SAR are
conducted with the phone transmitting at its highest power level in all tested frequency bands. Since 1996,
the FCC has required that the SAR of handheld wireless phones not exceed 1.6 watts per kilogram, averaged
over one gram of tissue.
Although the SAR is determined at the highest power level, the actual SAR value of a wireless phone while
operating can be less than the reported SAR value. This is because the SAR value may vary from call to
call, depending on factors such as proximity to a cell site, the proximity of the phone to the body while
in use, and the use of hands-free devices. For more information about SARs, see the FCC’s OET Bulletins
56 and 65 at http://www.fcc.gov/Bureaus/ Engineering_Technology/Documents/bulletins or visit the Cellular
Telecommunications Industry Association website at http://www.ctia.org/consumer_info/index.cfm/
AID/10371. You may also wish to contact the manufacturer of your phone.
Can I minimize my RF exposure?
If you are concerned about RF, there are several simple steps you can take to minimize your RF exposure. You
can, of course, reduce your talk time. You can place more distance between your body and the source of the
RF, as the exposure level drops off dramatically with distance. The FDA/FCC website states that “hands-free
kits can be used with wireless phones for convenience and comfort. These systems reduce the absorption of
RF energy in the head because the phone, which is the source of the RF emissions, will not be placed against
the head. On the other hand, if the phone is mounted against the waist or other part of the body during use,
then that part of the body will absorb more RF energy. Wireless phones marketed in the U.S. are required to
meet safety requirements regardless of whether they are used against the head or against the body. Either
configuration should result in compliance with the safety limit.” Also, if you use your wireless phone while in
a car, you can use a phone with an antenna on the outside of the vehicle. You should also read and follow your
wireless phone manufacturer’s instructions for the safe operation of your phone.
Do wireless phones pose any special risks to children?
The FDA/FCC website states that “the scientific evidence does not show a danger to users of wireless
communication devices, including children.” The FDA/FCC website further states that “some groups sponsored
by other national governments have advised that children be discouraged from using wireless phones at all”.
For example, the Stewart Report from the United Kingdom [“UK”] made such a recommendation in December
2000. In this report a group of independent experts noted that no evidence exists that using a cell phone
causes brain tumors or other ill effects. [The UK’s] recommendation to limit cell phone use by children was
strictly precautionary; it was not based on scientific evidence that any health hazard exists. A copy of the UK’s
leaflet is available at http://www.dh.gov.uk (search “mobile”), or you can write to: NRPB, Chilton, Didcot,
Oxon OX11 ORQ, United Kingdom. Copies of the UK’s annual reports on mobile phones and RF are available
online at www.iegmp.org.uk and http://www.hpa. org.uk/radiation/ (search “mobile”). Parents who wish to
reduce their children’s RF exposure may choose to restrict their children’s wireless phone use.
Where can I get further information about RF emissions?
For further information, see the following additional resources (websites current as of April 2005):
U.S. Food and Drug Administration
FDA Consumer magazine
November-December 2000
Telephone: (888) INFO-FDA
http://www.fda.gov (Under “c” in the subject index, select Cell Phones > Research.)
U.S. Federal Communications Commission
445 12th Street, S.W.
Washington, D.C. 20554
Telephone: (888) 225-5322
http://www.fcc.gov/oet/rfsafety
Independent Expert Group on Mobile Phones
http://www.iegmp.org.uk
Royal Society of Canada Expert Panels on Potential Health Risks of Radio Frequency Fields from Wireless
Telecommunication Devices
283 Sparks Street
Ottawa, Ontario K1R 7X9 Canada
Telephone: (613) 991-6990
http://www.rsc.ca/index.php?page=Expert_Panels_RF&Lang_id=120
Other manuals for X Style
1
Table of contents
Other LG Cell Phone manuals