2
ESP
ENGLISH
Failing to set the video card to the recommended (optimal) resolution may result in blurred text, a dimmed screen, a
truncated display area, or misalignment of the display.
The configuration procedure may differ depending on your computer and/or operating system. Also, some video
cards may not support certain resolutions. If this is the case, contact the manufacturer of the computer or video
card for assistance.
Some video cards may not support 2560x1080 resolution. It is recommended to use a video card that supports
2560 x 1080 resolution. Even when you set the resolution to 2560 x 1080 on your PC, the actual PC output may
not support the resolution. Press the OK button on the monitor to check the current resolution of your PC. (Shown
on the OSD at the top right of the monitor screen.)
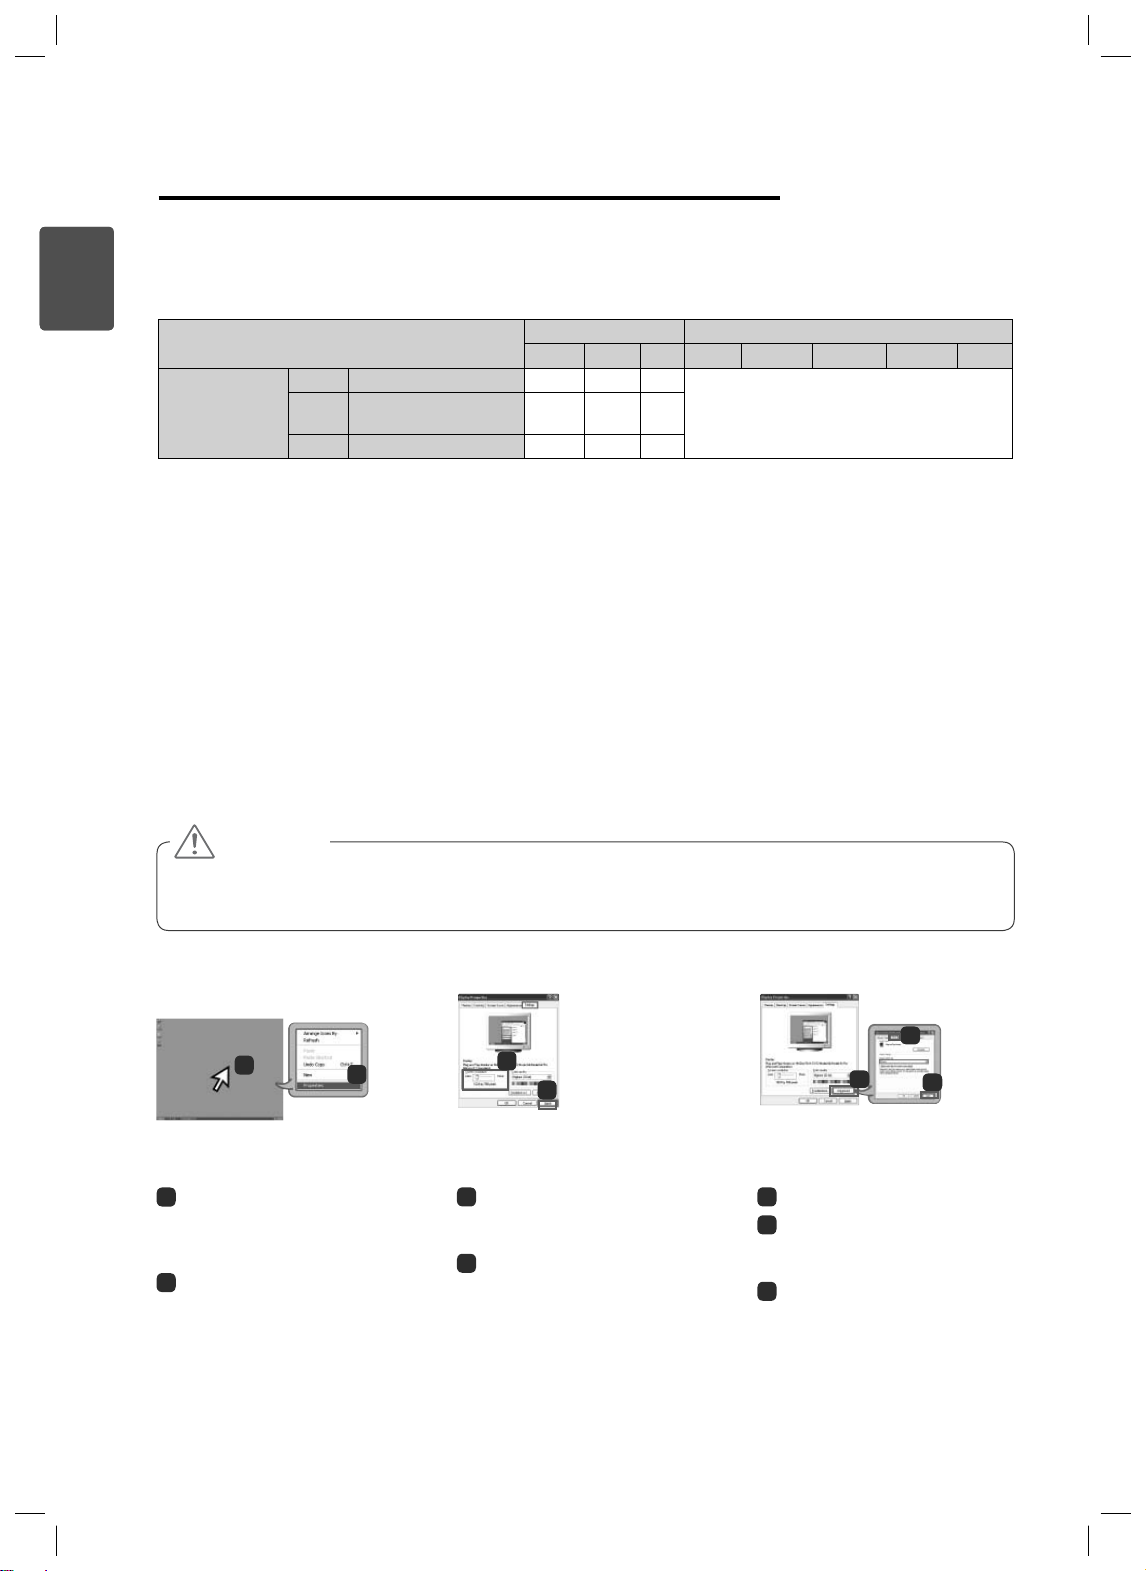
Graphics Card Interface OS
DVI-D HDMI DP Win XP Win Vista Win 7 Win 8 Mac
2560 x 1080
Intel HD3000 or higher O O O
No constraintsAMD HD54XX/HD64XX/
HD77XX or higher OOO
NVIDIA GeForce 300 or higher O O O
CAUTION
The setting method can vary depending on the computer and the O/S. You may not be able to select certain
resolutions depending on the video card performance. In such cases, please refer to the user's manual of the
computer and/or video card.
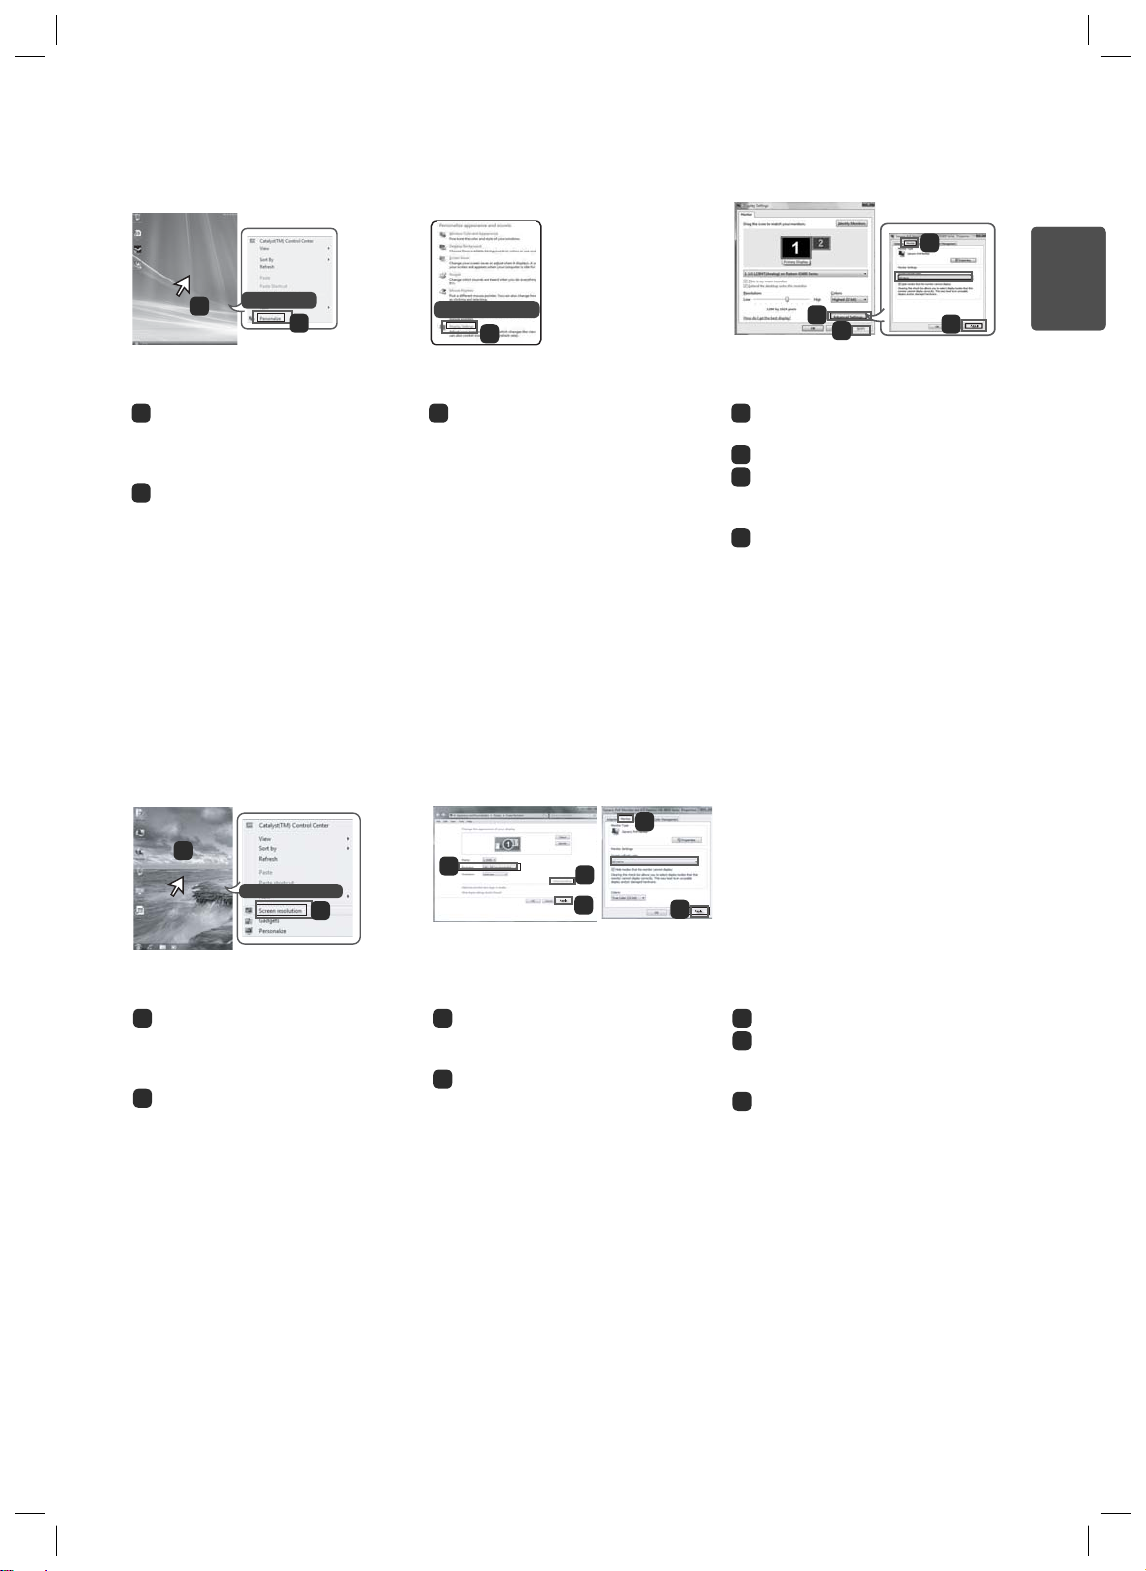
<STEP 1> <STEP 2> <STEP 3>
3Choose the "Settings" menu
and select an optimal resolution.
(2560x1080)
4Click the [Apply] button to
complete resolution setting.
5Select the [Advanced] button.
6Select the [Monitor] tab and set
the vertical frequency to 60Hz in the
"Refresh Rate" column.
7Click the [Apply] button to
complete optimal frequency setting.
[Windows XP]
1Move the mouse pointer to an
empty area on the Windows screen
(with no icons or task bars) and
click the right mouse button.
2When the pop-up menu appears,
click the "Property".
6
7
5
123
4
Guides on Using Product Functions (Windows)
Precautions for Changing Resolution
System Requirements for Graphics Cards