Overview
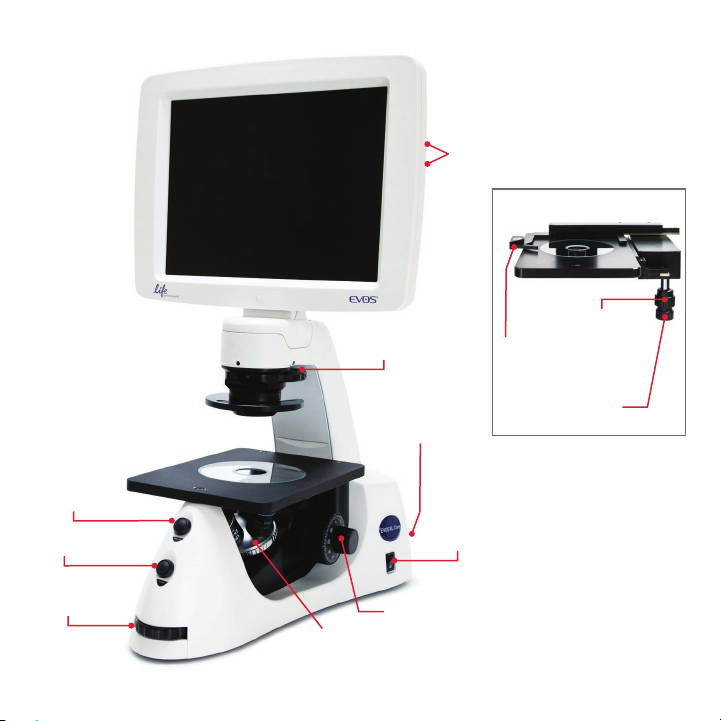
The EVOS®XL Core Imaging System has two
types of controls: manual and onscreen. Manual
controls include the illumination wheel, focus
knobs, Freeze and Save buttons, objective turret,
and the optional mechanical stage X-Y axis
knobs. Onscreen controls appear at the bottom
of the screen when the mouse rolls over the
controls area. Using a mouse is optional; you
can operate the EVOS®XL Core Imaging System
using only manual controls.
Note: The EVOS®XL Core Imaging SystemUser
Guide is provided on the USB flash drive. It isalso
available for downloading from the EVOS®XLCore
Imaging System product page at
www.lifetechnologies.com.
Operating Environment
Place the EVOS®XL Core Imaging System
on a level surface away from vibrations from
other pieces of equipment.
Allow at least 5 cm (2 in) of free space at
the back of the LCD housing to allow for
proper ventilation and prevent overheating
of electronic components.
Set up the instrument away from direct light
sources, such as windows. Ambient room
lighting can enter the imaging path and
affect the image.
Operating temperature range: 4°–32°C
(40°–90°F).
Relative humidity range: 30–90%. 2
Onscreen
Controls
Setup
1. Connect the power adapter to the power
jack on the back of the instrument base
and plug the cord into an outlet.
2. Plug the wireless mouse receiver into
either of theUSB ports located on the
right side of the LCD screen. Install the
battery and switch on the mouse.
3. Optional: If the instrument is equipped with
a mechanical stage, install the mechanical
stage following the instructions provided in
the user guide.
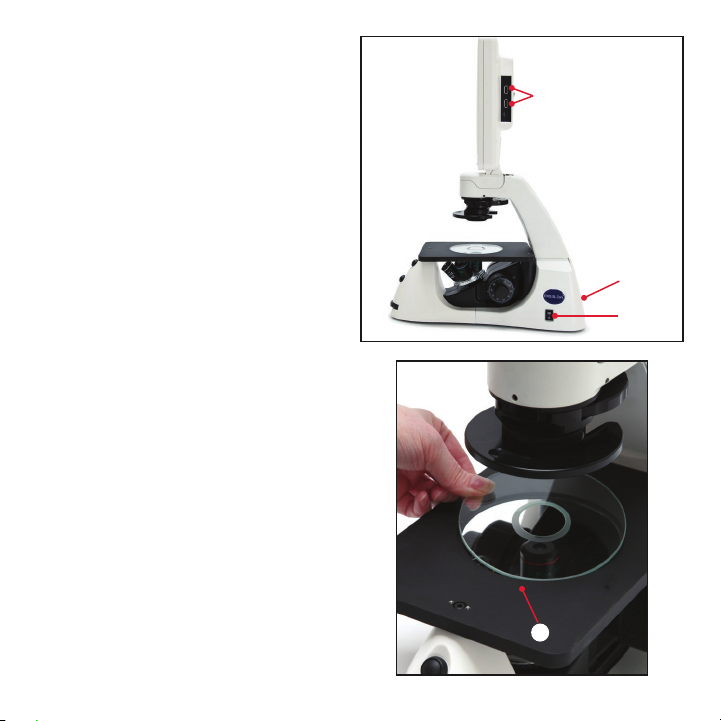
4. Unpack the glass stage plate and insert
it into the stage opening (if a mechanical
stage is installed, move it all the way back to
expose the stage opening).
5. Switch the instrument ON using the
power switch on the right side of the
instrument. Startup takes approximately
one minute. If the display remains black
after startup, adjust the illumination.
Note: For detailed setup instructions, refer
to the EVOS®XL Core Imaging SystemUser
Guide provided on the USB flash drive.
Basic Operation
1. Turn on the instrument using the power
switch on the right side of the base.
2. Plug a USB flash drive into one of the USB
ports on the right side of the instrument.
3. Place the sample on the glass stage
plate. If the instrument is equipped with
a mechanical stage, secure a vessel with
the stage clip to hold the sample over
the stage plate.
Note: Place slides with coverslips face up.
4. Set the objective turret to the desired
magnification.
5. Turn the phase turret to the position
that corresponds to the selected objective
and contrast method.
6. Bring the sample into focus using the
coaxial focus knob .
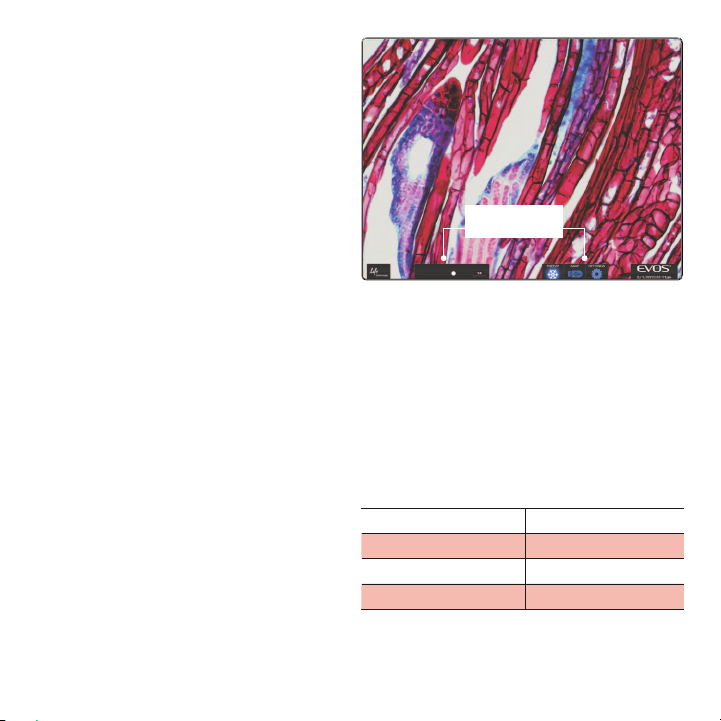
7. Adjust the illumination intensity if necessary,
using the onscreen illumination slider
or the illumination wheel .
8. Use the onscreen Freeze/Live button 11
or the manual Freeze button 12 to acquire
the image.
9. Use the onscreen Save button 13 or the
manual Save button 14 to save the image.
10. Click the onscreen Freeze/Live button 11
or the manual Freeze button 12 to return
to live viewing.
Note: The Freeze/Live button toggles
between Freeze and Live.
34
Note: Onscreen controls are available only when
mouse is installed. Roll over bottom of screen with
mouse to activate controls.
14
12
Dimensions
The EVOS®XL Core Imaging System will fit in cell
culture hoods that are at least 18 inches (457mm)
deep. If your cell culture hood is smaller, it may be
necessary to turn the instrument at a slight angle
to fit.
DEPTH 16.0 in (40.6 cm)
WIDTH 12.5 in (31.8 cm)
HEIGHT, TRANSPORT 13.5 in (34.3 cm)
HEIGHT, DISPLAY 21.0 in (55.3 cm) 1311