lifelong LLHSL08 User manual

Manufactured for & Marketed by :
Lifelong Online Retail Private Limited
For queries and complaints:
www.lifelongindiaonline.com
HOME SAFE
LOCKER
Built for Home. Built for India.
User Manual

1
INTRODUCTION:
Welcome to the Lifelong family.
Dear Customer,
Congratulations on purchasing Lifelong Home Safe 0.8 Cu. Ft with Led and a warm
welcome to the Lifelong family.
At Lifelong, we take pride in developing quality products for your home, health
and happiness. Through constant innovation in our products, we have been able to
develop a wide spectrum of products across Home, Kitchen, Grooming and Wellness
categories. We strive to enrich the lives of the modern consumer every day. Keeping
that in mind, we have offered all our products at a fair and honest price.
We hope that this Home safe Lockers serves you and your family’s needs without any
hassles.
Thanks again for becoming a part of the Lifelong family. Enjoy using the product!
Warm Regards,
Team Lifelong
2
LLHSL08

3 4
MOUNTING METHOD:
TABLE OF CONTENTS:
1. Mounting Method
2. Intelligent Electronic Safe
3. Opening your Safe for the first time
4. Inserting the Batteries
5. Opening Door
6. Closing Door
7. Automatic Lock
8. Setting the User Code
9. Setting Master Code
10. Opening the Safe with the Emergency Key
11. LED Light Functioning
12. Terms and Conditions
13. Warranty Card
•Select a stable, dry and secure location for your safe.
•If bolting to a wall, make sure that your safe is resting on a supporting
surface (such as the floor or a shelf). Do not bolt your safe to both the floor and
wall.
1. Place the safe on the selected location. Use a pencil to mark the mounting holes
on the floor or wall.
2. Move the safe and drill 2-inch-deep mounting holes (-50 mm) using the
appropriate drill bit.
3. Move the safe back in place, align the mounting holes to the openings in the
safe. Insert the expansion bolts (included) through the holes and into the
mounting holes and tighten them securely.

56
INTELLIGENT ELECTRONIC SAFE:
Please do not keep emergency keys in your safe!
Schematic drawing of case
For any help, kindly consult the local distributor Schematic drawing of control panel
1. Bolts
2. Reset Button
3. Battery Compartment
4. Knob (Master Key)
5. Emergency Lock Cover
6. Green Light
7. Red Light
8. Yellow Light
9. Confirming button
10. LED Light
10

7 8
OPENING YOUR SAFE FOR THE FIRST TIME:
To open the safe for the first time, please use the emergency key. The operation in
details refers to “opening the safe with the emergency key”.
• Remove emergency lock cover, then insert the emergency key, and turn it counter
clockwise.
• Insert the emergency key, turn it counter clockwise, then turn the knob
(master key) clockwise to open the door."
CAUTION: Finish operation, pull out the emergency key and keep it in a safe place.
INSERTING THE BATTERIES:
• Open the door.
• Insert 4 X AA batteries into the battery compartment.
• Under normal condition both red and green lights are on at the same time. It means
the voltage is low and you should insert new batteries.
CAUTION: Replace 4 batteries by lining them up in a manner as indicated by the “+ “
and “ - ” signs. You should reset the user's code after replace the batteries.
OPENING DOOR:
CLOSING DOOR:
• Input your user’s code (3 to 8 digits), each press results in one beep and
the yellow light flashes.
• Press “#” or “*” confirming button, the green light will be on.
• Rotate the knob (master key) clockwise and pull outwards within 5 seconds,
the door is opened.
CAUTION: The user preset code is “159”. Please input the user code again if the
yellow light flashes with beeps.
• Turn the knob (master key) counter clockwise to close the door.
AUTOMATIC LOCK:
• 3 continuously wrong entries will activate the warning beeps.

SETTING THE USER CODE:
• Open the safe, press the reset button, start setting code when the yellow light
goes on.
• Input new code (3-8 digits), and press the “#”or “*” button to confirm with beeps,
which indicates the acceptance and storage of the new code.
• The beeping automatically stops after beeping for approx. 20 secs and if the
customer wants to stop it before that then should use emergency or remove
batteries or else beeping will stop automatically after few seconds.
SETTING MASTER CODE:
• Open the safe, input “0” twice and press the reset button, start setting code when
beeps and the yellow light goes on.
• Input the new master code (3-8 digits),then press “#” or “*” button to confirm, it
will be confirmed by beeps,setting is done successfully.
• If the yellow light flashes with beeps, it means the new code is invalid and should
operate again.
OPENING THE SAFE WITH THE EMERGENCY KEY:
Upon first receipt of the safe, or either the electronic circuit malfunction or
codes unknown.You could also use the emergency key to open the safe.
• Remove the cover of the emergency lock.
• Insert the emergency key, turn it counter clockwise, then turn the knob (master
key) clockwise to open the door.
9 10
CAUTION: The key pad would be disabled during the beeping. The beeping will stop
automatically after aprox 20 seconds or can also be stopped by opening the safe with
emergency key & power-cut by removing the batteries.
LED LIGHT FUNCTIONING:
Post the batteries are inserted, on opening the door, LED will be automatically
switched ON for 10 seconds and will be auto-off after 10 seconds.

Terms and Conditions:
1.This warranty is void if:
a. The completely filled warranty card is not presented
at the time of servicing the product.
b. The product is not operated according to the
instructions given under the user manual.
C. Damages are caused by lightning, abnormal
voltage, water or other liquid intrusion, fire, flood,
accident, negligence or improper handling.
d. Product has been damaged due to installation,
repairs, alterations or modifications by unauthorized
service organizations or persons.
e. Product label specifying the model number, serial
number and production code has been removed
and altered.
f. Defects or parts requiring replacement due to
ordinary wear and tear, corrosion, rust or stains,
scratches, dents on the casing or paintwork of the
product.
g. Claims damaged and/or missing parts
(accessories) after 7 days from the original date of
goods received.
h. Defects or faults in product which have been used
for commercial/industrial purposes or which have
been rented/leased or have been otherwise subject
to non-household/non-domestic use.
2. Repairs or replacements will be carried out by
authorized service provider.
3. During the limited warranty period, Lifelong or its
authorized service provider will repair without charge
the defective unit inclusive of labor and parts and
restore the unit to its optimum working condition. All
defective parts used for the warranty repair should be
surrendered to Lifelong and/or its authorised servicer.
4. All expenses incurred in collecting the unit (s) or
part(s) thereof from authorised service provider as
will as any other expenses and incidentals will be
borne by the consumer.
5. Lifelong obligations are limited to the repair and
replacement of the defective product. Except as set
forth above, there are no other express or implied
warranty and all warrantied, conditions or other terms
implied by statute or common law (including any
warranty of satisfactory quality, merchantability or
fitness for a particular purpose) are excluded to the
fullest extent permitted by the lass.
6. Lifelong total liability for damages relating to or arising
out of the purchase or use of the product regardless of
the type or cause of such damage of the form of
characterization of the claim asserted (e.g. contract or
tort) shall not exceed the original purchase price paid
for the product.
7. However in no event shall Lifelong and Lifelong
authorized distributors be liable for any punitive, special
incidental, indirect or consequential losses or damages
whatsoever (including without limitation, damages for
the loss of revenue, business, profits, goodwill, or
contracts, business interruptions, loss of business
information or any other pecuniary loss.) Whether or
not Lifelong has been advised of the possibility of such
damages.These limitations shall apply not with
standing the failure of the essential purpose of any
limited warranty. This limited warranty does not affect
consumer's statutory rights under the law.
8. No carrier, dealer or employee is thereof authorized to
make modifications to this warranty and you should not
reply on any such representation. Lifelong reserves the
right to amend the terms and conditions if necessary.
11 12
Consumer Warranty Card
Dear Customer,
Thank you for choosing a Lifelong consumer product. All Lifelong Consumer
products are designed and manufactured to the highest standards to deliver high
quality performance, as well as easy installation and use. At Lifelong, we believe in
providing not only service, but adding value to your purchase. The warranty has
therefore been designed especially for you with your interest at heart.
Warranty Service
All Lifelong consumer products are covered against manufacturing defects from
them date of purchase.
Name of the product:
Model:
Warranty coverage: 1 year
Please note: Purchase receipt is necessary for warranty verification.
Customer Details
Name:
Address:
Home Number:
Office Number:
E-mail Address:
Product Details
Model No.:
Serial No.:
Purchase Date:
Invoice Number:
Online Site:
Please log on to www.lifelongindiaonline.com and complete the online warranty form with your
personal and product details within 14 days.
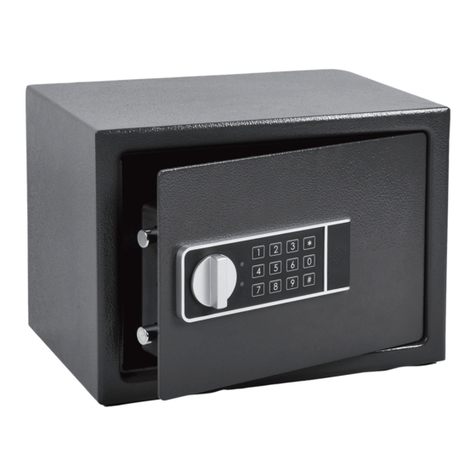
Table of contents
Other lifelong Safe manuals