Lightspeed Twenty 3G User manual

3G USER’S GUIDE
LISTEN TO SILENCE.
LIGHTSPEED AVIATION HEADSETS

Headset Adjustment
Getting the right fit is important.When properly fitted,
the LightSPEED 3G series is designed to give you the
most comfort while providing the best active cancellation
performance.There are several things to remember:
•The headset is non-reversible.The boom and cable
must be on your left.
•Make sure both your ears are inside the ear seals and
not pinched underneath.
•With 1-2 “clicks”, move each ear dome up into the
headband making sure both right and left are adjusted
equally. Expect to feel slight upward pressure on the
bottom of your ear lobe.This assures the domes are
above your jawbone.
•Position the mic about 1/8" from your mouth.
Boom & Cable worn
at LEFT side only
Position mic 1/8"
from mouth

POWER
VOLUME
EQ
LR
BB TB
1
2
3
57
6
4
Top View Bottom View
Battery Box Controls
The tear-shaped control box uses two AA batteries to
supply power to the headset’s Active Noise Reduction
(ANR) circuit. The control box also houses the various
boost features and provides a port for the use of a cell
phone or personal listening device, such as a compact
disc player or MP3 unit.
We Recommend
Alkaline AA Batteries.
Non-Alkaline Batteries
Decrease Available
Operation 40% to 70%.

Auxiliary Audio Input Jack
Your 3G Series product has a unique and patent-pending
feature that allows you to interface either a cell phone or
personal music device into your headset audio line.To
make this feature fully usable for all flying conditions, we
also added a ‘Comm priority’ mode that will automatically
mute 80% of the auxiliary audio signal.This allows you to
easily hear radio and intercom communications above any
auxiliary audio input.This muting feature can easily be
turned on or off during flight as needed.
There are a few general instructions for optimal use of
this suite of features and then some specific instructions
for separate devices below.The Auxiliary input jack is
enabled when the ANR system is activated. Make sure the
power button is “On” before trying to use ANY device
through this jack. Listening volume for audio from the
auxiliary device is controlled BY THEVOLUME
CONTROL ON the auxiliary device.The volume controls
on the battery box are designed to control volume from
the radio or intercom. Set/keep your volumes for the
headset at the levels you need to hear Radio and intercom
communications.The level of the auxiliary input device
must be set/controlled from the device itself.The headset
should be initially received set in “Comm Priority” Mode.
This means that any audio coming from an intercom or
Radio will ‘mute’ any auxiliary audio signal.The feature can
be turned on or off by depressing and holding the EQ
button down for over 5 sec. Once released, the mode will
change. Depress and hold again and it will switch back to
its previous state.
1

The Sidetone EQ features directly affect the audio
characteristics of ALL audio…both radio/intercom
communication and any auxiliary audio input. Utilize this
feature to optimize the audio characteristics of either or
both sources as you deem best.
A unique cable is provided for either type of input. Below
are specific instructions and warnings associated with
various devices.
Cell Phone usage
Interface cable: Use the cable with a smaller (2.5mm)
straight plug. It is the evolving standard for handsfree
headsets in the cell phone market and many phones have
a direct interface from this plug into the phone. For those
that do not, adapters are readily available as a LightSPEED
accessory or for some models through a phone store or
electronics outlet that carries cell phone accessories.
Caution: The FCC only allows the use of a cell phone within
the cockpit when the plane is on the ground. By offering the
cell phone interface on the control box LightSPEED Aviation
does not promote the use of your cell phone while in the air. If
you choose to use your cell phone in the air, you do so in
violation of FCC rules and at your own risk.The FAA has no
position on the use of cell phones either while on the ground, or
in the air. However, it is the duty of the pilot in command to be
sure that electronic devices used in the plane do not conflict
with the proper operation of the aircraft or its systems.
*We don’t promise that this will work with all phones.
Contact LightSPEED if yours does not.

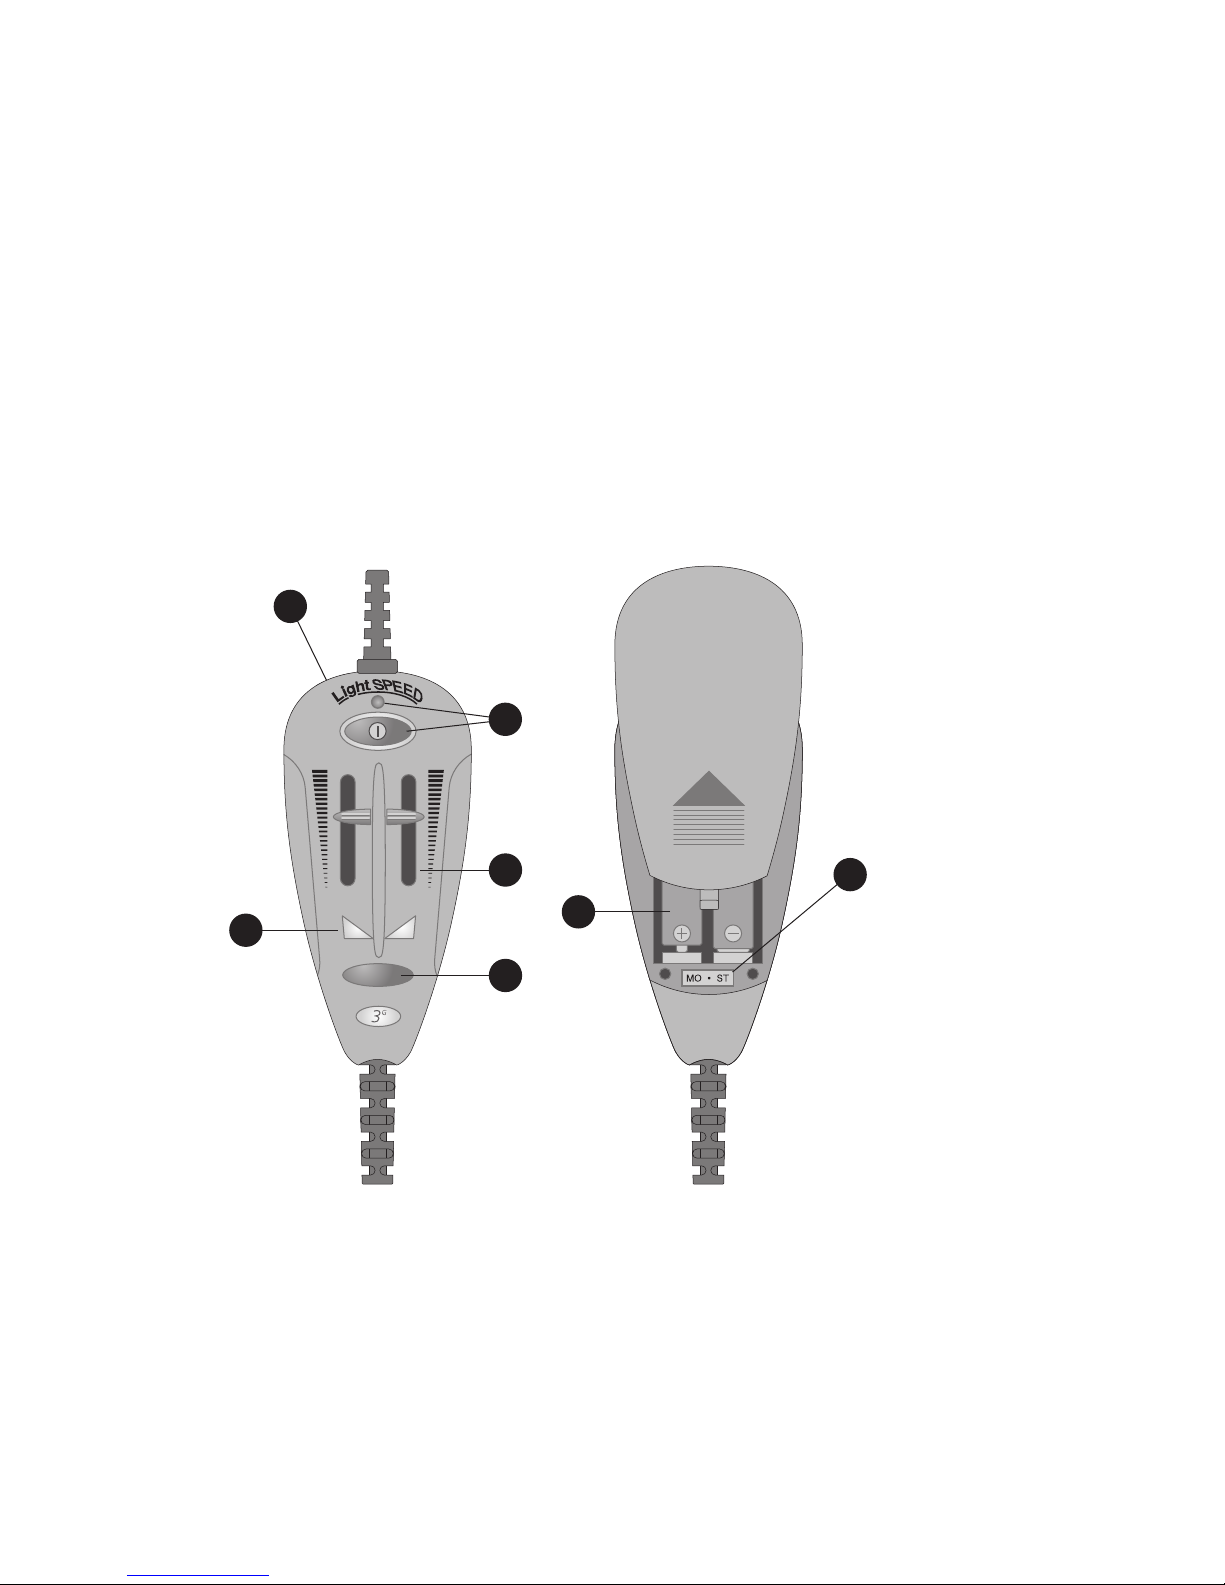
ANR Power Button / Battery Level Indicator
The oval Power button controls the headset’s ANR and
other functions.The button is counter intuitive to what
you might think.To turn the power on, press the button
so it’s in the outward position. A flashing green LED light
above the power button indicates the power is on. This
green flashing light will change to Red when battery
power runs low. The ANR feature will activate within two
seconds. It will continue to function until (1) the power is
turned off by pressing the Power button again, or (2) the
headset is removed from the user’s head and placed aside
for at least several minutes.
2
Music input (CD or MP3)
Use the cable that has both (2) right angle plugs, making
sure you insert the 4 band plug into the battery
box and the 3 band plug into your music device.
Elect whether you want to be in “Comm priority” mode
or not. Based on this, you’ll make a different volume
setting on the auxiliary device.
**Warning: The dB level for transmission of auxiliary
audio components such as cell phone, or CD players can
exceed the safe hearing limits. Do Not plug in one of
these components without first setting volume levels of
input component to minimum. Gradually increase the
audio component volume until desired levels are reached.
Headset volume controls DO NOT control the volume
level of auxiliary audio components.
The EQ features will really be noticeable when a music
source is plugged in. Make sure to try the different modes
to see which is optimal for your listening pleasure.

Tone Selection Switch
The EQ button activates the boost features – Bass boost,
Treble boost, boost both bass, or no boosting at all.To
change the setting, turn on the headset with the Power
button. If the Bass-Boost or Treble-Boost setting has
already been selected, the appropriate glowing LED will
indicate that selection. Press the EQ button once while
the LED is glowing.The next choice will light. Press the
EQ button again while the LED is glowing to move to the
next selection, and so forth. Both LEDs indicate both
treble and bass boost are operating. If neither LED is
glowing, there is no boost.
Note: If the operator is listening to a personal listening
device, or talking on their cell phone, an incoming radio
transmission will cause the auxiliary audio to drop out,
allowing the incoming transmission to be picked up by
the operator.This ‘muting’ feature can be disabled so
the music or cell phone is not muted by incoming
transmission by pressing and holding down the
EQ button for about 5 seconds.
4
Dual Volume Controls
These controls provide separate volume levels in each ear
cup. Move the slide switches up and down to change the
volume levels.
3

MONO/STEREO Selector Switch
Your 3G headset can be used compatibly with either a
Monaural or Stereo intercom system.With the slide
switch in the left position, it is in Stereo.When moved to
the right, it is in Mono. If you are only receiving audio
in one ear, move the slider to the right.
6
Battery Compartment
Access batteries by sliding battery door cover ‘up’. (2) AA
batteries are used to power the system.We recommend
you use alkaline batteries. Non-Alkaline batteries
decrease available operation 40% - 70%.
7
AES™ Auto Shut-Off (Patent Pending)
All 3G Series products are equipped with proprietary
technology called Acoustic Electronic Shut-Off (AES™).
This unique feature saves batteries if you forget to turn
the unit off.The AES™ system senses when the headset is
off your head and will shut down the ANR circuitry after
3-5 minutes of inactivity. If the AES™ has activated, the
flashing light will stop.To re-initiate the active electronics
simply push the power button.
Tone Boost Indicator Lights
BB is Bass Boost indicator, and TB is Treble Boost
indicator. BB or TB LED indicator will be lit when
accessing that feature.
5

Five Year Limited Warranty to
Original Purchaser
The LightSPEED Twenty 3G and Thirty 3G Aviation
Headset is guaranteed against malfunction due to defects
in materials and workmanship for a period of five years,
beginning at the date of original purchase. If such a
malfunction occurs, the product will be repaired or
replaced (at our option) without charge during the period
and under the limitations stipulated in the data sheet or
owner’s manual (if any) for that individual product. If
delivered prepaid to the LightSPEED warranty service
center, the unit will be returned prepaid.Warranty does
not extend to finish, appearance items, or malfunctions
due to abuse or operation other than specified
conditions, nor does it extend to incidental or
consequential damages, so the above exclusion may not
apply to you. Repair by other than LightSPEED or its
authorized service agencies will void this guarantee.
Information on authorized service agencies is available
from LightSPEED Aviation, Inc.

15954 SW 72nd Avenue
Portland, Oregon 97224
1.800.332.2421
503.968.3113
fax: 503.968.7664
www.anrheadsets.com
This manual suits for next models
1
Table of contents
Other Lightspeed Headset manuals