Lignomat Ligno-Scanner SD User manual

User Instructions for Ligno-Scanner SD
Moisture Meter
Lignomat USA Ltd.
14345 NE Morris Ct
Portland, OR 97230
E-mail: [email protected]
www.lignomat.com
Tel: 503-257-8957
800-227-2105
FAX: 503-255-1430

Table of Contents
Ligno-Scanner SD, Meter Functions and Warranty ................................. 3
General Information ................................................................................. 4
First Step: Check and Change Settings ....................................................... 5
Taking Measurements ................................................................................ 5, 6
Dual-Depth 1/4” and 3/4” ............................................................................ 6, 7
Toggle between 1/4” and 3/4” ...................................................................... 7
Measuring Veneer ....................................................................................... 7
Find Settings for Composite and Engineered Boards .................................. 9
Wood Floor Installations ............................................................................. 8
Relative Humidity - Wood Moisture and EMC Chart ................................... 10
Function and Calibration Check .................................................................. 11
Calculating Specific Gravity ........................................................................ 9
Change inches to mm .................................................................................. 8
Summary Pinless Meters and Specifications................................................ 12

Measured value.
% sign is only present, if
the indicated value is a
moisture percentage.
If % sign is missing,
the value is a reference
number (setting #0).
Press up or down key
to change settings for
Wood Species.
Battery cover is located
at the back of the meter.
Battery: One 9V battery.
A low battery symbol will
appear on the display,
when the battery is
drained to 25%.
If the display is blank and the
SET/HOLD key is pressed, the
active setting is displayed:
- wood species #30-100
or reference scale #0
If the display shows a measured
value and the SET/HOLD key
is pressed repeatedly:
- Scanner is put into Hold mode
- Scanner is put into Set mode,
- wood species setting can be
changed.
Two measuring pads are
mounted on the back of the
meter. The measuring pads
cover an area of:
2.75” L x 1.75” W
(6.8 x 4.2 cm)
Overall size of Meter:
4.5” x 2.4” x 1”
(12 x 6 x 2.5 cm)
Ligno-Scanner SD - Meter Functions
3
On the left side of the display,
the active wood species set-
ting and measuring depth are
indicated.
For measurements
press the READ key.
Automatic shut-off after
3 minutes.
Hold Function
The HOLD key is used (while taking readings) to “freeze” measured values for
one minute. During that time you can switch back to measuring by pressing the
READ key again. This feature is helpful when taking notes or when measuring in
areas, where the display cannot be read.
Warranty: All Lignomat meters have a 2-year warranty.
Accessories have a 1-year warranty. Battery and pins are excluded.

Ligno-Scanner SD
The Scanners SD is a capacitance-type meter for
wood with a reference scale for other materials. The
sensor plates on the back emit and pick-up very
low-powered electro-magnetic signals.
The readings generated by the Ligno-Scanner SD
are average values for the entire measuring field be-
tween the surface and the maximum depth of pene-
tration. Moisture closer to the surface has a greater
effect on the average than the moisture closer to the
maximum depth of penetration.
All Lignomat meters internally check and adjust the calibration.
Manual recalibration is not needed.
Wood Range 5*-60%. Readings above 25% fiber saturation point are less accurate.
*To check the lowest possible reading, hold the meter in the air and push the READ
key. The range for hardwoods with high specific gravity is lower than 5%. The range
for softwood with low specific gravity is higher than 5%.
Settings: #30-100. The most common wood species are listed on the laminated
pocket guide included with each Scanner. Gravity Range is 0.3 to 1.0. For unlisted
species the specific gravity can be entered as species setting. Example, for specific
gravity of 0.42 the setting is #42. Values for specific gravity can be found on the in-
ternet by entering <specific gravity...> followed by the name of the wood.
For calculating the specific gravity see page 9.
For unlisted species or new products we offer testing to determine the correct setting.
Reference scale:
Code #0: Sensitivity level for laminates and products made out of wood.
Selectable Measuring Depths: 1/4” (7mm) and 3/4” (20mm)
Battery: One 9V battery (included). To exchange battery, slide bat-
tery cover off on back of instrument. A low battery symbol will appear
on the display, when the battery has been drained to 25% of its capacity.
Size of meter:
2”W x 5.5”L x 1”H (12 x 6 x 2.5cm)
Size of measuring pads:
2 1/2”L x 1 1/2”W (65 x 40mm)
Warranty:
All Lignomat meters have a two year warranty. Battery excluded.
4

First Step Check and Change Settings
Settings for wood species are listed on the laminated pocket guide included with
each meter. To recall active settings push the SET/HOLD key repeatedly.
1st: Active Material settings for wood
2nd: Active settings for Measuring Depth
for 1/4” or 3/4” (7mm or 20mm).
Use ▲or ▼keys to change settings.
Taking Measurements
After settings have been checked / changed, press the READ
key to obtain moisture readings. The active settings appear
briefly. Then, if the measuring pads are not in contact with any
material, the lowest possible value for the active wood setting
appears: SCAN/min is 4.6 for setting #53.
If measurements are taken, the measured value (9.6%), the
active wood species setting (53) and the measuring depth is
displayed. (1/4” or 3/4”)
The HOLD key is used to freeze the indicated value for one
minute. Helpful when taking notes or when measuring in places,
where the display cannot be read while measuring. At any time
you can switch back to measuring by pushing the READ key
again.
5
While taking measurements:
- If the material is too dry to be measured, the meter will show the lowest possible value
indicated by SCAN/Min on the left side of the display.
- If the material is too wet to be measured, the meter will show the highest possible value
indicated by SCAN/Max on the left side of the display.
The lowest possible moisture percentage is different depending on wood species, for
hardwoods the value is below 5%, for softwoods the value is above 5%.
HOLD function can be activated at any time during measurements. The meter turns off
automatically after three minutes.

To obtain accurate measurements:
Turn the meter on and place it on the test sample (for
wood in the direction of the grain). Press down lightly,
holding the outer sides of the meter without touching
the test sample with your hand. It is important to put
light pressure on the meter towards the test sample.
For accurate measurements:
- The test sample should be big enough to cover both
measuring pads.
- The test sample should be at least as thick as the measuring depth. See below.
- If the surface is not smooth and flat, several measurements should be taken.
Select the highest value.
Note, all materials within the measuring field contribute to the value indicated. If the test
sample is composed of different materials, the value indicated may not be a true moisture
percentage, but may only be a reference number. Page 9: Find Settings for Composite
and Engineered Boards.
To make sure the material underneath the test sample is not influencing the measure-
ments, arrange an air space underneath the test sample. For example: Elevate one end
of the test board to create an air space underneath the board.
Measuring Depth Selectable 1/4” and 3/4”
Selectable dual-depth 1/4” and 3/4” is a unique feature only available in Lignomats
dual-depth meters: Ligno-Scanners SD and SDM, Ligno-DuoTec BW and Ligno-
VersaTec. All dual-depth meters from Lignomat have 2 independent sets of calibrations,
one for 1/4” deep and one for 3/4” deep.
Measuring depth is crucial for all pinless meters.
Most pinless meters are calibrated for a fixed ma-
terial thickness of 3/4”. That means, accurate mea-
surements can only be taken if the material is at
least 3/4” thick and no more than 1.5” thick. If test
samples are thicker than 1.5”, core measurements are only possible with a pin electrode.
If test samples are thinner than the measuring depth, readings may be inaccurate:
- If not enough test material is underneath the measuring pads, values will be too low.
- If material underneath the test sample is included in the measuring field, values
could be too high.
New ways to use the dual-depth capability of the dual-depth Ligno-Scanner SD ....
6

7
New ways to use the dual-depth capability of the Ligno-Scanner SD
-- Measuring products less than 3/4” thick: Many panel and floor products are only
5/8” thick, which does not work well for a 3/4” measuring depth. One example: When
floor planks 5/8” thick are installed and measured with a pinless meter set for a 3/4”
measuring depth, you cannot be sure that the subfloor or concrete underneath is not
affecting the readings. With the Ligno-Scanner SD on the 1/4” depth setting, you defi-
nitely only measure the floor planks .
--Measuring engineered products: You can find the moisture content of the thin top
layer made from hardwood by using the corresponding species setting and 1/4” depth.
Using those results, a setting can be found for the entire floor plank. Page 9.
--Toggle function: The measuring depth can be changed with up or down keys with
out moving the meter. This allows you to compare surface and core moisture.
Toggling can also be used to diagnose floor failures or to monitor acclimation.
-- 1/4” depth setting allows for checking dryness of waterbased finishes. Works great
for veneer or for measuring moisture close to the surface.
Toggle Between 1/4” and 3/4”
While measuring, you can toggle between the
two measuring depths. Push the ▲key to switch
to 1/4” (20mm). Push the ▼key to switch to 3/4”
(7mm). One hand can hold the meter, the other
hand can activate the up or down key. You do not
have to move the meter at all.
This is a great way to compare surface with core
moisture.
Measuring Veneer
Measuring Veneer: We recommend placing a lite-weight (non-weight) material such as
styrofoam underneath the test sample when measuring veneer or other thin materials. It
not only prevents inaccurate readings, but also helps to create a flat measuring platform.
To obtain accurate readings for very thin veneer it may be necessary to make a stack of
several sheets.
You can also find a calibration setting for single veneer sheets,
see “Find Settings for Composite and Engineered Boards” page 9:
Start with Step 2, if you know the moisture content of the veneer sheet. Otherwise, start
with Step 1b, if you have a sheet acclimated to a known relative humidity.

8
Wood Floor Installation
Wood moisture meters and thermo-hygrometers
are essential tools for floor installers. Lignomat
offers the Thermo-Hygrometer PN or a combi-
nation meters: pin/pinless/RH:
Ligno-Versatec
Ligno-DuoTec BW. (Summary last pg)
First: Take measurements when the floor is de-
livered, make sure the floor is dry.
Next: Take measurements (moisture and RH) before, during and after acclimation.
Mark sample boards and take readings of the same spot repeatedly.
Last: The moisture content of a floor should be documented at the time the customer signs
offon the installation. Select several moisture sensitive areas, under windows, in-
side doors, by the refridgerator, etc. Take readings with both depth levels and doc-
ument the measurements with moisture content, species setting, measuring depth
and location. Take a photo to pinpoint the location. Use a thermo-hygrometer to
take relative humidity and temperature measurements.
Keeping track of moisture conditions may in the end protect you from unwarranted claims
and help find the cause of a problem. If you ever have to go back to check out a complaint,
you can measure the same areas again and compare with the original measurements.
The dual-depth readings can indicate if moisture was absorbed from the down-side of the
floor or from the up-side of the floor. See EMC chart on page 10 for equilibrium moisture
contents and the corresponding relative humidity and temperature. If EMC and MC are
kept in close range, wood floors are absolutely stable.
Change Measuring Depth from US to Metric System
Check Software Version
To change from US to metric system, disconnect the battery and press the SET key twice.
Connect the battery again. Display shows software version as a 3-digit number. Example
3.19. To the right side of the software number in the upper or lower corner °C or °F ap-
pears. By changing from °F to °C, the measuring depth will change from mm to inches.
Use ▲or ▼keys to change settings.
The setting can only be changed, while the 3-digit software number is displayed.
To switch the setting from °F to °C, use down key.
To switch the setting from °C to °F, use up key.

Find Settings for Composite and Engineered Boards
Follow steps 1 and 2 to find settings for products not listed on the species card.
For best results, the test sample should be acclimated to a uniform moisture content.
1:Determine the moisture content (MC value) of the test sample using 1a) or 1b).
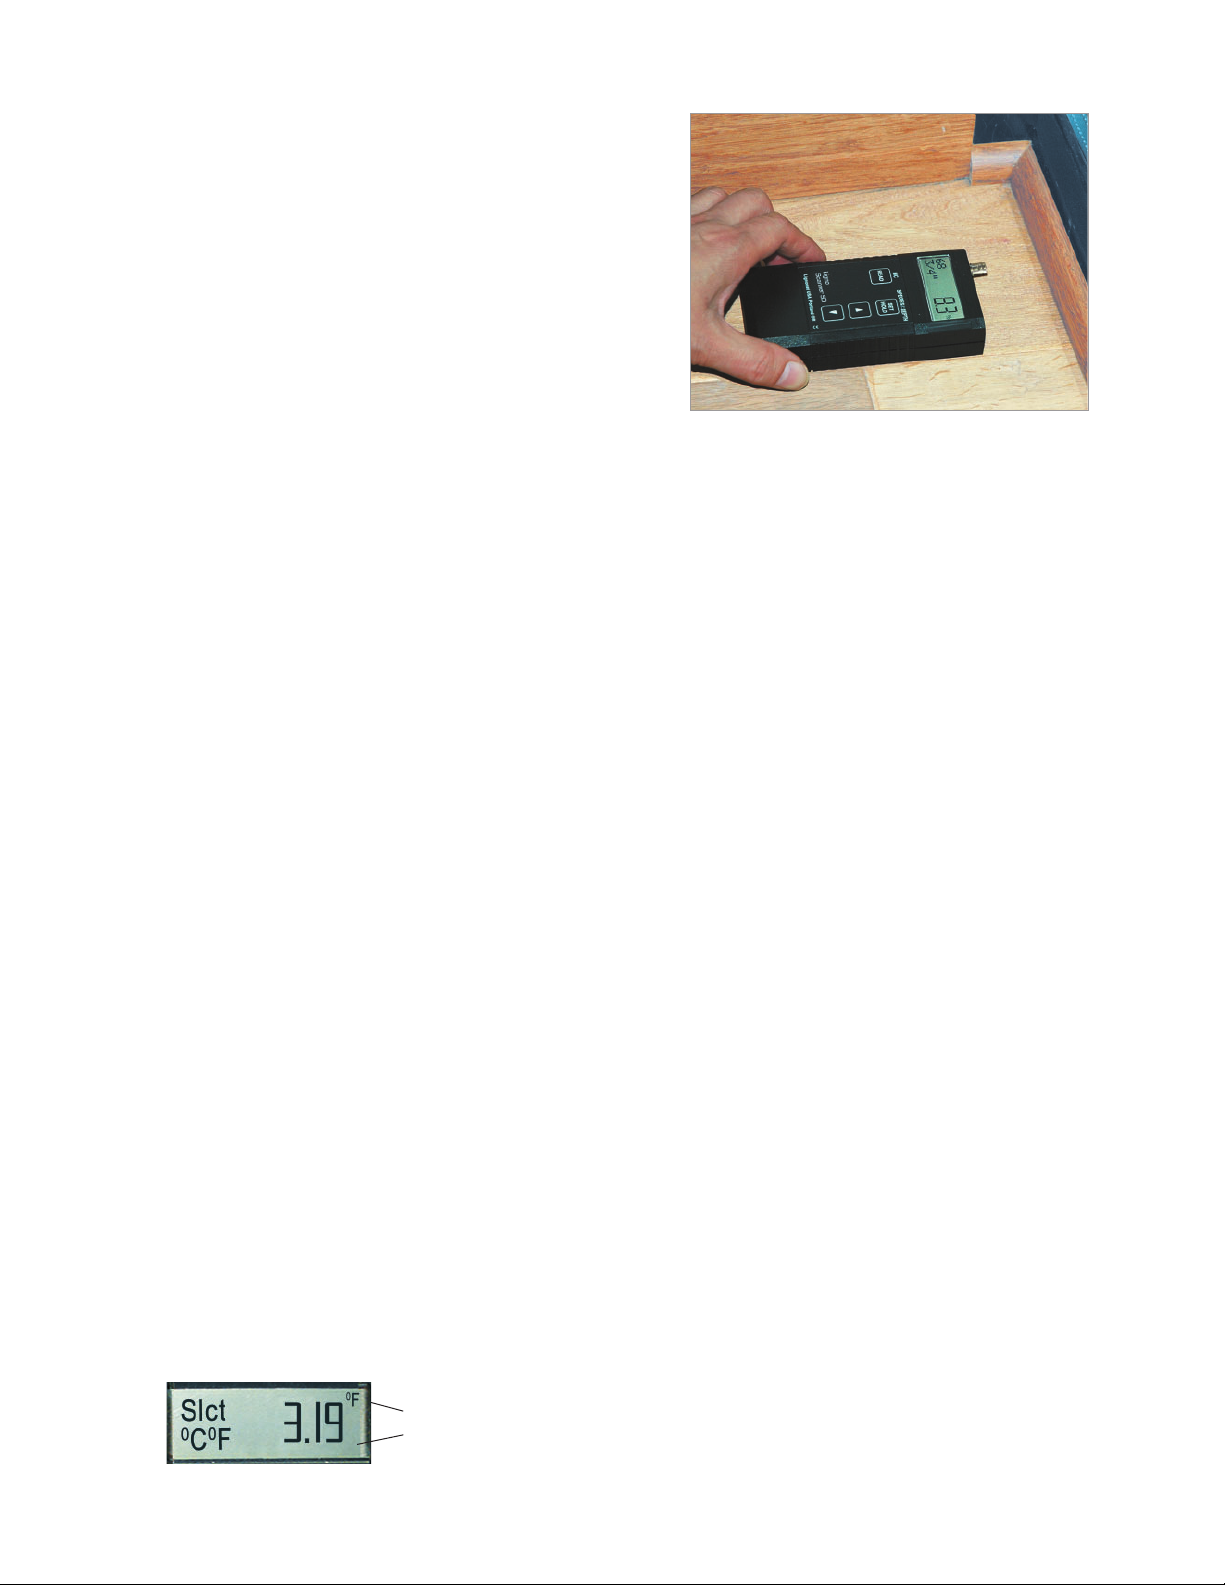
1a) If the top layer is wood, find the MC value by taking readings. Set the meter to the
wood species of the top layer at 1/4” depth, even if the top layer is thinner than 1/4”.
1b) If the top layer is not wood or the product is less than 1/4” thick (veneer), the test
sample has to be well acclimated in a known relative humidity. Then you can find the
MC value in the EMC chart. Moisture measurements with the meter are not needed.
Look up the relative humidity and find the corresponding EMC value. For a test sample accli-
mated in 40-50% rel. humidity, the MC value is 8.5% . Page 10.
2:Determine the new setting using the MC value found in step 1. Take a measurement with
setting # 50 and 3/4” depth. Use depth 1/4” for a test sample less than 3/4” thick.
--If the reading is lower than the MC value found in step 1, choose a setting lower than 50.
--If the reading is higher than the MC value found in step 1, choose a setting higher than 50
Then, take another measurement. Change the setting, until you get a reading close to the
MC value determined in step 1.
The new-found setting can be used in the future for the same type of boards.50.
If the reading is higher than the MC value found in step 1, choose a setting higher than 50.
Then, take another measurement. Change the setting, until you get a reading close to the
MC value determined in step 1.
The new-found setting can be used in the future for the same type of boards.
9
Specific gravity can be found on the Internet by entering <specific gravity ....> followed
by the wood species. Specific gravity can be calculated by dividing:
Dry Weight x 1.73 enter Dry Weight in ounces
Length x Width x Heights enter Length, Width and Heights in inches
Dry Weight enter Dry Weight in grams
Length x Width x Heights enter Length, Width, Heights in centimeters
If the specific gravity is 0.42, the Ligno-Scanner SDM should be set to #42 in pinless
mode. For unlisted species or new products call customer service at 800-227-2105. If
no listing is available, Lignomat offers testing to determine the correct setting.
Calculating Specific Gravity

Relative Humidity, Wood Moisture and EMC Chart
Recommended ambient conditions in buildings are 30-50% relative humidity at 60-80°F.
If ambient conditions stay within this range, the amount of expansion and contraction of
wood floors and furnishings at 6-9% moisture content is limited. (Table from US Dept of
Agriculture “Wood Handbook, Wood as an Engineering Material”)
Example: For a relative humidity of 35% and a temperature of 70°F, the EMC is 6.9%. A wood floor at 6.9%
moisture content is stable, if the surrounding air has a relative humidity of 35% and a temperature of 70°F.
In short a floor is stable, when MC and EMC are the same.
Dimensional Stability of Wood:Wood moisture and relative humidity are crucial
factors for dimensional stability of wood. Use moisture meter and thermo-hygrometer
to measure both. If wood shrinks, warps, cups, checks or delaminates, it always has to
do with changes in wood moisture and/or relative humidity. No shrinking and warping
occurs, when an equilibrium (see EMC chart) with the surrounding air has already been
reached, which means wood is not losing or absorbing any more moisture.
Predictions and Explanations: Measure relative humidity, temperature and moisture
content. Compare the measured values with the EMC chart above to predict, if wood is
stable or will loose or gain moisture.
-- A hardwood floor shows gaps from shrinking. The moisture content at the present time
measures 6.2% and the rel. humidity is at 30%. The only explanation for the gapping
is, that the floor was installed at a higher moisture content. Once exposed to the dry
air, the floor dried out and the gapping occurred.
-- If a dry floor with a perfect moisture content of 6.2% is exposed for a long time to air
with a relative humidity of 60% at 70°F, it can be predicted that the floor will absorb
moisture until 11% has been reached. Depending on the wood species, a 5% increase
in moisture content can be accompanied by a substantial amount of expansion.
No more surprises! Use the EMC chart and your Ligno-Scanner to predict problems.
The chart is also helpful to explain to your customers, why relative humidity in their home
matters.
EMC CHART
10

11
Function and Calibration Check for Ligno-Scanners
All pinless meters from Lignomat are built with high quality components, micro-processor
based, to guarantee stable calibrations for many years of usage. All meters from Ligno-
mat internally check and if necessary adjust the calibration before each reading. There-
fore, the meters are not set up to be re-calibrated manually by the user.
Before the battery is drained completely and the meter will not give any more values, a
warning sign appears in the middle of the display, indicating the battery should be re-
placed soon.
Function Test: Pinless measurement functions can be tested for open and closed circuit
connections manually without using the check block.
Calibration Verification: Pinless measurements can be tested for calibration accuracy
with check block TS available from Lignomat.
For sensitive testing we recommend using the check block before and after a test series.
Every time you check, the indicated value should be within +/- 1% of the test standard.
Manual function check for pinless meters: Step 1 and 2
Calibration verification for pinless meters: Step 3
Step 1: Open circuit check. Set the meter to pinless mode,
choose code # 50. Hold the meter in the air to make sure no
material is touching the measuring plates. When the READ
key is pressed, a low moisture value of 5.4% should be indi-
cated with SCAN/Min to the left side of the display. For 1/4”
and the 3/4” depth the same value should appear.
Step 2: Closed circuit check. Place the pinless meter on your
forearm and press the READ key. A high moisture value should
be indicated. An additional meter check can be performed by
measuring a ream of paper. If the paper test is done repeatedly
with the same setting, the indicated value should not vary sig-
nificantly over the course of a year. This can be used to check
consistancy / accuracy of the pinless calibration.
Step 3: Lignomat offers an external calibration check block TS
for all Lignomat pinless meters. The check block for pinless
meters from Lignomat is a material plate which produces a
defined reading, when the meter is lightly pressed against its
surface.
If step 1, 2 or 3 fail either the battery needs to be replaced or the meter is defective. Call
customer service 800-227-2105.

Bamboo
Item
Gypsum
Sheetrock
Concrete
Pinless Mode
Reference
Scales
RH In-Situ
Concrete
Pin Mode
Depth 1/4”
Depth 3/4”
Summary of all
Pinless Meters
Ligno-Scanner S S
Ligno-Scanner D D
Ligno-Scanner SD SD
Ligno-Scanner SDM SDM
Ligno-DuoTec BW BW
Ligno-VersaTec V-0
Summary of Pinless Meters offered by Lignomat.
SPECIFICATIONS: Ligno-Scanner S, D, SD, SDM, Ligno-DuoTec BW and Ligno-VersaTec
All pinless meters from Lignomat indicate wood moisture in percent, corrected by 71 wood group
settings or by the specific gravity between 0.3 to 1.0 (Settings 30 -100). Moisture Range: 5-60%.
Resolution 0.1% . HOLD function. The calibration is internally checked and adjusted before each
reading. Function and calibration can be verified with the pinless test block TS. Page
Additional calibrations for
Ligno-Scanner SDM, DuoTec BW, Ligno-VersaTec:
-- Bamboo and other strand woven products
-- Sheetrock scale from 0-2%
-- Reference scales with 3 sensitivity levels:
concrete, standard bldg materials, laminates
Size of meter: 2”x 5.5”x1/2”. Weight 8 oz.
Measuring pad 1 5/8” by 2 5/8”.
Test sample should be as large as the
measuring pads and as thick as the measur-
ing depth of the meter.
SpecificaƟons are subject to change without noƟce.
Lignomat USA LTD, 14345 NE Morris Ct., Portland OR 97230,
- Ligno-VersaTec
- Electrode E12
- Electrode E14
- RH Thermo-Hygro probe
- in-situ concrete testing
E12 E14 RH probe RH concrete
Ligno-VersaTec Pin - Pinless- RH All-in-one
12
This manual suits for next models
2
Table of contents
Other Lignomat Measuring Instrument manuals

Lignomat
Lignomat Lignometer K User manual

Lignomat
Lignomat Ligno-DuoTec BW User manual

Lignomat
Lignomat mini-Ligno DX/C User manual

Lignomat
Lignomat Ligno-VersaTec V-0 User manual

Lignomat
Lignomat PK Setup guide

Lignomat
Lignomat Ligno-VersaTec User manual

Lignomat
Lignomat S-10 User manual

Lignomat
Lignomat Ligno-Scanner S User manual