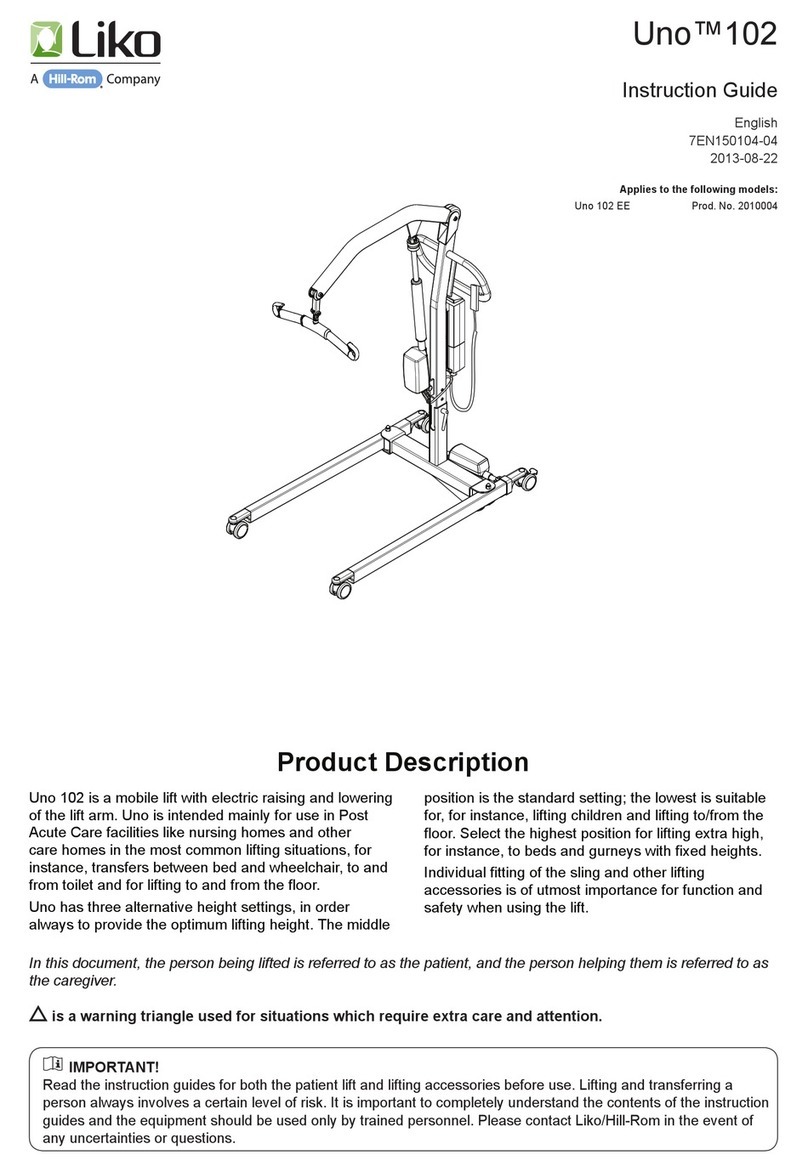
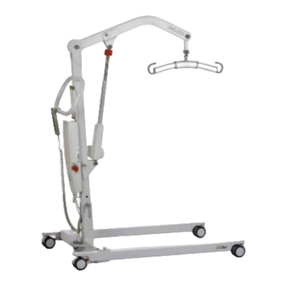
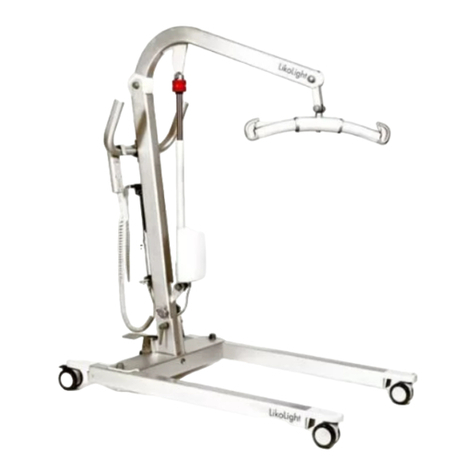
Liko Viking L Manual

Product Descripon
In this document, the person being lied is referred to as the paent, and the person helping them is referred to as the caregiver.
Viking™ L and XL mobile lis are two versale li models
intended mainly for use in health care, intensive care and
rehabilitaon. Viking L and XL mobile lis are intended for
heavier paents.
Both models are excellent aids in daily transfers of adults
and bariatrics, for instance, liing to and from wheel chair,
bed, toilet and oor. A Viking™ mobile li equipped with
the Viking™ Armrest accessory can be used for gait training.
Horizontal liing can also be performed in combinaon with a
recommended Liko™ stretcher accessory.
The control box together with the handcontrol contains
a series of features which meet the needs for a safe and
comfortable li. Data is collected in the control box (work
counter & intelligent cycle counter) and can be read out
from the informaon display.
Individual ng of Liko slings and other Liko liing
accessories to t the paent is of the utmost
importance for opmal performance and safety when
using the li.
Viking™ L / XL
mobile li
Instrucon Guide
Viking L Prod. No. 2040044
Viking XL Prod. No. 2040043
7EN137108 Rev. 1
ENGLISH
Important informaon before use!
Liing and transferring a person always involves a level certain risk. Read the instrucon guide for both the paent li and
liing accessories before use. It is important to completely understand and adhere to the contents of the instrucon guides.
Keep the instrucon guides available to those using the product. The equipment should only be used by trained personnel.
Please contact your Hill-Rom representave in the event of any uncertaines or quesons.
(Viking L)

2
Viking™ L, XL mobile lis • 7EN137108 Rev. 1 www.hill-rom.com I www.liko.com
Table of Contents
Symbol descripon ................................................................................. 2
Safety Instrucons .................................................................................. 3
Denions .............................................................................................. 4
Technical Data ........................................................................................ 4
Dimensions ............................................................................................. 5
Assembly ................................................................................................ 5
Operaon ............................................................................................... 7
Charging the Baery ............................................................................. 10
Maximum Load ..................................................................................... 11
Recommended Liing Accessories ....................................................... 11
Troubleshoong ................................................................................... 13
Recycling instrucons ........................................................................... 13
Cleaning and Disinfecon ..................................................................... 14
Inspecon and Maintenance ................................................................ 16
Symbol Descripon
For indoor use only.
The product has extra protecon against electric shock (Insulaon Class II).
Protecon level against electric shock Type B.
Warning; this situaon require extra care and aenon
Read instrucon guide before use
This product complies with EC direcves.
IP N1 N 2 Protecon level against: ingress of solid objects (N1) and ingress of water (N2).
Manufacturer
Date of manufacture.
Cauon! consult instrucons for use
Consult instrucons for use for more informaon
Baery
,
Pb
,
All baeries in this product must be recycled separately.
- Pb underneath the symbol indicate baeries containing lead
- Single Black line underneath the symbol indicate this product have been placed on the market aer 2005.
UL Recognized Component Mark for Canada and the United States
EFUP, Environmental Friendly Usage Period (years)
Environmentally-friendly product which can be recycled and reused.
The Australian Safety/EMC
PSE Mark (Japan)
Symbol descripon
These symbols can be found in this document and/or on the product.

3
Viking™ L, XL mobile lis • 7EN137108 Rev. 1 www.hill-rom.com I www.liko.com
Intended use
This product is not intended to be used by the paent alone. Liing and transferring a paent shall always be performed
with the assistance of at least one caregiver. This product is used as a means to perform the li but is not in contact with the
paent; therefore we do not go into the various paent condions in this manual. Contact your Hill-Rom representave for
support and advice.
Certain environments and condions can limit the correct use of the mobile lis, including:
Thresholds, unlevel oor surfaces, various obstacles, and extra-thick carpets. These environments and condions can cause the
wheels of the mobile li not to roll as intended, possible imbalance in the mobile li, and increased exeron by the caregiver. If
you are uncertain that your care environment fulls the requirements for correct use of the mobile li, please contact your Hill-
Rom representave for further advice and assistance.
Before use, make sure that:
• the li is assembled in accordance with the assembly instrucons;
• the liing accessory is properly aached to the li;
• the baery has been charged for at least 6 hours;
• you have read the instrucon guides for the li and liing accessories;
• personnel using the li are informed of the correct operaon and use of the li.
Before liing, always make sure that:
• the liing accessories are not damaged;
• the liing accessory is correctly aached to the li;
• the liing accessory hangs vercally and can move freely;
• the liing accessory is selected appropriately, in terms of type, size, material and design, with regard to the paent’s needs;
• the liing accessory is correctly and safely applied to the paent in order to prevent injuries;
• the latches are intact; missing or damaged latches must always be replaced;
• the sling’s strap loops are correctly connected to the sling bar hooks when the sling straps are stretched up but before the
paent is lied from the underlying surface.
Prod. No. 2040043 and 2040044 are tested by an accredited tesng instute and comply with the requirements specied in
the Medical Device Direcve 93/42/EEC, for Class I products.
Prod. No. 2040043 and 2040044 comply with the requirements in EN ISO 10535:2006 and CAN/CSA Z10535-03 and applicable
parts of IEC 60601-1, EN 60601-1-2, ANSI/AAMI ES60601-1, CAN/CSA C22.2 no 60601-1, and AS/NZS 3200-1-0.
No modicaon of the product is allowed.
Use of the product adjecent to other equipment should be avoided because it could result in improper operaon, if such use
is neccessary, observe and verify that the other equipment is operang normally.
Electromagnec disturbance, may aect the liing performance of the product. Modicaon using other parts than original
spare parts (cables etc.) may aect the electromagnec compability of the product. Parcular care must be observed when
using strong sources of potenal disturbance, such as diathermy, etc, so that diathermy cables are not posioned on or near
the product.
If you have quesons, please consult the responsible assisve device technician or the supplier.
The product may not be used in areas where ammable mixtures may occur, for example, in areas where ammable
goods are stored.
Unbalanced liing poses a pping risk and may damage the li equipment!
Do not raise the li arm manually!
Never leave a paent unaended during a liing situaon!
Safety Instrucons
This Cauon noce is found on the Baery:
CAUTION! NOT TO BE OPENED BY UNAUTHORIZED PERSONNEL
DO NOT SHORT CIRCUIT
USE THE SPECIFIED CHARGER ONLY
MAY EXPOLODE IF DISPOSED IN FIRE
This Cauon noce is found on the Control box:
CAUTION! NOT TO BE OPENED BY UNAUTHORIZED PERSONNEL

4
Viking™ L, XL mobile lis • 7EN137108 Rev. 1 www.hill-rom.com I www.liko.com
Denions
1. Li arm
2. Li Mast (with color code for sling sizes)
3. Oponal accessory:
Holder for Quick Reference Guide
and color code for sling sizes.
4. Handles
5. Handcontrol
6. Baery
7. Control box with;
- Emergency stop
- Electrical Emergency Lowering
- Electrical Emergency liing
- Baery charger indicators
- Informaon display
8. Product decal
9. Locking handles
10. Motor for base-width adjustment
11. Rear wheels with brakes
12. Front wheels
13. Base
14. Li Motor (Actuator)
15. Emergency Lowering Device (mechanical)
16 Sling Bar with latches
17. Flexlink
Technical Data
Maximum load: Viking L: 250 kg (550 lbs)
Viking XL:300 kg (660 lbs)
Material: Aluminium
Weight: Viking L
Total: 36,7 kg (81.0 Ibs)
Heaviest part: 21,6 kg (47.6 Ibs)
Viking XL
Total: 39,9 kg (88.0 Ibs)
Heaviest part: 23,6 kg (52.0 Ibs)
Wheels: Viking L, XL
Front: 100 mm (4 in) twin wheels.
Rear: 125 mm (5 in) twin wheels.
Turning diameter: Viking L: 1460 mm (57.4 in)
Viking XL: 1570 mm (61.8 in)
Emergency
lowering device:
Mechanical and electrical
Liing interval: Viking L: 1330 mm (52.4 in)
Viking XL: 1370 mm (54.0 in)
Liing speed
(no load)
Viking L : 23 mm/s and 17 mm/s,
Viking XL : 23 mm/s and 17 mm/s,
(Viking L: 0.9 in/s and 0.7 in/s),
(Viking XL: 0.9 in/s and 0.7 in/s).
Sound level: Viking L : 51 dB(A)
Viking XL : 51 dB(A)
Protecon class: IP X4
Operang Forces
of Controls:
Handcontrol: 5 N
Electrical data: 24 V
Intermient
power:
Int. Op 10/90, acve operaon max 2 min.
Only 10% of a given length of me may be
acve, but no more than 2 min.
Baeries: Lead-acid gel, valve-regulated baery
24 V 2.9 Ah Prod. No. 2006106.
Weight: 2,8 kg (6.2 Ibs.)
Li-ION baery
25.6 V, 3.3 Ah Prod. No. 2006110.
Weight: 1,4 kg (3.1 Ibs.)
Baery charger: Internal charger, 100-240 V AC, 50-60 Hz,
max. 400 mA.
Li motor: Permanent magnet motor with mechanical
safety mechanism.
Viking L: 24 V, 8.0 A
Viking XL: 24 V, 9.0 A
Motor for base-
width adjustment:
Permanent magnet motor
24 V, 5,5 A
Surrounding
funconal
environment:
Temperature:
+10°C to +40°C, (50° F to 104° F)
Humidity: 20% to 80% at 30°C non-con-
densing, Air pressure: 800HPa to 1060HPa,
Altude: max. 2000m.
The device is intended for use indoors
Type B, in accordance with the electrical
shock protecon class.
Class II equipment.
Viking (L)
3
8
6
Forward direcon
14
16
17
2
4
10
9
11
5
1
12
7
13
15
BATTERY
ON CHARGE

5
Viking™ L, XL mobile lis • 7EN137108 Rev. 1 www.hill-rom.com I www.liko.com
Dimensions
Note: The measurements are based on the li being equipped with standard sling bar. When changing to other liing accessories, check that the li sll
achieves desired liing height.
** Reference measurement according to Standard EN ISO 10535:2006.
Assembly
Before assembly, make sure you have the following parts: • Locking handles, pair (2 pair Viking XL)
• Baery
• Instrucon guide, charger cable,
charger connector cable.
• Li mast with li arm, li motor incl. cable, sling bar and
control box with handcontrol
• Base with motor for base-width adjustment, incl. cable
Top view
Lateral view
B
B1
FF1
Amax.
B2
Amin.
**600 mm (24 in)
E
M
N
O
Max. reach posion of li arm
B3
Lmin
Lmax
C
D2
D
Max. reach posion of li arm
D1
**700 mm (28 in)
1. Lock both rear wheels.
Place the li mast in
the foot of the base.
2. Use the pair of locking handles to secure the
li mast in the base.
Note! (XL) 2 pair, start in the lower hole and
use "Pull-out-rotate" to secure li mast, see
illustraon.
Viking L Measurements: mm / in
Viking XL Measurements: mm / in
Amax Amin BB1 B2 B3** CDD2** E F F1 Lmax Lmin MNO
max min max min
2030 1390 1360 900 630 560 1070 695 950 625 230 1060 140 43 1790 460 500 280 550
80.0 54.7 53.5 35.4 24.8 22.0 42.1 27.4 37.4 24.6 9.1 41.7 5.5 1.7 70.5 18.1 19.7 11.0 21.7
Amax. Amin. BB1 B2 B3** CDD2** E F F1 Lmax Lmin MNO
max. min. max. min.
2110 1500 1420 960 600 560 1130 815 1015 605 145 1010 140 40 1910 540 557 365 665
83.1 59.1 55.9 37.8 23.6 22.0 44.5 32.1 40.0 23.8 5.7 39.8 5.5 1.6 75.2 21.3 21.9 14.4 26.2
1
23
Pull-out-rotate XL L
3. Aer securing the mast use
"Pull-out-rotate" to set the
locking handles in a downwards
posion, see illustraon.

6
Viking™ L, XL mobile lis • 7EN137108 Rev. 1 www.hill-rom.com I www.liko.com
10. Place the charger cable on the
hook provided on the mast
aer completed charging.
9. A) Connect the extension cable for the charging cable to the control box.
B) Insert the extension cable in the tension clip underneath the control box.
C) Connect the charging cable to the extension cable.
NOTE! Always charge the baery before using the li the rst me,
See chapter “Charging the Baery”.
A B C
8. Reset the emergency stop by turning
the buon clockwise.
ON CHARGE
BATTERY
7. Hang the handcontrol on
the handle.
kg/lbs
6. Oponal accessories:
- Quick reference guide
- Holder for Quick reference guide.
Motor for base
adjustment.
Li motor
Handcontrol
ON CHARGE
BATTERY
Aer assembly and charging, ensure that:
• the baery has been fully charged
• li arm moons correspond with the buons on the handcontrol
• service interval is acvated! Push following buons on the handcontrol simultaneously:
Up / Down , unl a audio signal (single beep) is heard = service interval acvated.
(Alternavely use the push buons simultaneously for emergency liing up and down on the control box)
• base width adjustment correspond with the buons on the handcontrol
• emergency lowering works properly (mechanical and electrical)
• Rear wheel brakes, funcons properly.
5. Connect the baery and secure it to the control box
bracket. A click sound can be heard when the baery is
installed correctly.
4. Connect cables to the control box, see
ilustraon. Make sure plugs are fully seated.
NOTE! The liing height can be aected when liing maximum load during in-run of actuator (up to 10 lis).

7
Viking™ L, XL mobile lis • 7EN137108 Rev. 1 www.hill-rom.com I www.liko.com
Operaon
Handcontrol operaon and indicators
Operate the li using the push buons on the handcontrol. For raising and
lowering: Direconal arrows show the direcon of movement (up/down)
The liing and base movement stops as soon as the push buon is released.
Indicator: 1 - 4
1 - Overload (Kg/Ibs) light "ashes yellow", too much load is applied to the li.
2 - Green light, baery power (100 - 50 %), Ok!
- will constantly light up green when charger is connected to mains.
3 - Yellow light, baery power (50 - 25 %), baery needs charging
4 - Yellow light, baery power (Less than 25 %), baery needs charging.
A buzzer will sound when pressing a push buon.
Note! If the buzzer sound starts during an ongoing li complete the li
and charge the li aerwards!
4 - Light "ashes yellow" and a buzzer will sound when pressing a push buon.
Charge the li immediately! The remaining baery power can only make
the li arm go down.
Note! Please see chapter "Charging the Baery" for more informaon.
Cable
Push buons:
Li arm:
Up / Down
Li arm (low speed):
Up / Down
Push buons:
Base width:
Out
In
kg/lbs
Indicator: 1 - 4
kg/lbs
2
3
4
1
Control Box operaon and informaon
1. Emergency Stop buon
- Acvate: Push the red buon
- Reset: Turn the red buon clockwise.
2.
UP (Arrow), Electrical emergency liing.
3.
DOWN (Arrow), Electrical emergency lowering.
Operaon of the push buons 2 and 3 are done by pressing
with a narrow object into the circle mark above each (Arrow).
The Actuator movement stops as soon as the push buon is released.
4. "ON" - lights up green when the charger is connected to mains.*
5. "CHARGE" - lights up yellow constantly during charging and will turn o when
charging is completed.
6. Display Pop-up informaon:
Baery power (100 - 50 %) Ok!
Baery power (50 - 25 %) Baery needs charging.
Baery power (Less than 25 %) baery needs charging.
A buzzer will sound when pressing a push buon.
Note! If the buzzer sound starts during an ongoing li complete the li
and charge the li aerwards!
Charge the li immediately! A buzzer will sound when pressing a
push buon. The remaining baery power can only make the li arm go down.
The li is connected to the mains.
Short circuit warning!
check cables and connecons.
Warning is shown unl repaired!
Overload!
Too much load is applied to the li.
Service needed; contact Hill-Rom.
SHORT CIRCUIT
CHECK CONNECTION
!
kg/Ibs.
service
6
4
3
5
2
ON CHARGE
BATTERY
1

8
Viking™ L, XL mobile lis • 7EN137108 Rev. 1 www.hill-rom.com I www.liko.com
Never move the li by
pulling on the actuator!
Electrical emergency lowering / liing
Use a narrow object to press into the
circle mark above each (Arrow),
See chapter "Operaon" for more
informaon.
Do not use sharp objects, since this
may cause damage on the control box!
ON CHARGE
To acvate the emergency stop:
Push the red Emergency Stop
buon on the control box.
To reset the emergency stop:
Turn the buon clockwise.
ON CHARGE
BATTERY
ON CHARGE
BATTERY
Locking the Wheels
The rear wheels can be locked to prevent rotang
and turning. The locking/unlocking of the wheels is
done with the foot.
NOTE: When liing, the wheels should be unlocked
so that the li can be moved to the paent’s centre of
gravity. The wheels should be locked, however, if there
is a risk of the li rolling into the paent, for instance,
when liing from the oor.
Locked wheels during liing can increase the risk
of pping.
www.liko.com
© Copyright Liko AB
900002568 Rev 2
2015Maj29
MOD003178
Namn: Dekal Skyddsrör
Art. nr: 900002568
Mått (ytterkant tryckt cirkel): (Ø 46 mm)
Färgkoder: Cirkel, Röd (PMS 185 C), Ilustration, 100% Svart
Övrig info: Trycks på genomskinlig rund bakgrund (IP 5700 Vinyl).
ON CHARGE
BATTERY
Total number of li cycles with load
Work done by actuator; Amp. x Sec.
Number of overload indicaons
Days since last service/Days between services.
xxx
xx/xxx
xxxxxx
xxxxx
A x S
kg/Ibs.
service
6. Informaon display:
Acvate informaon display by a "quick press" at a U P, push buon.
Li-ION baery - specic informaon
Sleep mode! the sleep mode will be acvated in a Li-ION baery if not in use or charged in one week or more. The sleep
mode switches o the baery and it´s electronics to save power. The baery will stay in sleep mode unl the baery is set
back to operaon mode again.
How to set the Li-ION baery back in operaon mode; Charge the baery, when the "CHARGE" indicator,
5
is lit the
baery has been set back in operaon mode and ready for use. Note! We recommend to charge the baery unl charging
is completed, see "Charging the Baery" for more informaon and instrucons.
Delay! a delay to indicators for current baery power at the control box and hand control occurs if the emergency stop
funcon is acvated and restored, see 1 above.
Mechanical Emergency Lowering
Turn the emergency lowering control
clockwise, repeat the movements
unl the paent being lied is on a
rm surface and the strap loops of the
sling can be unhooked.
Unlock
Lock

9
Viking™ L, XL mobile lis • 7EN137108 Rev. 1 www.hill-rom.com I www.liko.com
Posion of the Li when Liing
From/To: Bed Chair/Toilet Seat Floor
NOTE: Place a pillow under the paent’s
head for increased performance and comfort.
Always have the wheels locked when liing
from the oor.
Using the Viking XL mobile li with Twin bar
Universal TwinBar 670
Universal TwinBar 670 (prod. no. 3156077) for a maximum load of 300 kg (660 lbs) is included
with Viking XL mobile li. It is equipped with four hooks. The widest bar is intended for the
upper strap loops of the sling and the short bar is for the strap loops of the leg supports. The
wide sling bar provides for comfortable space for the upper body of the paent, even when
the arms are on the inside of the sling.
It is important that all four hooks be loaded when liing.
Installaon of Latches
Aer installaon, ensure that the
spring loaded latches is taut against
the sling bar and moves freely in the
sling bar hook.
Li correctly!
Before each li, make sure that:
– the Sling loops at opposite sides of the Sling are at the same height
– all the Sling loops are fastened securely in to the Slingbar hooks
– the Slingbar is level during the li, see Figure 1.
If Slingbar is not level (see Figure 2) or if the sling loops are wrongly
aached to the slingbar (see Figure 3) lower the user to a rm surface and
adjust according to the Instrucon Guide of Sling in use.
An improper li can be uncomfortable for the user and cause damage to
the li equipment! (see Figure 2 and gure 3).
Figure 1. Figure 2. Figure 3.

10
Viking™ L, XL mobile lis • 7EN137108 Rev. 1 www.hill-rom.com I www.liko.com
Old baeries are to be deposited at the nearest recycling staon or given to personnel authorized by Hill-Rom.
Wall mounted charger accessory or table charger housing accessory:
Loosen the holder for the charger cable. Remove the baery pack from the control box by loosening the locking device on
top of the baery pack. See chapter "Assembly".
Charger informaon;
"ON" - lights up green when the charger is connected to mains.
"CHARGE" - lights up yellow constantly during charging and will turn o when charging is completed.
Alt. A. Place the baery pack on the wall mounted charger. Plug the charger cable into mains (100-240 VAC)
check that both "ON" and "CHARGE" on the charger lights up.
Alt. B. Place the baery pack on the charger in the table charger housing. Plug the charger cable into mains (100-240 VAC)
check that both "ON" and "CHARGE" on the charger lights up.
Alt. A Alt. B
Alternave charging procedures
ON
CHARGE
ON
CHARGE
Charging the Baery
Charger informaon
1. "ON" - lights up green when the charger is connected to mains.
2. "CHARGE" - lights up yellow constantly during charging and will
turn o when charging is completed.
Charging with the control box internal charger (standard)
Plug the charger cable into mains (100-240 VAC), see charger informaon 1 - 2
above. The baery is fully charged aer about 6 hours and the
charger disconnects automacally, the yellow "CHARGE" indicator turns o.
For maximum baery life, baeries must be charged regularly.
We recommend charging aer each use or every night.
Never charge baeries in a wet area!
NOTE! If the charger cable is stretched out it should be replaced to avoid the risk of the cable geng caught and tear.
NOTE! The li cannot be used when the charger cable is plugged into a wall socket.
NOTE! If the yellow "CHARGE" indicator at the control box connues to be lit aer 8 hours, disconnue charging and replace
the baery with a new one.
NOTE! A damaged baery shall be replaced and contact with leaking uids shall be avoided.
BATTERY
ON CHARGE
1. 2.
ON CHARGE
NOTE! Charging a deep discharged Li-ION baery
When charging a deep discharged Li-ION baery the charger will start charging at a low charging rate to protect the baery.
During the low rate charging the charge indicator will not light up.
When the low rate charging is completed the charger will automacally switch to normal charge rate and the "CHARGE"
indicator will light up yellow and will turn o when charging is completed.

11
Viking™ L, XL mobile lis • 7EN137108 Rev. 1 www.hill-rom.com I www.liko.com
Recommended Liing Accessories
Dierent maximum loads may apply to dierent products on the assembled li unit, sling bar, sling and any other accessories
used. For the assembled li unit, the maximum load is always the lowest maximum load rang for any of the components.
For example, a Viking™ L mobile li which is approved for 250 kg (550 lbs) can be equipped with a liing accessory which is
approved for 200 kg (440 lbs). In this case, the maximum load of 200 kg (440 lbs) applies to the assembled li unit.
Study the markings on the li and liing accessories or contact your Hill-Rom representave if you have any quesons.
Maximum Load
Using liing accessories other than those approved can entail a risk.
Recommended sling bars and accessories for Viking™ L and XL mobile lis are listed below.
When changing sling bar or other liing accessories, the highest possible liing height of the li is aected. Before changing
liing accessories you should always ensure that the li, aer change, can full the desired liing height in order to
manage the liing situaons for which the li is to be used. For addional guidance in selecng a sling, study the operang
instrucons for the respecve sling models. There you will also nd guidance for combining Liko™ sling bars with Liko slings.
Contact your Hill-Rom representave or visit www.liko.com for advice and informaon on Liko’s product range.
* this product is also available in a version with Quick-Release Hook.
SlingBar Mini 220 Prod. No. 3156005
Max. 205 kg (450 lbs)
Universal SlingBar 350* Prod. No. 3156074
Max. 300 kg (660 lbs)
Universal SlingBar 450* Prod. No. 3156075
(Standard on Viking™ L mobile li)
Max. 300 kg (660 lbs)
Universal SlingBar 600* Prod. No. 3156076
Max. 300 kg (660 lbs)
Universal TwinBar 670* Prod. No. 3156077
(Standard on Viking™ XL mobile li)
Max. 300 kg (660 lbs)
Universal SideBars 450 Prod. No. 3156079
including bag
Max. 300 kg (660 lbs)
Sling Cross-bar 450* Prod. No. 3156021
Max. 300 kg (660 lbs)
Sling Cross-bar 670* Prod. No. 3156018
Max. 300 kg (660 lbs)
SlingBar Cover Paddy 30 Prod. No. 3607001
(ts Universal SlingBars 350, 450,
and 600, as well as SlingBar Slim 350)
Holder for Quick Reference Guide Prod. No. 2000100
Quick Guide Prod. No. 2000400
Liko Mobile li system
XS
S
MS
M L
XL XX
L

12
Viking™ L, XL mobile lis • 7EN137108 Rev. 1 www.hill-rom.com I www.liko.com
Quick-release Hook
Universal
Prod. No. 3156508
Q-link 13
Prod. No. 3156509
Quick-release Hook
TDM
Prod. No. 3156502
X
Y
Z
Quick-Release Hook
Liko™ Quick-Release Hooks is a system for quick change of liing accessories on
Liko’s mobile and staonary lis. Viking™ mobile li must be equipped with the
Q-link 13 in order to be used with the Quick-release Hook.
The Quick-release Hook Universal ts the Universal SlingBar 350, 450 and 600
(prod. no. 3156074 - 3156076). Quick-release Hook TDM ts the SlingBar Mini
220 (prod. no. 3156005), Sling Cross-bar 450 and 670 (prod. no. 3156021 and
3156018) and Universal TwinBar 670 (prod. no. 3156077).
When changing to a sling bar with quick release hook, the liing height is reduced
by 33 mm (1.3 in) in comparison with a xed sling bar.
Contact Hill-Rom for further informaon.
Viking™ L and XL mobile lis can be used for horizontal liing with:
Liko™ FlexoStretch Prod .No. 3156057
Liko™ OctoStretch with Leveller Prod. No. 3156056
Liko™ OctoStretch Prod. No. 3156055
Contact Hill-Rom for further informaon.
Bag for SlingBars Prod. No. 2001025
LikoScale™ device
for Weighing a paent in combinaon with Viking™ mobile lis
LikoScale™ 350, Max 350 kg (770 lbs) Prod. No. 3156228
LikoScale™ 350 is cered according to the
European Direcve NAWI 2014/31/EU
(Non-Automac Weighing Instruments).
LikoScale™ devices only for use in the United states and Canada:
LikoScale™ 200, Max. 200 kg (440 Ibs.) Prod. No. 3156225
LikoScale™ 400, Max. 400 kg (880 Ibs.) Prod. No. 3156226.
Contact your Hill-Rom representave for more informaon.
Viking Armrest Prod. No. 2047011
Leg Protector Viking L Prod. No. 2046012
Leg Protector Viking XL Prod. No. 2046013
Adapter 12 mm
Prod. No. 2016504
Baery charger,
for wallmounng or to use with
the Table charger housing
Prod. No. 2004106
Table charger housing
excl. charger and baery
Prod. No. 2107103
Prod. No. 3156056
Baery
Lead baery (Pb)
Prod. No. 2006106
Baery
Li-ION baery
Prod. No. 2006110
LikoScale™ device

13
Viking™ L, XL mobile lis • 7EN137108 Rev. 1 www.hill-rom.com I www.liko.com
Troubleshoong
The charger doesn’t work.
The li is stuck in the high posion.
If you hear unusual sound from the li.
1. Check that the charger cables are connected correctly.
2. Make sure that the baery is properly seated in the control box.
3. Try an alternave mains outlet.
4. If the problem persists, please contact Hill-Rom.
1. Make sure that the emergency stop buon has not been
acvated (shall not be pressed in).
2. Make sure that the baery is properly seated in the control box.
3. Check the baery capacity.
Check if the Li-ION baery has been set in to sleep mode,
see chapter "Operaon".
4. Check that the handcontrol cable is connected correctly.
5. Electrical emergency lowering, use the operaon panel to
lower the paent onto a rm surface, see chapter; Operaon.
6. Use the mechanical emergency lowering device to lower the
paent onto a rm surface, see chapter; Operaon.
7. If the problem persists, please contact Hill-Rom.
Contact Hill-Rom.
The li do not work up/down
with Hand Control.
The base-width adjustment
doesn’t work (in/out) with the
Hand Control.
1. Make sure that the emergency stop buon has not been
acvated (shall not be pressed in).
2. Check the baery capacity.
Check if the Li-ION baery has been set in to sleep mode,
see chapter "Operaon".
3. Make sure that the baery is properly seated in the control box.
4. Check that the charger cable is not connected to an electric outlet.
5. Check that the handcontrol cable is correctly connected to
the control box.
6. Check that the li arm actuator cable is correctly connected to
the control box.
7. Check that the base widht actuator cable is correctly connected to
the control box.
8. If the problem persists, please contact Hill-Rom.
Recycling instrucons
Waste of Electrical and Electronic
Equipment (WEEE).
Metals
Lead baery (Pb) or
Li-ION baery

14
Viking™ L, XL mobile lis • 7EN137108 Rev. 1 www.hill-rom.com I www.liko.com
Cleaning and Disinfecon
Safety recommendaons
Cleaning and disinfecng procedures for Liko™ Mobile lis. This instrucons do not replace the facility’s own cleaning and
disinfecon policies.
• Wear protecve equipment according to manufacturer’s instrucon and per facility protocol throughout the cleaning
operaons, such as: rubber gloves, goggles, apron, face mask and shoe covers.
• Unplug mains (AC power source) before cleaning and disinfecon.
• Never clean the li by pouring water on it, steam cleaning it, or by using a high-pressure jet.
• Refer to the recommendaons made by the cleaning and disinfecng product manufacturer.
Equipment:
• Protecve equipment (such as: rubber gloves, goggles, apron, face mask and shoe covers) as recommended by the facility
protocol and manufacturers instrucons
• Clean buckets
• Cloths for washing and drying
• So brush
• Warm water
• To nd Cleaning / Disifectants compable or not compable for use on Liko’s products, follow the
”Applicaon of commonly used Cleaning / Disinfectants on Liko products” in this document.
Cleaning instrucons
1. Unplug mains (AC power source) before cleaning and disinfecon.
2. Clean the li with a cloth moistened with warm water and a neutral cleaning agent approved by your organizaon.
A so brush may be used to remove stains and resistant dirt.
3. Wipe o the enre li with a cloth moistened with clean water starng from the top and working down. The cloth shall
not be so damp that it drips. To have access to all areas run the li into the highest and lowest posions and extend the base
width adjustment enrely in and out. Remove the Baery to have access behind the baery.
NOTE! Do not clean the piston rod!
4. Pay special aenon to the following areas:
• Sling bar
• Mechanical emergency lowering
• Handles
• Control box
• Baery
• Hand control
• Emergency stop
• Operaon panel/display (where applicable)
• Lever for base width adjustment (where applicable)
• Pedal for base width adjustment (where applicable)
• Locking handles
• Wheels
Disinfecon Instrucons
1. For the use of suitable disinfectants see ”Applicaon of commonly used Cleaning / Disifectants on Liko products” in this document.
2. Use the choice of disinfectant according to the manufacturer’s instrucons and repeat the work step as in”Cleaning instrucons"
3. Remove traces of disinfectant aer disinfecon. Wipe o the li with a cloth moistened with clean water starng from the top
and working down. The cloth shall not be so damp that it drips.
The li may not be cleaned with CSI or equivalent.
The hand control may not be cleaned with Viraguard or equivalent.
The control box may not be cleaned with Anioxy Spray or equivalent.
Do not clean!
(piston rod)

15
Viking™ L, XL mobile lis • 7EN137108 Rev. 1 www.hill-rom.com I www.liko.com
Applicaon of commonly used Cleaning / Disinfectants on Liko products
Chemical class Acve ingredient pH Cleaners /
Disinfectant *) Manufacturer *) May not be used on the
following items:
Quaternary ammonium chloride Didecyl dimethyl ammonium chloride = 8.704%
Alkyl dimethyl benzyl ammonium chloride = 8.19%
9.0 – 10.0 in use Virex II (256) Johnson/Diversey Foot rest for Sabina™ and
Roll-On™
Quaternary ammonium chloride Alkyl dimethyl benzyl ammonium chloride = 13.238%
Alkyl dimethyl ethylbenzyl ammonium chloride = 13.238%
9.5 in use HB Quat 25L 3M
Accelerated Hydrogen Peroxide Hydrogen Peroxide 0.1 -1.5%
BenzylAlcohol: 1-5%
Hydrogen Peroxide 0.1 -1.5%
BenzylAlcohol: 1-5%
3 Oxivir Tb Johnson/Diversey The li straps for Golvo™
and ceiling lis
Phenolic Ortho-Phenylphenol = 3.40%
Ortho-Benzyl-para-Chlorophenol = 3.03
3.1 +/- 0.4 in use Wexcide Wexford Labs
Bleach Sodium hypochlorite 12.2 Dispatch Caltech The li straps for Golvo™
and ceiling lis
Alcohol Isopropyl alcohol = 70% 5.0 – 7.0 Viraguard Veridien Hand controls for all lis
Quaternary ammonium n-Alkyl dimethyl benzyl ammonium chlorides = 0.105%
n-Alkyl dimethyl ethylbenzyl ammonium chlorides = 0.105%
11.5 - 12.5 CSI Central Soluons Inc. Viking™, Liko M220™, Liko
M230™, Uno™, Sabina™,
Golvo™,
LikoLight™, Roll-On™,
Likorall™, Mulrall™
Benzyl-C12-18-alkyldimethylammonium,
chlorides
Benzyl-C12-18-alkyldimethylammonium, chlorides (22 %)
2-Phenoxyethanol (20 %)
Tridecylpolyethylenglycolether (15 %)
Propan-2-ol (8 %)
approx 8.6 in use Terralin Protect Shülke Foot rest for Sabina™ and
Roll-On™
Organic peroxide (type E, solid) Magnesium monoperoxyphtalate hexahydrate (50-100%)
Anionic surfactant (5-10%)
Nonionic surfactant (1-5%)
5.3 in use Dismozon Pur Bode The li straps for Golvo™
and ceiling lis
Ethanol Hydrogen peroxyde (2.5-10 %)
Lauryldimethylamine oxid (0-2.5 %)
Ethanol (2.5-10 %)
7Anioxy-Spray WS Anios Control box for all mobile
lis
Troclosene sodium Adipic acid 10-30%
Amorphous silica < 1%
Sodium Toluene sulphonate 5-10 %
Troclosene sodium 10-30 %
4-6 in use Chlor-Clean Guest Medical Ltd The li straps for Golvo™
and ceiling lis
*) Or equivalent

For trouble-free use, certain details should be checked each day the li is used:
• Inspect the li and check to make sure that there is no external damage.
• Check the sling bar aachment.
• Check the funconality of the latches.
• Check the integrity of the liing moon and the base-width adjustment.
• Check to make sure that the emergency lowering (both electrical and mechanical) works.
• Charge the baeries each day the li is used and then check that the charger works.
When necessary, clean the li with a moist cloth and check that the wheels are free from dirt. Find more detailed
informaon regarding cleaning and disinfecon of your Liko product in chapter; Cleaning and Disinfecon.
The li should not be exposed to running water.
Service
A periodic inspecon of the li should be carried out at least once per year.
Periodic inspecon, repair and maintenance should be performed only in accordance with the Liko™ Service Manual,
and by personnel authorized by Hill-Rom and using original Liko™ spare parts.
Service Agreement
Hill-Rom oers the opportunity to enter into service contracts for the maintenance and regular inspecon of your Liko
product.
Expected Life Time
The product has an expected service life of 10 years when correctly handled, serviced and periodically inspected in accordance
with Liko’s instrucons.
Parts listed below are subject to wear and tear and have specic expected life me:
- Handcontrol, expected life me 2 years,
- Baery, expected life me 3 years.
Transport and Storage
During transport, or if the li is not to be used for a long me, the Emergency Stop should be acvated.
The environment where the li is transported and stored should have a temperature of -10°C to +50°C (14°F to 122°F),
20-90% humid., pressure 800-1060 hPa.
The environment where baeries is transported and stored should have a temperature of -10°C to +40°C (14°F to 104°F) ,
20-80% humid., pressure 800-1060 hPa.
Product Changes
Liko products undergo connuous development. We reserve the right to make product changes without prior noce.
Contact your Hill-Rom representave for advice and informaon about product upgrades.
Design and Quality by Liko in Sweden
The management system for both manufacturing and development of the product is cered in accordance with ISO9001
and its equivalent for the medical device industry, ISO13485. The management system is also cered in accordance with
the environmental standard ISO14001.
Inspecon and Maintenance
(C)2017. Liko R&D AB. All Rights Reserved.
Liko AB
Nedre vägen 100
SE-975 92 Luleå, Sweden
+46 (0)920 474700
www.hill-rom.com I www.liko.com
Other manuals for Viking L
1
This manual suits for next models
1
Table of contents
Other Liko Fitness Equipment manuals
Popular Fitness Equipment manuals by other brands

G-FITNESS
G-FITNESS AIR ROWER user manual

CAPITAL SPORTS
CAPITAL SPORTS Dominate Edition 10028796 manual

Martin System
Martin System TT4FK user guide

CIRCLE FITNESS
CIRCLE FITNESS E7 owner's manual

G-FITNESS
G-FITNESS TZ-6017 user manual

Accelerated Care Plus
Accelerated Care Plus OMNISTIM FX2 CYCLE/WALK user manual