haben muss eventuell der Switch 2 am Local Unit auf ON gesetzt werden. Weitere hilfreiche Informationen
finden Sie im ausführlichen englischen Handbuch auf CD über die folgenden Themengebiete: Passwort
Sicherheit und Überschreiben, Hotkey Bedienung, sperren und entsperren des Extenders, Audio Mikrofon
Stereo/Mono Einstellung, Konfigurationsmodus, Firmware Information und Update, Einstellung der Bildqualität,
Helligkeit, Kontrast und Kompensation der Signallaufzeiten (Skew Compensation), Hilfe bei Problemen.
Manuel Utilisateur Français
1. Introduction
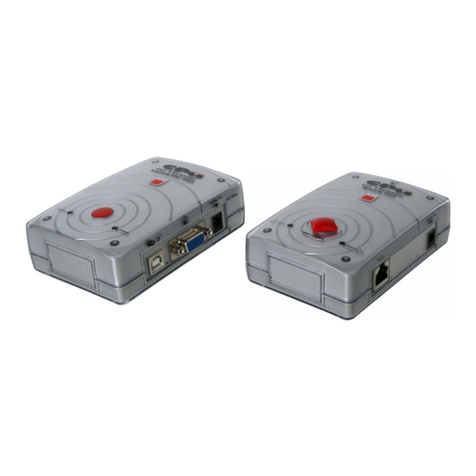
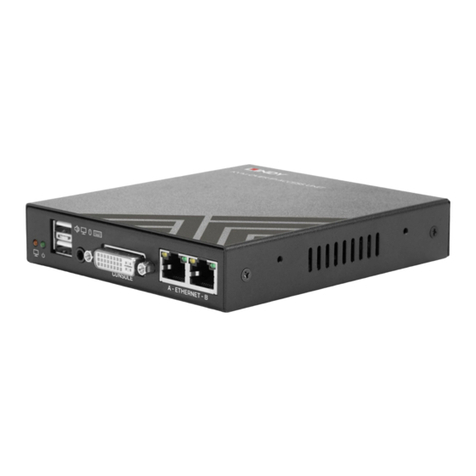
Le LINDY KVM Extender C5 PRO-300 inclut une unité locale et une unité distante, un câble KVM, un câble
série, une alimentation et un ensemble de pieds en plastique anti-dérapant.
Ce KVM Extender vous permet d’étendre un signal écran, clavier, souris et série à une distance jusqu’à 300m
avec une résolution de 1600 x 1200 @ 75Hz en utilisant un câble UTP Catégorie 5e. La connexion longue
distance entre les deux modules se fait par du câble Catégorie 5 ou plus, en paires torsadées. Il n’y a aucun
avantage de choisir des câbles de catégorie 6. En contradiction, il est même possible que des câbles de
catégorie 6 et blindés peuvent causer davantage de dégradation au niveau de.
Spécialement pour des distances au delà de 100m, il est nécessaire d’ajuster ses paramètres vidéo – ou bien la
qualité d’affichage ne sera pas suffisante! Des composants spéciaux installés dans le boîtier distant vous
permettent d’ajuster la luminosité et la netteté. Une fonction supplémentaire permet d’ajuster le signal en
fonction de la longueur du câble de connexion utilisé.
2. Installation
L’installation de l’Extender C5 est très simple. Vous pouvez l’utiliser tout simplement, ou bien le monter en
rack 19 ‘’. Installez l’appareil dans un endroit adéquat à votre utilisation et connectez les deux appareils
avec un câble Cat.5 ou plus de la longueur appropriée. Connectez les câbles KVM au PC local ou un
commutateur KVM à l’Extender local.
Connectez la console distante et l’alimentation au module Extender distant.
Les fonctions basiques des modules LOCAL et REMOTE sont contrôlées par une rangée de 4 switches
présents sur chacun des modules. Lors du déballage du produit, tous les switches sont placés en position OFF
et cela convient pour une utilisation normale avec une entrée microphone standard. Si vous rencontrez
d’éventuels problèmes pendant l’utilisation, veuillez vous référer au manuel en Anglais disponible sur le CD,
vous indiquant des solutions pour divers problèmes. Si vous rencontrez des problèmes de fonctionnement de la
souris, veuillez vous référer à la section
Configuration Switch Settings
and
Hot Plugging and Mouse Restoration
.
Si vous rencontrez des problèmes avec les raccourcis clavier de votre commutateur KVM et le menu OSD,
placez le switch 2 de l’Extender LOCAL sur ON. D’autres informations supplémentaires peuvent être trouvées
dans le manuel en Anglais sur le CD concernant les sujets suivants: protection par mot de passe, mode de
raccourci clavier, blocage du système, utilisation du mode audio MIC mono/stéréo, mode de configuration, mise
à jour du BIOS, système d’ajustement de la vidéo et divers paramètres.
Manuale d’uso Italiano
1. Introduzione
Il LINDY KVM Extender C5 PRO-300 include un’unità remota e una locale, un cavo KVM, un cavo seriale, un
alimentatore e un set di piedini di gomma per ogni unità.
Questo KVM Extender consente di controllare una tastiera, monitor, mouse, accessori audio e anche un
dispositivo seriale fino a 300 metri tramite un cavo UTP Cat 5, con una risoluzione video fino a 1600 x 1200 @
75Hz. Il collegamento tra i due moduli avviene tramite una coppia di cavi ritorti di Cat 5. Non si ottiene una
qualità migliore utilizzando cavi di Cat 6. Potrebbe risultare controproducente usare cavi Cat 6 o cavi schermati,
in quanto ne potrebbe risentire la qualità video.
Specialmente su distanze superiori ai 100m occorre effettuare un’accurato settaggio del segnale video altrimenti
la qualità delle immagini potrebbe essere scarsa. Circuiti speciali nell’unità remota consentono di regolare la
precisione e la brillantezza delle immagini. In oltre è possibile anche regolare la lunghezza dei cavi nel caso in
cui fossero di lunghezza differente.
2. Installazione
L’istallazione dell’ Extender C5 è la seguente. Si può utilizzare come unità indipendenti o si può montare in
un armadio rack 19”. Per ulteriori informazioni riferirsi al manuale sul CD. Installare le unità , collegarle con
cavi Cat.5 o superiori della lunghezza desiderata. Collegare i cavi KVM al PC locale o al KVM switch e
all’unità locale dell’extender. Collegare la console remota e l’alimentatore all’unità remota dell’extender.
Le operazioni principali delle unità LOCALE e REMOTA sono gestate da quattro switch situati su ciascuna unità.
Quando viene inviato il segnale, gli switch sono spenti e questo consente di operare regolarmente con il
normale input per microfono. Se si incotrano problemi consultare il manuale completo in inglese o il CD. Se si
incontrano problemi con il mouse riferirsi alla sezione
Configuration Switch Settings
and
Hot Plugging and
Mouse Restoration
. Se si riscontrano problemi con le hotkey del KVM switch e con il menu OSD accendere lo
switch 2 dell’unità locale dell’extender. Si possono trovare ulteriori informazioni sul manuale complete in inglese
o sul CD alle seguenti voci: password protection and password override, hotkey operation, locking and
unlocking the system, audio MIC mono/stereo usage, configuration mode, firmware info and update, video
quality adjustment, skew compensation and troubleshooting.
Radio Frequency Energy and Compliance Declaration
All interface cables except the C at.5 network connection cable used with this equipment must be shielded in
order to maintain compliance with radio frequency energy emission regulations and ensure a suitably high level
of immunity to electromagnetic disturbances.
European EMC directive 89/336/EEC
This equipment has been tested and found to comply with the limits for Information Technology Equipment in
accordance with the specifications in the European standard EN55022 and EN55024.
FCC Compliance Statement (United States)
This equipment generates, uses and can radiate radio frequency energy and if not installed and used properly,
that is, in strict accordance with the manufacturer’s instructions, may cause interference to radio communication
and television reception . It has been tested and found to comply with the limits for a class A computing device
in accordance with the specifications in Subpart J of part 15 of FCC rules, which are designed to provide
reasonable protection against such interference when the equipment is operated in a commercial environment.
Operation of this equipment in a residential area may cause interference, in which case the user at his own
expense will be required to take whatever measures may be necessary to correct the interference.
However, there is no guarantee that harmful interference will not occur in a particular installation. If this
equipment does cause interference to radio or television reception, which can be determined by turning the
equipment on and off, the user is encouraged to correct the interference with one or more of the following
measures: (a) Reorient or relocate the receiving antenna. (b) Increase the separation between the equipment
and the receiver. (c) Connect the equipment to an outlet on a circuit different from that to which the receiver is
connected. (d) Consult the supplier or an experienced radio / TV technician for help.
Changes or modifications not expressly approved by the manufacturer could void the user’s authority to operate
the equipment.
Canadian Department of Communications RFI statement
This equipment does not exceed the class A limits for radio noise emissions from digital apparatus set out in the
radio interference regulations of the Canadian Department of Communications.
Le présent appareil numérique n’émet pas de bruits radioélectriques dépassant les limites applicables aux
appareils numériques de la classe A prescrites dans le règlement sur le brouillage radioélectriques publié par le
ministère des Communications du Canada.
© LINDY ELECTRONICS LIMITED & LINDY-ELEKTRONIK GMBH - FIRST EDITION (September 2005)
Tested to Comply with
FCC Standards
For Commercial Use


