Einführung und Betrieb Deutsch
Dieser EDID/DDC Emulator stellt kontinuierlich EDID/DDC Daten zur
Verfügung. Er ist ideal geeignet in Systemen, wo EDID/DDC Daten ohne
Unterbrechung zur Verfügung stehen müssen, wie zum Beispiel unter
Windows 7/8 Umgebungen. Dieser Emulator kann die EDID/DDC Daten
eines Monitors aufnehmen und klonen, oder wahlweise seine Default
EDID/DDC einem angeschlossenen System ununterbrochen zur Verfügung
stellen. Er spiegelt so dem System vor, dass der Monitor kontinuierlich
angeschlossen ist, so dass bei Aus-, Umschalten oderWechsel des Monitors
keine Zustandsänderung an das System weitergegeben wird und dieses
keinen Interrupt auslöst.
Eigenschaften
Zur Verwendung mit HDMI PC & AV Equipment
Simuliert Standard- oder geklonte EDID/DDC Daten und stellt sie dem
System kontinuierlich ohne Unterbrechung zur Verfügung
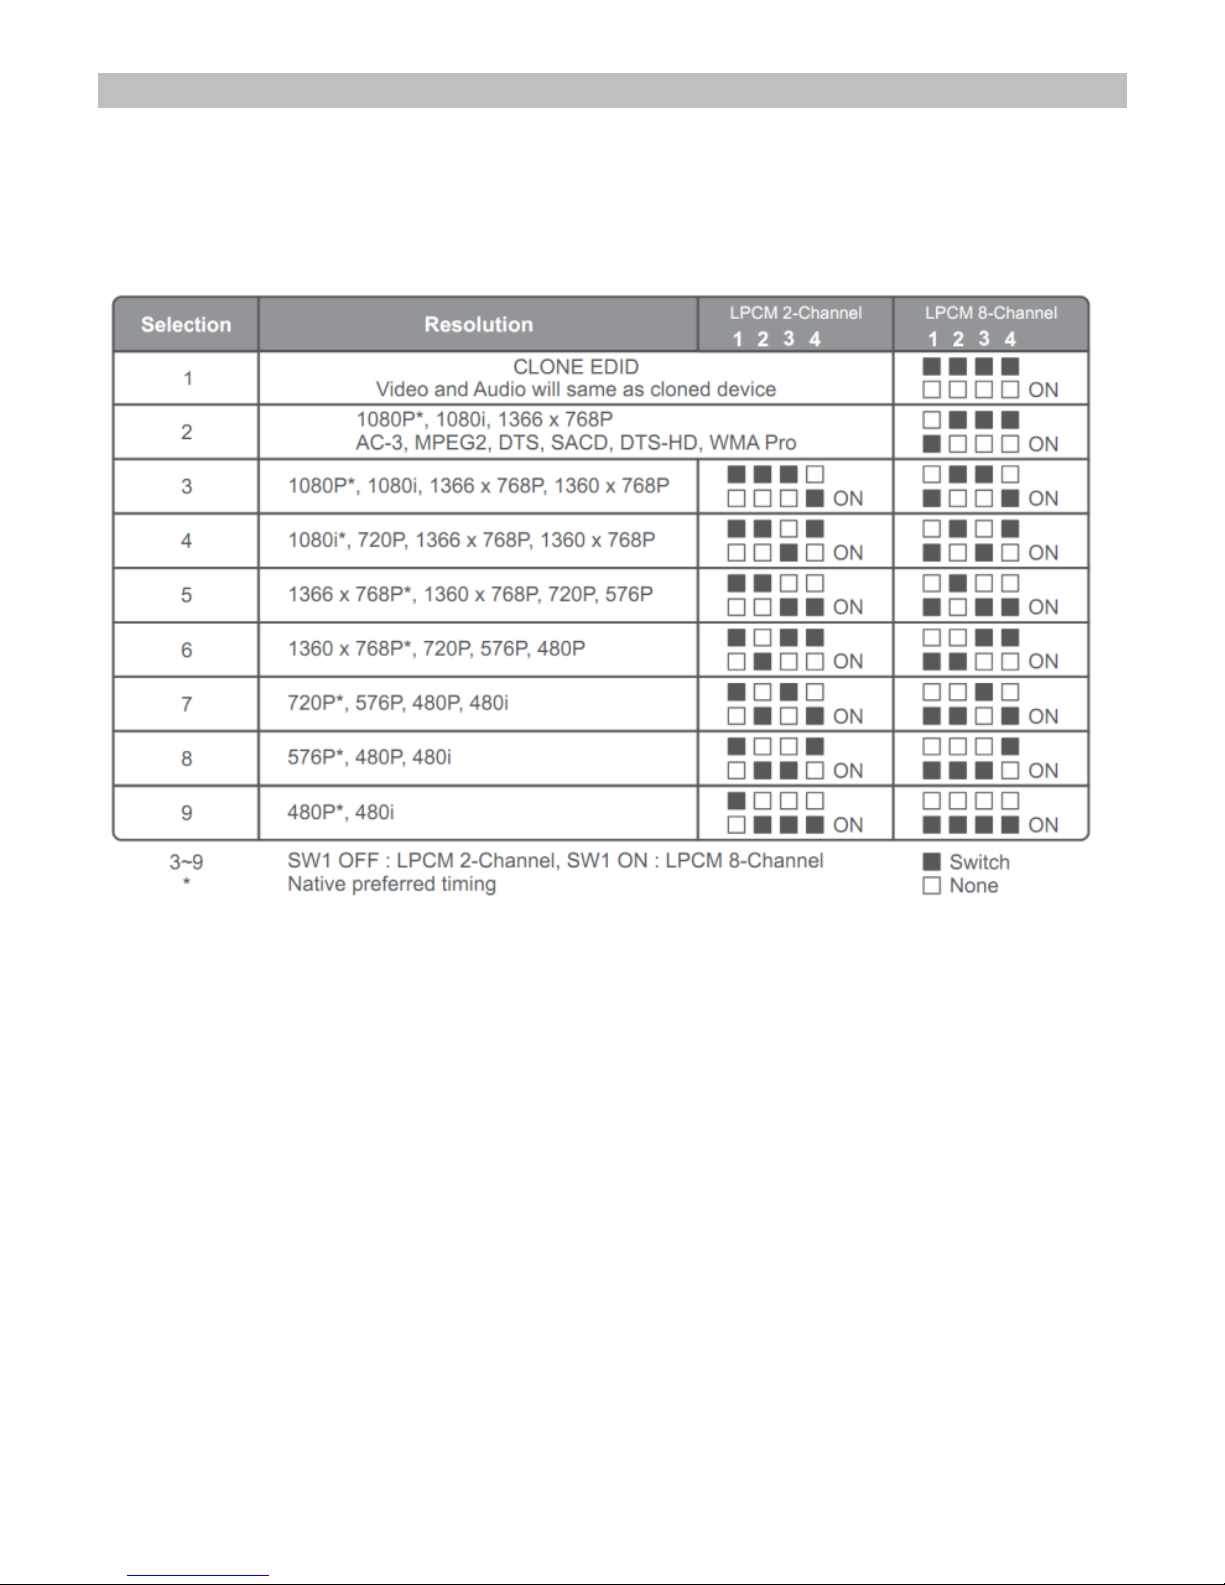
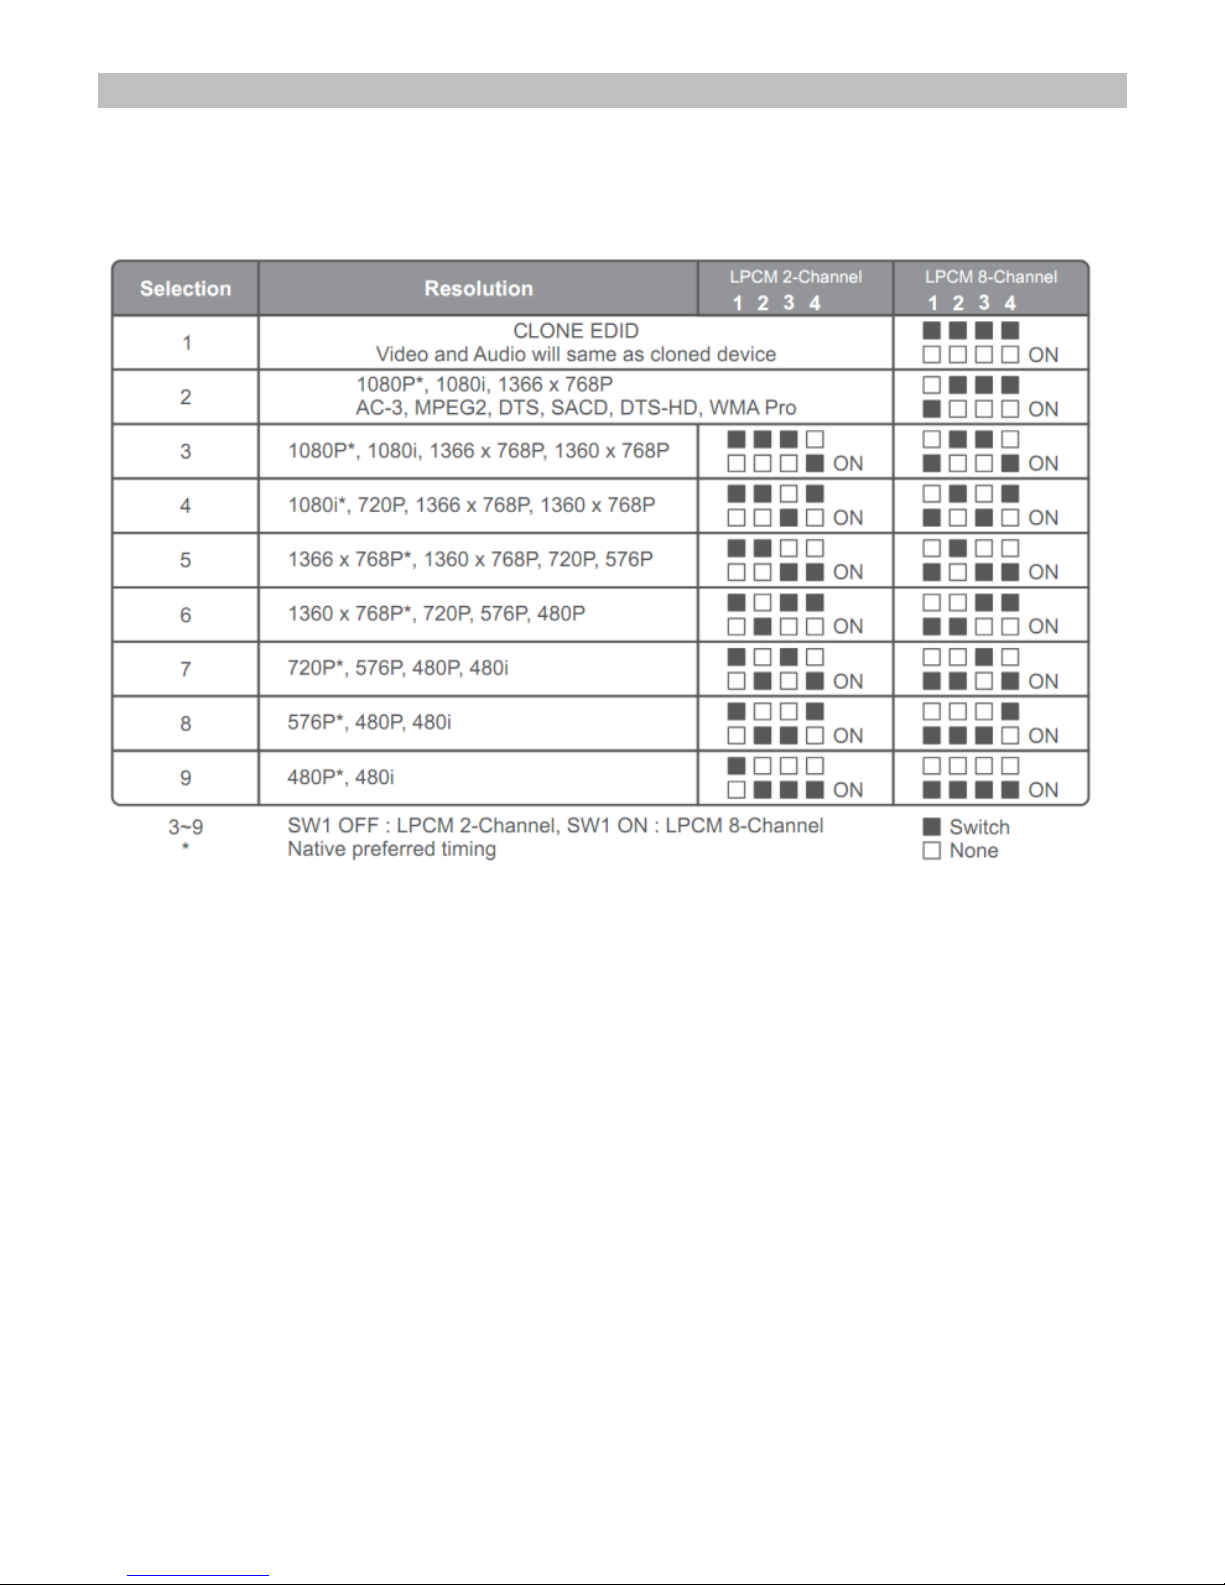
Standard-EDID/DDC Daten per DIP-Switch einstellbar
Unterstützt alle 3D Formate durch Klonen
Unterstützt HDCP und HDCP verschlüsselte Signale
Stromversorgung über USB Schnittstelle oder separates Netzteil
Lieferumfang
HDMI EDID Emulator
Diese Anleitung
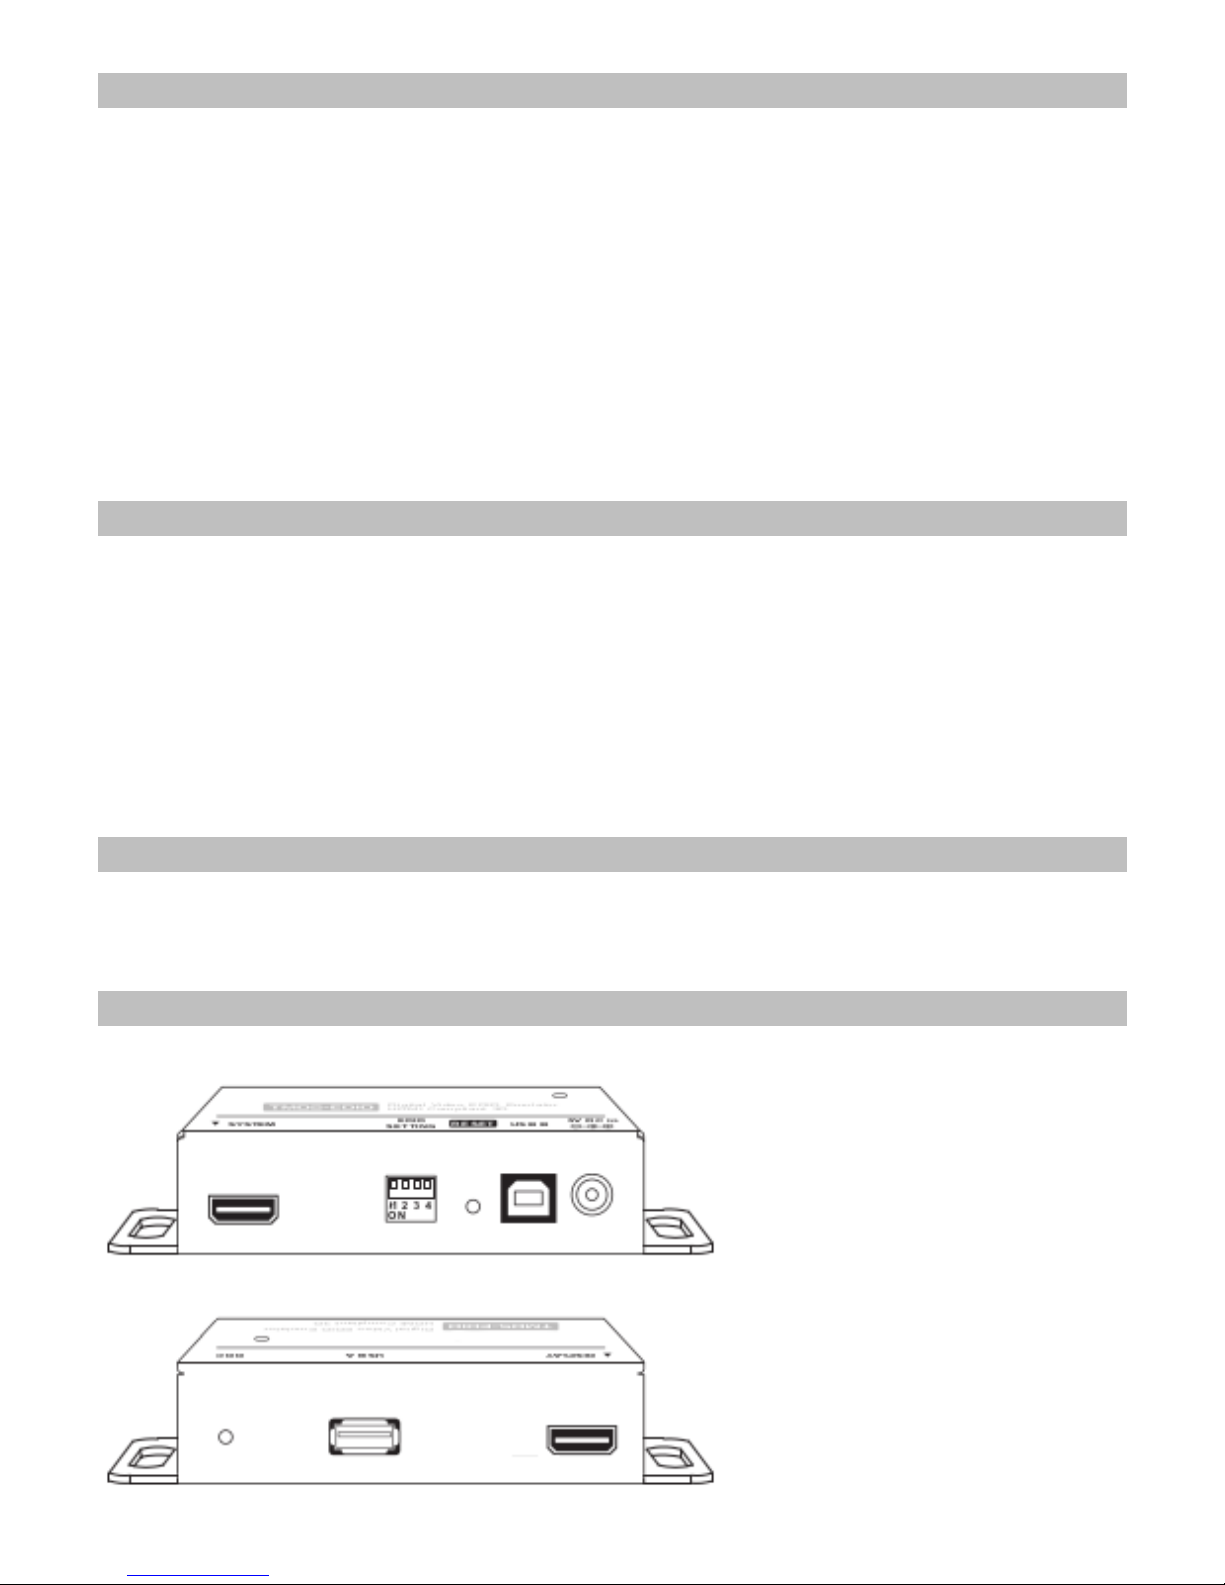
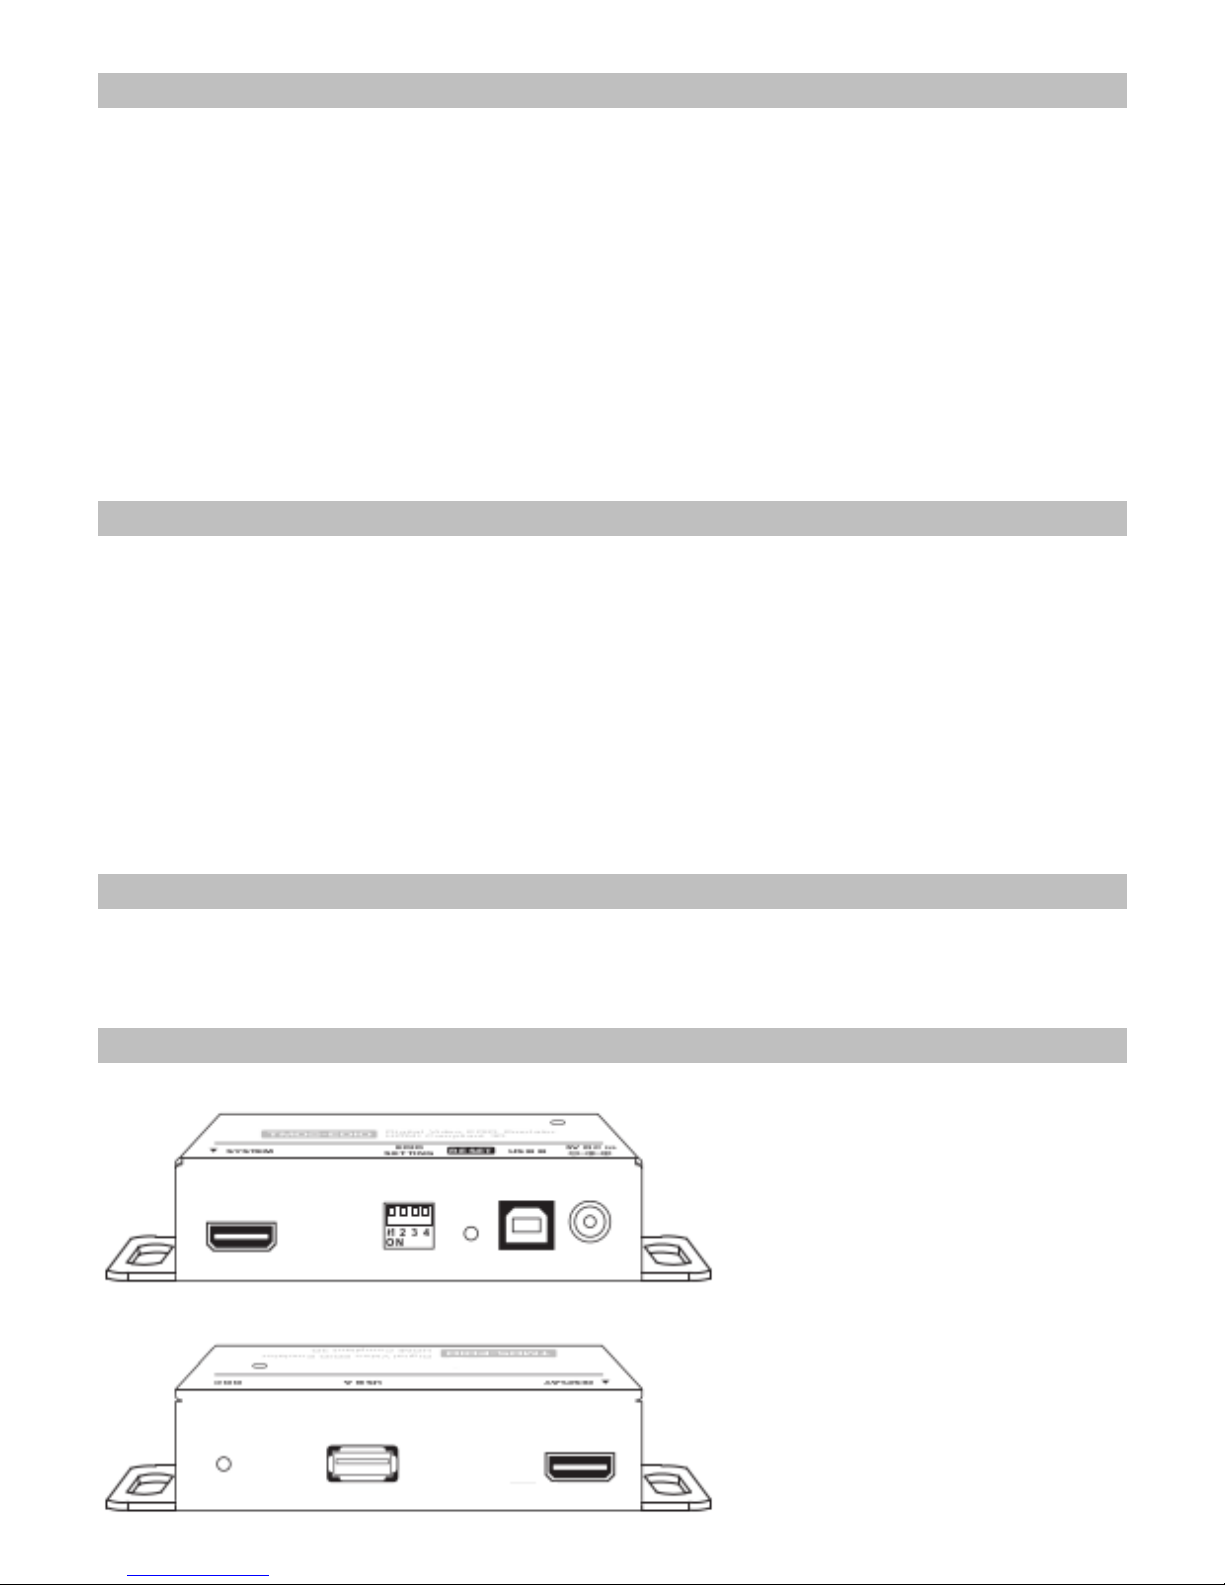
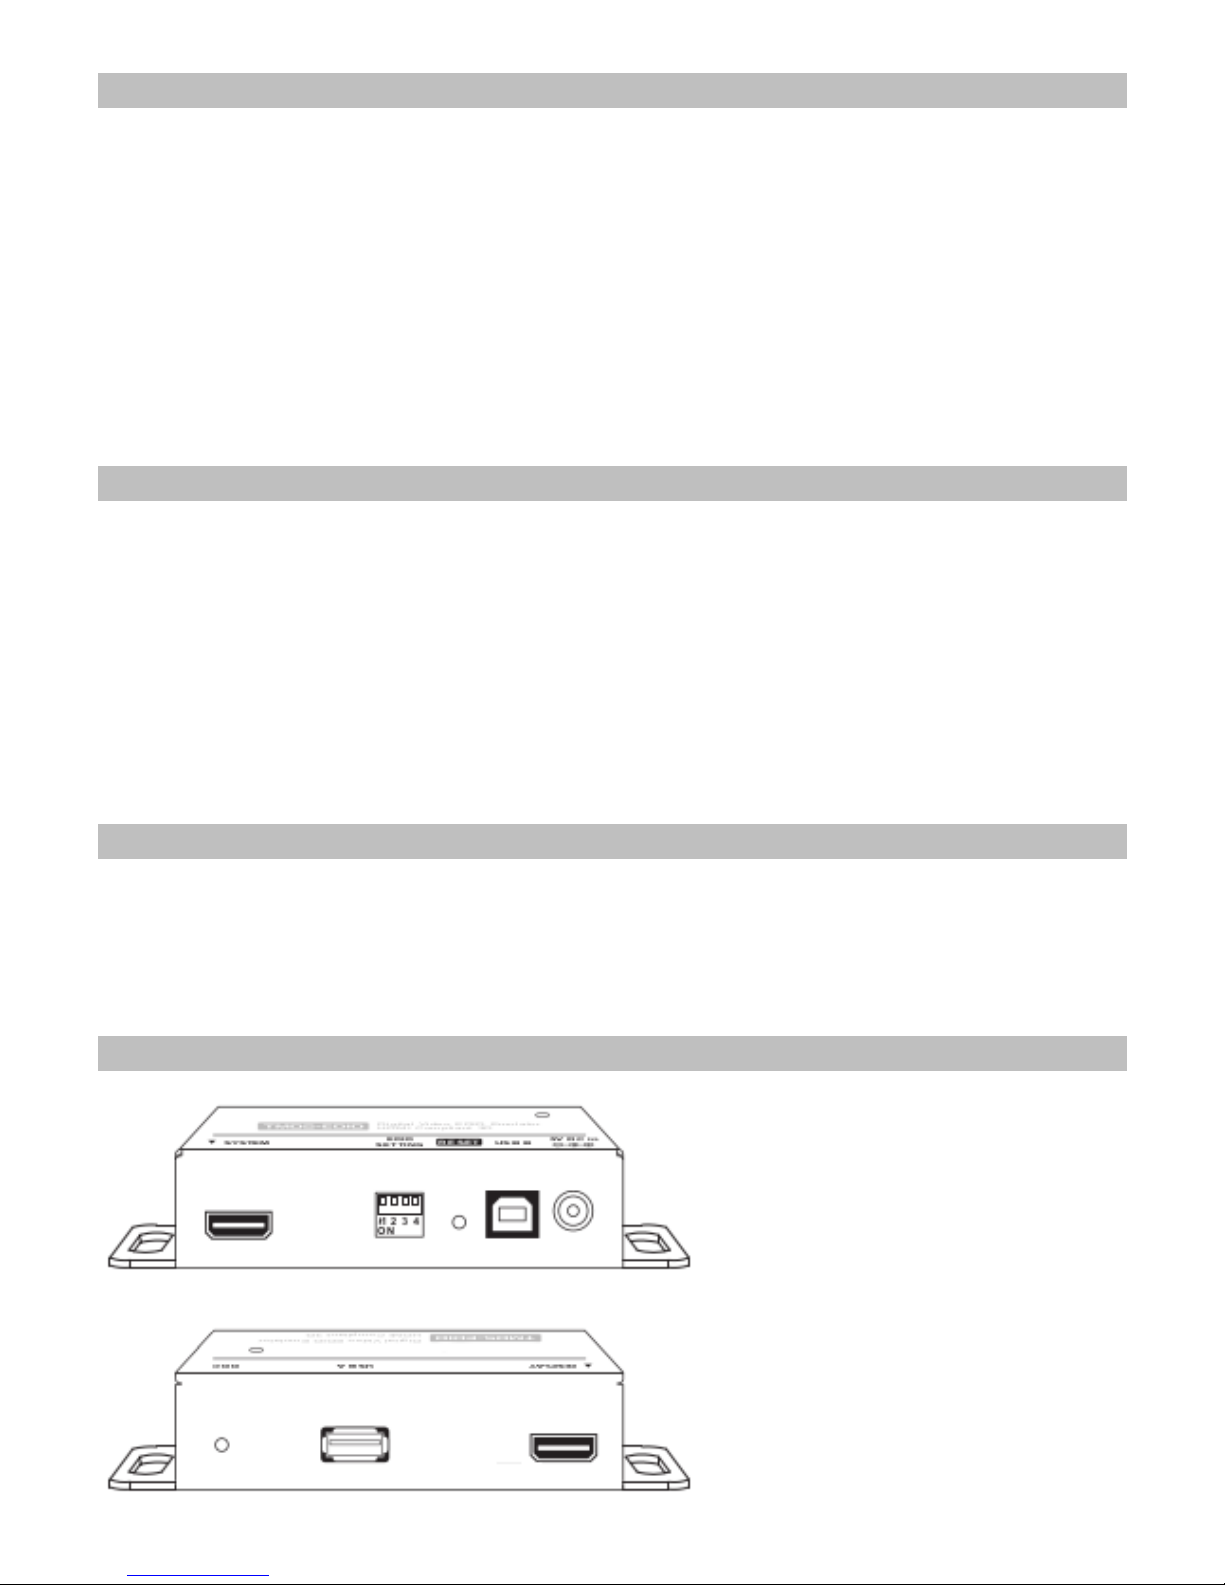
Ansicht