manuals.online logo
Brands
  1. Home
  2. •
  3. Brands
  4. •
  5. Linksys
  6. •
  7. Adapter
  8. •
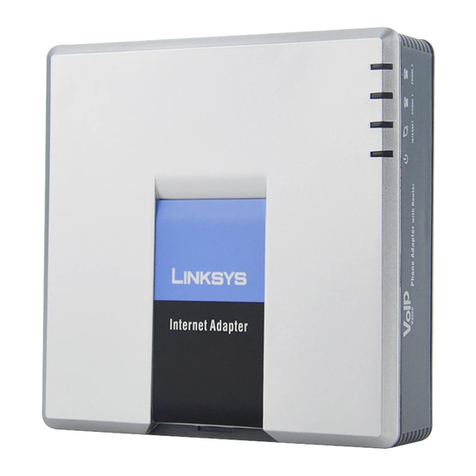
  9. Linksys PAP2 User manual

Linksys PAP2 User manual

csdata brasil Ltda. / Tel. +55 81 3422 1714 / Fax. +55 81 3422 1984 / VoIP 2031
Web: www.linhagratuita.com.br / E-Mail: v[email protected]om.br / CNPJ: 07.196.259/0001-07
User Manual
Linksys PAP2
Broadband Phone Service
Linhagratuita
grupo csdata
www.linhagratuita.com.br
Linksys PAP2 User Manual csdata the VoIP Company
csdata brasil Ltda. / Tel. +55 81 3422 1714 / Fax. +55 81 3422 1984 / VoIP 2031
Web: www.linhagratuita.com.br / E-Mail: v[email protected]om.br / CNPJ: 07.196.259/0001-07
Please follow the step-by-step guide below to
set up your Linksys PAP2 for use with
Linhagratuita Broadband Phone Service
Before you begin to configure your device:
A Set your device to factory default:
1. Pick up the phone attached to your Linksys.
2. Dial ****73738#
3. Press 1 to confirm.
. Hang up the phone.
2
Linksys PAP2 User Manual csdata the VoIP Company
csdata brasil Ltda. / Tel. +55 81 3422 1714 / Fax. +55 81 3422 1984 / VoIP 2031
Web: www.linhagratuita.com.br / E-Mail: v[email protected]om.br / CNPJ: 07.196.259/0001-07
STEP 1 Connect the Linksys PAP2 to your
Broadband Connection
Use this illustration of the back of the ATA to connect it to your network
1. Phone 1 - Plug your analog telephone cord in here:
2.
Ethernet Port - Use an Ethernet cable to connect your PAP2 to your router or
Internet connection:
3. Power connection - Connect the power to your PAP2:
3
Linksys PAP2 User Manual csdata the VoIP Company
csdata brasil Ltda. / Tel. +55 81 3422 1714 / Fax. +55 81 3422 1984 / VoIP 2031
Web: www.linhagratuita.com.br / E-Mail: v[email protected]om.br / CNPJ: 07.196.259/0001-07
STEP 2 Verify & Configure your IP address
If you have purchased your Linksys PAP2 adaptor from Linhagratuita, skip this
section and proceed to Section B
If your network utilizes a DHCP Server to assign IP addresses to network devices,or if you are
connecting the PAP2 to a home router such as Linksys or Netgear, please do the following:
A First you must verify that your PAP2 will acquire an IP adress automatically
1. Pick up the phone connected to the “Phone 1” port of the PAP2 and enter “* * * *”.
You will then hear a voice say, “Linksys configuration menu.”
2. Press the keys 110 # on your analog phone.
3. Press # to enable DHCP.
. Press to save your configuration settings. Hang up the phone and wait for a couple
of minutes.
B Next, you need to verify that your PAP2 has a valid IP address Be prepared with
pen and paper, and proceed with the following:
1. Pick up the phone connected to Phone 1 of the PAP2 and enter “* * * *”. You will
hear a voice prompt say, “Linksys configuration menu.”
2. Press keys 1 1 0 # on your analog phone. The system will then read back the IP
address of your PAP2. Please write this down.
If the IP is 0 0 0 0, your PAP2 does not have a valid IP address In this case, you
need to:
1. Hang up the phone, then unplug and replug your PAPA2 power cord.
2. Wait 2 minutes, then check the IP again (see STEP 2).
3. If the automated voice again says your number is still 0.0.0.0, there are three
reasons for this:
a. Your DHCP Server is not assigning an IP address to the PAP2. In this case,
contact your network administrator or ISP for assistance.
b. Your network does not have a DHCP server. In this case, you must
configure your IP manually (See Page 7).
c. You have purchased a Static IP. In this case, configure your IP manually
(See Page 7).
4
Linksys PAP2 User Manual csdata the VoIP Company
csdata brasil Ltda. / Tel. +55 81 3422 1714 / Fax. +55 81 3422 1984 / VoIP 2031
Web: www.linhagratuita.com.br / E-Mail: v[email protected]om.br / CNPJ: 07.196.259/0001-07
STEP 3 Prepare your device to connect with the
Linhagratuita network
1. Open your configuration page by typing the following address into your web
browser:
https://aaa.bbb.ccc.ddd/admin/advanced
(“aaa.bbb.ccc.ddd. “ represents the IP address of your PAP2).
2. On the configuration page click “Admin Logic,” then click “switch to advanced view.”
3. Next, click the tab link “Line1” and fill in the configuration as shown below. Do not
disturb other default values given on the page.
. If you want to configure “Line 2” repeat the above configuration with a new
Linhagratuita DID/PIN account.
5. After making the above changes, click “Save Settings.”
6. Close your browser.
1 Inbound-Outbound Configuration with Linhagratuita DID
5
(switch to advanced view) Admin Login
SIP Port 5065
Proxy xxx
Outbound Proxy xxxx
Outbound Proxy yes
Display Name Type Your Name
User ID Type in xxx
Password Type in xxx DID Password
Use Auth ID yes
Auth ID Type in xxx
Prefered Codec G729a
Linksys PAP2 User Manual csdata the VoIP Company
csdata brasil Ltda. / Tel. +55 81 3422 1714 / Fax. +55 81 3422 1984 / VoIP 2031
Web: www.linhagratuita.com.br / E-Mail: v[email protected]om.br / CNPJ: 07.196.259/0001-07
6
Linksys PAP2 User Manual csdata the VoIP Company
csdata brasil Ltda. / Tel. +55 81 3422 1714 / Fax. +55 81 3422 1984 / VoIP 2031
Web: www.linhagratuita.com.br / E-Mail: v[email protected]om.br / CNPJ: 07.196.259/0001-07
7
Linksys PAP2 User Manual csdata the VoIP Company
csdata brasil Ltda. / Tel. +55 81 3422 1714 / Fax. +55 81 3422 1984 / VoIP 2031
Web: www.linhagratuita.com.br / E-Mail: v[email protected]om.br / CNPJ: 07.196.259/0001-07
2: Outbound Dialtone (No IVR) Configuration
8
SIP Port 5065
Proxy xxx
Outbound Proxy xxx
Register no
Make calls without Reg yes
Use Outbound Proxy yes
Display Name Type Your Name
User ID Type in xxx PIN
Use Auth ID yes
Preffered Codec G729a
Linksys PAP2 User Manual csdata the VoIP Company
csdata brasil Ltda. / Tel. +55 81 3422 1714 / Fax. +55 81 3422 1984 / VoIP 2031
Web: www.linhagratuita.com.br / E-Mail: v[email protected]om.br / CNPJ: 07.196.259/0001-07
9
Linksys PAP2 User Manual csdata the VoIP Company
csdata brasil Ltda. / Tel. +55 81 3422 1714 / Fax. +55 81 3422 1984 / VoIP 2031
Web: www.linhagratuita.com.br / E-Mail: v[email protected]om.br / CNPJ: 07.196.259/0001-07
10
Linksys PAP2 User Manual csdata the VoIP Company
csdata brasil Ltda. / Tel. +55 81 3422 1714 / Fax. +55 81 3422 1984 / VoIP 2031
Web: www.linhagratuita.com.br / E-Mail: v[email protected]om.br / CNPJ: 07.196.259/0001-07
3: Outbound IVR Configuration - Requiring user to enter PIN and destination #
11
SIP Port 5065
Proxy xxx
Outbound Proxy xxx
Register no
Display Name Type Your Name
User ID 1234
Use Auth ID yes
Auth ID 1234
Preffered Codec G729a
Dial Plan xxx
Linksys PAP2 User Manual csdata the VoIP Company
csdata brasil Ltda. / Tel. +55 81 3422 1714 / Fax. +55 81 3422 1984 / VoIP 2031
Web: www.linhagratuita.com.br / E-Mail: v[email protected]om.br / CNPJ: 07.196.259/0001-07
12
Linksys PAP2 User Manual csdata the VoIP Company
csdata brasil Ltda. / Tel. +55 81 3422 1714 / Fax. +55 81 3422 1984 / VoIP 2031
Web: www.linhagratuita.com.br / E-Mail: v[email protected]om.br / CNPJ: 07.196.259/0001-07
13
Linksys PAP2 User Manual csdata the VoIP Company
csdata brasil Ltda. / Tel. +55 81 3422 1714 / Fax. +55 81 3422 1984 / VoIP 2031
Web: www.linhagratuita.com.br / E-Mail: v[email protected]om.br / CNPJ: 07.196.259/0001-07
4: Outbound- IVR Configuration - Enter Destination
14
SIP Port 5065
Proxy xxx
Outbound Proxy xxx
Register no
Display Name Type Your Name
User ID Type Your xxx PIN
Use Auth ID yes
Auth ID Type Your xxx PIN
Preffered Codec G729a
Dial Plan xxx
Linksys PAP2 User Manual csdata the VoIP Company
csdata brasil Ltda. / Tel. +55 81 3422 1714 / Fax. +55 81 3422 1984 / VoIP 2031
Web: www.linhagratuita.com.br / E-Mail: v[email protected]om.br / CNPJ: 07.196.259/0001-07
15
Linksys PAP2 User Manual csdata the VoIP Company
csdata brasil Ltda. / Tel. +55 81 3422 1714 / Fax. +55 81 3422 1984 / VoIP 2031
Web: www.linhagratuita.com.br / E-Mail: v[email protected]om.br / CNPJ: 07.196.259/0001-07
16
Linksys PAP2 User Manual csdata the VoIP Company
csdata brasil Ltda. / Tel. +55 81 3422 1714 / Fax. +55 81 3422 1984 / VoIP 2031
Web: www.linhagratuita.com.br / E-Mail: v[email protected]om.br / CNPJ: 07.196.259/0001-07
STEP 4 Manually Configure Your Static IP
The Linksys adaptor you have received for your Broadband Phone Service is fully configured,
and within minutes you can begin to make your calls. Members using Static IP on their home
network may wish to configure the adaptor with Static IP. If you have otained a Static IP with
your internet service provider (ISP) and wish to configure your adaptor with your Static IP
settings, please follow the instructions below:
1. You will first have to obtain the following information: IP Address, Default Gateway
and Subnet Mask. If you are using a router, please contact the router manufacturer
for instructions for retrieving this information from the router directly. If you have
obtained a Static IP from your internet service provider (ISP) and wish to configure
your adaptor with your Static IP settings, please obtain the information directly from
your ISP.
2. Pick up the telephone receiver of the phone connected to the adaptor and dial * * *
*. You will hear a voice prompt say “Linksys configuration menu.”
3. Press the keys 101# on your analog phone to access the static IP configuration
menu.
. Press 0 # to disable DHCP, then press 1to save the setting.
5 Press # to access the IP address Menu.
6 Enter your IP address followed by # (i.e., “1 2 3 * 5 * 6 7 * 8 9 #” to represent
the IP 123. 5.67.89). Press 1 to save the setting.
7 Press 3 # to access the Default Gateway Menu.
8 Enter your Default Gateway (i.e. “1 2 3 * 5 * 6 7 * 8 9 #” to represent the
gateway 123. 5.67.89. Press to save the setting.
9 Press 2 # to access the subnet mask menu.
10. Enter your Subnet Mask (i.e. “1 2 3 * 5 * 6 7 * 8 9 #” to represent the subnet
mask 123. 5.67.89. Press to save the setting.
You have now completed the static IP configuration
To verify that the configuration is correct, please pick up the telephone receiver on the phone
connected to the ATA, and dial * * * * to enter the Linksys configuration menu. Dial 110 # to
hear the adaptor read back the IP address that you have configured. If the IP read aloud is
not the same as the one that you have just entered in, please repeat steps 1 through 10
above once again to ensure that you have entered the correct settings.
17

Other manuals for PAP2

14

Other Linksys Adapter manuals

Linksys WUSB54G User manual

Linksys

Linksys WUSB54G User manual

Linksys WUSB12 User manual

Linksys

Linksys WUSB12 User manual

Linksys WUSBF54G User manual

Linksys

Linksys WUSBF54G User manual

Linksys USB1000 User manual

Linksys

Linksys USB1000 User manual

Linksys WMA11B - Wireless-B Media Adapter Operation manual

Linksys

Linksys WMA11B - Wireless-B Media Adapter Operation manual

Linksys G User manual

Linksys

Linksys G User manual

Linksys PLE200 - PowerLine AV EN Adapter Bridge User manual

Linksys

Linksys PLE200 - PowerLine AV EN Adapter Bridge User manual

Linksys HU200 User manual

Linksys

Linksys HU200 User manual

Linksys AE1000 User manual

Linksys

Linksys AE1000 User manual

Linksys WUSB11 ver. 2.6 User manual

Linksys

Linksys WUSB11 ver. 2.6 User manual

Linksys WPC54G EU User manual

Linksys

Linksys WPC54G EU User manual

Linksys WUSB54G Operation manual

Linksys

Linksys WUSB54G Operation manual

Linksys USBBT100 Original operating instructions

Linksys

Linksys USBBT100 Original operating instructions

Linksys WPC200 User manual

Linksys

Linksys WPC200 User manual

Linksys WMA11B - Wireless-B Media Adapter User manual

Linksys

Linksys WMA11B - Wireless-B Media Adapter User manual

Linksys USBVPN1 User manual

Linksys

Linksys USBVPN1 User manual
Linksys PAP2-T User manual

Linksys

Linksys PAP2-T User manual

Linksys WPC54GS - Refurb Wrls-g Notebook Adr Spdbstr No... Original operating instructions

Linksys

Linksys WPC54GS - Refurb Wrls-g Notebook Adr Spdbstr No... Original operating instructions

Linksys WMA11B - Wireless-B Media Adapter User manual

Linksys

Linksys WMA11B - Wireless-B Media Adapter User manual

Linksys WUSB54GP Operation manual

Linksys

Linksys WUSB54GP Operation manual

Linksys USB100TX - EtherFast 10/100 USB Network... User manual

Linksys

Linksys USB100TX - EtherFast 10/100 USB Network... User manual

Linksys PAP2T-NA Service manual

Linksys

Linksys PAP2T-NA Service manual

Linksys Small Business SPA2102 User manual

Linksys

Linksys Small Business SPA2102 User manual

Linksys WPC54GR (DE) User manual

Linksys

Linksys WPC54GR (DE) User manual

Popular Adapter manuals by other brands

NETGEAR XAV2001 - Powerline AV Ethernet Adapter installation guide

NETGEAR

NETGEAR XAV2001 - Powerline AV Ethernet Adapter installation guide

3idee MSI - G241VC-017 instruction manual

3idee

3idee MSI - G241VC-017 instruction manual

D-Link DWA-552 user manual

D-Link

D-Link DWA-552 user manual

StarTech.com ICUSBAUDIO instruction manual

StarTech.com

StarTech.com ICUSBAUDIO instruction manual

Mitsubishi FX3G Series installation manual

Mitsubishi

Mitsubishi FX3G Series installation manual

Gefen DVIAUD-2-HDMI user manual

Gefen

Gefen DVIAUD-2-HDMI user manual

Valcom V-9939B user guide

Valcom

Valcom V-9939B user guide

Balluff BIS VM-920 installation guide

Balluff

Balluff BIS VM-920 installation guide

Canon LV-WN02 manual

Canon

Canon LV-WN02 manual

TRENDnet TEG-PCBUSR installation guide

TRENDnet

TRENDnet TEG-PCBUSR installation guide

Audiovox WFM7810 owner's manual

Audiovox

Audiovox WFM7810 owner's manual

D-Link DHP-208AV user manual

D-Link

D-Link DHP-208AV user manual

Velleman PCUSBVGA3 user manual

Velleman

Velleman PCUSBVGA3 user manual

Polycom EagleEye Digital Breakout Adapter Supplemental user guide

Polycom

Polycom EagleEye Digital Breakout Adapter Supplemental user guide

Tizi Tankstelle mini manual

Tizi

Tizi Tankstelle mini manual

MCC iPort/LAN 2 user guide

MCC

MCC iPort/LAN 2 user guide

Wantec 5714 Quick installation guide

Wantec

Wantec 5714 Quick installation guide

Keyspan USB Twin Serial Adapter user manual

Keyspan

Keyspan USB Twin Serial Adapter user manual

manuals.online logo
manuals.online logoBrands
  • About & Mission
  • Contact us
  • Privacy Policy
  • Terms and Conditions

Copyright 2025 Manuals.Online. All Rights Reserved.