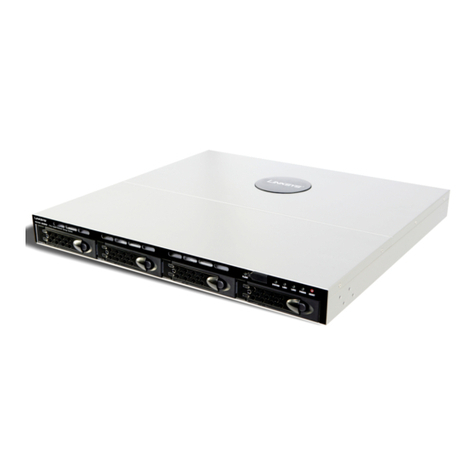
Linksys NSLU2 - Network Storage Link NAS Server User manual

Model No.
Quick Installation Guide
A Division of Cisco Systems, Inc.
®
WIRED
NSLU2 (EU/UK/LA)
Network Storage Link
Package Contents
• One NSLU2 - Network Storage Link
for USB 2,0 Disk Drives
• One Power Adapter
• One 6 ft. Ethernet Cable
• One Setup Wizard CD with User Guide
(English Only) in PDF format
• One Quick Installation
•OneDeviceStand
for USB 2,0 Disk Drives

2
1Connect the Network Storage Link
APlug the included Ethernet
cable into the Network
Storage Link’s Ethernet port.
Then, connect the other end
to your hub or switch.
BConnect the USB storage
devices.
If you are using a USB flash
memory device (USB Key),
insert it in the Disk 2 port.
This Quick Installation will explain how to physically connect the Network
Storage Link to the network and how to set up the Network Storage Link for
basic operation.
Before you install the Network Storage Link, make sure these requirements
have been met:
• TCP/IP protocol is installed on your PCs
• a port is available on a hub or switch (to connect to the network)
• you have a USB flash drive and/or a USB hard disk drive (to store data)
If these requirements have been met, then proceed to Step 1.
A
B1
NOTE: The flash drive must be inserted
into the Disk 2 port. It will not work if it
is inserted into the Disk 1 port.
IMPORTANT: The Network Storage Link
is not hot-swappable. Make sure that
the Network Storage Link is powered off
before you connect or disconnect any
USB flash or hard disk drive.

3
If you are connecting a USB
hard disk drive, you can
connect it to either port;
however, Linksys recommends
that you connect the first hard
disk drive to the Disk 1 port.
APlug the power cord into the
Network Storage Link's power
port. Then connect the other
end to an electrical outlet.
BTo power on the Network
Storage Link, press the power
button once. (It is located near
the bottom of the front panel.)
CThe Network Storage Link will
run a brief self-test (2 or 3
seconds) before actually
booting up. During the self-test,
all of the Network Storage Link's
LEDs will be lit or flashing.
When the self-test is complete,
the Ready/Status LED will flash
continuously, and the Ethernet
LED will flash occasionally as
the Network Storage Link is
booting up. This should take
approximately 1-3 minutes.
When boot-up is complete, the
Ready/Status LED and the
Ethernet LED will be
continuously lit.
C
B2
D

4
• If a flash memory or USB disk
is connected to the Disk 2
port, the Disk 2 LED should
be lit.
• If a USB hard disk drive is
connected to the Disk 1 port,
the Disk 1 LED should be lit.
• If the Network Storage Link
repeatedly beeps, there is a
hardware problem. Refer to
the Troubleshooting section
of the User Guide on the CD-
ROM for possible solutions.
Proceed to Step 2.
NOTE: For details about
removing or changing USB
storage devices, refer to the User
Guide on the CD-ROM.

5
A
AInsert the Setup Wizard CD-
ROM into your PC’s CD-ROM
drive.
The Setup Wizard should
run automatically, and the
Main Menu
screen should
appear. If it does not, click
Start
and then
Run
. In the field
provided, enter
D:\SetupUtility.exe
(if “D” is the
letter of your CD-ROM drive).
BClick the Setup button.
CThe Setup Wizard will
automatically search for any
Network Storage Link that is
currently on your network or
attached to your PC. If it fails to
detect the Network Storage
Link or if an Network Storage
Link has been installed since
the Setup Wizard’s last search,
click Search Again to locate
the Network Storage Link.
Select the Network Storage Link
that you want to set up. Then
click the Yes button to change
any of the Network Storage
Link’s settings.
DYou will be asked for your
password. For security
purposes, enter the current
password for the Network
Storage Link. The default is
admin. Click OK.
C
2Set up the Network Storage Link
D

6
AThe IP Settings screen will
appear. If you already have a
router or other DHCP server
automatically assigning IP
addresses, then select
Automatically obtain an IP
address (DHCP) and click Next.
Proceed to Step F.
If you want to set the Network
Storage Link’s IP address and
network information, then
select Set IP configuration
manually and enter the
following information:
• IP Address. Enter the Network
Storage Link’s IP address, and
make sure that it is on the
same local area network
(LAN) segment as the PC
running the Setup Wizard.
• IP Mask. Enter the Subnet
Mask, which must match the
subnet mask of the other
devices on your network. The
default is 255.255.255.0.
• Gateway. This field is left
blank by default. However, if
you have a router on your
network, enter its IP address in
this field.
Click the Next button.
E

7
AOn the Date/Time Settings
screen select your local time
zone. Then set the current date
and time. Click Next.
BReview the Network Storage
Link’s settings. If they are
correct, click Save. If you would
like to change them, click Back
to return to a previous screen.
CA screen will appear and ask
you to confirm that you want to
save new settings. To save
these changes, click OK, or
click Cancel to return to the
previous screen.
DIf the USB hard disk drive was
not previously used with a
Network Storage Link, then its
format must be changed. The
message shown in Figure I will
be displayed. To change the
USB hard disk drive's format so
that it can be used in the
Network Storage Link, click OK.
To leave the USB hard disk drive
unchanged, click Cancel, and
you will not be able to store
data on the hard disk drive.
F
G
IMPORTANT:The Network Storage
Link’s format is NOT compatible with
Windows. You cannot swap USB hard
disk drives between Windows systems
and Network Storage Links.
H
I

8
AOn the Congratulations
screen, click Exit to exit the
Setup Wizard.
Congratulations! The installation of
the Network Storage Link
is complete.
NSLU2-QIG-UK-40610NC KL
Linksys is a registered trademark or trademark of
Cisco Systems, Inc. and/or its affiliates in the U.S.
and certain other countries. Copyright © 2004
Cisco Systems, Inc. All rights reserved.
J
For additional information or troubleshooting
help, refer to the User Guide on the CD-ROM
or the Technical Support Insert. You can also
e-mail for further support.
Website
http://www.linksys.com/international

Modelnr.
Installationsvejledning
A Division of Cisco Systems, Inc.
®
WIRED
NSLU2 (DK)
Network Storage Link
Pakkens indhold
• En NSLU2 - Network Storage Link til
USB 2.0-diske
• En strømforsyning
• Et Ethernet-kabel på 2 meter
• En cd-rom med guidet konfiguration
og brugervejledning (kun på engelsk)
i pdf-format
• En installationsvejledning
• Et enhedsstativ
til USB 2.0-diskdrev

2
1Tilslut Network Storage Link
ASlut det medfølgende
Ethernet-kabel til Ethernet-
porten på Network Storage
Link. Slut derefter den anden
ende af kablet til din hub eller
switch.
BTilslut USB-lagerenhederne.
Hvis du bruger en USB-
flashhukommelse (USB Key),
skal du slutte den til Disk 2-
porten.
Denne installationsvejledning beskriver, hvor du fysisk skal slutte Network
Storage Link til netværket, og hvordan du skal konfigurere Network Storage
Link til basisdrift.
Inden du installerer Network Storage Link, skal du kontrollere, at disse krav
overholdes:
• TCP/IP-protokol skal være installeret på dine pc'er
• en port skal være tilgængelig på en hub eller switch (for tilslutning til
netværket)
• du skal have et USB-flashdrev og/eller en USB-harddisk (til lagring af
data)
Hvis disse krav overholdes, kan du fortsætte til trin 1.
A
B1
BEMÆRK: Flashdrevet skal sluttes
til Disk 2-porten. Det vil ikke fungere,
hvis du slutter det til Disk 1-porten.
VIGTIGT: Network Storage Link er
ikke ”hot-swappable”. Kontroller, at
der er slukket for Network Storage
Link, før du tilslutter eller frakobler et
USB-flashdrev eller en harddisk.

3
Hvis du tilslutter en USB-harddisk,
kan du tilslutte den til begge
porte. Linksys anbefaler dog,
at du tilslutter den første
harddisk til Disk 1-porten.
CTilslut netledning til strømstikket
på Network Storage Link. Tilslut
derefter den anden ende til en
stikkontakt.
DTryk én gang på tænd/
slukknappen for at tænde for
Network Storage Link. Den er
placeret nederst på
frontpanelet.
ENetwork Storage Link udfører
en kort selvtest (2 eller
3 sekunder), inden den egentlig
starter. Under selvtesten lyser
eller blinker alle lysdioder på
Network Storage Link.
Når selvtesten er udført, lyser
lysdioden Klar/status fast, og
lysdioden Ethernet blinker,
mens Network Storage Link
starter. Det tager ca.
1-3 minutter.
Når enheden er startet, lyser
lysdioderne Klar/status og
Ethernet fast.
C
B2
D

4
• Hvis der er tilsluttet en
flashhukommelse eller USB-
disk til Disk 2-porten, skal
lysdioden Disk 2 lyse.
• Hvis der er tilsluttet en USB-
harddisk til Disk 1-porten, skal
lysdioden Disk 1 lyse.
• Hvis Network Storage Link
bipper, er der opstået en
hardwarefejl. Se afsnittet om
fejlfinding i
brugervejledningen på cd-
rom'en for at finde en mulig
løsning.
Fortsæt til trin 2.
BEMÆRK: Yderligere detaljer om
at fjerne eller ændre USB-
lagerenheder finder du i
brugervejledningen på cd-rom'en.

5
Modelnr.
A
APlacer cd-rom'en med guidet
konfiguration i pc'ens cd-rom-
drev.
Den guidede
konfiguration køres automatisk,
og skærmbilledet
Main Menu
(Hovedmenu) vises. Hvis det
ikke er tilfældet, skal du klikke
på
Start
og derefter vælge
Run
(Kør)
. I det viste felt skal du taste
D:\SetupUtility.exe
(hvis ”D” er
bogstavet for cd-rom-drevet).
BKlik på knappen Setup
(Konfiguration).
CDen guidede konfiguration
søger automatisk efter et evt.
Network Storage Link, som er
tilsluttet dit netværk eller din pc.
Hvis den guidede konfiguration
ikke kan finde Network Storage
Link, eller hvis der er installeret
et Network Storage Link siden
den sidste søgning, skal du
klikke på Search Again (Søg
igen) for at finde Network
Storage Link.
Vælg det Network Storage Link,
som du vil konfigurere. Klik
derefter på knappen Yes (Ja)
for at ændre indstillingerne for
Network Storage Link.
DDu bliver bedt om at angive
din adgangskode. Af
sikkerhedshensyn, skal du
angive den aktuelle
adgangskode til Network
Storage Link. Standard er
admin. Klik på OK.
C
2Konfiguration af Network
D
Storage Link

6
E
Skærmbilledet
IP Settings
(IP-indstillinger) vises. Hvis du
allerede har en router eller en
anden DHCP-server, der
automatisk tildeler IP-adresser,
skal du vælge
Automatically
obtain an IP address (DHCP)
(Hent automatisk en IP-adresse
(DHCP)) og klikke på
Next
(Næste). Fortsæt til trin F.
Hvis du vil angive adresser og
netværksoplysninger til Network
Storage Link, skal du vælge
Set
IP configuration manually
(Indstil IP-konfiguration manuelt)
og angive følgende
oplysninger:
• IP Address (IP-adresse). Angiv
IP-adressen til Network Storage
Link, og kontroller, at den er
placeret på det samme LAN-
segment (Local Area Network)
som den pc, der kører den
guidede konfiguration.
•IP-maske.Angivden
undernetmaske, som skal
stemme overens med
undernetmasken på de
andre enheder i dit netværk.
Standard er
255.255.255.0
.
• Gateway. Dette felt er som
standard tomt. Hvis du har en
router på dit netværk, skal du
angive dens IP-adresse i
dette felt.
Klik på knappen Next (Næste).
E

7
FPå skærmbilledet Date/Time
Settings (Dato/tidsindstillinger)
skal du vælge din lokale
tidszone. Derefter skal du
angive den aktuelle data og
det aktuelle klokkeslæt. Klik på
Next (Næste).
GKontroller indstillingerne til
Network Storage Link. Hvis de er
korrekte, skal du klikke på Save
(Gem). Hvis du vil ændre dem,
skal du klikke på Back (Tilbage)
for at gå tilbage til et tidligere
skærmbillede.
HDer vises et skærmbillede, hvor
du bliver bedt om at bekræfte,
at du vil gemme de nye
indstillinger. Klik på OK for at
gemme ændringerne, eller klik
på Cancel (Annuller) for at
vende tilbage til det forrige
skærmbillede.
IHvis USB-harddisken ikke
tidligere har været anvendt
sammen med et Network
Storage Link, skal dens format
ændres. Meddelelsen i figur 1
vises. Klik på OK for at ændre
formatet på USB-harddisken, så
den kan anvendes sammen
med Network Storage Link. Klik
på Cancel (Annuller) for at
bevare formatet på USB-
harddisken. Derefter kan du
ikke gemme data på
harddisken.
F
G
H
I

8
JPå skærmbilledet
Congratulations (Tillykke) skal
du klikke på Exit (Afslut) for at
afslutte den guidede
konfiguration.
Tillykke! Installation af Network
Storage Link er fuldført.
VIGTIGT: Formatet i Network Storage
Link er IKKE kompatibelt med
Windows. Du kan ikke swappe USB-
harddiske mellem Windows-systemer
og Network Storage Link.
NSLU2-DK-QIG-40610NC KL
Linksys er et registreret varemærke tilhørende
Cisco Systems, Inc. og/eller Cisco Systems
associerede selskaber i USA og visse andre lande.
Copyright © 2004 Cisco Systems, Inc. Alle
rettigheder forbeholdes.
Yderligere oplysninger eller hjælp til
fejlfinding finder du i brugervejledningen på
cd-rom'en eller på arket med teknisk
support. Du kan også sende en e-mail for at
få yderligere support.
Websted
http://www.linksys.com/international
J

Modèle réf.
Guide d'installation rapide
A Division of Cisco Systems, Inc.
®
CABLE
NSLU2 (FR)
Unité de stockage NAS
Contenu de l'emballage
• Une NSLU2 - Unité de stockage NAS
pour disques durs USB 2.0
• Un adaptateur électrique
• Un câble Ethernet 1,8 m
• Un CD de l'Assistant de configuration
contenant le Guide de l'utilisateur (en
anglais uniquement) au format PDF
• Un Guide d'installation rapide
• Un support de périphérique
pour disques durs USB 2.0

2
1
Connectez l'unité de stockage NAS
ABranchez le câble Ethernet fourni
sur le port Ethernet de l'unité de
stockage NAS. Puis branchez l'autre
extrémité sur le concentrateur ou
le commutateur.
BConnectez les périphériques de
stockage USB.
Si vous utilisez un périphérique de
mémoire flash USB (clé USB),
insérez-la dans le port du
disque 2.
Ce Guide d'installation rapide vous explique comment connecter l'unité de
stockage NAS à votre réseau et comment la configurer pour effectuer les
opérations de base.
Avant d'installer l'unité de stockage NAS, assurez-vous que les conditions
suivantes ont été remplies :
• le protocole TCP/IP est installé sur vos ordinateurs,
• un port est disponible sur un concentrateur ou un commutateur (pour la
connexion au réseau),
• vous disposez d'un disque flash USB et/ou d'un disque dur USB (pour le
stockage des données).
Si ces conditions sont remplies, passez à l'étape 1.
A
B1
REMARQUE : Le disque flash doit être
inséré dans le port de disque 2. Il ne
fonctionnera pas s'il est inséré dans le
port de disque 1.
IMPORTANT : L'unité de stockage NAS ne
peut pas être remplacée à chaud. Assurez-
vous que l'unité de stockage NAS est hors
tension avant de connecter ou déconnecter
un disque dur USB ou flash.

3
Si vous connectez un disque dur
USB, vous pouvez utiliser le port de
votre choix ; toutefois, Linksys vous
recommande de connecter le
premier disque dur sur le port du
disque 1.
CBranchez le cordon
d'alimentation sur le port
d'alimentation de l'unité de
stockage NAS. Puis branchez
l'autre extrémité sur une prise
électrique.
DPour mettre sous tension l'unité de
stockage NAS, appuyez sur le
bouton d'alimentation. (Il est situé
dans la partie inférieure du
panneau avant.)
EL'unité de stockage NAS effectue
un auto-test pendant 2 à
3 secondes avant de démarrer
réellement. Au cours de cet auto-
test, tous les voyants de l'unité de
stockage NAS s'allument ou
clignotent.
Lorsque l'auto-test est terminé, le
voyant Prêt/Etat clignote en
continu et le voyant Ethernet
clignote par intermittence
pendant le démarrage de l'unité
de stockage NAS. Cette
opération dure environ 1 à
3 minutes.
Lorsque le démarrage est
terminé, les voyants Prêt/Etat et
Ethernet restent allumés.
C
B2
D

4
• Si une mémoire flash ou un
disque USB est connecté au
port du disque 2, le voyant du
disque 2 doit s'allumer.
• Si un disque dur USB est
connecté au port de disque 1,
le voyant de disque 1 doit
s'allumer.
• Si l'unité de stockage NAS émet
un bip de façon répétitive, cela
signifie qu'il s'est produit un
problème matériel. Pour
connaître les solutions possibles,
consultez la section
Troubleshooting (Dépannage)
du Guide de l'utilisateur contenu
dans le CD-ROM.
Passez à l'étape 2.
REMARQUE : Pour plus de détails
sur le retrait ou le changement de
périphériques de stockage USB,
consultez le Guide de l'utilisateur du
CD-ROM.
Other manuals for NSLU2 - Network Storage Link NAS Server
4
Table of contents
Languages:
Other Linksys Storage manuals

Linksys
Linksys NSS4100 - Gigabit Storage System Operation manual

Linksys
Linksys NSS4000 Series Operation manual

Linksys
Linksys NMH Series User manual

Linksys
Linksys NMH Series User manual

Linksys
Linksys WCF12 - Wireless-B Network CompactFlash Card Original operating instructions

Linksys
Linksys NSS4000 Series Service manual

Linksys
Linksys NAS200 User manual

Linksys
Linksys WCF12 - Wireless-B Network CompactFlash Card User manual
Linksys
Linksys WCF12 - Wireless-B Network CompactFlash Card User manual
Linksys
Linksys NSS4100 - Gigabit Storage System User manual