manuals.online logo
Brands
  1. Home
  2. •
  3. Brands
  4. •
  5. Linksys
  6. •
  7. Storage
  8. •
  9. Linksys WCF12 - Wireless-B Network CompactFlash Card Original operating instructions

Linksys WCF12 - Wireless-B Network CompactFlash Card Original operating instructions

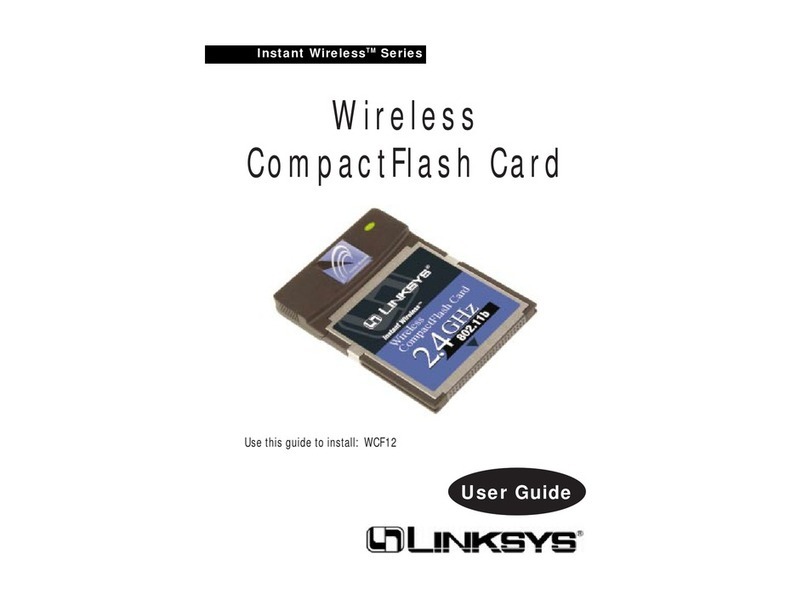
WCF12
System Requirements
• One Computer with the following:
• Pentium Class 200MHz or
Faster Processor
• CD-ROM Drive
• 64MB RAM (recommended)
• Windows 98, Me, 2000, or XP
(to load drivers)
• Microsoft ActiveSync Utility
• PDA with Windows CE 3.0 or
Higher and Available Type I
CompactFlash Slot
Wireless CompactFlashCard
Instant Wireless™
Package Contents
• One Instant Wireless™CompactFlash
Card (1)
• One Setup CD-ROM including
Drivers and User Guide (2)
• One Quick Installation
• One Registration Card
The Wireless CompactFlash Card comes with an automated software instal-
lation procedure that interacts with the Windows operating system on your
PC and the Windows CE operating systems on your PDA. This procedure
automatically installs the Configuration Utility with the driver. After
installing the software, you will install the hardware on your PDA.
A. Connect your PDA to your PC.
Make sure you have the
Microsoft ActiveSync Utility
installed on your PC. Insert the
Setup CD-ROM into your PC’s
CD-ROM drive. Unless you
have deactivated the auto-run
feature of Windows, the screen
in Figure A should appear
automatically.
If this screen does not appear automatically, you can access it by clicking
the Start button and choosing Run. In the drop-down box provided, type
d:\setup.exe (if “d” is the letter of your CD-ROM drive). Alternately, dou-
ble-click My Computer, and then double-click the CD-ROM drive where
the Setup CD is located. Double-click the Setup.exe icon that appears.
Installing the Wireless CompactFlash
Card’s Configuration Utility with Driver
B. Click the Setup button.
C. When you see the screen in
Figure C, click the Next but-
ton.
D. When you see the License
Agreement screen, read the
entire policy by clicking the
Page Down button on your
keyboard. Click the Yes button
if you agree, or No if you dis-
agree. Clicking No will termi-
nate the installation. If you
click Yes, the installation will
proceed.
E. You will determine where
the Wireless CompactFlash
Configuration Utility will be
installed. If you would like the
utility files installed in the
default directory, click the
Next button. If you would like
to choose an alternate directo-
ry, click the Browse button,
and select the appropriate fold-
er.Then click the Next button.
F. Choose either Infrastructure
mode or Ad-Hoc mode,
depending on your needs. If
you are unsure whether to
choose Infrastructure or Ad-
Hoc, refer to the User Guide on
the Setup CD-ROM for more
information. Once you have
made your choice, click the
Next button.
AD
This Quick Installation is meant to help you install the product quickly and easily.For detailed instructions on installation and
configuration, and further setup options, please consult the User Guide.
Continued on back
E
F
C
Note: Do NOT insert theWireless CompactFlash Card into the PDA.You must
install the Configuration Utility with driver first.
I. Windows will ask if you wish to install the driver in the default directo-
ry. Click the Yes button to use the default directory. Click the No button
to select a different directory.
J. When you see the screen in Figure J, check your PDA to see if addition-
al steps are required. Follow the steps requested by your PDA. Once this
is done, or if none are requested, click the OK button.
K. When the installation is com-
plete, click the Exit button.
Proceed to Step 2: Installing theWireless CompactFlash Card.
G.1If you chose Infrastructure
Mode, go to Step G.2now. If
you chose Ad-Hoc Mode,
select the correct operating
channel that applies to your
network. The channel you
choose should be the same as
the channel for the other com-
puters and devices in your
wireless network. Channel 6 is
the default. Select the appro-
priate channel, and click the
Next button.
G.2Enter your wireless network’s
SSID. The SSID must be iden-
tical for all points in the net-
work. The default setting is
linksys (all lowercase). Enter
this information, and click the
Next button.
H. At this point, the Wizard will
ask you to review your settings
before copying files. Select
Back to review or change any
settings or Next if you are sat-
isfied with your settings.
A. Insert the Wireless
CompactFlash Card
into your PDA.
B. The screen in Figure B will
appear.The default setting is
Use server-assigned IP
address. In most cases, you
should keep the default set-
ting. However, if you are
using fixed IP addresses on
your wireless network, then
click the radio button next to
Use specific IP address, and
complete the IP address,
Subnet mask, and Default
gateway fields.
C. Click the OK button to close the screen shown in Figure B.
D. Make sure the icon shown in Figure C1is displayed in
your PDA’s system tray (see Figure C2).
QI-WCF12-052102NC JL
WWW.LINKSYS.COM
H
K
Installing the Wireless CompactFlash
Card
A
B
The installation of the Wireless CompactFlash Card is complete.
If you wish to further customize its configuration or want additional
details, refer to the User Guide on the Setup CD-ROM.
I
J
G.1
G.2
C1
C2

Other manuals for WCF12 - Wireless-B Network CompactFlash Card

2

Other Linksys Storage manuals

Linksys NSS4100 - Gigabit Storage System User manual

Linksys

Linksys NSS4100 - Gigabit Storage System User manual

Linksys NAS200 User manual

Linksys

Linksys NAS200 User manual

Linksys WCF12 - Wireless-B Network CompactFlash Card User manual

Linksys

Linksys WCF12 - Wireless-B Network CompactFlash Card User manual

Linksys NSS4000 Series Operation manual

Linksys

Linksys NSS4000 Series Operation manual

Linksys NAS200 User manual

Linksys

Linksys NAS200 User manual

Linksys NSLU2 - Network Storage Link NAS Server User manual

Linksys

Linksys NSLU2 - Network Storage Link NAS Server User manual

Linksys EFG20 User manual

Linksys

Linksys EFG20 User manual

Linksys NSS4000 Series Service manual

Linksys

Linksys NSS4000 Series Service manual

Linksys WCF12 - Wireless-B Network CompactFlash Card User manual

Linksys

Linksys WCF12 - Wireless-B Network CompactFlash Card User manual

Linksys NMH Series User manual

Linksys

Linksys NMH Series User manual

Linksys NMH Series User manual

Linksys

Linksys NMH Series User manual

Linksys NSS4100 - Gigabit Storage System Operation manual

Linksys

Linksys NSS4100 - Gigabit Storage System Operation manual

Linksys NAS200 Operation manual

Linksys

Linksys NAS200 Operation manual

Popular Storage manuals by other brands

HP P9000 user guide

HP

HP P9000 user guide

Philips FM51FD00B/00 user manual

Philips

Philips FM51FD00B/00 user manual

Seagate Savvio 10K product manual

Seagate

Seagate Savvio 10K product manual

Maxtor Maxtor OneTouch 4 user guide

Maxtor

Maxtor Maxtor OneTouch 4 user guide

Follett ITS500-31 Installation, operation, and parts manual

Follett

Follett ITS500-31 Installation, operation, and parts manual

Ergo MD-21 user manual

Ergo

Ergo MD-21 user manual

Dell PowerVault DL2100 Getting started

Dell

Dell PowerVault DL2100 Getting started

HP 9130K Service manual

HP

HP 9130K Service manual

Cisco C880 M4 operating manual

Cisco

Cisco C880 M4 operating manual

MPI 51 product manual

MPI

MPI 51 product manual

Cybernetics V Series CY-miSAN-V Operator's manual

Cybernetics

Cybernetics V Series CY-miSAN-V Operator's manual

Tandberg Data SDLT220-320 INTEGRATION product manual

Tandberg Data

Tandberg Data SDLT220-320 INTEGRATION product manual

Sony USM128B operating instructions

Sony

Sony USM128B operating instructions

Memorex 660-1 Maintenance manual

Memorex

Memorex 660-1 Maintenance manual

Logicube F-FALCON-SA user manual

Logicube

Logicube F-FALCON-SA user manual

Advantech SQF-MSDS1-2G-85E Technical manual

Advantech

Advantech SQF-MSDS1-2G-85E Technical manual

Lenovo 7D7Y Service guide

Lenovo

Lenovo 7D7Y Service guide

TrekStor DataStation Pocket Capa user manual

TrekStor

TrekStor DataStation Pocket Capa user manual

manuals.online logo
manuals.online logoBrands
  • About & Mission
  • Contact us
  • Privacy Policy
  • Terms and Conditions

Copyright 2025 Manuals.Online. All Rights Reserved.