2
lci1.com 574-537-8900 Rev:05.11.21CCD-0003934
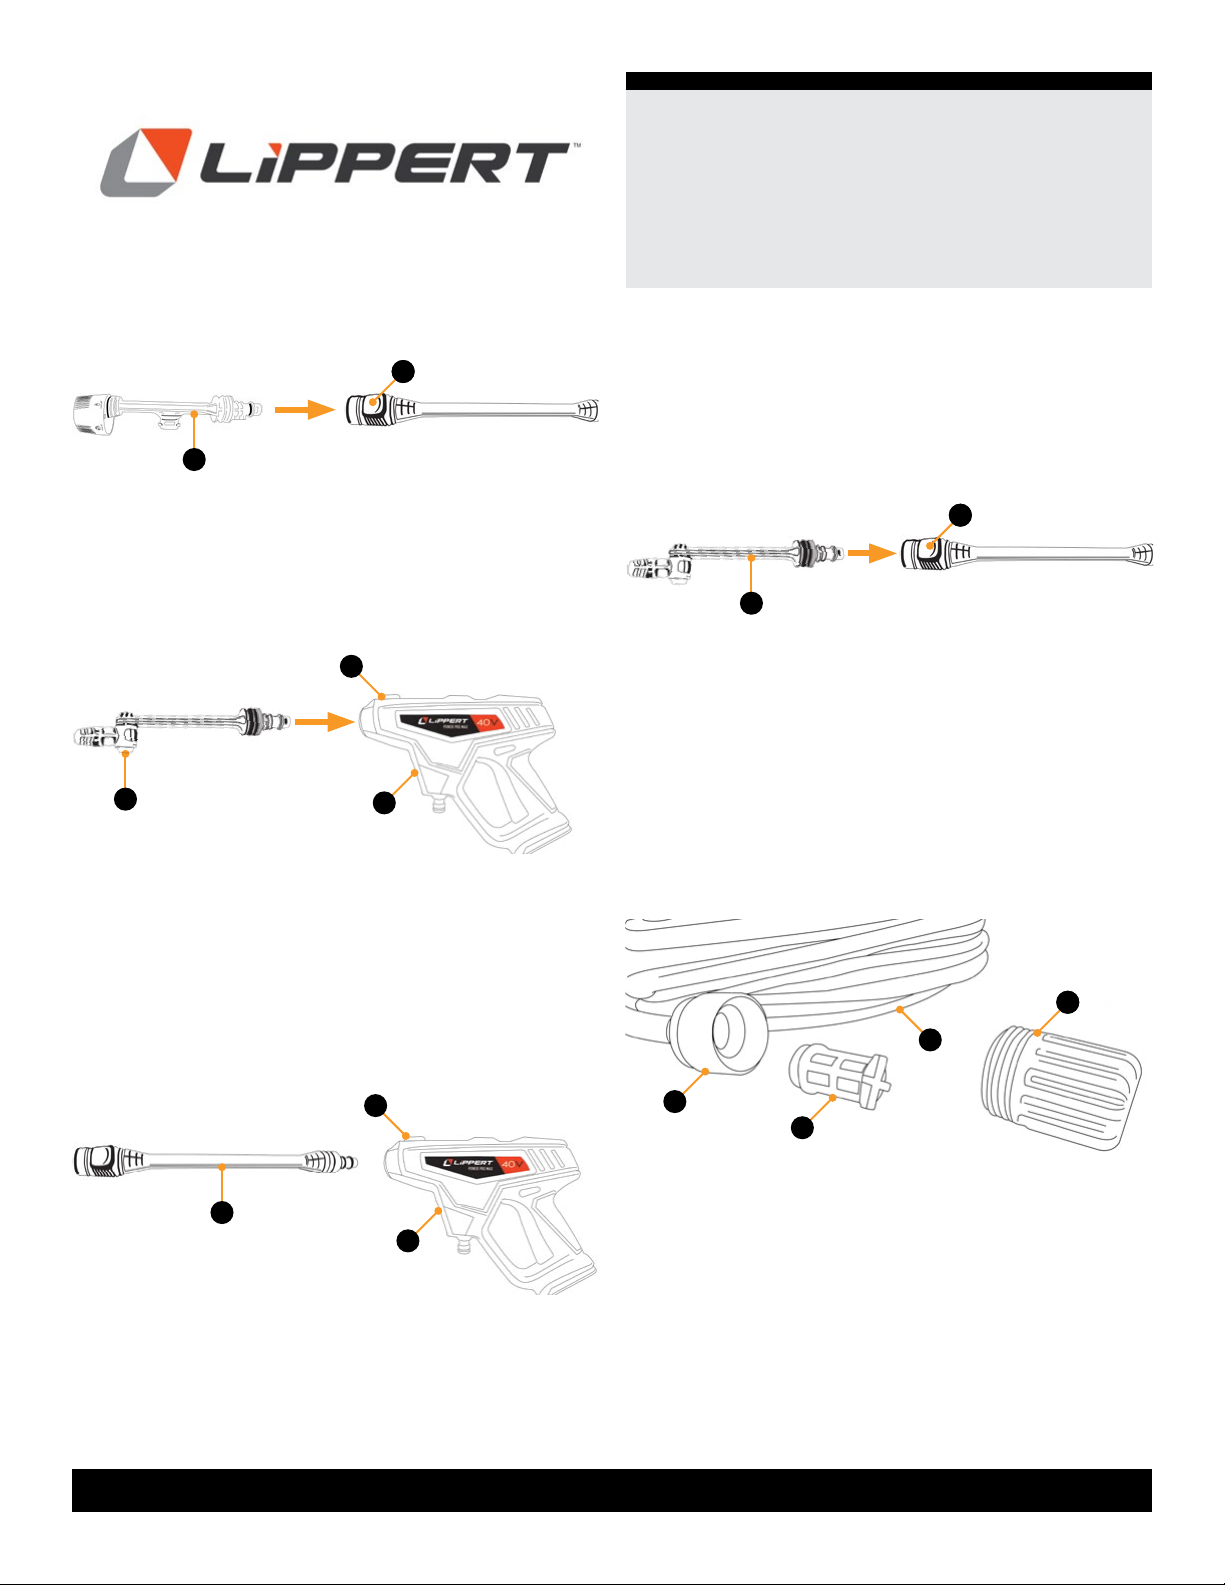
Power Pro Max™
(Portable Power Cleaner)
Installation and Owner’s Manual
(For Aftermarket Applications)
Safety
Read and fully understand all instructions before installing
or operating this product. Adhere to all safety labels.
This manual provides general instructions. Many variables
can change the circumstances of the instructions, i.e., the
degree of difficulty, operation and ability of the individual
performing the instructions. This manual cannot begin
to plot out instructions for every possibility, but provides
the general instructions, as necessary, for effectively
interfacing with the device, product or system. Failure
to correctly follow the provided instructions may result
in death, serious personal injury, severe product and/
or property damage, including voiding of the LCI limited
warranty.
THE “WARNING” SYMBOL ABOVE IS A SIGN THAT A
PROCEDURE HAS A SAFETY RISK INVOLVED AND
MAY CAUSE DEATH, SERIOUS PERSONAL INJURY
OR SEVERE PRODUCT AND/OR PROPERTY DAMAGE
IF NOT PERFORMED SAFELY WITHIN PARAMETERS
SET FORTH IN THIS MANUAL.
THE “CAUTION” SYMBOL ABOVE IS A SIGN THAT
A PROCEDURE HAS A SAFETY RISK INVOLVED
AND MAY CAUSE PERSONAL INJURY OR PRODUCT
AND/OR PROPERTY DAMAGE IF NOT PERFORMED
SAFELY WITHIN PARAMETERS SET FORTH IN THIS
MANUAL.
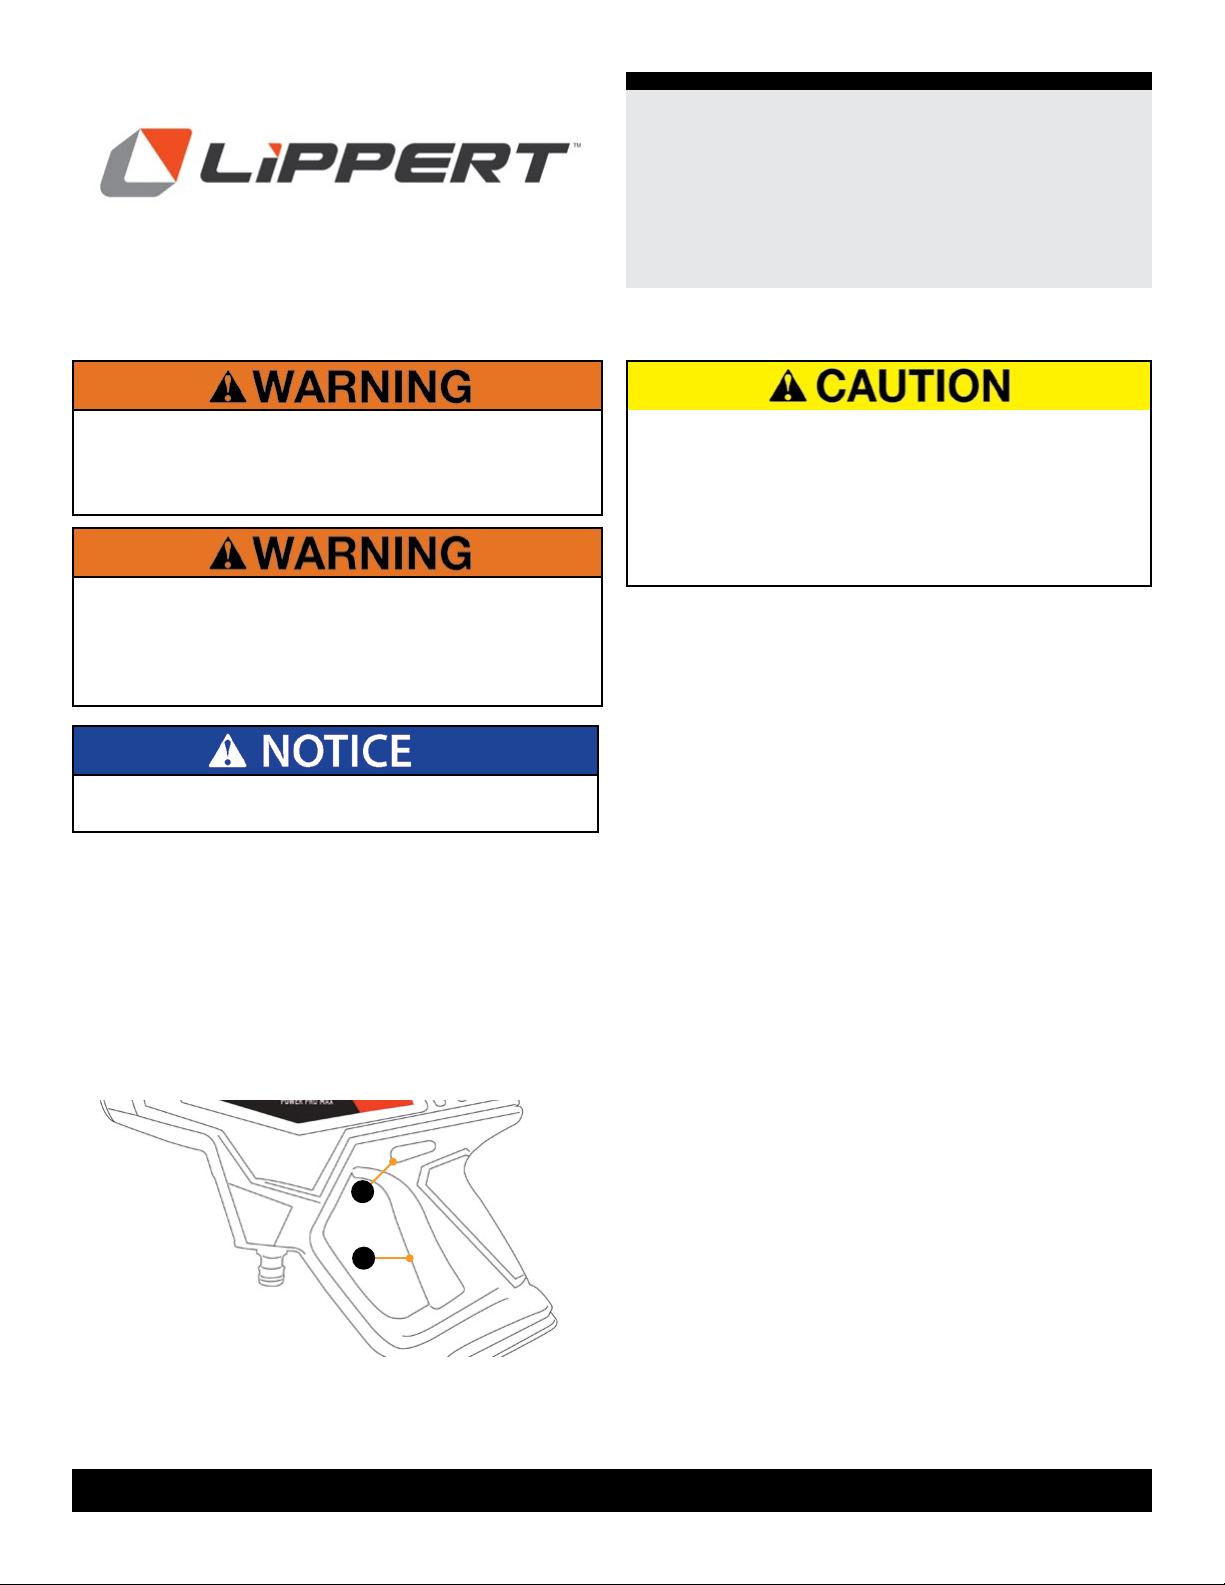
DO NOT OPERATE NEAR AN ELECTRICAL POWER
SOURCE SUCH AS AN ELECTRICAL OUTLET OR
WIRING. SPRAY CONTACTING ACTIVE ELECTRICAL
COMPONENTS CAN CAUSE PERSONAL INJURY
FROM AN ELECTRICAL SHOCK OR BURN.
DO NOT TOUCH THE ELECTRICAL PLUG WITH
WET HANDS. WET HANDS CONTACTING ACTIVE
ELECTRICAL COMPONENTS CAN CAUSE
PERSONAL INJURY FROM AN ELECTRICAL SHOCK
OR BURN.
DO NOT DIRECT OPERATING POWER CLEANER
NOZZLE AT PEOPLE OR PETS. HIGH WATER
PRESSURE CAN CAUSE PERSONAL INJURY TO
EXPOSED SKIN AND SEVERE INJURY TO PETS.
DO NOT TOUCH THE NOZZLE OR WATER SPRAY
WHILE OPERATING THE POWER CLEANER OR
PERSONAL INJURY CAN OCCUR.
USE PERSONAL PROTECTIVE EQUIPMENT (PPE)
SUCH AS PROTECTIVE EYE-WEAR, GLOVES AND
SHOES WHEN OPERATING THE POWER CLEANER.
DO NOT USE ZERO DEGREE SETTING ON
PAINTED OBJECTS, SOFT WOOD SURFACES OR
THIN PLASTIC OR FABRIC SURFACES. WATER
PRESSURE AT ZERO SETTING ON SUCH SURFACE
AND MATERIAL CAN CAUSE PROPERTY DAMAGE.
SELECT A LOWER PRESSURE AND WIDER SPRAY
SETTING TO CLEAN SUCH SURFACES AND
MATERIALS.
DO NOT CONNECT THE POWER CLEANER TO
ANY DIRTY OR CORROSIVE WATER SOURCE OR
CHEMICAL, SUCH AS SALT, MUDDY OR RUSTY
WATER OR ANY HARSH CLEANING LIQUIDS,
FERTILIZERS OR PLANT FOODS. USING AN
UNCLEAN WATER SOURCE OR CORROSIVE
ADDITIVE WILL DAMAGE FUNCTIONAL
COMPONENTS, WHICH MAY RENDER THE POWER
CLEANER INOPERABLE.