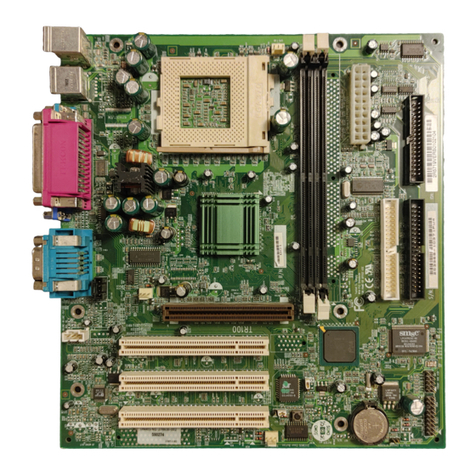
Lite-on Tech NA280 User manual

NA280
VIA® P4X266A Motherboard
USER’S MANUAL
Pentium®4 Processor Motherboard
Rev. 1.0

NA280 Motherboard

NA280 Motherboard
Revision History
Revision Date Description
1.0 Initial release of NA280 motherboard user’s manual
Item Checklist
1 NA280 Motherboard
1 Floppy Cable
1 ATA Cable 66/100
1 I/O Shield
1 Heatsink Retention Module
1 CD for Motherboard Driver
1 NA280 Quick Installation Guide
1 NA280 User Manual
Intel® Pentium 4 is a registered trademark of Intel Corporation.
Copyright © 2002, Lite-On Tech./System BU

NA280 Motherboard
Safety Instructions
Follow these precautions when operating your computer.
1. Always unplug the power cord when inserting any add-on card or
module inside the system.
2. Wear a grounding strap attached to a grounded device to avoid
damage from static electricity. If one is not available, discharge
static electricity by touching the metal case of a safely grounded
object before working on the motherboard.
3. Place components on a level grounded antistatic pad or on the
packaging that came with the components whenever the
components are separated from the system.
4. Keep equipment away from moisture and humidity.
5. Hold all circuit boards by the edges. Do not bend circuit boards.
6. Keep this User’s Manual for future reference.

NA280 Motherboard
Table of Contents
C
C
Ch
h
ha
a
ap
p
pt
t
te
e
er
r
r
1
1
1
I
I
In
n
nt
t
tr
r
ro
o
od
d
du
u
uc
c
ct
t
ti
i
io
o
on
n
n
1
1
1
Motherboard Specifications ........................................................................1
NA280 Motherboard Layout........................................................................6
C
C
Ch
h
ha
a
ap
p
pt
t
te
e
er
r
r
2
2
2
H
H
Ha
a
ar
r
rd
d
dw
w
wa
a
ar
r
re
e
e
I
I
In
n
ns
s
st
t
ta
a
al
l
ll
l
la
a
at
t
ti
i
io
o
on
n
n
P
P
Pr
r
ro
o
oc
c
ce
e
es
s
ss
s
s
9
9
9
Installing the Central Process Unit (CPU)...................................................9
Installing Memory Modules .......................................................................11
Connecting IDE and Floppy Disk Cables..................................................13
Connecting Floppy and IDE Drives...........................................................14
Installing Expansion Cards .......................................................................16
Connecting the Power Supply Cables ......................................................17
Jumper Introduction ..................................................................................21
C
C
Ch
h
ha
a
ap
p
pt
t
te
e
er
r
r
3
3
3:
:
:
A
A
Aw
w
wa
a
ar
r
rd
d
d®
®
®
B
B
BI
I
IO
O
OS
S
S
S
S
Se
e
et
t
tu
u
up
p
p
2
2
25
5
5
Entering the Setup Utility ..........................................................................25
The Main Menu .........................................................................................25
Standard CMOS Features ........................................................................26
Advanced BIOS Setup Option ..................................................................27
Advanced Chipset Features Option..........................................................28
Integrated Peripherals Option...................................................................32
Power Management Setup Option............................................................36
PNP/PCI Configuration Option .................................................................38
PC Health Status Option...........................................................................39
Frequency/Voltage Control .......................................................................40
Load Fail-Safe Defaults Option.................................................................41
Load Optimized Defaults Option...............................................................41
Set Password Option ................................................................................42
Save & Exit Setup Option .........................................................................43
Exit Without Saving...................................................................................43
NA280 Motherboard

NA280 Motherboard
1
C
C
Ch
h
ha
a
ap
p
pt
t
te
e
er
r
r
1
1
1
I
I
In
n
nt
t
tr
r
ro
o
od
d
du
u
uc
c
ct
t
ti
i
io
o
on
n
n
Motherboard Specifications
Form Factor:
• Standard ATX 305 x 244 mm
Processor:
• Supports single IntelPentium4 Processor in 478 ball FC-
PGA2 package
• Processor socket mPGA478B
• 533 MHz system bus
Cache Memory:
• Processor integrated level-1 and level-2 cache
System Memory:
• Three 184-pin DIMM sockets (90 degree, tin plated contact)
• Supports DDR (Double Data Rate) SDRAM at 200/266 MHz
• Supports 64/128/256/512 MB SDRAM devices
• Accommodates up to 3 GB (registered) or 1.5 GB (unbuffered)
memory
• Supports Suspend-to-RAM (STR) sleep state (ACPI S3)
On board EIDE:
• Two PCI IDE ports support up to four devices
• Supports ATA-33/66/100/133, PIO up to mode 4

NA280 Motherboard
2
Core Logic Chipset:
• High performance Northbridge 533 MHz front side bus plus AGP
4x external bus
• 64-bit Advanced ECC Memory controller supporting
PC2100/PC1600 DDR
• Combines VIA VT8233A V-Link Southbridge for integrated LAN,
audio, ATA133 IDE, and four USB ports
• Complies with AGP specification v2.0
• Two-bank interleaving for 16 Mbit SDRAM support and two and
four bank interleaving for 64 Mbit SDRAM support
• Supports 66 MHz V-Link Host interface with peak bandwidth of
266 MB/S
• Integrated Fast Ethernet Controller with 1/10/100 Mbit capability
• Integrated USB Controller with three root hub and four function
ports
• Dual channel UltraDMA-33/66/133 master mode EIDE controller
• Integrated keyboard controller with PS2 mouse support
• Integrated DS12885-style Real Time Clock with extended 256
bytes CMOS RAM
• Integrated ISA Bus controller including DMA, timer, and interrupt
controller
• Fast reset and Gate A20 operation
• Dual channel master mode PCI supporting four Enhanced IDE
devices
• Transfer rate up to 33MB/s to cover PIO mode 4, multi-word
DMA mode 2 drivers, and UltraDMA-33 interface
• USB v1.1 and Intel Universal HCI v1.1 compatible
• ACPI v1.0 and APM v1.2 compliant
PCI bus:
• PCI 2.2 compliant
• PME# and 3.3V aux signals support power management

NA280 Motherboard
3
Audio:
• Complies with AC ‘97 v2.2 specification
• AC-link interface for AC ‘97 audio codec and modem codec
• Integrated SoundBlasterPro/DirectSound compatible digital
audio controller
• 18-bit stereo full-duplex CODEC with independent and variable
sampling rate
• ALC201A analog CODEC
• Three Mini-DIN audio jacks (line-out, line-in, and mic-in)
• Two locking-type audio headers: CD-in, aux-in
Onboard LAN
• LAN Chip: RTL8100B (optional)
• Integrated Fast Ethernet MAC chip and transceiver in one chip
• 10 Mbps and 100 Mbps operation
• PCI local bus single-chip Fast Ethernet controller
• Complies with PCI Revision 2.2
• Supports ACPI, PCI power management
• Complies with PC99 standard
• Supports Wake-On-LAN function and remote wake-up
• Supports auxiliary power-on internal reset
• Half/full duplex capability
Expansion Slots:
• One AGP slot (2X/4X mode)
• One Communications and Networking Riser (CNR) slot
• Five PCI slots (including 1 shared PCI/CNR slot)
Additional Features:
• Thermal sensor & CPU monitoring
• NIC with integrated MBA boot (complete WOL support)
• Hardware monitor capability

NA280 Motherboard
4
On board I/O:
• Low Pin Count (LPC) interface
• Two serial ports – DB9 (16550 UART)
• One parallel port – DB25 with ECP/EPP support
• One PS/2 mouse connector
• One PS/2 keyboard connector
• Two PWM fan controlled output headers
• Four USB Ports: 2 ports on back panel, 2 ports via motherboard
2X5 header for front panel
• One game port
• RJ-45 LAN port
NOTE: The RJ-45 LAN port is only present when the
motherboard has the optional onboard LAN.
BIOS:
• Plug & Play BIOS (Award)
• ACPI v2.0 – WfM 2.0 – SMBIOS v2.3 – DMI v2.1 – PC2001
• Auto detect for: CPU Speed – AGP 4X – ATA-100
• Wake-on PS/2 (KB, Mouse) & USB devices
• Rapid Boot, WOL, and ASF support
• Power management: ACPI S3, S4 support
RAID (Optional)
• Supports Ultra ATA/100 drives and backward compatible with
Ultra ATA/66/33 & EIDE drives
• Supports UDMA 5/4/3/2/1/0, DMA 2/1/0, PIO 4/3/2/1/0 modes
• Two independent IDE channels support up to four
UDMA/100/66/33 or EIDE drives
• Offers double sustained data transfer rate of attached drive
(RAID 0, RAID 1)
• Intelligent DMA engine supports DMA HDDs with bus mastering

NA280 Motherboard
5
Other:
• Front panel I/O 2X5 header, key pin 10
• On-board buzzer

NA280 Motherboard
6
NA280 Motherboard Layout
FE
D
M
C
B
I
L
A
K
G
H
J
A Power Supply Connector H Floppy Connector
B CPU Socket I PCI Expansion Slots
C CPU Fan Connector J CNR Slot
D Memory Sockets K AGP Slot
E IDE Connectors L Audio Connector
F Front Panel Connectors M Back Panel Connectors
G RAID Connectors

NA280 Motherboard
7
Front Panel Connector Pin Definition
LPANEL 1
Pin Signal Name Pin Signal Name
1 HLED+ 2 HLED-
3 PLEDY- 4 SPKR VCC
5 PLEDG- 6 SPKR GND
7 PLED+ 8 SPKR GND
9 PS 10 SPKR
11 PS GND 12 RESET
13 KEY 14 RESET GND
PANEL1
Pin Signal Name Pin Signal Name
1 HD_LED_P 2 PWR_SLP
3 HD_LED_N 4 PWR_SLP
5 RST_SW_N 6 PWR_SW_P
7 RST_SW_P 8 PWR_SW_N
9 RSVD 10 KEY
3
1
7
11
5
9
13
4
2
8
12
6
10
14
3
1
7
5
9
4
2
8
6
10


NA280 Motherboard
9
Chapter 2 Hardware Installation Process
Installing the Central Process Unit (CPU)
CPU Installation
1. Unlock the CPU socket by pulling the locking lever up to a 90-
degree angle.
2. Position the CPU above the socket so that its marked corner (pin1)
matches the corner near the base of the lever.
3. Place the CPU into the socket. (If you cannot insert the CPU easily,
check its orientation and attempt to re-install it.)
Warning! Do not force the CPU into the socket. Doing so will bend
the CPU pins and damage the CPU.
4. Secure the CPU to the socket by lowering the lever and locking the
lever in place.
90-degree
angle
Pin1

NA280 Motherboard
10
CPU Heat Sink Installation
1. Read the related CPU heat sink user’s manual for more detailed
installation procedures.
2. Connect the CPU fan power cable to the CPU fan connector on the
motherboard.
CPU fan
power cable
CPU fan
connector
(CPUFAN1)

NA280 Motherboard
11
Installing Memory Modules
1. Push the white retaining clips on the memory socket outwards.
2. Match the notches on the contact edge of the memory module to
the ridge in the memory socket.
3. Insert the memory module vertically into place. When properly
inserted, the white retaining clips will move inward to lock in the
module.
4. Repeat the installation process to add additional modules.
Retaining
clip

NA280 Motherboard
12
Total Memory Sizes with Unbuffered DDR SDRAM DIMM
DIMM Type 1 DIMMx64/x72 2 DIMMsx64/x72 3 DIMMsx64/x72
64 Mbit
(2Mx8x4 banks)
128 MBytes 256 MBytes 384 MBytes
64 Mbit
(1Mx16x4 banks)
64 MBytes 128 MBytes 192 MBytes
128 Mbit
(4Mx8x4 banks)
256 MBytes 512 MBytes 786 MBytes
128 Mbit
(2Mx16x4 banks)
128 MBytes 256 MBytes 384 MBytes
256 Mbit
(8Mx8x4 banks)
512 MBytes 1 GByte 1.5 GBytes
256 Mbit
(4Mx16x4 banks)
256 MBytes 512 MBytes 768 Mbytes
512 Mbit
(16Mx8x4 banks)
1 GByte 2 GBytes 3 GBytes
512 Mbit
(8Mx16x4 banks)
512 MBytes 1 GByte 1.5 GBytes

NA280 Motherboard
13
Connecting IDE and Floppy Disk Cables
Connecting the floppy disk ribbon cable into the motherboard. The side
of the cable with the red stripe needs to be inserted into the Pin1 side of the
floppy disk connector. Pin1 is marked with a white triangle.
Connecting the IDE ribbon cable into the motherboard. The side of the
cable with the red stripe should be inserted into the Pin1 side of the IDE
connector. Pin1 is marked with a white triangle.
Note: The motherboard has two IDE connectors. You can connect
IDE devices to any of these connectors.
Red Stripe to
Pin1
Floppy
Connector
Red Stripe
to Pin1
IDE
Connectors

NA280 Motherboard
14
Connecting Floppy and IDE Drives
Follow these instructions to connect a floppy disk drive (FDD) and IDE drive
to your motherboard.
Floppy Disk Drive
1. Mount the drive into the case.
2. Connect the floppy disk ribbon cable and power cable to the FDD.
3. Connect the FDD ribbon cable to the motherboard FDD connector
FDD1 (refer to the previous section “Connecting IDE and Floppy
Disk Cables”).
Power
Cable
Floppy Disk
Ribbon Cable
Table of contents
Other Lite-on Tech Motherboard manuals

Lite-on Tech
Lite-on Tech NR120 User manual

Lite-on Tech
Lite-on Tech NA115 User manual

Lite-on Tech
Lite-on Tech TR101 User manual

Lite-on Tech
Lite-on Tech TR100 User manual

Lite-on Tech
Lite-on Tech NA120 User manual

Lite-on Tech
Lite-on Tech Scenic Edition X101 User manual

Lite-on Tech
Lite-on Tech NA380 User manual