manuals.online logo
Brands
  1. Home
  2. •
  3. Brands
  4. •
  5. Little Tikes
  6. •
  7. Toy
  8. •
  9. Little Tikes MY REAL JAM 654800EUC User manual

Little Tikes MY REAL JAM 654800EUC User manual

ADULT SUPERVISION RECOMMENDED
ADULT BATTERY INSTALLATION REQUIRED
AGES 3+
SKU: 654800EUC
CONTENTS
A. Electric Guitar
The batteries included in the unit are for in-store demonstration. Before playing, an adult must install
fresh alkaline batteries (not included) in the unit. Here’s how:
1. Using a Phillips screwdriver (not included), remove the screw and battery compartment cover located on
the back of the guitar.
2. Install three (3) fresh 1.5V AA (LR6) alkaline batteries (not included) making sure the (+) and (-) ends face
the proper direction as indicated inside the battery compartment.
3. Replace the compartment covers and tighten the screws.
BATTERY REPLACEMENT
Illustrations are for reference only. Styles may vary from actual contents.
Please remove all packaging including tags, ties & tacking stitches before giving this product to a child.
A.
B. Adjustable Strap
B.
1
3x AA Batteries
1.5V AA/LR6
1.5V AA/LR6
1.5V AA/LR6
4
ACTIVE
PLAY
MUSIC
ENG
Please keep this manual as it contains important information.
www.littletikes.com
www.littletikes.co.uk
www.littletikes.com.au
Little Tikes Consumer Service
2180 Barlow Road
Hudson, Ohio 44236 U.S.A.
1-800-321-0183
MGA Entertainment UK Ltd.
50 Presley Way, Crownhill, Milton
Keynes, MK8 0ES, Bucks, UK
support@LittleTikesStore.co.uk
Tel: +0 800 521 558
Imported by MGA Entertainment
Australia Pty Ltd
Suite 2.02, 32 Delhi Road
Macquarie Park NSW 2113
1300 059 676
BATTERY SAFETY INFORMATION
• Use only size“AA” (LR6) alkaline batteries (3 required).
• Charging of rechargeable batteries should only be done under adult supervision.
• Remove rechargeable batteries from the product before recharging.
• Do not mix old and new batteries.
• Do not mix alkaline, standard (carbon-zinc), or rechargeable batteries.
• Be sure to insert the batteries correctly and follow the toy and battery manufacturer’s instruction.
• Always remove exhausted or dead batteries from the product.
• Dispose of dead batteries properly: do not burn or bury them.
• Do not attempt to recharge non-rechargeable batteries.
• Avoid short-circuiting battery terminals.
• Remove batteries before placing the unit into storage for a prolonged period of time.
The Little Tikes Company makes fun, high quality toys. We warrant to the original purchaser that this product is free of defects in
materials or workmanship for one year * from the date of purchase (dated sales receipt is required for proof of purchase). At the
sole election of The Little Tikes Company, the only remedies available under this warranty will be the replacement of the
defective part or replacement of the product. This warranty is valid only if the product has been assembled and maintained per
the instructions. This warranty does not cover abuse, accident, cosmetic issues such as fading or scratches from normal wear, or
any other cause not arising from defects in material and workmanship. *The warranty period is three (3) months for daycare or
commercial purchasers. U.S.A and Canada: For warranty service or replacement part information, please visit our website at
www.littletikes.com, call 1-800-321-0183 or write to: Consumer Service, The Little Tikes Company, 2180 Barlow Road, Hudson OH
44236, U.S.A. Some replacement parts may be available for purchase after warranty expires—contact us for details. Outside U.S.A
and Canada: Contact place of purchase for warranty service. This warranty gives you specic legal rights, and you may also have
other rights, which vary from country/state to country/state. Some countries/states do not allow the exclusion or limitation of
incidental or consequential damages, so the above limitation or exclusion may not apply to you.
LIMITED WARRANTY
‘Let’s care for the environment!’
The wheelie bin symbol indicates that the product must not be disposed of with other household waste. Please use designated
collection points or recycling facilities when disposing of the item. Do not treat old batteries as household waste. Take them to a
designated recycling facility.
FCC COMPLIANCE
NOTE: This equipment has been tested and found to comply with the limits for a Class B digital device, pursuant to Part 15 of the FCC
Rules. These limits are designed to provide reasonable protection against harmful interference in a residential installation. This
equipment generates, uses and can radiate radio frequency energy and, if not installed and used in accordance with the instructions,
may cause harmful interference to radio communications. However, there is no guarantee that interference will not occur in a particular
installation. If this equipment does cause harmful interference to radio or television reception, which can be determined by turning the
equipment o and on, the user is encouraged to try to correct the interference by one or more of the following measures:
• Reorient or relocate the receiving antenna.
• Increase the separation between the equipment and receiver.
• Connect the equipment into an outlet on a circuit dierent from that to which the receiver is connected.
• Consult the dealer or an experienced radio/TV technician for help.
This device complies with Part 15 of the FCC Rules. Operation is subject to the following two conditions: (1) This device may not cause
harmful interference, and (2) this device must accept any interference received, including interference that may cause undesired
operation.
Caution: Modications not authorized by the manufacturer may void users authority to operate this device.
CAN ICES-3 (B)/NMB-3(B).
Frequency band: 2402-2480MHz
Max. transmit power: -1.5 dBm
This device contains licence-exempt transmitter(s)/receiver(s) that comply with Innovation, Science and Economic Development
Canada’s licence-exempt RSS(s). Operation is subject to the following two conditions:
1. This device may not cause interference.
2. This device must accept any interference, including interference that may cause undesired operation of the device.
© The Little Tikes Company, an MGA Entertainment company.
LITTLE TIKES® and MY REAL JAM™ are trademarks of Little Tikes in the U.S. and other
countries. All logos, names, characters, likenesses, images, slogans, and packaging
appearance are the property of Little Tikes.
Printed in China
0421-0-EUC
The Bluetooth® word mark and logos are registered trademarks owned by Bluetooth SIG, Inc.
and any use of such marks by MGA Entertainment, Inc. is under license. Other trademarks
and trade names are those of their respective owners.
YOUR GUITAR
ATTACHING THE STRAP
1. Locate both pins on the guitar.
2. Insert the pinhole on the straps into the pins on the guitar.
3. To adjust the strap, pull on the strap and slide the buckle up or down.
2
123
IMPORTANT INFORMATION
• The batteries included are for in-store demonstration. It is recommended to change the batteries before playing.
• To conserve battery power, always turn the unit o by moving the dial to the o ( )position.
• After 30 seconds of no activity, the unit will go into sleep mode. Strum the strings, push the whammy or press the chord
buttons to wake it up.
• Only attach the strap included to the guitar included in this kit. 3
Button Chords
F Minor
G Major
A Major
OFF/Volume Dial
Whammy Bar
Mode Switch
Play with the Band
Free Play
Solo Jam
Bluetooth®
Strings
To turn on the guitar, turn
the dial to the volume.
Locate the mode switch on the guitar and move the switch to the desired mode.
Instantly join the band and live out your
musical dreams! While in this mode, the
band will play in the background. Strum
the strings and push down the whammy
bar to add the guitar to the band.
Compose your own tune! While in this
mode, strum the strings, press the chord
buttons or push the whammy bar to play
rhythm guitar without the band.
Jam out to your own customized guitar
solo! While in this mode, strum the strings,
press the chord buttons or push the
whammy bar to play solo without the band.
Jam out to your favorite song by connecting the
guitar to your device. Here’s how:
1. Move the Mode Switch to the Bluetooth® icon. It
will continuously play music while it is
searching for your device.
2. Open the settings menu on your device.
3. Select Bluetooth® on your device and make sure
it is on.
4. Your device will search for the guitar.
5. Select the name “MGA Electric Guitar” to connect
your device.
Note: The instrument can only connect to one smart device
at a time. You will not be able to connect two devices to the
same instrument.
When using your device, follow the below steps.
1. Connect the device to your guitar. Follow the steps under Bluetooth®.
2. Make sure the volume on your device is set to the maximum volume.
3. Choose your favorite song.
4. Make sure the song is on pause.
5. Continuously strum the strings to start the song. If you stop playing
the guitar, the song will continue for a few seconds and then pause.
Play the guitar again to continue the song.
For the best experience, choose a song that ts the instrument’s genre.
TROUBLESHOOTING
Instrument isn’t playing the device’s song.
PROBLEM POSSIBLE SOLUTIONS
• Make sure the device is connected through Bluetooth®.
• Make sure the volume on the device is turned all the way up.
• After choosing a song, exit the app but don’t close it. Alternatively,
you can put the phone to sleep, but make sure the app is still
running in the background.
Instrument stopped working.
• The batteries included in the instrument are for in-store
demonstration. It is recommended to replace the
batteries before playing.
• Make sure it is on and the volume is turned up.
SUPERSTAR
PLAY
MODES
4
PLAY BAND
WITH
THE
FREE PLAY
SOLO JAM
COLLECT THEM ALL!
EACH SOLD SEPARATELY.
DRUM SET
KEYBOARD
DJ MIXER
ACOUSTIC GUITAR
Faster
Normal
Motion Sensor
Tilt the guitar to control the speed.
• Tilt it 55 to approximately 125 degrees up to go faster.
• Tilt it back down to its original position to go back to its
normal speed.
Jam out to your favorite song!
Start your own band!
When strumming
the strings, make
sure to strum in the
area shown here.

Other Little Tikes Toy manuals

Little Tikes Little Baby Bum Singing Storybook User manual

Little Tikes

Little Tikes Little Baby Bum Singing Storybook User manual

Little Tikes Squeezoos Ra-Ra Tumbles User manual

Little Tikes

Little Tikes Squeezoos Ra-Ra Tumbles User manual

Little Tikes 652059 User manual

Little Tikes

Little Tikes 652059 User manual

Little Tikes Junior Ballpit 641800 User manual

Little Tikes

Little Tikes Junior Ballpit 641800 User manual

Little Tikes Pelican 3-in-1 Adventure Trainer User manual

Little Tikes

Little Tikes Pelican 3-in-1 Adventure Trainer User manual

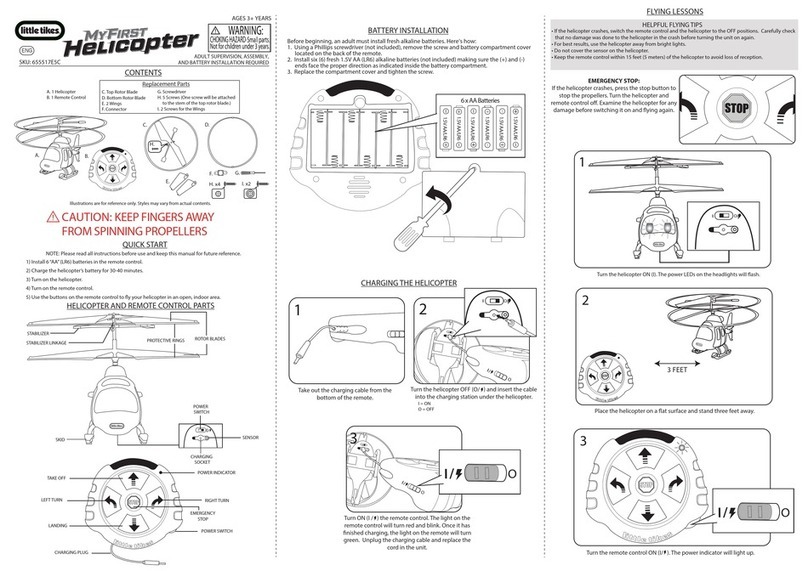
Little Tikes MyFirst Helicopter User manual

Little Tikes

Little Tikes MyFirst Helicopter User manual

Little Tikes 622113L User manual

Little Tikes

Little Tikes 622113L User manual

Little Tikes Kingdom Builders Wreckin Roller User manual

Little Tikes

Little Tikes Kingdom Builders Wreckin Roller User manual

Little Tikes Poptunes 636219M User manual

Little Tikes

Little Tikes Poptunes 636219M User manual

Little Tikes Giddyup 'N Go Pony User manual

Little Tikes

Little Tikes Giddyup 'N Go Pony User manual

Little Tikes SLAMMIN’ RACERS Turbo Tire Use and care manual

Little Tikes

Little Tikes SLAMMIN’ RACERS Turbo Tire Use and care manual

Little Tikes My First Pet Checkup Set User manual

Little Tikes

Little Tikes My First Pet Checkup Set User manual

Little Tikes Princess Horse & Carriage User manual

Little Tikes

Little Tikes Princess Horse & Carriage User manual

Little Tikes LITTLE HANDIWORKER 0920 User manual

Little Tikes

Little Tikes LITTLE HANDIWORKER 0920 User manual

Little Tikes Learn & Play Roll Arounds User manual

Little Tikes

Little Tikes Learn & Play Roll Arounds User manual

Little Tikes 641183C User manual

Little Tikes

Little Tikes 641183C User manual

Little Tikes 654053M User manual

Little Tikes

Little Tikes 654053M User manual

Little Tikes BIG ADVENTURES MINING TRUCK User manual

Little Tikes

Little Tikes BIG ADVENTURES MINING TRUCK User manual

Little Tikes Spiralin' Seas Waterpark User manual

Little Tikes

Little Tikes Spiralin' Seas Waterpark User manual

Little Tikes Dirt Diggers Sandbox User manual

Little Tikes

Little Tikes Dirt Diggers Sandbox User manual

Little Tikes Kingdom Builders JJ O'Hammer User manual

Little Tikes

Little Tikes Kingdom Builders JJ O'Hammer User manual

Little Tikes LEARN & PLAY MY FIRST LEARNING MAILBOX User manual

Little Tikes

Little Tikes LEARN & PLAY MY FIRST LEARNING MAILBOX User manual

Little Tikes 631917M User manual

Little Tikes

Little Tikes 631917M User manual

Little Tikes Seahorse Symphony 643415 User manual

Little Tikes

Little Tikes Seahorse Symphony 643415 User manual

Popular Toy manuals by other brands

Playskool 08133/08132 instruction manual

Playskool

Playskool 08133/08132 instruction manual

DTS DTS300 manual

DTS

DTS DTS300 manual

Smoby 99511791F quick start guide

Smoby

Smoby 99511791F quick start guide

Fisher-Price Laugh & Learn Fun with Friends Musical Table manual

Fisher-Price

Fisher-Price Laugh & Learn Fun with Friends Musical Table manual

Reely NEW1 RtR operating instructions

Reely

Reely NEW1 RtR operating instructions

Wen Sheng WS-B005 instruction manual

Wen Sheng

Wen Sheng WS-B005 instruction manual

Jamara Atlantique 040250 instructions

Jamara

Jamara Atlantique 040250 instructions

Real Good Toys Classic Bungalow instructions

Real Good Toys

Real Good Toys Classic Bungalow instructions

Black Horse Model L-39 Albatros Instruction manual book

Black Horse Model

Black Horse Model L-39 Albatros Instruction manual book

LEGO 79004 Hobbit Assembly guide

LEGO

LEGO 79004 Hobbit Assembly guide

RCRCM DLG Ali instruction manual

RCRCM

RCRCM DLG Ali instruction manual

MinimumRC KI-61 Tony Assembly instructions

MinimumRC

MinimumRC KI-61 Tony Assembly instructions

Baghera 854 Assembly instruction

Baghera

Baghera 854 Assembly instruction

Eduard Mi-24 interior manual

Eduard

Eduard Mi-24 interior manual

Lionel Electric Trains 390E Operation manual

Lionel Electric Trains

Lionel Electric Trains 390E Operation manual

Viessmann 4502 Operation manual

Viessmann

Viessmann 4502 Operation manual

Fisher-Price Dancin' Bandstand C6326 instructions

Fisher-Price

Fisher-Price Dancin' Bandstand C6326 instructions

Faller 463 manual

Faller

Faller 463 manual

manuals.online logo
manuals.online logoBrands
  • About & Mission
  • Contact us
  • Privacy Policy
  • Terms and Conditions

Copyright 2025 Manuals.Online. All Rights Reserved.