LIVARNO 1002-W Original instructions

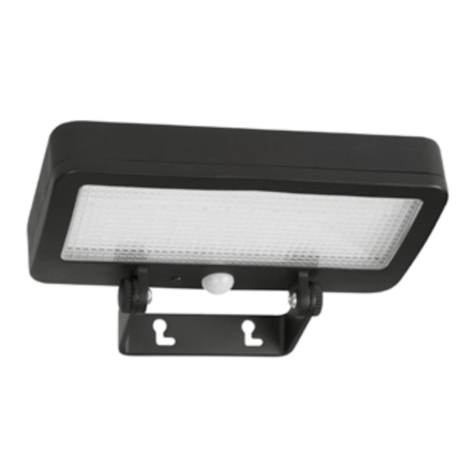
24W LED OUTDOOR SPOTLIGHT
IAN 365678_2010 BG
DE AT CH
LED-AUSSENSTRAHLER 24 W
Bedienungs- und Sicherheitshinweise
GR CY
ΠΡΟΒΟΛΈΑΣ ΈΞΩΤΈΡΙΚΟΎ
ΧΩΡΟΎ LED 24 W
Οδηγίες λειτουργίας και ασφαλείας
BG
ВЪНШЕН LED ПРОЖЕКТОР
24 W
Указания за експлоатация и безопасност
RO
REFLECTOR EXTERIOR
CU LED 24 W
Indicații de operare și siguranță
RS
LED SPOLJNI REFLEKTOR
24 W
Uputstva za rukovanje i bezbednost
HR
LED VANJSKI REFLEKTOR
24 W
Upute za uporabu i sigurnost
GB CY
24W LED OUTDOOR
SPOTLIGHT
Operating and safety information

GB CY
Before you start reading, please fold out the illustrations page and familiarise yourself with all of
the item’s functions.
HR
Prije čitanja otvorite stranicu s prikazima te se potom upoznajte sa svim funkcijama proizvoda.
RS
Pre nego što počnete da čitate rasklopite stranicu sa slikama i upoznajte se sa svim funkcijama
ovog proizvoda.
RO
Înainte să citiţi, desfășuraţi pagina cu fi gurile și familiarizaţi-vă cu toate funcţiile articolului.
BG
Преди четене отворете страницата с изображенията и се запознайте с всички функции
на артикула.
GR CY
Πριν διαβάσετε, ξεδιπλώστε τη σελίδα με τισ εικόνεσ και στη συνέχεια εξοικειωθείτε με όλεσ
τισ λειτουργίεσ του άρθρου.
DE AT CH
Klappen Sie vor dem Lesen die Seite mit den Abbildungen aus und machen Sie sich
anschließend mit allen Funktionen des Artikels vertraut.
GB/CY Operating and safety information page 7
HR Upute za uporabu i sigurnost stranica 14
RS Uputstva za rukovanje i bezbednost strana 22
RO Indicații de operare și siguranță pagina 30
BG Указания за експлоатация и безопасност страница 38
GR/CY Οδηγίες λειτουργίας και ασφαλείας σελίδα 48
DE/AT/CH Bedienungs- und Sicherheitshinweise Seite 56

B
D E
A
1
2
3 4 5
16
17
17
18
18
11 12
141514
13
C6 7
89
10

F
H
G
1919 20
21
90°
90°
90°
60°

5
HRGB CY
RORS
Introduction������������������������������������������� 7
Explanation of symbols����������������������� 7
Intended use ����������������������������������������� 7
Specications supplied ������������������������ 8
Description of parts������������������������������ 8
Technical data��������������������������������������� 8
Safety instructions�������������������������������� 9
Assembly and installation����������������� 10
Operation�������������������������������������������� 11
Cleaning and storing ������������������������� 12
Troubleshooting���������������������������������� 12
Disposal����������������������������������������������� 13
Warranty��������������������������������������������� 13
Service ������������������������������������������������� 14
Uvod����������������������������������������������������� 14
Tumač znakova����������������������������������� 14
Namjenska upotreba������������������������� 15
Opseg isporuke ���������������������������������� 15
Opis dijelova��������������������������������������� 15
Tehnički podaci����������������������������������� 16
Sigurnosne napomene����������������������� 16
Montaža ���������������������������������������������� 17
Rukovanje ������������������������������������������� 19
Čišćenje i skladištenje ������������������������ 19
Otklanjanje kvarova�������������������������� 19
Zbrinjavanje���������������������������������������� 20
Jamstvo ����������������������������������������������� 20
Servis ��������������������������������������������������� 21
Uvod����������������������������������������������������� 22
Objašnjenje znakova������������������������� 22
Namena����������������������������������������������� 22
Obim isporuke������������������������������������ 23
Opis delova����������������������������������������� 23
Tehnički podaci����������������������������������� 23
Bezbednosne napomene������������������� 24
Montaža ���������������������������������������������� 25
Rad������������������������������������������������������� 26
Čišćenje i skladištenje ������������������������ 27
Otklanjanje smetnji���������������������������� 27
Odlaganje u otpad����������������������������� 27
Garancija��������������������������������������������� 28
Servis ��������������������������������������������������� 29
Introducere������������������������������������������ 30
Explicația simbolurilor ��������������������������� 30
Destinația utilizării��������������������������������� 30
Furnitura ����������������������������������������������� 31
Descrierea componentelor��������������������� 31
Date tehnice ������������������������������������������ 31
Indicații de siguranță ����������������������������� 32
Montaj��������������������������������������������������� 33
Operarea ���������������������������������������������� 34
Curățarea și depozitarea����������������������� 35
Remedierea defecțiunilor����������������������� 35
Eliminare ����������������������������������������������� 36
Garanția������������������������������������������������ 36
Service �������������������������������������������������� 37

6
Въведение��������������������������������������������38
Обяснение на знаците�����������������������38
Употреба по предназначение����������39
Обхват на доставката������������������������39
Описание на частите �������������������������39
Технически данни������������������������������39
Указания за безопасност������������������ 40
Монтаж����������������������������������������������� 41
Управление �����������������������������������������43
Почистване и съхранение�����������������43
Отстраняване на неизправности ����� 44
Събиране на отпадъците ����������������� 44
Гаранция��������������������������������������������� 44
Сервизно обслужване���������������������� 46
BG GR CY
Εισαγωγή ��������������������������������������������� 48
Επεξήγηση συμβόλων������������������������� 48
Προβλεπόμενη χρήση������������������������� 49
Περιεχόμενο συσκευασίας������������������ 49
Περιγραφή εξαρτημάτων ������������������� 49
Τεχνικά στοιχεία ���������������������������������� 49
Υποδείξεις ασφαλείας ������������������������� 50
Εγκατάσταση��������������������������������������� 51
Λειτουργία ������������������������������������������� 53
Καθαρισμός και αποθήκευση������������ 53
Αντιμετώπιση βλαβών ������������������������ 54
Απόρριψη �������������������������������������������� 54
Εγγύηση����������������������������������������������� 54
Σέρβις��������������������������������������������������� 56
DE AT CH
Einleitung��������������������������������������������� 56
Zeichenerklärung ������������������������������� 56
Bestimmungsgemäße
Verwendung ��������������������������������������� 57
Lieferumfang��������������������������������������� 57
Teilebeschreibung������������������������������� 57
Technische Daten�������������������������������� 58
Sicherheitshinweise���������������������������� 58
Montage ���������������������������������������������� 59
Bedienung ������������������������������������������� 61
Reinigung und Lagerung ������������������� 62
Fehlerbehebung���������������������������������� 62
Entsorgung ������������������������������������������ 63
Garantie ���������������������������������������������� 63
Service ������������������������������������������������� 64

7
GB/CY
LED Outdoor Spotlight
zIntroduction
Congratulations on the purchase of
your new product� You have chosen
a high-quality product� Please read
these operating instructions thoroughly and
carefully� These instructions are an essential
part of the product and contain important
information on rst-time use and handling.
Always observe all safety instructions� If you
have any questions or are unsure how to
operate the appliance, please contact your
retailer or service centre� Please keep this
manual in a safe place and pass it on to
third parties where necessary�
zExplanation of symbols
Read the operating instructions!
Issue date of instruction manual
(month/year)
Date of manufacture
(month/year)
Alternating current
Observe warning notices and
safety instructions!
Risk of fatal injury and
accidents for infants and
children!
b
a
Dispose of packaging and
product in an environmentally
friendly manner!
Not suitable for indoor lighting
IP44
Protected against solid foreign
objects with a diameter of ≥
1�0 mm, splash-proof
Motion sensor eld of view
Motion sensor detection range
Illumination time
Beam width
Any protective cover that is
cracked or split must be
replaced� If the outdoor
spotlight is damaged in any
way, stop using it immediately
and contact the service address
indicated below�
Protection class I: the user and
third parties are protected
against electric shock by a
protective earth (PE) conductor�
With the CE label, the
manufacturer conrms that this
electrical device complies with
the applicable European
directives�
MIX
Packaging
Packaging made of FSC-
certied wood mix
The “GS” symbol stands for
safety-tested� Products that are
marked with this symbol meet
the requirements of the
German Product Safety Act
(Produktsicherheitsgesetz)�
zIntended use
This product is classed as a special product
because it can be operated at temperatures
below -21°C and remain fully functional� The
outdoor spotlight is intended for permanent
installation in a place protected from rain
and is intended exclusively for use as
temporary outdoor lighting, e�g� for

8GB/CY
illuminating private passageways, garages
or footpaths and for deterring unauthorised
intruders� The outdoor spotlight is intended
solely for use in private households and is
not suitable for commercial use� You should
only use the outdoor spotlight as described
in these instructions for use� Any other use is
considered use other than intended and may
cause property damage or personal injury�
The outdoor spotlight is not a toy� The
manufacturer or retailer accepts no liability
for loss or damage that occurs as a result of
use other than intended or incorrect use�
zSpecications supplied
1 LED outdoor spotlight with motion sensor
1 wall bracket (for mounting on building
walls or corners) inc. xings (4 wall plugs,
2 screws (10mm), 4 screws (25mm))
1 instruction manual
zDescription of parts
1LED module
2Motion and twilight sensor
3LUX control
(for setting sensitivity of twilight sensor)
4TIME control
(for setting the illumination time)
5SENS control
(for setting the detection range)
6Terminal strip
7Strain relief clamp
8Household mains live conductor L
9Household mains protective earth
conductor PE (green/yellow)
10
Household mains neutral conductor N
11
Gland nut
12
Cover plate
13
Always On/Automatic mode switch
14
Screw (cover plate)
15
Cable grommet
16
Wall bracket
17
Guide holes for xing screws (when
mounting on straight walls)
18
Guide holes for xing screws (when
mounting on corners)
19
Screw (25mm)
20
Wall plugs
21
Screw (10mm)
zTechnical data
Model number: 1002-W/1002-G
Light source: max. 24W
Power supply: 220-240 V AC,
50/60 Hz
Dimensions: approx. 190 x 230 x
200mm
Weight: approx. 0.50kg
Colour
temperature:
6,500 kelvin (cold white)
Luminous power: 1,900lm with diffusor
Beam width: 100 °
Max. projection
area:
294cm²
Colour
reproduction
index: RA > 80
Protection class: IP44
Motion detector: eld of view approx.
110°, range max. 12m
Twilight sensor: approx. 15-1000lux

9
GB/CY
Casing material: Aluminium/Plastic
Rated ambient
temperature:
-21°C to +25°C
Mounting height: up to 3m
Suitable
conductor
cross-section for
power supply
terminal:
H05RN-F, 3x 1,0 mm²
zSafety instructions
Safety instructions
WARNING!
RISK OF FATAL INJURY AND
ACCIDENTS FOR INFANTS AND
CHILDREN! Never leave children
unsupervised with the packaging material�
There is a danger of suffocation from the
packaging material� Children often
underestimate the dangers� Always keep
children away from the product�
This product can be used by children aged
8 years and over, as well as by persons
with limited physical, sensory or mental
abilities or lacking in experience and
knowledge if they have been supervised
and instructed as to the safe use of the
product and understand the resulting
hazards� Do not let children play with the
product� Cleaning and maintenance may
not be carried out by children without
proper supervision�
SUFFOCATION RISK!
Keep the product,
packing/protective foil and small parts
away from children� Children may swallow
small parts or protective foil and choke or
suffocate on them�
Do not use the product if you notice any
damage�
Once the lamp has reached its end of life,
it must be disposed of in accordance with
local disposal regulations�
The LEDs are non-replaceable�
RISK OF ELECTRIC SHOCK!
Incorrect
electrical installation or a power supply
voltage that is too high can potentially
cause electric shocks�
Installing this product involves working on
the mains electricity supply so it may only
be carried out by a competent person
according to the national regulations for
installation and connection in the country of
use�
Never tamper with or modify the product�
If the product has any identiable faults,
stop using it immediately�
Do not open up the casing and only have
the product repaired by qualied
professionals� To that end you should
contact a specialist repairer� No liability or
warranty claims are accepted in cases
where repairs have been carried out by
unauthorised persons or the product has
been incorrectly wired or used�
The manufacturer/distributor of this product
accepts no responsibility whatsoever for
personal injury or damage resulting from
incorrect installation or use�
Do not exceed the specied mains voltage
(see “Technical data”)�
Do not immerse the product in water or any
other liquids�
Keep the product away from naked ames
and hot surfaces�
Install the product in a position where it will
be protected from rain�
Before starting installation, cleaning or
maintenance work or if ever a fault occurs,
remove the mains fuse or switch off the
circuit-breaker for the circuit� Use a voltage
tester to check that the product is isolated
from the power supply�
RISK OF INJURY!
Incorrect handling of
the product may potentially result in
personal injury�

10 GB/CY
Any protective cover that is split or cracked
must be replaced�
Never look directly into the light source�
Never point the light into the eyes of other
people or animals�
PLEASE NOTE!
Incorrect handling of the
light may lead to damage to the product�
Check the screw xings at regular intervals.
zAssembly and installation
Please note:
remove the product from its
packaging�
Check that all package contents are
present�
Check whether the outdoor spotlight or
individual parts are damaged� If that is the
case, do not use the outdoor spotlight�
Please contact the retailer via the service
address indicated on the warranty card�
Choosing the installation position
Fix the outdoor spotlight at a height of 2-3m
to a sturdy wall that is not subject to
vibration�
Only install the outdoor spotlight outside of
the hand-contact zone so as to prevent it
being touched�
Position it at least 20cm away from other
objects so as to ensure good ventilation�
If possible, mount the outdoor security in a
position where it will not be exposed to dirt
or dust and is protected from rain (e�g�
under a roof overhang), sun and other
weathering effects�
Take care to ensure that the outdoor
spotlight is not affected by interference from
another light source�
Do not point the motion sensor 2towards
heating fans, air conditioning units,
swimming pools or other objects with
rapidly changing temperatures�
Do not point the motion sensor towards
trees, bushes or areas where moving
animals can be detected�
Take into account that the motion sensor
responds primarily to movement across its
eld of view and not so sensitively to
movement directly towards or away from it�
Mounting the outdoor spotlight
RISK OF ELECTRIC SHOCK!
Incorrect
electrical installation or a power supply
voltage that is too high can potentially cause
electric shocks� Failure to take account of
that risk endangers not only yourself but
other people as well�
You should only have the product installed
by a qualied electrician.
When drilling the xing holes, take care to
avoid drilling through wiring, cables or
pipes (e�g� water or gas pipes)�
Make sure the power supply is
disconnected during installation� Switch off
the circuit-breaker for the circuit concerned
or remove the fuse� Safeguard it against
being switched on again (e�g� by
displaying a warning notice)�
Observe the correct polarity when
connecting the wires to the terminal strip
6� Refer to Figure C for details of how to
connect the wiring/supply cable to the
terminals�
Make sure that the mains power supply is
switched off�
The outdoor spotlight can be mounted
either on a straight wall or on a corner
using the wall bracket
16
(see Fig� F)�
Please note:
make sure that you mount the
wall bracket the correct way round� Refer to
Figure F for guidance�
With the wall bracket
16
in its intended
mounting position, mark the positions on
the wall for the xing holes using either the
guide holes
18
(for mounting on building
corner) or guide holes
17
(for mounting on
straight wall) (see Figs� E and F)�
Drill two holes (dia� 6mm) and insert the
matching wall plugs
20
(see Fig� F)�
Screw the wall bracket
16
(for straight-wall
11
GB/CY
or corner mounting) in place by inserting
the screws (25mm)
19
through the guide
holes
17
/
18
and rmly tightening them.
Check that the wall bracket is xed rmly in
place�
Unscrew the gland nut
11
from the outdoor
spotlight�
Remove the screws
14
from the cover plate
12
and pull it away far enough to be able
to access the terminal strip 6attached to
the cover plate�
Feed the power supply cable rst through
the gland nut
11
, then through the cable
grommet
15
, and nally through the cover
plate
12
before starting installation�
Connect the power supply cable to the
terminal strip 6� Make sure that the
individual cable cores are correctly
connected� Take care to ensure that the
earth conductor 9is made longer than
the other conductors so that if the cable is
torn away from the outdoor spotlight, the
earth conductor comes away last� Connect
the neutral conductor
10
to the terminal
marked N and the live conductor 8to the
terminal marked L so as to avoid incorrect
installation and consequent damage to the
product or personal injury (see Fig� C)�
Secure the connecting lead (inc� outer
sleeve) with the strain-relief clamp 7(see
Fig� C)�
Feed the terminal strip 6back into the
casing and screw the cover plate
12
back
onto the outdoor spotlight�
Position the cable grommet
15
between the
cover plate and nut so as to obtain the best
possible seal and x it in place by
hand-tightening the gland nut
11
�
Slot the outdoor spotlight onto the wall
bracket
16
from above and screw it to the
bracket using the two screws (10mm)
21
(see Fig� G)�
Note:
The screw heads of the cover plate
must be countersunk so that the outdoor
spotlight can be tted onto the wall bracket.
Switch the circuit-breaker for the circuit back
on or replace the fuse�
Setting the beam width
Tilt the outdoor spotlight to the desired
position (see Fig� H)�
zOperation
The outdoor spotlight is operated by means
of the three control knobs on the bottom end
of the light (see Fig� B)�
Set the switch
13
to position “I” to activate
Always On mode� Set the switch
13
to
position “0” to activate Automatic mode
(motion sensor)� In this mode the following
settings are possible�
Setting the detection range
Turning the SENS control 5clockwise
increases the detection range so that the
motion sensor responds to movement as far
away as approx. 12m (see Fig. B).
Turning the SENS control 5anticlockwise
decreases the detection range so that the
motion sensor only responds to movement
as close as approx. 0.5m (see Fig. B).
Setting the burn time
Turning the TIME control 4clockwise
increases the illumination time (max.
1 minute) (see Fig� B)�
Turning the TIME control 4anticlockwise
decreases the illumination time (min�
10 seconds) (see Fig� B)�
Setting the sensitivity of the twilight
sensor
Turning the LUX control 3clockwise
increases the sensitivity so that the motion
sensor will respond even in brighter
ambient light conditions (e�g� daylight) (see
Fig� B)�

12 GB/CY
Turning the LUX control 3anticlockwise
decreases the sensitivity so that the motion
sensor will respond only in darker ambient
light conditions (e�g� at night) (see Fig� B)�
zCleaning and storing
RISK OF BURNS!
The light becomes hot
when switched on�
Always allow the outdoor spotlight to
completely cool down before cleaning it�
SHORT-CIRCUIT RISK!
Water penetrating
into the casing can potentially cause a
short circuit�
Before cleaning, remove the mains fuse or
switch off the circuit-breaker for the circuit to
isolate the outdoor spotlight from the mains
power supply� Use a voltage tester to check
that the outdoor spotlight is isolated from
the power supply�
Do not immerse the outdoor spotlight in
water�
Make sure that no water gets into the
casing�
RISK OF DAMAGE!
Cleaning the outdoor
spotlight incorrectly can potentially cause
damage�
Do not use corrosive cleaning agents,
brushes with metal or nylon bristles or sharp
or metallic cleaning implements such as
knives, hard spatulas or the like� They may
damage the surfaces�
Do not use any chemicals for cleaning�
Switch off the circuit-breaker or remove the
fuse for the circuit�
Use a voltage tester to check that the
outdoor spotlight is isolated from the power
supply�
Allow the outdoor spotlight to completely
cool down�
Wipe down the outdoor spotlight with a
slightly moistened cloth� Allow all parts to
dry completely�
If storing the outdoor spotlight away, keep
it in a dry place where it is safely out of the
reach of children�
zTroubleshooting
= Fault
=Cause
= Solution
= The outdoor spotlight fails to function�
= There is a fault with the power supply
or cable�
= Have it checked by a competent
person�
= The outdoor spotlight is incorrectly
adjusted�
= Use the control knobs to adjust the
settings properly�
= The wiring is incorrect�
= Have it checked by a competent
person�
= The detection range of the motion
sensor is badly adjusted�
= Readjust the detection range of the
motion sensor�
= The outdoor spotlight constantly
switches on and off�
= The outdoor spotlight constantly
responds to movement�
= Check the detection zone for moving
objects/animals�
= Check the adjustment of the outdoor
spotlight�
= Readjust the detection range of the
motion sensor�
= Adjust the illumination time�
= Adjust the sensitivity of the twilight
sensor�
= The outdoor spotlight gets hot�
= That is quite normal and not a fault�
= Make sure that the outdoor spotlight
is well ventilated�
Please note!
Any other repairs may only
be carried out by a qualied electrician.

13
GB/CY
zDisposal
b
a
Note the labels on the packaging
materials when sorting the waste;
they are marked with abbreviations
(a) and numbers (b) with the
following meanings:
1-7: Plastics
20-22: Paper and cardboard
80-98: Composite materials
You can nd out how to dispose of
the used product by contacting your
local district or city council�
In the interest of environmental
protection, when the product has
reached the end of its useful life, do
not dispose of it as general
household waste but have it
properly recycled� For information
on recycling centres and their
opening times, please contact your
local council�
zWarranty
Dear customer, This product comes with a
3-year warranty from the date of purchase�
In the event that this product is faulty, you
have legal rights against the seller of the
product� These statutory rights are not
restricted by our warranty as set out below�
Warranty terms
The warranty period begins with the date of
purchase� Please keep the original receipt in
a safe place� It is required as proof of
purchase� If a material or manufacturing
defect occurs within three years of the date
of purchase, we will repair or replace the
product for you free of charge, or refund the
purchase price, at our discretion� This
warranty service is granted provided that the
faulty device and the proof of purchase
(receipt) are presented within three years,
along with a brief written description of the
fault and of when it occurred� If the fault is
covered by our warranty, we will return the
xed product or send you a new one. No
new warranty period shall begin upon repair
or replacement of the product�
Warranty period and statutory
warranty claims
The warranty period is not renewed after a
warranty service has been granted� This rule
shall also apply for any replaced or repaired
parts� Any damage or faults that already
existed when buying the product must be
reported immediately upon unpacking the
product� A fee is charged for any repairs
that are carried out after the end of the
warranty period�
Warranty scope
The device was carefully manufactured
according to the strictest quality guidelines
and thoroughly tested before delivery� The
warranty applies to material or
manufacturing defects� This warranty does
not apply to product parts that are subject to
normal wear and tear and can therefore be
regarded as wearing parts, or damage to
fragile parts, such as switches, rechargeable
batteries or parts that are made of glass�
This warranty is void if the product has been
damaged, improperly used or serviced� To
ensure proper use, all instructions included in
the manual must be followed carefully� All
uses and actions that users are discouraged
from or warned of in the manual must be
avoided under all circumstances� The product
is intended for private household use only,
and not for commercial activities� The
warranty is void, if the product is treated
inappropriately, if force is applied, and in
the case of any manipulation that is not
carried out by our authorised service branch�
Warranty processing
To ensure your request is handled swiftly,
please observe the following
Notes:

14 HR
Please have the receipt and the article
number (e�g� IAN 123456) ready as proof
of purchase for all enquiries�
Please refer to the type plate on the
product, an engraving on the product, the
cover of the manual (bottom left) or the
sticker on the back or base of the product
to nd out the product number.
In the case of any malfunctions or other
defects, please call or email the service
department indicated below as a rst step.
After your product has been registered as
faulty, you can send it to the specied
service address, free of charge� Please
include the proof of purchase (receipt) and
information about the defect and about
when it occurred�
zService
GB
Service Great Britain
Tel�: 00800 80040044
E-Mail: administration@mynetsend�de
CY
Service Cyprus
Tel� : 00800 80040044
E-Mail: administration@mynetsend�de
IAN 365678_2010
Please have the receipt and the article
number (e�g� IAN 123456) ready as proof
of purchase for all enquiries�
You can nd an up-to-date version of the
operating instructions at: www�citygate24�de
LED vanjski reektor
zUvod
Čestitamo Vam na kupnji Vašeg
novog uređaja. Ovime ste se odlučili
za kvalitetan proizvod� Molimo
pažljivo i do kraja pročitajte ove upute za
uporabu� Ove su upute dio ovog proizvoda i
sadrže važne napomene za stavljanje u
pogon i rukovanje. Uvijek se pridržavajte
svih sigurnosnih uputa� Ako imate bilo kakvih
pitanja ili niste sigurni u vezi rukovanja
uređajem, obratite se Vašem trgovcu ili
servisnom centru. Molimo čuvajte ove upute
na sigurnom mjestu i proslijedite ih trećim
osobama, ako je potrebno�
zTumač znakova
Pročitajte upute za uporabu!
Datum izdavanja uputa za
uporabu (mjesec/godina)
Datum proizvodnje
(mjesec/godina)
Izmjenična struja
Pridržavajte se upozorenja i
sigurnosnih uputa!
Opasnost po život i od
nezgoda za malu djecu i
djecu!
b
a
Ambalažu i uređaj zbrinite na
ekološki prihvatljiv način!
Nije prikladno za
osvjetljavanje prostorija
IP44
Zaštićeno od krutih stranih
tijela promjera ≥ 1,0 mm,
zaštićeno od prskajuće vode

15
HR
Kut pokrivenosti detektora
pokreta
Domet pokrivenosti detektora
pokreta
Trajanje svjetla
Kut snopa
Svaki polomljeni zaštitni
poklopac mora se zamijeniti� U
slučaju oštećenja reektor
odmah stavite izvan pogona i
obratite se na niže navedenu
adresu servisa�
Klasa zaštite I: Korisnik i drugi
zaštićeni su od strujnog udara
provodnikom (PE) za
izjednačavanje potencijala.
S CE oznakom proizvođač
potvrđuje da ovaj električni
uređaj ispunjava važeće
europske smjernice�
MIX
Packaging
Ambalaža od miješanog drva
s FSC certikatom
Simbol „GS“ označava
provjerenu sigurnost� Proizvodi
koji su označeni ovim
simbolom ispunjavaju zahtjeve
njemačkog Zakona o sigurnosti
proizvoda (ProdSG)�
zNamjenska upotreba
Ovaj proizvod je specijalan proizvod jer
može raditi na temperaturama ispod - 21 °C
i ispunjava svoju funkciju. Vanjski reektor je
predviđen kao trajna instalacija na mjestu
zaštićenom od kiše i služi isključivo za
privremeno osvjetljavanje na otvorenom, na
primjer za osvjetljavanje kućnih hodnika,
garaža ili nogostupa, kao i za odvraćanje
neovlaštenih osoba. Vanjski reektor je
namijenjen isključivo za upotrebu u privatne
svrhe i nije prikladan za komercijalni sektor�
Vanjski reektor koristite samo na način
opisan u uputi o uporabi. Svaka drugačija
uporaba ne smatra se namjenskom i može
prouzročiti materijalne štete ili čak i tjelesne
ozljede. Vanjski reektor nije dječja igračka.
Proizvođač ili trgovac ne preuzima
odgovornost za štete koje su nastale
nenamjenskom ili pogrešnom uporabom.
zOpseg isporuke
1 x LED vanjski reektor s detektorom
pokreta
1 x zidni držač (za kutove ili zidove kuća),
uključujući materijal za montažu (4x
tiple, 2x vijci (10 mm), 4x vijci (25 mm))
1 x upute za uporabu
zOpis dijelova
1LED modul
2Detektor pokreta + senzor sumraka
3LUX (podešavanje osjetljivosti senzora
sumraka)
4TIME (podešavanje trajanja svetla)
5SENS (podešavanje područja
pokrivenosti)
6Zatična stezaljka
7Element za vlačno rasterećenje
8Vanjski vod L za kućni priključak
9Zaštitni vod PE za kućni priključak (žuti/
zeleni)
10
Neutralni vod L za kućni priključak
11
Zatvarač
12
Poklopac
13
Prekidač za trajno svjetlo/
automatski način rada
14
Vijak (poklopac)
15
Prolaz za kabel/kablovska uvodnica
16
Zidni držač

16 HR
17
Otvori za vođenje za pričvršćivanje
vijaka (zidovi kuća)
18
Otvori za vođenje za pričvršćivanje
vijaka (kutova kuća)
19
Vijak (25 mm)
20
Tiple
21
Vijak (10 mm)
zTehnički podaci
Broj modela: 1002-W / 1002-G
Rasvjetno
sredstvo:
maks� 24 W
Električno
napajanje:
220–240 V ~, 50/60 Hz
Dimenzije: cca. 190 x 230 x
200 mm
Težina: cca� 0,50 kg
Temperatura
boje:
6�500 Kelvina
(hladno bijela boja)
Svjetlosni tok: 1�900 lm s difuzorom
Kut snopa: 100°
Maksimalna
projekcijska
površina: 294 cm²
Indeks
reprodukcije
boje:
RA > 80
Vrsta zaštite: IP44
Senzor pokreta: cca� 110° senzor,
domet maks� 12 m
Senzor sumraka: cca� 15–1000 luksa
Materijal kućišta: Aluminij / plastika
Projektirana
temperatura:
- 21°C do + 25°C
Visina montaže maks� 3 m
Odgovarajući
presjek voda za
priključnu
stezaljku:
H05RN-F, 3x 1,0 mm²
zSigurnosne napomene
Sigurnosne napomene
UPOZORENJE!
OPASNOST PO ŽIVOT I OD
NEZGODA ZA MALU DJECU I
DJECU! Nikada ne ostavljajte djecu bez
nadzora s ambalažom. Postoji opasnost od
gušenja zbog ambalaže. Djeca često
podcjenjuju opasnosti. Djecu uvijek držite
podalje od proizvoda�
Ovaj proizvod mogu koristiti djeca starija
od 8 godina te osobe sa smanjenim
zičkim, osjetilnim ili mentalnim
sposobnostima ili nedostatkom iskustva i
znanja, ako su nadzirane ili upućene u
sigurnu uporabu proizvoda i razumiju
opasnosti koje iz toga proizlaze� Djeci nije
dopušteno igrati se s proizvodom. Čišćenje
i održavanje od strane korisnika ne smiju
izvoditi djeca bez nadzora�
OPASNOST OD GUŠENJA!
Proizvod,
folije ambalaže, zaštitne folije i sitne
dijelove držite podalje od djece. Djeca
mogu progutati sitne dijelove ili zaštitne
folije i ugušiti se.
Nemojte koristiti proizvod ako primijetite
bilo kakvu vrstu oštećenja.

17
HR
Ako je svjetiljka dosegla kraj svog životnog
vijeka, svjetiljku se mora zbrinuti u skladu s
lokalnim propisima o odlaganju otpada�
LED žaruljice nisu zamjenjive.
OPASNOST OD STRUJNOG UDARA!
Neispravna električna instalacija ili
previsok mrežni napon mogu dovesti do
strujnog udara�
Kod instalacije ovog proizvoda predviđen
je rad na mrežnom naponu; stoga to mora
obaviti ovlašteni stručnjak u skladu s
propisima o ugradnji specičnim za zemlju
i uvjetima priključenja.
Nikada nemojte manipulirati ili mijenjati
proizvod�
U slučaju uočljivog oštećenja proizvod
odmah stavite izvan pogona�
Ne otvarajte kućište, već popravak
prepustite stručnjaku. Obratite se
specijaliziranoj radionici. U slučaju
samostalno izvedenih popravaka,
nepropisnog priključka ili nepravilnog
rada, zahtjevi za odgovornost i garanciju
su isključeni.
Proizvođač/prodavatelj ovog proizvoda ne
preuzima nikakvu odgovornost za povrede
ili štete koje su nastale uslijed nepravilne
montaže/pogrešne uporabe.
Ne prelazite navedeni mrežni napon (vidi
poglavlje „Tehnički podaci“).
Ne uranjajte proizvod u vodu ili druge
tekućine.
Proizvod držite dalje od otvorenog
plamena i vrućih površina.
Proizvod montirajte tako da bude zaštićen
od kiše.
Prije početka montaže, čišćenja i
održavanja ili ako dođe do kvara, uklonite
osigurač ili isključite automatski osigurač.
Provjerite ispitivačem napona je li proizvod
bez napona�
OPASNOST OD OZLJEDA!
Nepravilno
rukovanje proizvodom može dovesti do
povreda�
Svaki polomljeni zaštitni poklopac mora se
zamijeniti�
Ne gledajte direktno u izvor svjetlosti�
Ne usmjeravajte proizvod u oči drugih ljudi
ili životinja.
NAPOMENA!
Nepravilno rukovanje
svjetiljkom može oštetiti svjetiljku. U
redovnim intervalima kontrolirajte spojeve s
vijcima�
OPREZ
UPOZORENJE:
Mogućnost
strujnog udara! Ne otvarati kućište
proizvoda!
zMontaža
Napomena:
Izvadite proizvod iz
ambalaže.
Provjerite je li isporuka potpuna�
Provjerite ima li znakova oštećenja na
vanjskom reektoru ili pojedinačnim
dijelovima. Ako je to slučaj, nemojte koristiti
vanjski reektor. Obratite se distributeru
putem adrese servisa navedene na
jamstvenoj kartici�
Pronađite mjesto montaže
Vanjski reektor pričvrstite na zid koji je
stabilan i bez vibracija na visini od 2 - 3
m�
Vanjski reektor instalirajte samo izvan
područja ruku kako bi se izbjegla
dodirivanja�
Ostavite minimalni razmak od ostalih
predmeta od oko 20 cm da biste osigurali
dobru ventilaciju�
Ako je moguće, vanjski reektor montirajte
na mjesto bez prljavštine i prašine,
zaštićeno od kiše (npr. ispod nadstrešnice),
zaštićeno od sunca i drugih vremenskih
utjecaja�
Pobrinite se da vanjski reektor ne ometaju
drugi izvori svjetlosti�
Ne usmjeravajte detektor pokreta 2na

18 HR
ventilatore za grijanje, klima uređaje,
bazene i druge predmete s brzo
promjenjivim temperaturama�
Ne usmjeravajte detektor pokreta prema
drveću, grmlju ili mjestima na kojima se
mogu primijetiti životinje koje trče uokolo.
Uzmite u obzir da detektor kretanja reagira
prije svega na bočne, a ne toliko na
uzdužne pokrete.
Montaža vanjskog reektora
OPASNOST OD STRUJNOG UDARA!
Neispravna električna instalacija ili previsok
mrežni napon mogu dovesti do strujnog
udara. Ugrožavate ne samo sebe, već i
druge osobe�
Provođenje instalacije prepustite isključivo
ovlaštenom električaru.
Prilikom bušenja otvora za pričvršćivanje,
vodite računa o tome da se ne izbuše
vodovi, kabeli ili cijevi (npr� cijevi za vodu
ili plin)�
Instalaciju provodite u stanju bez napona�
Isključite automatski osigurač strujnog
kruga ili odvrtite osigurač. Osigurajte ga
(npr� znakom upozorenja) od ponovnog
uključivanja.
Tijekom instalacije obratite pažnju na
ispravan polaritet na zatičnoj stezaljci 6�
Pogledajte sliku C za informacije o tome
kako spojiti vod/priključni vod.
Provjerite je li struja isključena.
Imate mogućnost montiranja vanjskog
reektora na ravan zid ili neki kut pomoću
zidnog držača
16
(vidi sl� F)�
Napomena:
Vodite računa o tome da zidni
držač pravilno montirate. Pogledajte sliku F.
Prenesite položaje otvora za zidni držač
16
pomoću otvora za vođenje
18
(montaža u kutove kuća) ili otvora za
vođenje
17
(montaža na zidovima kuća)
na mjesto montaže na zidu (vidi sl. E i F).
Izbušite dvije rupe (ø 6 mm) i umetnite
odgovarajuću tiplu
20
(vidi sl� F)�
Čvrsto zategnite vijke
16
(za zidnu ili kutnu
montažu), tako što ćete vijke (25 mm)
19
umetnuti kroz otvore za vođenje
17
/
18
i
čvrsto zategnuti. Provjerite je li zidni držač
čvrsto nalegao.
Odvrnite zatvarač
11
vanjskog reektora.
Uklonite vijke
14
s poklopca
12
i podižite
ga sve dok ne dođete do zatične stezaljke
6 koja je pričvršćena na poklopcu.
Prije početka instaliranja provucite priključni
kabel sljedećim redoslijedom kroz zatvarač
11
, kablovsku uvodnicu
15
i poklopac
12
�
Spojite priključni kabel na zatičnu stezaljku
6. Vodite računa o tome da su
pojedinačne žice pravilno priključene.
Imajte u vidu da priključak zaštitnog vodiča
9 treba raditi duže od ostalih vodiča kako
bi u se u slučaju otkidanja vanjskog
reektora zadnjo otkinuo. Neutralni vodič
10
priključite na stezaljku koja je
označena slovom N, a vanjski vodič 8na
stezaljku koja je označena slovom L kako bi
se spriječila pogrešna instalacija i time
oštećenje proizvoda ili ozljeđivanje osoba
(vidi sl� C)�
Učvrstite priključni kabel (uklj. omotač) s
vlačnim rasterećenjem 7(vidi sl� C)�
Zatičnu stezaljku 6postavite ponovno u
kućište i ponovno pritegnite poklopac
12
na vanjskom reektoru.
Kablovsku uvodnicu
15
postavite između
poklopca i matice radi optimalnog
brtvljenja i ksirajte je sa zatvaračem
11
tako da ga čvrsto okrenete rukom.
Vanjski reektor stavite od gore na zidni
držač
16
i zategnite ga s dva vijka (10
mm)
21
(vidi sl� G)�
Napomena:
Glave vijaka na poklopcu
moraju biti upuštene kako bi se vanjski
reektor mogao pričvrstiti na zidni držač.
Ponovno uključite automatske osigurače
strujnog kruga ili ponovo zavrnite osigurač.
Podešavanje kuta snopa
Nagnite vanjski reektor u željenu poziciju
(vidi sl� H)�

19
HR
zRukovanje
Vanjskim reektorom rukujete pomoću tri
rotacijske sklopke na donjem kraju vanjskog
reektora (vidi sl. B.).
Pritisnite prekidač
13
u položaj „I“ kako
biste uključili način trajnog svjetla. Pritisnite
prekidač
13
u položaj „0“ kako biste
uključili automatski način rada (detektor
pokreta). U ovom načinu rada mogu se
izvršiti sljedeća podešavanja.
Podešavanje područja pokrivenosti
Ako regulator SENS 5okrenete u smjeru
kazaljki na satu, povećava se područje
pokrivenosti, a detektor pokreta reagira već
na udaljenosti od cca� 12 m (vidi sl� B)�
Ako regulator SENS 5okrenete suprotno
od smjera kazaljki na satu, smanjuje se
područje pokrivenosti, a detektor pokreta
reagira tek na udaljenosti od cca� 0,5 m
(vidi sl� B)�
Podešavanje trajanja svjetla
Ako regulator TIME 4okrenete u smjeru
kazaljki na satu, trajanje svjetla se
produžuje (maks. 1 minutu) (vidi sl. B).
Ako regulator TIME 4okrenete suprotno
od smjera kazaljki na satu, trajanje svjetla
se skraćuje (minimalno 10 sekundi) (vidi sl.
B)�
Podešavanje osjetljivosti senzora
sumraka
Ako regulator LUX 3okrenete u smjeru
kazaljki na satu, osjetljivost se povećava, a
detektor pokreta reagira već pri svijetlom
okruženju (npr. pri dnevnom svjetlu) (vidi sl.
B)�
Ako regulator LUX 3okrenete suprotno od
smjera kazaljki na satu, osjetljivost se
smanjuje, a detektor pokreta reagira tek u
tamnom okruženju (npr. noću) (vidi sl. B).
zČišćenje i skladištenje
OPASNOST OD OPEKLINA!
Rasvjetno
sredstvo je vruće u uključenom stanju.
Ostavite vanjski reektor da se prije svakog
čišćenja u potpunosti ohladi.
OPASNOST OD KRATKOG SPOJA!
Voda koja prodre u kućište može
prouzročiti kratki spoj.
Prije početka čišćenja uklonite osigurač
odn. isključite automatski osigurač i
isključite vanjski reektor iz strujne mreže.
Provjerite ispitivačem napona je li vanjski
reektor bez napona.
Ne uranjajte vanjski reektor u vodu.
Vodite brigu o tome da voda ne uđe u
kućište.
OPASNOST OD OŠTEĆENJA!
Nestručno
čišćenje vanjskog reektora može dovesti
do oštećenja.
Ne koristite agresivna sredstva za čišćenje,
četke s metalnim ili najlonskim čekinjama
niti oštre ili metalne predmete za čišćenje
poput noževa, tvrdih lopatica i slično. Oni
mogu oštetiti površinu.
Ne koristite kemikalije za čišćenje.
Odvrtite osigurač ili isključite automatski
osigurač.
Provjerite ispitivačem napona je li vanjski
reektor bez napona.
Ostavite vanjski reektor da se potpuno
ohladi�
Vanjski reektor obrišite lagano
navlaženom krpom. Nakon toga ostavite
da se svi dijelovi u potpunosti osuše.
Vanjski reektor čuvajte na suhom mjestu
zaštićenom od djece.
zOtklanjanje kvarova
= Kvar
= Uzrok
= Rješenje
= Vanjski reektor ne funkcionira.

20 HR
=Napajanje strujom ili priključni vod
je neispravan�
= Za provjeru tih kvarova pozovite
stručnjaka.
= Vanjski reektor je pogrešno
podešen.
= Odaberite odgovarajuću postavku
putem rotacijskih sklopki�
= Kabeli su pogrešno postavljeni.
= Za provjeru tih kvarova pozovite
stručnjaka.
= Područje pokrivenosti detektora
pokreta je loše podešeno.
= Podesite područje pokrivenosti
detektora pokreta�
= Vanjski reektor se neprestano
uključuje i isključuje.
=Vanjski reektor neprestano detektira
pokrete�
= Provjerite pokrete područja
pokrivenosti�
= Provjerite podešenost vanjskog
reektora.
= Podesite područje pokrivenosti
detektora pokreta�
= Podesite trajanje svjetla�
= Podesite osjetljivost senzora sumraka�
= Vanjski reektor se grije.
= To je sasvim normalno i ne
predstavlja kvar�
= Vodite brigu o tome da je vanjski
reektor dobro prozračen.
Napomena!
Sve ostale popravke moraju
provesti ovlašteni stručnjaci.
zZbrinjavanje
b
a
Pri razvrstavanju otpada vodite
računa o oznakama na ambalaži,
ona je označena kraticama (a) i
brojevima (b) sa sljedećim
značenjem:
1–7: Plastike
20–22: Papir i ljepenka
80 – 98: Kompozitni materijali
Možete se obratiti Vašoj općinskoj
ili gradskoj upravi za opcije
odlaganja dotrajalog proizvoda�
U interesu zaštite okoliša, nemojte
odlagati Vaš dotrajali proizvod kao
kućni otpad, nego ga zbrinite na
profesionalan način. Kako biste
saznali gdje se nalaze mjesta
prikupljanja i njihovo radno vrijeme,
možete se obratiti nadležnoj
lokalnoj upravi�
zJamstvo
Poštovani kupci, za ovaj proizvod dobivate 3
godine jamstva od datuma kupnje. U slučaju
nedostataka na ovom proizvodu imate
zakonska prava u odnosu na prodavatelja
proizvoda� Ova zakonska prava nisu
ograničena našim niže navedenim
jamstvom�
Uvjeti jamstva
Jamstveni rok počinje teći s datumom kupnje.
Molimo dobro čuvajte originalni račun. On
je potreban kao dokaz o kupnji� Ako se
pojave nedostaci u materijalu ili izradi
unutar tri godine od datuma kupnje ovog
proizvoda, proizvod će se - prema našem
izboru - besplatno popraviti, zamijeniti ili
izvršiti povrat novca. Za ovo jamstvo
potrebno je unutar trogodišnjeg jamstvenog
razdoblja dostaviti neispravan uređaj i
potvrdu o kupnji (račun), kao i kratak opis
nedostatka i trenutka njegovog nastanka�
Ako je nedostatak pokriven našim jamstvom,
vratit ćemo Vam popravljeni ili novi
proizvod� S popravkom ili zamjenom
proizvoda ne započinje novo jamstveno
razdoblje�
Jamstveno razdoblje i zakonski
zahtjevi u slučaju nedostataka
Jamstveno razdoblje se ne produljuje
This manual suits for next models
2
Table of contents
Languages:
Other LIVARNO Spotlight manuals

LIVARNO
LIVARNO 314812 Technical specifications

LIVARNO
LIVARNO 1020-B User manual

LIVARNO
LIVARNO Z31171 Technical specifications

LIVARNO
LIVARNO home 387731 2101 Quick guide

LIVARNO
LIVARNO 88651 User manual

LIVARNO
LIVARNO 375304 2101 Original instructions

LIVARNO
LIVARNO home 353560_2010 Technical specifications