LIVARNO 375304 2101 Original instructions

LED SOLAR SPOTLIGHT
WITH MOTION DETECTOR
IAN 375304_2101 HR
DE AT CH
LED-SOLARSTRAHLER MIT
BEWEGUNGSMELDER
Bedienungs- und Sicherheitshinweise
GR CY
ΗΛΙΑΚΌΣ ΠΡΌΒΌΛΈΑΣ LED
ΜΈ ΑΙΣΘΗΤΗΡΑ ΚΙΝΗΣΗΣ
Οδηγίες λειτουργίας και ασφαλείας
BG
LED СОЛАРЕН ПРОЖЕКТОР
С ДАТЧИК ЗА ДВИЖЕНИЕ
Указания за експлоатация и безопасност
RO
REFLECTOR SOLAR CU LED
ȘI SENZOR DE MIȘCARE
Indicații de operare și siguranță
RS
LED SOLARNI REFLEKTOR
SA SENZOROM POKRETA
Uputstva za rukovanje i bezbednost
HR
LED SOLARNI REFLEKTOR S
DETEKTOROM POKRETA
Upute za uporabu i sigurnost
GB CY
LED SOLAR SPOTLIGHT
WITH MOTION DETECTOR
Operating and safety information

GB CY
Before you start reading, please fold out the illustrations page and familiarise yourself with all of
the item’s functions.
HR
Prije čitanja otvorite stranicu s prikazima te se potom upoznajte sa svim funkcijama proizvoda.
RS
Pre nego što počnete da čitate rasklopite stranicu sa slikama i upoznajte se sa svim funkcijama
ovog proizvoda.
RO
Înainte să citiţi, desfășuraţi pagina cu fi gurile și familiarizaţi-vă cu toate funcţiile articolului.
BG
Преди четене отворете страницата с изображенията и се запознайте с всички функции
на артикула.
GR CY
Πριν διαβάσετε, ξεδιπλώστε τη σελίδα με τισ εικόνεσ και στη συνέχεια εξοικειωθείτε με όλεσ
τισ λειτουργίεσ του άρθρου.
DE AT CH
Klappen Sie vor dem Lesen die Seite mit den Abbildungen aus und machen Sie sich
anschließend mit allen Funktionen des Artikels vertraut.
GB/CY Operating and safety information page 7
HR Upute za uporabu i sigurnost stranica 14
RS Uputstva za rukovanje i bezbednost strana 21
RO Indicații de operare și siguranță pagina 28
BG Указания за експлоатация и безопасност страница 35
GR/CY Οδηγίες λειτουργίας και ασφαλείας σελίδα 45
DE/AT/CH Bedienungs- und Sicherheitshinweise Seite 52

A
C D
B
1
6
2
3456
7 8
6

E F
H
G
1 2
9
10
5
11
4
12
8 7
13
10
9

5
Uvod ���������������������������������������������������� 21
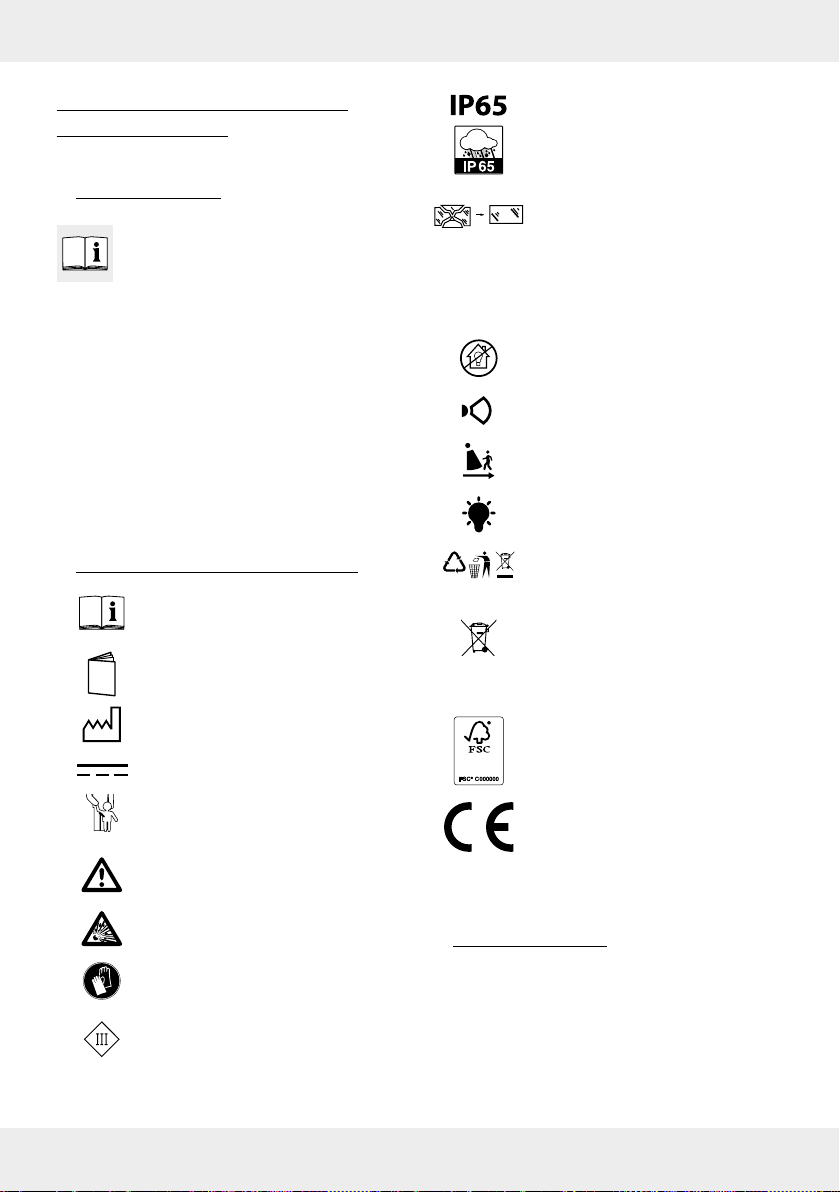
Objašnjenje znakova ������������������������ 21
Namena ���������������������������������������������� 21
Obim isporuke ������������������������������������22
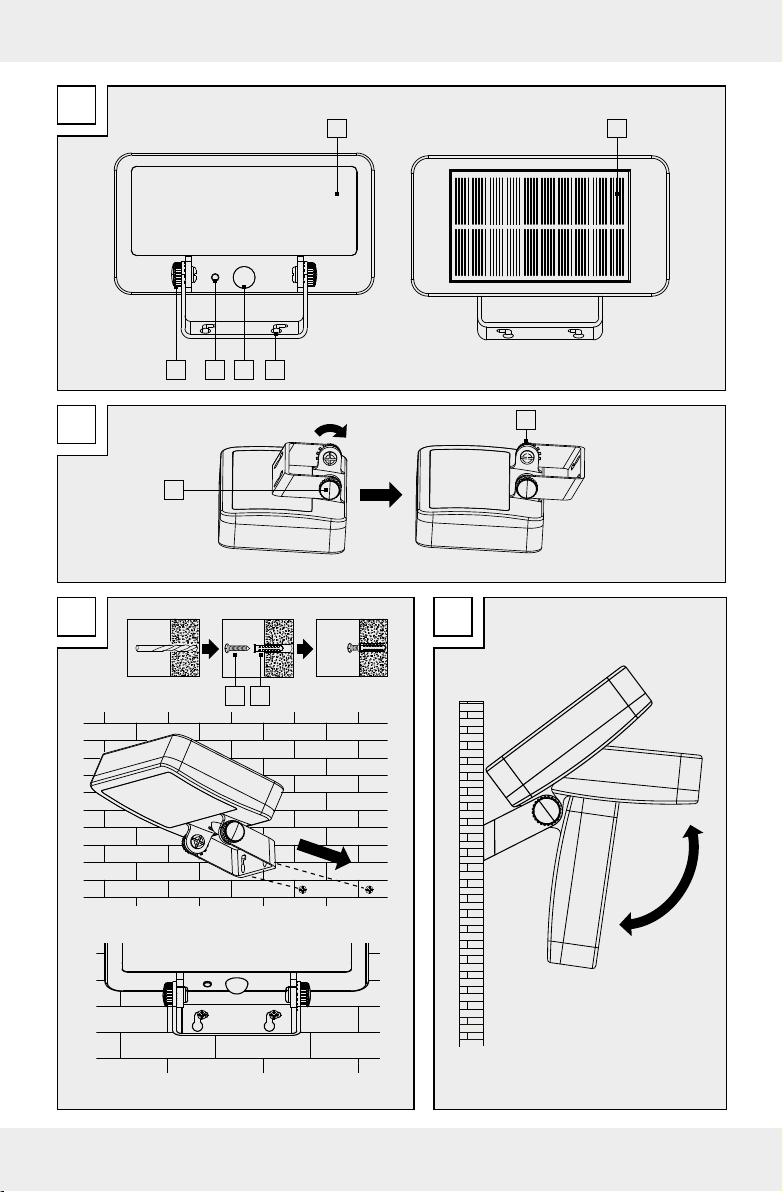
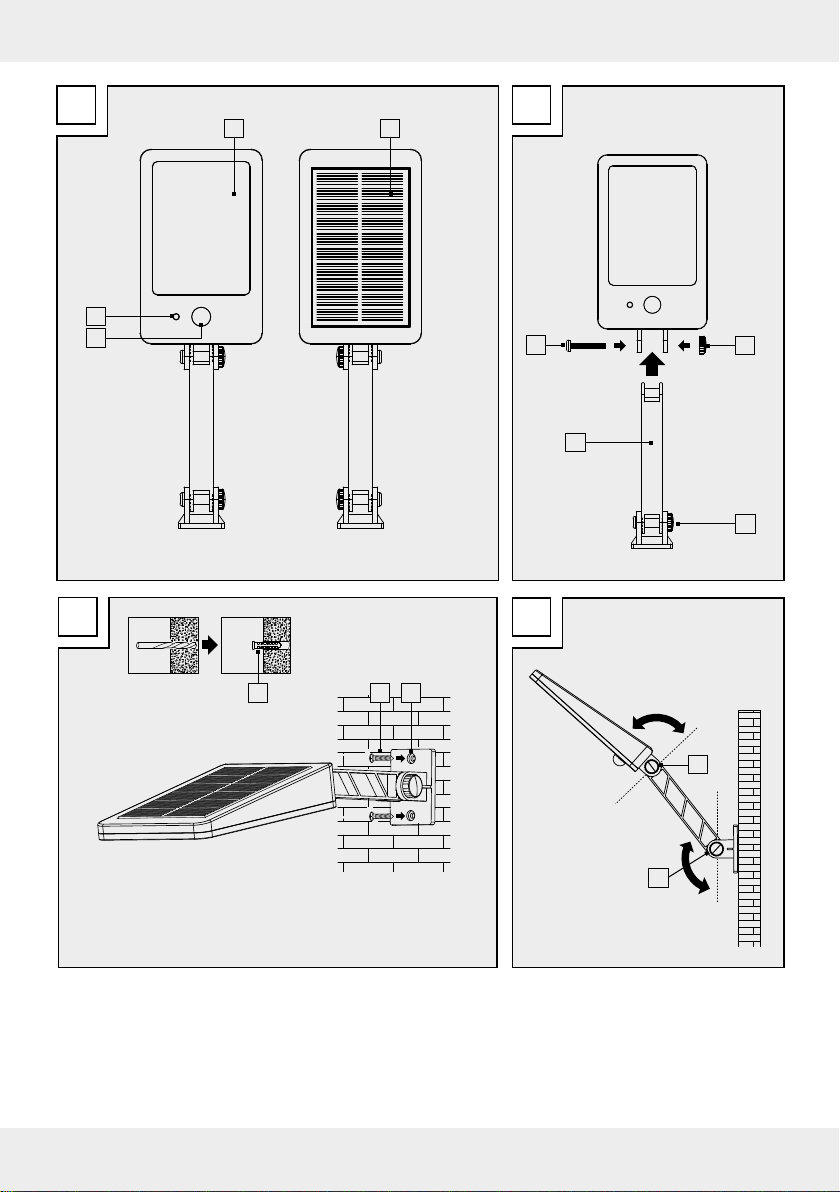
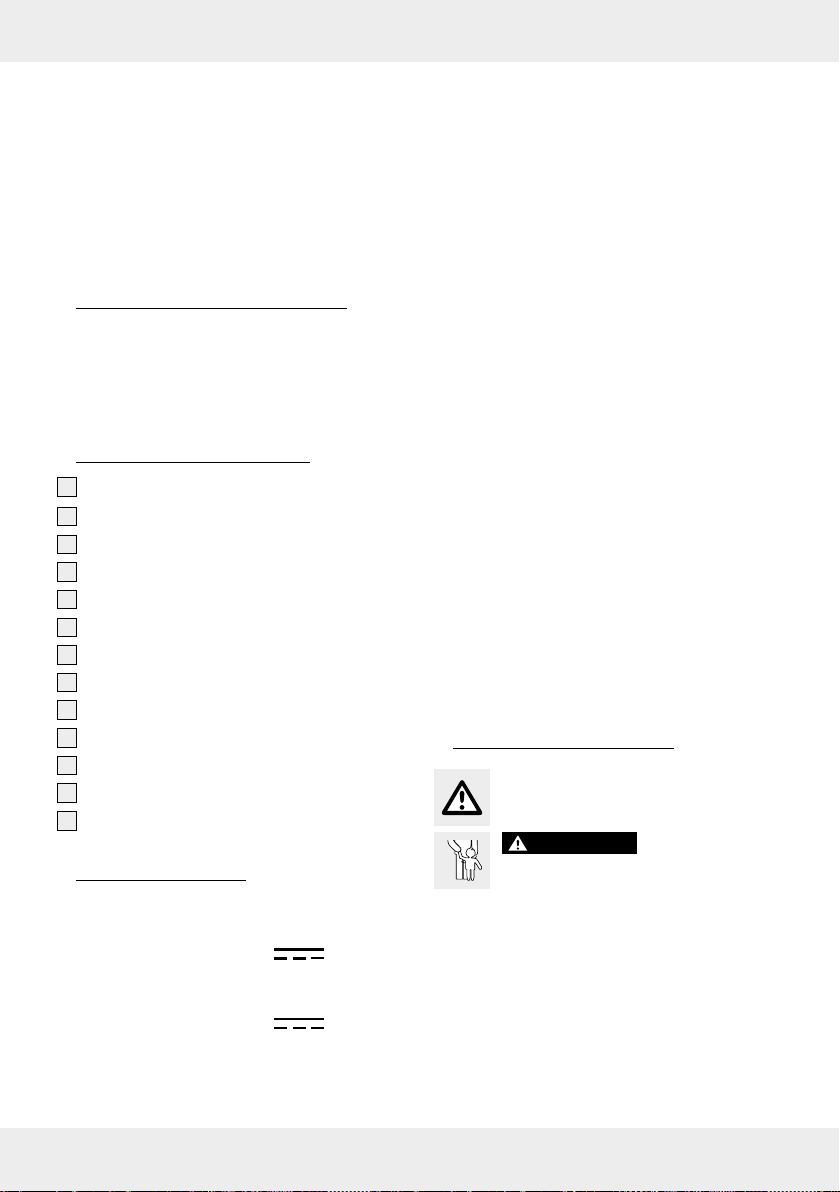
Opis delova �����������������������������������������22
Tehnički podaci �����������������������������������22
Bezbednosne napomene�������������������22
Opasnost od isticanja tečnosti iz
batera/punjivih batera������������������23
Montaža�����������������������������������������������23
Montiranje reektora�������������������������24
Poravnanje reektora/solarnog
panela ��������������������������������������������������24
Punjenje punjive batere�������������������25
Rad��������������������������������������������������������25
Otklanjanje smetnji ����������������������������25
Čišćenje i skladištenje ������������������������26
Odlaganje u otpad�����������������������������26
Garanca ���������������������������������������������26
Servis����������������������������������������������������27
GB CY HR
RS RO
Introduction ������������������������������������������ 7
Explanation of symbols���������������������� 7
Intended use����������������������������������������� 7
Specications supplied������������������������ 8
Description of parts����������������������������� 8
Technical data �������������������������������������� 8
Safety instructions ������������������������������� 8
Risk of leakage from batteries/
rechargeable batteries ����������������������� 9
Assembly and installation������������������ 9
Mounting the Spotlight���������������������� 10
Positioning the Spotlight/
solar panel������������������������������������������ 10
Charging the battery ������������������������ 11
Operation ������������������������������������������� 11
Troubleshooting��������������������������������� 11
Cleaning and storage������������������������ 12
Disposal����������������������������������������������� 12
Warranty �������������������������������������������� 12
Service������������������������������������������������� 13
Uvod ���������������������������������������������������� 14
Tumač znakova���������������������������������� 14
Namjenska upotreba������������������������ 14
Opseg isporuke���������������������������������� 15
Opis delova �������������������������������������� 15
Tehnički podaci ���������������������������������� 15
Sigurnosne napomene���������������������� 15
Opasnost od curenja batera/
punjivih batera �������������������������������� 16
Montaža���������������������������������������������� 16
Montaža reektora ��������������������������� 17
Reektor / usmjeravanje solarne
ploče ���������������������������������������������������� 17
Punjenje batere�������������������������������� 18
Rukovanje������������������������������������������� 18
Otklanjanje kvarova������������������������� 18
Čišćenje i skladištenje ����������������������� 18
Zbrinjavanje ��������������������������������������� 19
Jamstvo����������������������������������������������� 19
Servis��������������������������������������������������� 20
Introducere�������������������������������������������� 28
Explicația simbolurilor ��������������������������� 28
Destinația utilizării��������������������������������� 29
Furnitura ����������������������������������������������� 29
Descrierea componentelor��������������������� 29
Date tehnice ������������������������������������������ 29
Indicații de siguranță ����������������������������� 30
Risc de scurgere a bateriilor/
acumulatorilor��������������������������������������� 30
Montaj��������������������������������������������������� 31
Montarea reflectorului ��������������������������� 31
Reglarea reflectorului/panoului solar ����� 31
Încărcarea acumulatorului��������������������� 32
Operarea ���������������������������������������������� 32
Remedierea defecțiunilor����������������������� 33
Curățarea și depozitarea����������������������� 33
Eliminarea ��������������������������������������������� 33
Garanția������������������������������������������������ 33
Service �������������������������������������������������� 35

6
Въведение������������������������������������������ 35
Обяснение на знаците��������������������� 35
Употреба по предназначение������� 36
Обхват на доставката��������������������� 36
Описание на частите ����������������������� 36
Технически данни ���������������������������� 37
Указания за безопасност ���������������� 37
Риск от изтичане на батерии/
акумулаторни батерии������������������� 38
Монтаж ���������������������������������������������� 38
Монтирайте прожектора���������������� 39
Насочване на прожектора/
соларния панел��������������������������������� 39
Зареждане на акумулаторната
батерия����������������������������������������������� 40
Управление ��������������������������������������� 40
Отстраняване на неизправности��� 40
Почистване и съхранение�������������� 41
Събиране на отпадъците���������������� 41
Гаранция�������������������������������������������� 41
Сервизно обслужване ��������������������� 43
BG GR CY
DE AT CH
Εισαγωγή �������������������������������������������� 45
Επεξήγηση συμβόλων����������������������� 45
Προβλεπόμενη χρήση����������������������� 46
Περιεχόμενο συσκευασίας���������������� 46
Περιγραφή εξαρτημάτων������������������ 46
Τεχνικά στοιχεία��������������������������������� 46
Υποδείξεις ασφαλείας������������������������ 47
Κίνδυνος διαρροής μπαταριών/
συσσωρευτών������������������������������������� 47
Εγκατάσταση�������������������������������������� 48
Τοποθέτηση προβολέα����������������������� 48
Προσανατολισμός ηλιακού πάνελ/
προβολέα �������������������������������������������� 49
Φόρτιση συσσωρευτή����������������������� 49
Λειτουργία ������������������������������������������ 49
Αντιμετώπιση βλαβών����������������������� 50
Καθαρισμός και αποθήκευση���������� 50
Απόρριψη ������������������������������������������� 50
Εγγύηση���������������������������������������������� 51
Σέρβις �������������������������������������������������� 52
Einleitung �������������������������������������������� 52
Zeichenerklärung ������������������������������ 52
Bestimmungsgemäße Verwendung
�� 53
Lieferumfang �������������������������������������� 53
Teilebeschreibung������������������������������ 53
Technische Daten ������������������������������� 54
Sicherheitshinweise ��������������������������� 54
Risiko des Auslaufens von
Batterien/Akkus��������������������������������� 55
Montage���������������������������������������������� 55
Strahler montieren����������������������������� 56
Strahler/Solarpanel ausrichten �������� 56
Akku aufladen����������������������������������� 57
Bedienung������������������������������������������� 57
Fehlerbehebung��������������������������������� 57
Reinigung und Lagerung ������������������ 57
Entsorgung������������������������������������������ 58
Garantie���������������������������������������������� 59
Service������������������������������������������������� 60

7
GB/CY
LED Solar Spotlight with
Motion Sensor
zIntroduction
Congratulations on the purchase of
your new product� You have chosen
a high-quality product� Please read
these operating instructions thoroughly and
carefully� These instructions are an essential
part of the product and contain important
information on rst-time use and handling.
Always observe all safety instructions� If you
have any questions or are unsure how to
operate the product, please contact your
retailer or service centre� Please keep this
manual in a safe place and pass it on to
third parties where necessary� Name of
product as referred to below: “Spotlight”
zExplanation of symbols
Read the operating instructions!
Issue date of
instruction manual
(month/year)
Date of manufacture
(month/year)
Direct current
Risk of fatal injury and
accidents for infants and
children!
Observe warning notices and
safety instructions!
Explosion hazard!
Wear protective gloves!
This symbol indicates that the
product operates with safety
extra-low voltage (SELV/PELV,
protection class III)�
Protected against ingress of
dust (dust-proof, fully
contactproof) and jet proofed
from any direction�
Any protective cover that is
cracked or split must be
replaced� If the product is
damaged in any way, stop
using it immediately and
contact the service address
indicated below�
Not suitable for indoor lighting
Motion detector
eld of view
Detection range
Motion detector
Luminous power
b
a
Dispose of packaging and
product in an environmentally
friendly manner!
Risk of environmental damage
from incorrect disposal of
batteries/rechargeable
batteries!
MIX
Packaging
Packaging made of FSC
certied wood mix
With the CE label, the
manufacturer conrms that this
product complies with the
applicable European directives�
zIntended use
The product is intended for automatic
illumination in outdoor areas (e�g� garden,
patio, etc�)� The product must not be installed
indoors, as the battery cannot then be
charged� The product is not suitable for
general indoor lighting in the home� This

8GB/CY
product is intended for use in private
households only� Any type of use other than
that described above or any modication of
the product is prohibited and likely to cause
damage or even personal injury� The
manufacturer or retailer accepts no liability
for loss or damage that occurs as a result of
use other than intended or incorrect use�
zSpecications supplied
1 LED solar Spotlight with motion sensor
1 wall bracket (model 1020-S)
1 set of xings (2 wall plugs and 2 screws)
1 instruction manual
zDescription of parts
1LED module
2Solar panel
3Guide holes (1020-B)
4Motion sensor
5Switch
6Spotlight star knob (1020-B)
7Screw
8Wall plug
9Spotlight star knob (1020-S)
10
Wall bracket star knob (1020-S)
11
Wall bracket (1020-S)
12
Screw for Spotlight star knob (1020-S)
13
Guide holes (1020-S)
zTechnical data
Model number: 1020-B / 1020-S
Input voltage
(spotlight): 3,7 V , 5 W
Solar panel: 300mA, max� 1�5W
Li-ion battery: 3,7 V ,
1500 mAh
(non-replaceable)
Light source: 56 LEDs
(non-replaceable)
Motion sensor: Detection range:
max� 10m
Field of view:
approx� 120°
Illumination time: 15 s
Luminous power: max� 450 lm
Charging time: approx� 7-8h
at 50,000lux
LED service life: approx� 50,000h
Colour temperature: 6500K (cold white)
Recommended
installation height: approx� 2-4m
Dimensions of
spotlight (excluding
wall bracket):
approx� 20 x 11 x
3cm (Model 1020-B)
approx� 17�5 x 11 x
3�5cm (Model 1020-S)
Max� projection
area: approx� 119cm²
(Model 1020-B)
approx� 118cm²
(Model 1020-S)
Weight: approx� 310 g
(Model 1020-B)
approx� 300 g
(Model 1020-S)
zSafety instructions
Safety instructions
WARNING!
RISK OF FATAL INJURY AND
ACCIDENTS FOR INFANTS AND
CHILDREN!
Never leave children
unsupervised with the packaging material�
There is a danger of suffocation from the
packaging material� Children often
underestimate the dangers� Always keep
children away from the product�
This product can be used by children aged
8 years and over, as well as by persons
with limited physical, sensory or mental

9
GB/CY
abilities or lacking in experience and
knowledge if they have been supervised
and instructed as to the safe use of the
product and understand the resulting
hazards� Do not let children play with the
product� Cleaning and maintenance may
not be carried out by children without
proper supervision�
Do not use the product if you notice any
damage�
The manufacturer/distributor of this product
accepts no responsibility whatsoever for
personal injury or damage resulting from
incorrect installation or use�
Do not immerse the product in water or any
other liquids�
Keep the product away from naked ames
and hot surfaces�
The LED module 1is not replaceable�
The LEDs are not replaceable� Once the
light source reaches the end of its service
life, the product must be replaced�
RISK OF FATAL INJURY!
Keep children
away from the work area during
installation� The product as supplied
includes a number of screws and other
small parts� These can be fatal if they are
swallowed or inhaled�
Safety instructions for
batteries/rechargeable
batteries
RISK OF FATAL INJURY!
Keep batteries/
rechargeable batteries out of the reach of
children� If swallowed, seek medical advice
immediately!
PLEASE NOTE!
The rechargeable battery
is not replaceable� When it is worn out, the
entire product must be disposed of�
EXPLOSION HAZARD!
Never
recharge non-rechargeable
batteries� Do not short-circuit and/
or open up batteries/rechargeable
batteries. They could overheat, cause a re
or explode�
Never throw batteries/rechargeable
batteries into re or water.
Do not expose the batteries/rechargeable
batteries to mechanical stress�
zRisk of leakage from
batteries/rechargeable
batteries
Avoid exposing (rechargeable) batteries to
extreme conditions and temperatures, e�g�
radiators or direct sunlight�
Avoid contact with skin, eyes and mucous
membranes! In the event of skin contact
with battery acid, rinse the affected area
immediately with plenty of clean water and
seek medical advice immediately!
WEAR PROTECTIVE GLOVES!
Leaking or damaged batteries/
rechargeable batteries can cause
chemical burns if they come into contact
with the skin� Therefore, wear suitable
protective gloves in such cases�
In the event that a battery leaks, remove it
from the product immediately to avoid
damage�
zAssembly and installation
Please note:
remove all packaging material
from the product� Decide prior to mounting
where the product is to be mounted� Before
drilling the xing holes, satisfy yourself that
there is no danger of drilling into or
damaging gas or water pipes or electricity
cables in the position where you are about
to drill the holes� Use a drill to drill the holes
into the masonry� Observe all safety
instructions provided in the operation and
safety manual for your drill� Otherwise there
is a risk of serious or fatal injury from electric
shock�
Please note:
the xings included are
suitable for conventional solid masonry� You
should check independently what kind of

10 GB/CY
xings are best suited for the surface on
which you intend to mount the light� If
necessary, you should seek the advice of an
expert�
When deciding where to mount the
light, pay attention to the following:
Ensure the product illuminates the desired
area� Make sure that the motion sensor 4
covers the desired area�
The motion sensor has a maximum
detection range of 10m with a eld of view
of approx� 120°�
Ensure that the motion sensor 4is not in a
position where street lighting will shine on it
at night� This may impair the function�
The recommended installation height is 2 to
4m� If possible, mount the Spotlight in a
position where it will not be exposed to dirt
or dust and is protected from rain (e�g�
under a roof overhang) and other
weathering effects�
Please note:
the solar panel 2should be
positioned where it will be exposed to as
much direct sunlight as possible� Even partial
shade during the day can signicantly
impair the charging process�
Orientation:
The optimum alignment is facing south�
Choose an orientation facing slightly to the
west rather than slightly to the east�
z
Mounting the Spotlight
Transfer the positions of the guide holes 3
/
13
to the mounting point on the wall�
Drill two holes (dia� 6mm) and insert the
matching wall plugs 8(see Figs� C and
G)�
Mounting model 1020-B
Screw the screws 7into the wall plugs 8,
leaving a gap of approx� 3mm between the
screw head and the wall (see Fig� C)�
Slot the guide holes 3over the screws and
then slide the Spotlight along the guides to
x it in place (see Fig. C).
If necessary, adjust the gap between the
screw heads and the mounting surface to
provide a rm seating for the Spotlight.
Mounting model 1020-S
Screw the wall bracket
11
rmly in place
by inserting the screws 7through the
guide holes
13
into the wall plugs 8and
rmly tightening them (see Fig. G).
Fix the Spotlight to the wall bracket
11
by
loosening the Spotlight star knob 9and
removing the screw
12
�
Align the holes in the Spotlight with the
holes in the wall bracket and slot the screw
12
through the holes (see Fig� F)�
Screw the Spotlight star knob 6onto the
screw and tighten it hand-tight� Check that
the product is xed rmly in place.
z
Positioning the Spotlight/
solar panel
Positioning model 1020-B
The Spotlight can be adjusted horizontally
(top/bottom) to an angle of up to 180° (see
Fig� D)�
Loosen the two Spotlight star knobs 6to
adjust the Spotlight (see Fig� B)�
When the desired position is obtained,
tighten the star knobs again� If necessary,
use a screwdriver to hold the screw while
tightening the star knob�
Positioning model 1020-S
The Spotlight can be adjusted horizontally
(top/bottom) to an angle of up to 180° (see
Fig� H)�
Loosen the wall bracket star knob
10
to
adjust the height of the Spotlight (see Fig�
H)�
When the desired position is obtained,

11
GB/CY
tighten the star knob again�
Loosen the Spotlight star knob 9to adjust
the angle (see Fig� H)�
When the desired position is obtained,
tighten the star knob again� If necessary,
use a screwdriver to hold the screw while
tightening the star knob�
Please note:
the motion sensor has a eld
of view of up to 120°� Make sure that the
motion sensor faces directly towards the
desired detection zone�
Please note:
to ensure the solar panel
functions as effectively as possible, make
sure that the surface of the solar panel 2is
not dirty�
Orientation:
The optimum alignment is facing south�
Choose an orientation facing slightly to the
west rather than slightly to the east�
zCharging the battery
The battery is charged in all operating
modes� To optimise initial charging, charge
the product while it is turned off�
Please note:
the battery is fully charged
after it has been well exposed to sunlight for
7 to 8 hours� The duration of the charging
process depends on the battery‘s charge
level and the quality of the sunlight�
zOperation
The product can be operated in three
different modes� The operating mode is set
by means of the switch 5�
Please note:
the solar panel will turn on the
product in twilight or darkness in the mode
you have set�
Please note:
battery charging via the solar
panel does not depend on which mode is
selected� The battery is charged continuously
at all times�
Mode 1
Press and hold the switch 5for 3 seconds
to switch to “Mode 1”�
The Spotlight will light up once and then
switch to guide-light function (reduced
brightness)�
If the motion sensor detects movement
within its range, the Spotlight will light up
at maximum brightness�
After approx� 15 seconds, it switches back
to guide-light function�
Mode 2
Press the switch 5again to switch to
“Mode 2”�
The light will icker twice and then switch
off�
If the motion sensor detects movement
within its range, the Spotlight will light up
at maximum brightness�
After approx� 15 seconds, it will switch off
again�
Mode 3
Press the switch 5again to switch to
“Mode 3”�
The light will icker 3 times. The guide-light
function (reduced brightness) is then
permanently active� The motion sensor is
inactive in this mode�
Switching o the Spotlight
To switch off the Spotlight, press the switch
5for a fourth time�
zTroubleshooting
= Fault
=Cause
= Solution
= The product fails to switch on�
= The product is switched off�
= Press the switch 5to turn on the
product (see section “Operation”)�

12 GB/CY
= The light is ickering.
= The battery is almost fully discharged�
= Charge the battery (see section
"Charging the battery")�
zCleaning and storage
Switch the product off if you want to stop
using it, store it away and/or clean it�
Regularly inspect the motion sensor 4and
the solar panel 2to make sure they are
not dirty� Remove any dirt to ensure the
product works correctly�
Keep the product and especially the solar
panel free of snow and ice in winter�
Use only a dry, lint-free cloth for cleaning� If
the product is very dirty, dampen the cloth
slightly�
zDisposal
b
a
Note the labels on the packaging
materials when sorting the waste;
they are marked with abbreviations
(a) and numbers (b) with the
following meanings:
1-7: Plastics
20-22: Paper and cardboard
80-98: Composite materials
You can nd out how to dispose of
the used product by contacting your
local district or city council�
In the interest of environmental
protection, when the product has
reached the end of its useful life, do
not dispose of it as general
household waste but have it
properly recycled� For information
on recycling centres and their
opening times, please contact your
local council�
Faulty or used batteries must be recycled in
accordance with Directive 2006/66/EC
and its amendments� Return batteries and/or
the product to the local recycling facilities
provided�
Risk of environmental damage
from incorrect disposal of
rechargeable batteries!
Batteries must not be disposed of as general
household waste� They may contain toxic
heavy metals and are subject to special
waste treatment� The chemical symbols of the
heavy metals are as follows:
Cd = cadmium, Hg = mercury, Pb = lead�
zWarranty
Dear customer, This product comes with a
3-year warranty from the date of purchase�
In the event that this product is faulty, you
have legal rights against the seller of the
product� These statutory rights are not
restricted by our warranty as set out below�
Warranty terms
The warranty period begins with the date of
purchase� Please keep the original receipt in
a safe place� It is required as proof of
purchase� If a material or manufacturing
defect occurs within three years of the date
of purchase, we will repair or replace the
product for you free of charge, or refund the
purchase price, at our discretion� This
warranty service is granted provided that the
faulty device and the proof of purchase
(receipt) are presented within three years,
along with a brief written description of the
fault and of when it occurred� If the fault is
covered by our warranty, we will return the
xed product or send you a new one. No
new warranty period shall begin upon repair
or replacement of the product�
Warranty period and statutory
warranty claims
The warranty period is not renewed after a
warranty service has been granted� This rule
shall also apply for any replaced or repaired
parts� Any damage or faults that already

13
GB/CY
existed when buying the product must be
reported immediately upon unpacking the
product� A fee is charged for any repairs
that are carried out after the end of the
warranty period�
Warranty scope
The device was carefully manufactured
according to the strictest quality guidelines
and thoroughly tested before delivery� The
warranty applies to material or
manufacturing defects� This warranty does
not apply to product parts that are subject to
normal wear and tear and can therefore be
regarded as wearing parts, or damage to
fragile parts, such as switches, rechargeable
batteries or parts that are made of glass�
This warranty is void if the product has been
damaged, improperly used or serviced� To
ensure proper use, all instructions included in
the manual must be followed carefully� All
uses and actions that users are discouraged
from or warned of in the manual must be
avoided under all circumstances� The product
is intended for private household use only,
and not for commercial activities� The
warranty is void, if the product is treated
inappropriately, if force is applied, and in
the case of any manipulation that is not
carried out by our authorised service branch�
Warranty processing
To ensure your request is handled swiftly,
please observe the following
Notes:
Please have the receipt and the article
number (e�g� IAN 123456) ready as proof
of purchase for all enquiries�
Please refer to the type plate on the
product, an engraving on the product, the
cover of the manual (bottom left) or the
sticker on the back or base of the product
to nd out the product number.
In the case of any malfunctions or other
defects, please call or email the service
department indicated below as a rst step.
After your product has been registered as
faulty, you can send it to the specied
service address, free of charge� Please
include the proof of purchase (receipt) and
information about the defect and about
when it occurred�
zService
GB
Service Great Britain
Tel�: 00800 80040044
E-Mail: administration@mynetsend�de
CY
Service Cyprus
Tel� : 00800 80040044
E-Mail: administration@mynetsend�de
IAN 375304_2101
Please have the receipt and the article
number (e�g� IAN 123456) ready as proof
of purchase for all enquiries�
You can nd an up-to-date version of the
operating instructions at: www�citygate24�de

14 HR
LED solarni reektor sa
senzorom pokreta
zUvod
Čestitamo Vam na kupnji Vašeg
novog proizvoda� Ovime ste se
odlučili za kvalitetan proizvod.
Molimo pažljivo i do kraja pročitajte ove
upute za uporabu� Ove su upute dio ovog
proizvoda i sadrže važne napomene za
stavljanje u pogon i rukovanje� Uvijek se
pridržavajte svih sigurnosnih uputa. Ako
imate bilo kakvih pitanja ili niste sigurni u
vezi s rukovanjem proizvodom, obratite se
Vašem trgovcu ili servisnom centru. Molimo
čuvajte ove upute na sigurnom mjestu i
proslijedite ih trećim osobama, ako je
potrebno� Naziv proizvoda u nastavku:
„reektor“
zTumač znakova
Pročitajte upute za uporabu!
Datum izdavanja
uputa za uporabu
(mjesec/godina)
Datum proizvodnje
(mjesec/godina)
Istosmjerni napon
Opasnost po život i od
nezgoda za malu djecu i
djecu!
Pridržavajte se upozorenja i
sigurnosnih uputa!
Opasnost od eksplozije!
Nosite zaštitne rukavice!
Ovaj simbol označava da
proizvod radi sa sigurnosnim
malim naponom (SELV/PELV)
(klasa zaštite III).
Zaštita od prodiranja prašine
(otporno na prašinu, potpuna
zaštita od kontakta) i zaštita
od prskanja vode iz svih
smjerova�
Svaki polomljeni zaštitni
poklopac mora se zamijeniti�
U slučaju oštećenja proizvod
odmah stavite izvan pogona i
obratite se na navedenu
adresu servisa�
Nije prikladno za
osvjetljavanje prostorija
Obuhvatni kut senzora pokreta
Domet kut senzora pokreta
Svjetlosni tok
b
a
Ambalažu i proizvod zbrinite
na ekološki prihvatljiv način!
Oštećenja okoliša zbog
nepravilnog odlaganja
baterija/punjivih baterija!
MIX
Packaging
Ambalaža od miješanog drva
s FSC certikatom
S CE oznakom proizvođač
potvrđuje da ovaj proizvod
ispunjava važeće europske
smjernice�
zNamjenska upotreba
Proizvod predviđen je za automatsko
osvjetljenje u vanjskom području (npr. vrt,
terasa, itd�)� Proizvod ne smije biti montiran
u unutarnjim prostorijama jer se baterija tada
ne može puniti. Ovaj proizvod nije prikladan

15
HR
za osvjetljavanje prostorija u kućanstvu.
Ovaj proizvod je namijenjen samo za
korištenje u privatnim kućanstvima. Uporaba
na drugačiji način od opisanog ili preinaka
proizvoda nije dozvoljena i može prouzročiti
materijalne štete ili čak i tjelesne ozljede.
Proizvođač ili trgovac ne preuzima
odgovornost za štete koje su nastale
nenamjenskom ili pogrešnom uporabom.
zOpseg isporuke
1 x LED solarni reektor sa senzorom
pokreta
1 x zidni držač (model 1020-S)
1 x materijal za montažu (2x tiple i 2x vijci)
1 x upute za uporabu
zOpis delova
1LED modul
2Solarna ploča
3Otvori vodilice (1020-B)
4Senzor pokreta
5Prekidač
6Rotacijski prekidač za reektor (1020-B)
7Vijak
8Tiple
9Rotacijski prekidač za reektor (1020-S)
10
Rotacijski prekidač za zidni držač
(1020-S)
11
Zidni držač (1020-S)
12
Vijak za rotacijski prekidač za reektor
(1020-S)
13
Otvori vodilice (1020-S)
zTehnički podaci
Broj modela: 1020-B / 1020-S
Ulazni napon
(reektor): 3,7 V , 5 W
Solarna ploča: 300 mA, maks� 1,5 W
Li-Ion baterija: 3,7 V ,
1500 mAh
(nije zamjenjivo)
Rasvjetno sredstvo: 56x LED
(nije zamjenjivo)
Senzor pokreta: Domet: maks� 10 m
Obuhvatni kut:
cca� 120°
Trajanje svjetla: 15 s
Svjetlosni tok: maks� 450 lm
Vrijeme punjenja: cca� 7-8 h
kod 50�000 luksa
LED životni vijek: cca� 50�000 h
Temperatura boje: 6500 K
(hladno-bijela boja)
Preporučena visina
instalacije: cca� 2-4 m
Dimenzije reektora
(bez zidnog
držača):
cca� 20 x 11 x 3 cm
(model 1020-B)
cca� 17,5 x 11 x
3,5 cm (model
1020-S)
Maksimalna
projekcijska
površina:
cca� 119 cm²
(model 1020-B)
cca� 118 cm²
(model 1020-S)
Težina: cca� 310 g
(model 1020-B)
cca� 300 g
(model 1020-S)
zSigurnosne napomene
Sigurnosne napomene
UPOZORENJE!
OPASNOST PO ŽIVOT I OD
NEZGODA ZA MALU DJECU I
DJECU!
Nikada ne ostavljajte djecu bez
nadzora s ambalažom. Postoji opasnost od
gušenja zbog ambalaže. Djeca često
podcjenjuju opasnosti. Djecu uvijek držite
podalje od proizvoda�
Ovaj proizvod mogu koristiti djeca starija

16 HR
od 8 godina te osobe sa smanjenim
zičkim, osjetilnim ili mentalnim
sposobnostima ili nedostatkom iskustva i
znanja, ako su nadzirane ili upućene u
sigurnu uporabu proizvoda i razumiju
opasnosti koje iz toga proizlaze� Djeci nije
dopušteno igrati se s proizvodom. Čišćenje
i održavanje od strane korisnika ne smiju
izvoditi djeca bez nadzora�
Nemojte koristiti proizvod ako primijetite
bilo kakvu vrstu oštećenja.
Proizvođač/prodavatelj ovog proizvoda ne
preuzima nikakvu odgovornost za povrede
ili štete koje su nastale uslijed nepravilne
montaže/pogrešne uporabe.
Ne uranjajte proizvod u vodu ili druge
tekućine.
Proizvod držite dalje od otvorenog
plamena i vrućih površina.
LED-Modul 1 se ne može zamijeniti.
LED žaruljice nisu zamjenjive. Kada izvor
svjetlosti dosegne kraj vijeka trajanja, mora
se zamijeniti cijeli proizvod�
OPASNOST PO ŽIVOT!
Tijekom montaže
držite djecu podalje od radnog područja.
Opseg isporuke uključuje različite vijke i
druge sitne dijelove� Oni mogu biti opasni
po život ako se progutaju ili udišu.
Sigurnosne upute za
batere/punjive batere
OPASNOST PO ŽIVOT!
Baterije /
punjive baterije čuvajte izvan dosega
djece. U slučaju gutanja odmah potražiti
liječničku pomoć!
NAPOMENA!
Baterija nije zamjenjiva�
Jednom kada je potrošena, potrebno je
zbrinuti cijeli proizvod�
OPASNOST OD EKSPLOZE!
Nikada nemojte puniti baterije
koje se ne mogu ponovo puniti�
Nemojte kratko spajati baterije / punjive
baterije i/ili nemojte ih otvarati� Rezultat
može biti pregrijavanje, opasnost od
požara ili pucanje.
Nikada ne bacajte baterije / punjive
baterije u vatru ili vodu�
Ne izlažite baterije / punjive baterije
mehaničkom opterećenju.
zOpasnost od curenja
batera/punjivih batera
Izbjegavajte ekstremne uvjete i temperature
koji mogu utjecati na baterije / punjive
baterije, npr� na radijatorima / izravnoj
sunčevoj svjetlosti.
Izbjegavajte kontakt s kožom, očima i
sluznicama! Ako dođete u kontakt s
kiselinom iz baterije, odmah isperite
pogođena područja s velikom količinom
čiste vode i odmah potražite liječničku
pomoć!
NOSITE ZAŠTITNE RUKAVICE!
Baterije / punjive baterije koje su
iscurile ili su oštećene mogu
uzrokovati nagrizanje ako dođu u dodir s
kožom. Stoga u tom slučaju nosite
odgovarajuće zaštitne rukavice.
Ako neka od baterija procuri, odmah je
izvadite iz proizvoda kako biste izbjegli
oštećenja.
zMontaža
Napomena:
Odstranite svu ambalažu s
proizvoda. Prije montaže odlučite gdje ćete
postaviti proizvod. Prije bušenja otvora za
pričvršćivanje provjerite da se na mjestu
bušenja ne mogu probušiti ili oštetiti cijevi za
plin, vodu ili električni vodovi. Koristite
bušilicu za bušenje rupa u zidnu
konstrukciju. Pridržavajte se sigurnosnih
uputa iz uputa za uporabu i sigurnost
bušilice. U protivnom postoji opasnost od
smrti ili ozljede zbog električnog udara.
Napomena:
Priloženi materijal za montažu
prikladan je za uobičajeno čvrste zidove.
Informirajte se također o tome koji je

17
HR
materijal za montažu prikladan za podlogu
za montažu koju ste odabrali. O tome se
eventualno informirajte kod stručnjaka.
Pripazite prilikom odabira mjesta
montaže na sljedeće stvari:
Uvjerite se da proizvod osvjetljava željeno
područje. Provjerite da senzor pokreta 4
obuhvaća željeno područje.
Senzor pokreta ima domet od maks� 10 m
uz obuhvatni kut od cca� 120°�
Pripazite na to da na senzor pokreta 4
noću ne pada svjetlo ulične rasvjete. To
može utjecati na njegovu funkcionalnost.
Preporučena visina instalacije je 2 do 4 m.
Ako je moguće, reektor montirajte na
mjesto bez prljavštine i prašine, zaštićeno
od kiše (npr. ispod nadstrešnice) i drugih
vremenskih utjecaja�
Napomena:
Solarnoj ploči 2potrebna je
što izravnija sunčeva svjetlost. Čak i
djelomično zasjenjenje solarne ploče tijekom
dana može značajno utjecati na punjenje.
Orentaca:
Optimalna je orijentacija prema jugu� Radije
odaberite orijentaciju koja je blago okrenuta
prema zapadu nego li prema istoku�
z
Montaža reektora
Pozicije otvora vodilice 3/
13
označite na
mjestu montaže na zidu.
Izbušite dvije rupe (ø 6 mm) i umetnite
odgovarajuću tiplu 8(vidi sl� C i G)�
Montaža modela 1020-B
Zategnite vijke 7u tiple 8i ostavite cca�
3 mm mjesta između glave vijka i zida za
montažu (vidi sl. C).
Postavite otvore vodilice 3preko vijaka i
pristisnite reektor duž vodilice kako biste
ga pričvrstili (vidi sl. C).
Ako je potrebno, prilagodite razmak vijaka
i površine za montažu kako bi reektor
čvrsto nalegao.
Montaža modela 1020-S
Čvrsto zategnite zidni držač
11
, tako što
ćete vijke 7umetnuti kroz otvore vodilice
13
u tiple 8 i čvrsto ih zategnite (vidi sl.
G)�
Pričvrstite reektor za zidni držač
11
tako
što ćete otpustiti rotacijski prekidač
reektora 9i ukloniti vijak
12
�
Postavite otvore reektora i zidni držač
jedne preko drugih i umetnite vijak
12
kroz
otvore (vidi sl� F)�
Zavrnite rotacijski prekidač reektora 6na
vijke i čvrsto ih pritegnite. Provjerite je li
proizvod čvrsto nalegao.
z
Reektor / usmjeravanje
solarne ploče
Usmjeravanje modela 1020-B
Reektor se može usmjeriti vodoravno (gore/
dolje) pod kutom do 180° (vidi sl� D)�
Otpustite oba rotacijska prekidača za
reektor 6 kako biste podesili reektor
(vidi sl� B)�
Na željenoj poziciji ponovno zavrnite
rotacijski prekidač okretanjem. Ako je
potrebno, pomognite si s odvijačem kako
biste pričvrstili vijak na rotacijskom
prekidaču.
Usmjeravanje modela 1020-S
Reektor se može usmjeriti vodoravno (gore/
dolje) pod kutom do 180° (vidi sl� H)�
Otpustite rotacijski prekidač za zidni držač
10
kako biste podesili visinu reektora (vidi
sl� H)�
Na željenoj poziciji ponovno zavrnite
rotacijski prekidač okretanjem.
Otpustite rotacijski prekidač za reektor 9
kako biste podesili kut (vidi sl� H)�
Na željenoj poziciji ponovno zavrnite
rotacijski prekidač okretanjem. Ako je
potrebno, pomognite si s odvijačem kako
biste pričvrstili vijak na rotacijskom
prekidaču.

18 HR
Napomena:
Senzor pokreta raspolaže
obuhvatnim kutom do 120°� Pripazite na to
da je senzor pokreta usmjeren ravno na
željeni domet.
Napomena:
Vodite računa o tome da
površina solarne ploče 2nije zaprljana
kako bi se osigurala optimalna
funkcionalnost�
Orentaca:
Optimalna je orijentacija prema jugu� Radije
odaberite orijentaciju koja je blago okrenuta
prema zapadu nego li prema istoku�
zPunjenje batere
Baterija se puni u svakom načinu rada.
Optimalno punjenje za početak ćete postići
kada je proizvod isključen.
Napomena:
Nakon 7 do 8 sati dobrog
utjecaja sunčeve svjetlosti baterija je
napunjena� Trajanje procesa punjenja ovisi
o stanju napunjenosti baterije i kvaliteti
sunčevih zraka.
zRukovanje
Proizvod može raditi u tri različita načina
rada. Oni se mogu podesiti pomoću
prekidača 5�
Napomena:
Solarna ploča uključit će
proizvod u sumrak odn. po mraku u način
rada koji ste podesili�
Napomena:
Punjenje baterije putem
solarne ploče ne ovisi o odabiru načina
rada. Punjenje se događa u svakom trenutku.
Način rada 1
Držite prekidač 5pritisnutim na 3
sekunde kako biste podesili „način rada 1“.
Reektor će jednom zasvijetliti i promijenit
će se svjetlo za orijentaciju.
Ako senzor pokreta obuhvati pokret unutar
svog dosega, reektor će svijetliti punim
sjajem�
Nakon cca� 15 sekundi ponovno se
uključuje svjetlo za orijentaciju.
Način rada 2
Ponovno pritisnite prekidač 5kako biste
podesili „način rada 2“.
Svjetlo treperi 2 puta i nakon toga se
isključuje.
Ako senzor pokreta obuhvati pokret unutar
svog dosega, reektor će svijetliti punim
sjajem�
Nakon cca� 15 sekundi svjetlo se ponovno
uključuje.
Način rada 3
Ponovno pritisnite prekidač 5kako biste
podesili „način rada 3“.
Svjetlo treperi 3 puta� Svjetlo za orijentaciju
(manje svjetlina) je trajno uključeno. Senzor
za pokrete pritom nije aktivan�
Isključivanje reektora
Za isključivanje reektora pritisnite prekidač
5 četvrti put.
zOtklanjanje kvarova
= Kvar
= Uzrok
= Rješenje
= Proizvod se ne uključuje.
=Proizvod je isključen.
= Pritisnite prekidač 5kako biste
uključili proizvod (vidi poglavlje
„Rukovanje“)�
= Svjetlo treperi�
= Baterija je gotovo prazna�
= Napunite bateriju (vidi poglavlje
"Punjenje baterije")�
zČišćenje i skladištenje
Isključite proizvod ako ga ne koristite, ako
ga želite skladištiti i/ili čistiti.
Redovito provjeravajte eventualnu

19
HR
prljavštinu senzora pokreta 4i solarne
ploče 2� Uklonite je kako biste osigurali
ispravan rad proizvoda�
Sprječavajte zimi zadržavanje snijega i
leda na reektoru, posebice na solarnoj
ploči.
Za čišćenje koristite samo suhu krpu bez
dlačica. U slučaju jačeg zaprljanja lagano
navlažite krpu.
zZbrinjavanje
b
a
Pri razvrstavanju otpada vodite
računa o oznakama na ambalaži,
ona je označena kraticama (a) i
brojevima (b) sa sljedećim
značenjem:
1–7: Plastike
20–22: Papir i ljepenka
80 – 98: Kompozitni materijali
Možete se obratiti Vašoj općinskoj
ili gradskoj upravi za opcije
odlaganja dotrajalog proizvoda�
U interesu zaštite okoliša, nemojte
odlagati Vaš dotrajali proizvod kao
kućni otpad, nego ga zbrinite na
profesionalan način. Kako biste
saznali gdje se nalaze mjesta
prikupljanja i njihovo radno vrijeme,
možete se obratiti nadležnoj
lokalnoj upravi�
Neispravne ili iskorištene baterije moraju se
reciklirati u skladu s Direktivom 2006/66/
EZ i njezinim izmjenama� Vratite baterije i/
ili proizvod kod ponuđenih mjesta za
prikupljanje�
Oštećenja okoliša zbog
nepravilnog odlaganja
batera!
Baterije se ne smiju
odlagati zajedno s kućnim otpadom. One
mogu sadržavati otrovne teške metale i
podliježu obradi opasnog otpada. Kemijski
simboli teških metala su sljedeći: Cd =
kadmij, Hg = živa, Pb = olovo.
zJamstvo
Poštovani kupci, za ovaj proizvod dobivate 3
godine jamstva od datuma kupnje. U slučaju
nedostataka na ovom proizvodu imate
zakonska prava u odnosu na prodavatelja
proizvoda� Ova zakonska prava nisu
ograničena našim niže navedenim
jamstvom�
Uvjeti jamstva
Jamstveni rok počinje teći s datumom kupnje.
Molimo dobro čuvajte originalni račun. On
je potreban kao dokaz o kupnji� Ako se
pojave nedostaci u materijalu ili izradi
unutar tri godine od datuma kupnje ovog
proizvoda, proizvod će se - prema našem
izboru - besplatno popraviti, zamijeniti ili
izvršiti povrat novca. Za ovo jamstvo
potrebno je unutar trogodišnjeg jamstvenog
razdoblja dostaviti neispravan uređaj i
potvrdu o kupnji (račun), kao i kratak opis
nedostatka i trenutka njegovog nastanka�
Ako je nedostatak pokriven našim jamstvom,
vratit ćemo Vam popravljeni ili novi
proizvod� S popravkom ili zamjenom
proizvoda ne započinje novo jamstveno
razdoblje�
Jamstveno razdoblje i zakonski
zahtjevi u slučaju nedostataka
Jamstveno razdoblje se ne produljuje
uslugom iz jamstva� Isto vrijedi i za
zamijenjene i popravljene dijelove�
Oštećenja i nedostaci koji se utvrde nakon
kupnje prilikom raspakiranja moraju se
odmah prijaviti� Potrebni popravci po isteku
jamstvenog razdoblja se naplaćuju.
Opseg jamstva
Uređaj je pažljivo proizveden u skladu sa
strogim smjernicama za kvalitetu te je
uredno ispitan prije isporuke� Jamstvo se
odnosi na materijalne ili proizvodne
nedostatke. Ovo jamstvo ne obuhvaća
dijelove proizvoda koji su podložni

20 HR
normalnom trošenju i stoga se mogu smatrati
potrošnim dijelovima niti oštećenja lomljivih
dijelova, kao što su prekidači, baterije ili
dijelovi proizvedeni od stakla� Ovo jamstvo
prestaje važiti ako je proizvod oštećen,
nepravilno korišten ili servisiran. Za pravilno
korištenje proizvoda potrebno je pridržavati
se svih uputa navedenih u uputama za
uporabu� Namjene i radnje koje nisu
preporučene ili na koja se upozorava u
uputama za uporabu moraju se obavezno
izbegavati� Ovaj proizvod namijenjen je
samo za privatnu uporabu i nije predviđen
za komercijalnu uporabu� Jamstvo se
poništava u slučaju zlouporabnog i
nepravilnog rukovanja, primjene sile i
intervencija koje nisu izvršene od strane
našeg ovlaštenog servisnog predstavništva.
Postupak u slučaju zahtjeva temeljem
jamstva
Kako bi se osigurala brza obrada Vašeg
zahtjeva, pratite sljedeće
Napomene:
Molimo Vas da za sve upite imate pri ruci
račun i broj artikla (npr. IAN 123456) kao
dokaz o kupnji�
Broj proizvoda možete naći na tipskoj
pločici na proizvodu, žigu na proizvodu,
na naslovnoj stranici uputa (dolje lijevo) ili
na naljepnici na stražnjoj ili donjoj strani
proizvoda�
U slučaju da dođe do smetnji u radu ili
sličnih nedostataka, prvo se putem telefona
ili e-pošte obratite servisu koji je naveden u
nastavku�
Proizvod, za koji je utvrđeno da je
neispravan, možete poslati na Vama
dojavljenu adresu servisa bez plaćanja
poštarine, uz prilaganje potvrde o kupnji
(račun) i navođenje nedostatka i trenutka
njegovog nastanka�
(1) U slučaju manjeg popravka jamstveni rok
se produljuje onoliko koliko je kupac bio
lišen uporabe stvari.
(2) Međutim, kad je zbog neispravnosti
stvari izvršena njezina zamjena ili njezin
bitni popravak, jamstveni rok počinje teći
ponovno od zamjene, odnosno od vraćanja
popravljene stvari�
(3) Ako je zamijenjen ili bitno popravljen
samo neki dio stvari, jamstveni rok počinje
teći ponovno samo za taj dio.
zServis
HR
Servis Hrvatska
Tel� : 00800 80040044
E-Mail: administration@mynetsend�de
IAN 375304_2101
Molimo Vas da za sve upite imate pri ruci
račun i broj artikla (npr. IAN 123456) kao
dokaz�
Aktualnu verziju uputa za uporabu možete
pronaći na: www.citygate24.de
Table of contents
Languages:
Other LIVARNO Spotlight manuals