LIVARNO 314812 Technical specifications

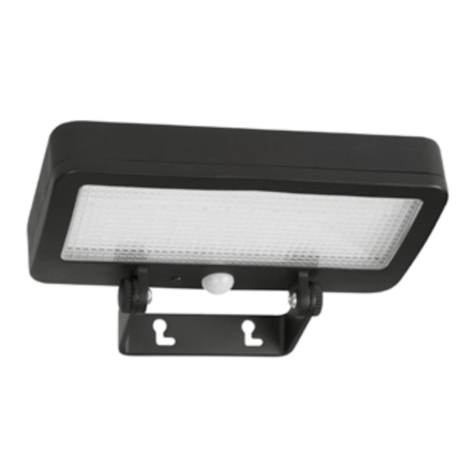
LED SOLAR SPOTLIGHT
IAN 314812
LED-SOLARSTRAHLER
Montage-, Bedienungs- und Sicherheitshinweise
LED SOLAR SPOTLIGHT
Assembly, operating and safety instructions
LED SOLÁRNÍ REFLEKTOR
Pokyny k montáži, obsluze a bezpečnostní pokyny
LED SOLÁRNY REFLEKTOR
Pokyny pre montáž, obsluhu a bezpečnostné pokyny
SOLARNI LED-REFLEKTOR
Navodila za montažo, uporabo in varnostna navodila
NAPELEMES LED REFLEKTOR
Szerelési, használati és biztonsági tudnivalók

GB Assembly, operating and safety instructions Page 5
HU Szerelési, használati és biztonsági tudnivalók Oldal 14
SI Navodila za montažo, uporabo in varnostna navodila Stran 23
CZ Pokyny k montáži, obsluze a bezpečnostní pokyny Strana 32
SK Pokyny pre montáž, obsluhu a bezpečnostné pokyny Strana 41
DE/AT/CH Montage-, Bedienungs- und Sicherheitshinweise Seite 50

A
2
3
4
1
8
10
11
5
6
79
B
12
13
1415
16

E
12m
0m1m 1m
F
DC
19 18 17

5GB
List of pictograms used..........................................................................................Page 6
Introduction.....................................................................................................................Page 6
Intended use..........................................................................................................................Page 6
Description of parts...............................................................................................................Page 6
Included items .......................................................................................................................Page 7
Technical data.......................................................................................................................Page 7
Safety notes....................................................................................................................Page 7
Safety instructions for batteries/rechargeable batteries ...................................................Page 8
Functioning.......................................................................................................................Page 8
Charging the rechargeable battery............................................................Page 8
Assembly...........................................................................................................................Page 9
Mounting the spotlight..........................................................................................................Page 9
Mounting the solar cell.........................................................................................................Page 9
Preparing the product for use.........................................................................Page 10
Switching the motion detector on and off ...........................................................................Page 10
Setting the lighting duration..................................................................................................Page 10
Adjusting the sensitivity of the sensor...................................................................................Page 10
Setting the daylight level ......................................................................................................Page 11
Orientating the motion detector...........................................................................................Page 11
Cleaning and storage .............................................................................................Page 11
Troubleshooting ..........................................................................................................Page 11
Disposal..............................................................................................................................Page 12
Warranty...........................................................................................................................Page 13

6 GB
List of pictograms used
Volt, Direct current Protection class III
Motion detector detection range
approx. 12m (weather depend-
ant) Splashproof (IP44)
LED lifespan Rotatable motion detector
LED Solar Spotlight
Introduction
We congratulate you on the purchase of your
new product. You have chosen a high quality
product. The instructions for use are part of the
product. They contain important information
concerning safety, use and disposal. Before us-
ing the product, please familiarise yourself with
all of the safety information and instructions for
use. Only use the product as described and for
the specified applications. If you pass the prod-
uct on to anyone else, please ensure that you
also pass on all the documentation with it.
Intended use
This product is suitable for outdoor use. This
product is only intended for private use and is
not suitable for commercial use or for use in
other applications.
Description of parts
1Dowels (mounting material for spotlight,
Ø 9mm)
2Screws (mounting material for spotlight,
Ø 6 x 40mm)
3Mounting bracket
4Hinge joint
5Spring washer
6Flat washer
7Fasten screws
8Solar electricity socket
9Motion detector
10 Spotlight
11 ON/OFF switch
12 Solar cell
13 Screws (mounting material for solar cell,
Ø 4 x 34mm)
14 Solar cable plug
15 Dowels (mounting material for solar cell,
Ø 6mm)
16 Compass
17 Rotary control LUX
18 Rotary control SENS
19 Rotary control TIME

7GB
Included items
Immediately after unpacking, check that all the
items and accessories are present and that the
product is in perfect condition.
1 spotlight
1 solar cell
2 screws (mounting material for spotlight
Ø 6 x 40mm)
4 screws (mounting material for solar cell
Ø 4 x 34mm)
2 dowel (mounting material for spotlight
Ø 9mm)
4 dowel (mounting material for solar cell,
Ø 6mm)
1 operating instructions
Technical data
Operating voltage: 7.4V
Lithium-ion battery: 7.4V , 1800mAh
(not replaceable)
LEDs: 50 x 0.2W
Protection class: III/
Solar cell: monocrystalline,
3.5W/14.5V
Twilight switch: adjustable from approx.
5 lx–20,000lx
Lighting duration: adjustable from 5s
+/-2s to 5min +/-1min
Spotlight:
Motion detector: range: max. 12m,
detection angle:
approx. 180 degree
Degree of protection: IP44 (splash proof)
Weight: approx. 480g
Dimensions: approx. 15 x 14.8 x
12.4cm
Max projected area: max. 15 x 14.8cm
Mounting height: max. 1.8–2.5 m
Safety notes
DANGER
TO LIFE AND ACCIDENT
HAZARD FOR TODDLERS
AND SMALL CHILDREN! Never leave
children unsupervised with the packaging
materials. The packaging material presents
a danger of suffocation. Children often un-
derestimate dangers. Always keep children
away from the product.
DANGER TO LIFE! During installation
keep children away from the area in which
you are working. A large number of screws
and other small parts are included with de-
livery. These may prove life-threatening if
swallowed or inhaled.
This product can be used by children aged
from 8 years and above and persons with
reduced physical, sensory or mental capa-
bilities or lack of experience and knowledge
if they have been given supervision or in-
struction concerning use of the product in
a safe way and understand the hazards
involved. Children shall not play with the
product. Cleaning and user maintenance shall
not be made by children without supervision.
Do not use the product if you detect any
kind of damage.
The illuminants are not replaceable.
If the illuminants fail at the end of their lifes,
the entire light must be replaced.

8 GB
0.5m
FIRE HAZARD! Fit the product
so that it is at least 0.5 m away
from the material to be illumi-
nated. Excessive heat can result in a fire.
Safety instructions for
batteries/rechargeable
batteries
DANGER TO LIFE! Keep batteries/
rechargeable batteries out of reach of
children. If accidentally swallowed seek
immediate medical attention.
DANGER OF EXPLOSION!
Never recharge non-rechargea-
ble batteries. Do not short-circuit
batteries/rechargeable batteries and/or
open them. Overheating, fire or bursting
can be the result.
Never throw batteries/rechargeable batteries
into fire or water.
Do not exert mechanical loads to batteries/
rechargeable batteries.
Risk of leakage of batteries /
rechargeable batteries
Avoid extreme environmental conditions
and temperatures, which could affect
batteries/rechargeable batteries, e.g.
radiators/direct sunlight.
If batteries/rechargeable batteries have
leaked, avoid contact with skin, eyes and
mucous membranes with the chemicals!
Flush immediately the affected areas with
fresh water and seek medical attention!
WEAR PROTECTIVE
GLOVES! Leaked or damaged
batteries/rechargeable batteries
can cause burns on contact with the skin.
Wear suitable protective gloves at all times
if such an event occurs.
This product has a built-in rechargeable
battery which cannot be replaced by the user.
The removal or replacement of the rechargea-
ble battery may only be carried out by the
manufacturer or his customer service or by
a similarly qualified person in order to avoid
hazards. When disposing of the product, it
should be noted that this product contains a
rechargeable battery.
Functioning
When exposed to sunlight, the solar cell 12
converts the light into electrical energy and via
the connected solar electricity socket 8, stores
the electricity in the built-in rechargeable battery.
With a fully charged rechargeable battery, the
lighting duration is about 100mins. Before
being used for the first time, the rechargeable
battery must be fully loaded (see section
“Charging the rechargeable battery”).
Charging the
rechargeable battery
Upon delivery, the rechargeable battery is fully
charged. Due to storage times, the rechargeable
battery may be partially discharged when first
used. Therefore, charge the rechargeable
battery completely before first use.
Charging the rechargeable batteries
with a solar cell
Press the ON/OFF switch 11 into the OFF
position and red LED indicator of ON/OFF
switch 11 extinguish at the same time, so

9GB
the charging process is not influenced by
the light being switched on.
Insert the solar cable plug 14 into the solar
electricity socket 8of the spotlight 10 .
Position the solar cell 12 as described in
section “Mounting the solar cell 12 ”.
Note: With steady exposure to sunlight,
the rechargeable battery is fully charged
after 4 to 6 days. The duration of the charg-
ing process depends on the charge state of
the rechargeable battery as well as the
quality of the exposure to sunlight.
Assembly
Note: Remove all packaging materials from the
product.
Before mounting, decide where you want to
Mount the solar cell 12 and the spotlight 10 .
The solar cell 12 and the spotlight 10 can be
mounted independently of each other, but after
being mounted must be connected with the ap-
prox. 5 m long power cable of the solar cell
12
.
After the mounting, lay the cable so it is not sub-
ject to any mechanical stresses. Use typical in-
stallation material such as cable clamps or
conduit to fasten the cable, to prevent damage
to the insulation.
Note: The included mounting material is suitable
for ordinary solid concrete or masonry construc-
tion. Other wall substrates may require other
fastening materials. Seek specialist advice if
necessary.
Mounting the spotlight
Make sure you will not be drilling into electrical,
gas or water lines inside the wall. Use a power
drill to drill the holes into the brick wall. Always
observe all safety instructions for the power drill
in the manual for the power drill. Death or injury
due to electric shock may otherwise result.
When selecting the mounting location for the
spotlight 10 , pay attention to the following:
Make sure the spotlight 10 illuminates the
desired area. You can move the spotlight
10
.
Make sure the motion detector 9covers
the desired area. The motion detector 9
has a maximum coverage range of 12 m,
with a coverage angle of about 180°
(depending on the mounting height – a
height of 1.8–2.5m is ideal) (see Fig. D).
Make sure the motion detector 9is not
illuminated at night by street lighting. This
can influence its functioning.
Unscrew hinge joint 4to detach the
mounting bracket 3from the spotlight 10 .
Utilize the mounting bracket
3
as a template
for making the position of the two outer drill
holes.
Then drill these holes and attach the mount-
ing bracket 3using the supplied dowels 1
and screws 2.
Now attach the spotlight 10 to the mounting
bracket 3using the previously removed
hinge joint 4, spring washer 5and flat
washer 6. Please make sure that the
spring washer 5and flat washer 6are
located as fig A.
Mounting the solar cell
Make sure you will not be drilling into electrical,
gas or water lines inside the wall. Use a power
drill to drill the holes into the brick wall. Always
observe all safety instructions for the power drill

10 GB
in the manual for the power drill. Death or injury
due to electric shock may otherwise result.
When selecting the mounting location for the
solar cell 12 , pay attention to the following:
The solar cell 12 needs to be as directly
exposed to sunlight as possible. Even partial
shading of the solar cell 12 during the day
can have a significant influence on charging.
Cardinal direction:
Orientation towards the south is optimum. Ori-
entations with slight deviations towards the west
are preferable to those with slight deviations
towards the east.
Horizontal orientation:
The horizontal orientation of the solar cell 12
depends on the geographic latitude of the
mounting location. In central Europe, and angle
of 30°–40° is ideal.
A mounting plate with 6 drill holes for screws is
located at the back of solar cell 12 .
Mount the solar cell 12 at the designated
location using the 4 small screws 13 and
dowels 15 . Depending on the topography
of the mounting location, you can freely
choose 4 of the drill holes in the mounting
plate; however, you should ideally select
2 drill holes on the right and left each (see
fig. B).
Then lay the solar cable plug 14 and con-
nect the plug to the solar electricity socket
8of the spotlight 10 .
The solar cell 12 is connected to the mount-
ing plate via a swivel joint. Orient the solar
cell 12 in a manner that ensures maximum
exposure to sunlight.
Preparing the product
for use
Switching the motion
detector on and off
Press the ON/OFF switch 11 into the ON
position to switch on the motion detector
9and red LED indicator of ON/OFF
switch 11 lights on at the same time.
Press the ON/OFF switch 11 into the OFF
position to switch off the motion detector
9and red LED indicator of ON/OFF
switch 11 extinguish at the same time.
Setting the lighting duration
Turn the rotary control TIME 19 on the
bottom of the motion detector 9clockwise
to increase the duration of the illumination
(see Fig. C). The lighting duration can be
adjusted within a time window of approx.
5s +/-2s to 5min +/-1min.
Adjusting the sensitivity of
the sensor
Turn the rotary control SENS 18 on the
bottom of the motion detector 9clockwise
to increase the sensitivity of the sensor (see
Fig. C).
Note: The motion detector 9responds to
heat radiation. When outdoor temperatures
are low, it is more sensitive to body heat
than when outdoor temperatures are warm.
Be sure to regulate the sensitivity of the
sensor over the course of the year.

11GB
Setting the daylight level
Turn the rotary control LUX 17 on the bottom
of the motion detector 9clockwise to
increase the daylight level. In position , the
motion detector 9only responds at pitch-
black night (approx. 5 lx). In position ,
the motion detector 9also responds at
daylight levels, as long as about 20,000lx
are not exceeded (see Fig. C).
Orientating the
motion detector
Loosen the fastening screws 7of the
motion detector 9.
Turn the rotary control LUX 17 to position
. Orient the motion detector 9into the
central region of the desired coverage area.
Move about through the coverage area un-
til you are satisfied with the response char-
acteristics of the motion detector 9. To find
the proper orientation, change the position
of the rotary control SENS 18 or the orien-
tation of the motion detector 9.
Re-tighten the fastening screws 7to fix the
adjustment.
Turn the rotary control LUX 17 to the desired
position. These can be determined during
the dawn or twilight hours during which the
spotlight 10 should respond. Slowly turn
the rotary control LUX 17 clockwise until it
reacts to movement within the coverage area.
Cleaning and storage
Press the ON/OFF switch 11 into the OFF
position if you will not be using the product
and want to store it.
Check the motion detector 9and the solar
cell 12 for dirt regularly. If dirt or is present,
remove it to guarantee flawless function of
the product.
During the winter, keep the product and
especially the solar cell 12 free from snow
and ice.
Clean the product with a lint-free, slightly
moist cloth and mild cleaning agent.
Troubleshooting
=Fault
=Cause
=Solution
=The product does not switch on.
=The ON/OFF switch 11 is in the
OFF position.
=Press the ON/OFF switch 11 into the ON
position and red LED indicator of ON/OFF
switch 11 lights on at the same time.
=The rotary rotary control LUX 17 is adjusted
too dark.
=Adjust the rotary control LUX 17 so it is
brighter.
=The motion detector 9is dirty or is incor-
rectly oriented.
=Clean the motion detector 9or reorient it.
=The sensitivity of the motion detector 9is
too low.
=Readjust the sensitivity of the motion detec-
tor 9(see section “Adjusting the sensitivity
of the sensor”).

12 GB
=The rechargeable battery is discharged.
=Charge the rechargeable battery (see sec-
tion “Charging the rechargeable battery”).
=The product also switches on at
bright.
=The rotary control LUX 17 is adjusted too
bright
=Adjust the rotary control LUX 17 so it is
darker.
=The light flickers.
=
The rechargeable battery is almost discharged.
=Charge the rechargeable battery (see sec-
tion “Charging the rechargeable battery”).
=The rechargeable battery loses its
charge after a short time.
=The plug connection of the solar cell 12
and spot light 10 has come loose.
=Refasten the plug connection at the product.
=The solar cell 12 is dirty.
=Clean the solar cell 12 .
=The solar cell 12 is unfavourably oriented.
=Re-align the solar cell 12 (see section
“Mounting the solar cell”).
Disposal
The packaging is made entirely of recyclable
materials, which you may dispose of at local
recycling facilities.
b
a
Observe the marking of the packag-
ing materials for waste separation,
which are marked with abbreviations
(a) and numbers (b) with following
meaning: 1–7: plastics/20–22:
paper and fibreboard/80–98: com-
posite materials.
The product and packaging materi-
als are recyclable, dispose of it sepa-
rately for better waste treatment. The
Triman logo is valid in France only.
Contact your local refuse disposal
authority for more details of how to
dispose of your worn-out product.
To help protect the environment,
please dispose of the product prop-
erly when it has reached the end of
its useful life and not in the household
waste. Information on collection points
and their opening hours can be ob-
tained from your local authority.
Faulty or used batteries/rechargeable batteries
must be recycled in accordance with Directive
2006/66/EC and its amendments. Please return
the batteries/rechargeable batteries and/ or
the product to the available collection points.
Environmental damage
through incorrect disposal of
the batteries / rechargeable
batteries!
Batteries/rechargeable batteries may not be
disposed of with the usual domestic waste. They
may contain toxic heavy metals and are subject
to hazardous waste treatment rules and regula-
tions. The chemical symbols for heavy metals
are as follows: Cd = cadmium, Hg = mercury,
Pb = lead. That is why you should dispose of
used batteries/rechargeable batteries at a lo-
cal collection point.

13GB
Warranty
The product has been manufactured to strict
quality guidelines and meticulously examined
before delivery. In the event of product defects
you have legal rights against the retailer of this
product. Your legal rights are not limited in any
way by our warranty detailed below.
The warranty for this product is 3 years from the
date of purchase. Should this product show any
fault in materials or manufacture within 3 years
from the date of purchase, we will repair or re-
place it – at our choice – free of charge to you.
The warranty period begins on the date of pur-
chase. Please keep the original sales receipt in
a safe location. This document is required as
your proof of purchase. This warranty becomes
void if the product has been damaged, or used
or maintained improperly.
The warranty applies to defects in material or
manufacture. This warranty does not cover
product parts subject to normal wear, thus pos-
sibly considered consumables (e.g. batteries)
or for damage to fragile parts, e.g. switches,
rechargeable batteries or glass parts.

14 HU
Az alkalmazott piktogramok jelmagyarázata................................. Oldal 15
Bevezető............................................................................................................................. Oldal 15
Rendeltetésszerű használat................................................................................................... Oldal 15
Alkatrészleírás........................................................................................................................ Oldal 15
A csomag tartalma................................................................................................................. Oldal 16
Műszaki adatok ..................................................................................................................... Oldal 16
Biztonsági tudnivalók ............................................................................................. Oldal 16
Az elemekre/akkukra vonatkozó biztonsági tudnivalók.................................................... Oldal 17
Működésmód.................................................................................................................. Oldal 17
Az akkumulátor töltése......................................................................................... Oldal 17
Szerelés ............................................................................................................................... Oldal 18
A spot szerelése..................................................................................................................... Oldal 18
A napelem felszerelése.......................................................................................................... Oldal 18
Üzembe helyezés........................................................................................................ Oldal 19
Mozgásjelző be-/kikapcsolása ........................................................................................... Oldal 19
Világítási időtartam beállítása............................................................................................... Oldal 19
A szenzor érzékenységének a beállítása............................................................................. Oldal 19
Fényérzékenység beállítása.................................................................................................. Oldal 19
A mozgásjelző beálltása....................................................................................................... Oldal 20
Tisztítás és tárolás....................................................................................................... Oldal 20
Hibák elhárítása.......................................................................................................... Oldal 20
Mentesítés ......................................................................................................................... Oldal 21
Garancia............................................................................................................................. Oldal 21

15HU
Az alkalmazott piktogramok jelmagyarázata
Volt, egyenáram III. érintésvédelmi osztály
A mozgásérzékelő hatótávolsága
kb. 12m (az időjárástól függ) Fröccsenő víz ellen védett (IP44)
LED élettartama Elforgatható mozgásérzékelő
Napelemes LED reflektor
Bevezető
Gratulálunk új termékének vásárlása alkalmából.
Ezzel a döntésével vállalatunk értékes terméke
mellett döntött. A használati utasítás ezen termék
része. A biztonságra, a használatára és a meg-
semmisítésre vonatkozó fontos tudnivalókat tar-
talmazza. A termék használata előtt ismerje meg
az összes használati és biztonsági tudnivalót.
A terméket csak a leírtak szerint és a megadott
felhasználási területeken alkalmazza. A termék
harmadik személy számára való továbbadása
esetén kézbesítse vele annak a teljes dokumen-
tációját is.
Rendeltetésszerű használat
A termék kültéri használatra készült. A terméket
csak magánháztartásokban történő és nem kö-
zületi felhasználásra, vagy egyéb alkalmazásra
szánták.
Alkatrészleírás
1Tipli (szerelőanyga a spothoz, Ø 9mm)
2Csavar (szerelőanyag a spothoz,
Ø 6 x 40mm)
3Szerelési rögzítő
4Forgóizület
5Rugótárcsa
6Alátétlemez
7Rögzítőcsavar
8Napelemes konnektor
9Mozgásjelző
10 Spot
11 BE-/KI-kapcsoló
12 Napelem
13 Çsavar (szerelőanyag a napelemhez,
Ø 4 x 34mm)
14 Napelemes vezeték dugója
15 Tipli (szerelőanyag a napelemhez,
Ø 6mm)
16 Iránytű
17 LUX szabályozógomb
18 SENS szabályozógomb
19 TIME szabályozógomb

16 HU
A csomag tartalma
Közvetlenül a kicsomagolás után vizsgálja
meg a csomag teljességét, valamint a termék
kifogástalan állapotát.
1 Spot
1 Napelem
2 Csavar (szerelőanyag a spothoz,
Ø 6 x 40mm)
4 Csavar (szerelőanyag a napelemhez,
Ø 4 x 34mm)
2 Tipli (szerelőanyag a spothoz, Ø 9mm)
4 Tipli (szerelőanyag a napelemhez, Ø 6mm)
1 Használati útmutató
Műszaki adatok
Üzemi feszültség: 7,4V
Lítium-ion Akku: 7,4 V , 1800 mAh
(nem cserélhető)
LED-ek: 50 x 0,2W
Érintésvédelmi
osztály: III./
Napelem: monokristály,
3,5W/14,5 V
Alkonyati kapcsoló: állítható
kb. 5lx–20.000lx között
Világítás tartama: állítható 5s +/-2s és
5min +/-1min között
Spot:
Mozgásjelző: hatótávolság: max. 12m,
látószög: kb. 180°
Védettség: IP44 (fröccsenő vízzel
szemben védett)
Súly: kb. 480g
Méretek: kb. 15 x 14,8 x 12,4 cm
Kivetítési felület: max. 15 x 14,8 cm
Szerelési magasság: max. 1,8–2,5m
Biztonsági tudnivalók
ÉLET-
ÉS BALESETVESZÉLY KIS-
GYEREKEK ÉS GYEREKEK
SZÁMÁRA! Soha ne hagyja a gyerekeket
felügyelet nélkül a csomagolóanyaggal.
A csomagolóanyagok miatt fulladásveszély
áll fenn. A gyerekek gyakran alábecsülik a
veszélyeket. Tartsa a gyerekeket a terméktől
mindig távol.
ÉLETVESZÉLY! Szerelés közben tartsa a
gyermekeket távol a munkaterülettől. A szál-
lítmány számos csavart és más kis részt
tartalmaz. Ezek lenyelése, vagy belégzése
életveszélyes lehet.
A terméket 8 éves kor feletti gyermekek,
valamint korlátozott fizikai, érzékszervi
vagy szellemi képességgel élő vagy nem
megfelelő tapasztalattal és tudással rendel-
kező személyek csak felügyelet mellett, illetve
a termék biztonságos használatára vonat-
kozó felvilágosítás és a lehetséges veszélyek
megértése után használhatják. A gyermekek
nem játszhatnak a termékkel. A tisztítást és
az ápolást gyermekek felügyelet nélkül nem
végezhetik.
Ne használja a terméket, ha bármiféle
károsodást fedez fel rajta.
Az izzók nem cserélhetők.
Amennyiben az izzó élettartama végén kiik-
tatódik, úgy az egész terméket ki kell cserélni.
0,5m
TŰZVESZÉLY! A terméket a
megvilágítandó anyagtól legalább
0,5m-re szerelje fel. A túlzott
hőfejlődés tűz kitöréséhez vezethet.

17HU
Az elemekre/akkukra
vonatkozó biztonsági
tudnivalók
ÉLETVESZÉLY! Tartsa távol az elemeket/
akkumulátorokat a gyermekektől. Lenyelés
esetén azonnal forduljon orvoshoz!
ROBBANÁSVESZÉLY! Soha
ne töltse a nem feltölthető eleme-
ket. Az elemeket/akkukat tilos
rövidre zárni és/vagy felnyitni. Annak
következménye túlhevülés, tűzveszély vagy
a kihasadásuk lehet.
Soha ne dobja az elemeket/ akkukat tűzbe
vagy vízbe.
Ne tegye ki az elemeket/akkukat mechani-
kai terhelésnek!
Az elemekre/akkukra kifolyásának
kockázata
Kerülje a szélsőséges körülményeket és hő-
mérsékleteket, mint pl. fűtőtestek/közvetlen
napsugárzás, amelyek hatással lehetnek az
elemekre/ akkukra.
Ha az elemek/akkumulátorok kifolytak,
kerülje el bőr, a szemek és a nyálkahártyák
vegyszerekkel való érintkezését! Azonnal
mossa le az érintett helyet tiszta vízzel és
forduljon orvoshoz!
VISELJEN VÉDŐKESZTYŰT!
A kifutott, vagy sérült elemek/
akkuk a bőrrel érintkezve felmar-
hatják azt. Ezért ilyen esetben mindenképpen
húzzon megfelelő védőkesztyűt!
Ez a termék beépített akkumulátorral rendel-
kezik, melyet a felhasználó nem cserélhet. Az
akku cseréjét, vagy kivételét a veszélyezte-
tések elkerülése érekében csak a gyártó vagy
a vevőszolgálat, ill. egy hasonlóan képzett
személy végezheti. A megsemmisítés során
utalni kell arra, hogy a termékben akkumu-
látor található.
Működésmód
A napelem 12 a Nap által sugárzott energiát
elektromos energiává változtatja és azta csatla-
koztatott napelemes konnektoron 8keresztül
a beépített akkuban tárolja. Teljesen feltöltött
akkumulátorral a világítási időtartam kb. 100perc.
Az első üzembevétel előtt az akkumulátort telje-
sen fel kell tölteni (lásd az „Akkumulátor töltése“
c. fejezetet).
Az akkumulátor töltése
A kiszállításnál az akku teljesen fel van töltve.
Raktározás miatt előfordulhat, hogy az akkumu-
látor az üzembevételkor részben már kisült. Ezért
az első üzembevétel előtt töltse fel teljesen az
akkumulátort.
Akkumulátor töltése napelemmel
Állítsa a BE-/KI-kapcsolót
11
OFF helyzetbe,
a BE-/KI-kapcsoló piros LED-kijelzője 11
egyidejűleg kialszik annak érdekében, hogy
ne hátráltassa a töltési folyamatot a termék
bekapcsolásával.
Dugja a napelem vezetékének napelemes
csatlakozódugóját 14 a spot 10 napelemes
konnektorába 8. Helyezze el a napelemet
12 a „Napelem 12 felszerelése“ fejezetben
leírtak szerint.
Tudnivaló: 4 - 6 nap múlva jó napsugár-
zás esetén az akku újra fel van töltve. A töltési
folyamat időtartama függ az akku töltöttségi
szintjétől, valamint a napsugárzás minősé-
gétől.

18 HU
Szerelés
Tudnivaló: Távolítsa el teljesen a csomagoló-
anyagot. A szerelés előtt döntse el, hova akarja
szerelni a napelemet 12 és a spotot 10 . A nap-
elem 12 és a spot 10 egymástól függetlenül is
felszerelhető, a szerelét követően ugyanakkor
össze kell őket kötni a napelem 12 kb. 5 m-es
vezetékével. A szerelést követően úgybhelyezze
el a vezetket, hogy az semmilyen mechanikai
terhelésnek ne legyen kitéve. A hálózati vezeték
rögzítéséhez használjon a kereskedelemben
kapható szerelőanyagokat, úgmint vezetékkap-
csolt, vagy kábelvezetőt, hogy elkerülje a vezeték
szigetelésének megsérülését.
Tudnivaló: A mellékelt szerelőanyag a szok-
ványos téglafalakhoz megfelelő. Eltérő alapoknál
előfordulhat, hogy más rögzítő anyagokra lesz
szüksége. Adott esetben kérjen tanácsot egy
szakembertől.
A spot szerelése
Bionyosodjon meg róla, hogy fúrás közben nem
ütközik elektromos-, gáz-, vagy vízvezetékbe.
Használjon egy fúrógépet a falba történő lyuk-
fúráshoz. Tartsa be a fúrógép Használati- és
biztonsági utasításában található utasításokat.
Különben áramütés általi élet-, vagy sérülésveszély
fenyeget.
A spot 10 szerelési helyének megválasztásakor
ügyeljen a következőkre:
Bizonyosodjon meg róla, hogy a fényszó-
rója 10 bevilágítsa a kívánt területet. Tudja
mozgatni a spotot 10 .
Bizonyosodjon meg róla, hogy a mozgás-
jelző 9bevilágítsa a kívánt területet. A
mozgásjelző 9hatótávolsága max. 12m
kb. 180°-os befogószögnél (a szerelési
magasságtól függően– ideális az 1,8–
2,5m-es magasság) (lásd a D ábrát.).
Ügyeljen arra, hogy a mozgásérzékelőt 9
éjszaka ne világítsa meg az utcai lámpa.
Ez hátrányosan befolyásolná a működést.
Csavarozza ki a forgókart
4
hogy levehesse
a szerelésrögzítést 3a spotról 10 .
Használja a szerelésrögzítőt 3, a két külső
furat megjelöléséhez.
Fúrja ki a lyukakat és rögzítse a szerelésrög-
zítőt 3a melléékelt tiplikkel 1és csava-
rokkal 2.
Ezután rögzítse a spotot 10 a szerelésrög-
zítőhöz 3a korábban eltávolított forgókar-
r
al
4
, rugókkal -
5
és alátétlemezekkel
6
.
Bizonyosodjon meg arról, hogy a rugó 5
és az alátétlemez 6az A-ábrán látható
módon van elhelyezve.
A napelem felszerelése
Bionyosodjon meg róla, hogy fúrás közben nem
ütközik elektromos-, gáz-, vagy vízvezetékbe.
Használjon egy fúrógépet a falba történő lyuk-
fúráshoz. Tartsa be a fúrógép Használati- és
biztonsági utasításában található utasításokat.
Különben áramütés általi élet-, vagy sérülésve-
szély fenyeget.
A szolárcella 12 felszerelési helyének kiválasz-
tásakor a következőkre ügyeljen:
A napelem 12 lehetőleg közvetlen napsu-
gárzást igényel. A nap során akár csak
részben leárnyékolt napelem 12 is hátrá-
nyosan befolyásolja töltést.

19HU
Égtájakra irányítás:
Optimális a déli irányba állítás. A beállítást
inkább kis eltéréssel nyugat felé végezze,
mintsem kis eltéréssel kelet felé.
Horizontális beállítás:
A szolárcella 12 horizontális beállítása függ a
felszerelési hely geográfiai szélesség fokától.
Közép-Európában az ideális szög 30°–40°.
A 6 furatos szerelőlap a napelem 12 hátolda-
lán található.
Szerelje fel a napelemet 12 a számára
kiválasztott helyre. Ehhez használja a 4 kis
csavart
13
és a tipliket
15
. A szerelés helyétől
függően használhatja a négy legmegfelelőbb
furatot a szerelőlapon, ideális esetben ezek
a két-két szélső furat a bal- és jobb oldalon
(lásd B- ábra).
Ezután fektesse le a napelem vezetékének
napelemes csatlakozódugóját 14 és dugja
azt a spot 10 napelemes konnektorába 8.
Csatlakoztassa a napelemet 12 a sze-
relőlaphoz a forgokaron keresztül. Állítsa
be a napelemet 12 úgy, hogy azt lehetőleg
közvetlenül érje a napsugárzás.
Üzembe helyezés
Mozgásjelző be-/
kikapcsolása
Á
llítsa a BE-/KI-kapcsolót
11
ON helyzetbe
a mozgásérzékelő 9bekapcsolásához;
a BE-/KI-kapcsoló piros LED-kijelzője 11
egyidejűleg világít.
Tolja a BE- / KI-kapcsolót 11 OFF helyzetbe
a mozgásérzékelő 9kikapcsolásához; a
BE-/KI-kapcsoló piros LED-kijelzője 11
egyidejűleg kialszik.
Világítási időtartam
beállítása
A világítási időtartam növeléséhez forgassa
el a mozgásérzékelő 9alján lévő TIME
szabályzógombot 19 az óramutató járásá-
val megegyező irányba (lásd C ábra). A
világítási időtartamot kb. 5 másodperc
+/-2 mp és 5 perc +/-1 perc között szabá-
lyozhatja.
A szenzor érzékenységének
a beállítása
Fordítsa a SENS kapcsológombot 18 a
mozgásérzékelő 9alsó oldalán a szenzor
érzékenységének növeléséhez (lásd C ábra).
Tudnivaló: a mozgásjelző 9a hősugár-
zást érzékeli. Alacsonyabb külső hőmérsék-
letnél érzékenyebben reagál a testhőmér-
sékletre, mint magasabb külső hőmérsékle-
teknél. Adott esetben ügyeljen a szenzor
érzékenységének a beszabályozására az
évszakok változása során.
Fényérzékenység beállítása
Fordítsa a LUX kapcsológombot 17 a
mozgásérzékelő 9alsó oldalán a fényér-
zékenység növeléséhez. A helyzetben a
mozgásjelző 9csak sötét éjszaka reagál
(kb. 5 lx). A helyzetben a mozgásjelző
nappali fény mellet is reagál, mindaddig

20 HU
míg nem kerül túllépésre a kb. 20.000 lx
érték (lásd C ábra).
A mozgásjelző beálltása
Oldja ki a mozgásérzékelő 9rögzítőcsa-
varját 7.
Fordítsa a LUX- kapcsológombot 17 -hely-
zetbe. Állítsa be a mozgásjelzőt a kívánt
észlelési tartomány központi irányába.
Mozogjon az észlelési tartományban egé-
szen addig, míg elégedett nem lesz a moz-
gásjelző 9reagálásával. Ebből a célból
változtassa a SENS forgószabályozó 18
helyzetét vagy a mozgásjelző
9
beállítását.
Szorítsa vissza a rögzítőcsavart 7a beállí-
tások rögzítéséhez.
Fordítsa a LUX- kapcsológombot 17 a kívánt
helyzetbe. Számítsa ki ezt az alkonyat ide-
jében, amikor a spotnak 10 reagálnia kell.
Fordítsa lassan a LUX-állítógombot 17 az
óra járásával megegyezően, amíg az a be-
fogótartományban nem reagál a mozgásra.
Tisztítás és tárolás
Állítsa a BE-/KI- kapcsolót
11
OFF- helyzetbe,
ha már nem használja és tárolni szereté a
terméket.
Rendszeresen ellenőrizze a mozgásjelzőt 9
és a napelemet 12 szennyeződések szem-
pontjából. Szüntesse meg ezeket a termék
kifogástalan működése érdekében.
A terméket és különösen a napelemet 12
tartsa télen hó- és jégmentesen.
A terméket enyhén nedves, szöszmentes
kendővel és lágy tisztíószerrel tisztítsa.
Hibák elhárítása
=Hiba
=Ok
=Megoldás
=A termék nem kapcsol be.
= A BE-/Ki- kapcsoló 11 „OFF“ állásban van.
=Állítsa a BE-/KI-kapcsolót 11 ON helyzetbe
és a BE-/KIS-kapcsoló piros LED-kijelzője 11
egyidejűleg világít.
=A LUX-KAPCSOLÓGOMB 17 túl sötétre
van beállítva.
=Állítsa világosabbra a LUX-kapcsológombot
17 .
=Elszennyeződött a mozgásjelző 9vagy
helytelenül lett beállítva.
=Tisztítsa meg, vagy állítsa be újra a moz-
gásjelzőt 9.
=A mozgásjelző 9érzékenysége túl ala-
csony.
=Állítsa be újra a mozgásjelző 9érzékeny-
ségét (lásd „A szenzor érzékenységének
beállítása“ fejezetet).
=Az akkumulátor lemerült.
=Töltse fel az akkumulátort (lásd az „Akku-
mulátor töltése“ c. fejezetet).
= A termék világosban is bekapcsol.
=A LUX szabályozógomb 17 túl világosra
van beállítva.
= Fordítsa el a LUX- kapcsológombot 17 az
óra járásával ellentétesen.
=A fény vibrál.
=Az akkumulátor már majdnem lemerült.
=Töltse fel az akkumulátort (lásd az „Akku-
mulátor töltése“ c. fejezetet).
Table of contents
Languages:
Other LIVARNO Spotlight manuals

LIVARNO
LIVARNO 88651 User manual

LIVARNO
LIVARNO home 387731 2101 Quick guide

LIVARNO
LIVARNO Z31171 Technical specifications

LIVARNO
LIVARNO 1020-B User manual

LIVARNO
LIVARNO home 353560_2010 Technical specifications

LIVARNO
LIVARNO 1002-W Original instructions
LIVARNO
LIVARNO 375304 2101 Original instructions