Living & Co VFSLR-LC User manual

VFSLR-LC
Vacuum Food Sealer
Instruction Manual
0800 422 274
NZ N13275

2
0800 422 274
NZ
Contents
03 General Safety Instructions
06 Product Overview
08 Features
09 Getting Started
12 Instructions
15 Troubleshooting
17 Other Useful Information

3
0800 422 274
NZ
General Safety Instructions
IMPORTANT SAFETY INSTRUCTIONS
READ CAREFULLY AND KEEP FOR FUTURE REFERENCE
Read this manual thoroughly before first use, even if you are familiar with this
type of product. The safety precautions enclosed herein reduce the risk of fire,
electric shock and injury when correctly adhered to. Keep the manual in a safe
place for future reference, along with any completed warranty information,
purchase receipt and carton. If applicable, pass these instructions on to the next
owner of the appliance.
Always follow basic safety precautions and accident prevention measures
when using an electrical appliance, including the following:
Electrical Safety and Cord Handling
• Voltage: Make sure your outlet voltage and circuit frequency correspond to
the voltage stated on the appliance rating label.
• Adaptors: Do not use multiple electrical adaptors.
• Power cord: A short power supply cord is provided to reduce the risk resulting
from becoming entangled in or tripping over a longer cord. We recommend
avoiding the use of an extension cord, but if one must be used, exercise
due care in its use. Ensure that the marked electrical rating of the cord is no
less than that of the appliance. Arrange the longer cord so that it does not
drape over the benchtop or tabletop where it is capable of being tripped over,
snagged, or pulled on unintentionally, especially by children.
• Cord protection: Always handle the power cord with care. Do not kink,
bend, squash, strain or damage the power cord and protect it from sharp
edges and heat. Do not place the appliance on a power cord. Do not let it
touch hot surfaces (including the sealing strip of the appliance).
• Do not immerse: To protect against fire and electric shock, do not immerse
the cord, plug or the appliance itself in water or other liquid. Do not pour or
drip any liquids on the appliance or power cord. When liquids are spilled on
the appliance, immediately unplug the appliance and dry it to avoid risk of
electric shock or fire. Do not attempt to operate the appliance when liquids
are on or in the electrical section of the appliance.
• RCD: The installation of a residual current device (safety switch) is
recommended to provide additional safety protection when using electrical
appliances. It is advisable that a safety switch with a rated residual operating
current not exceeding 30mA be installed in the electrical circuit supplying the
appliance. See your electrician for professional advice.

4
0800 422 274
NZ
General Safety Instructions (Cont.)
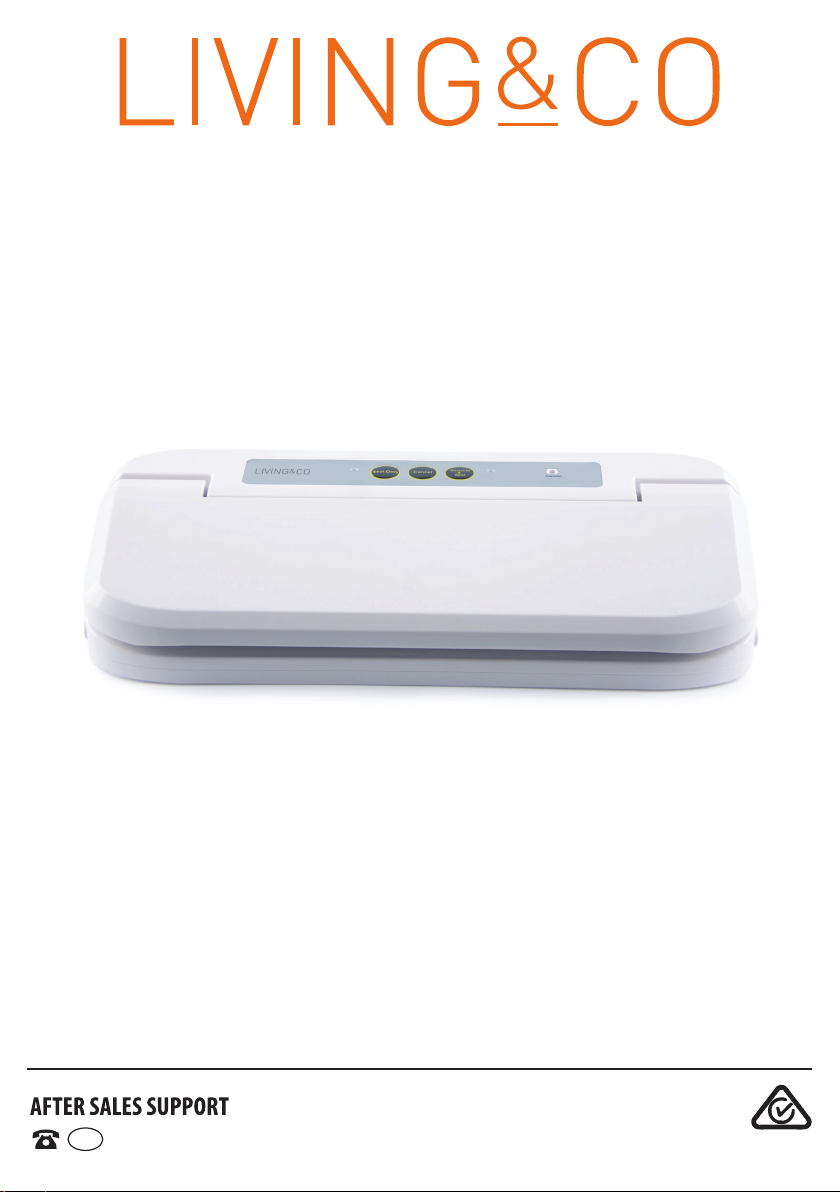
Usage Conditions and Restrictions
• Usage: This appliance is intended for indoor household use only. It is not
suitable for commercial/industrial use. Do not operate or store the appliance
in humid or wet areas or outdoors. Do not use it in moving vehicles.
• Purpose: Do not use the appliance for anything other than its intended
purpose, and only use it as described in this manual. Any other use,
especially misuse, can cause severe injuries or damage to the appliance.
• Usage restriction: The appliance is not intended for use by persons (including
children) with reduced physical, sensory or mental capabilities, or lack of expe-
rience and knowledge, unless they have been given supervision or instruction
concerning use of the appliance by a person responsible for their safety.
• Children: Supervise children to ensure they do not play with the appliance.
Do not let children operate this appliance! Close supervision is necessary
when this appliance is used near children. Do not let young children play with
the bags or packaging materials: Risk of suffocation!
• Disconnect: Never leave this appliance unattended when it is connected to
the power supply. Always unplug it and wait until the sealing strip has cooled
down before moving or cleaning the appliance, or after use. Do not grasp
the appliance at the open lid or power cord for moving the appliance. When
unplugging, grip by the plug, do not pull by the cord.
• Obstructions: To avoid any risk of fire, electric shock or overheating, do not
place any cloth or tissue under or on top of the appliance. Never place heavy
or hard objects on the appliance or any part of it. Do not place any foreign
substances (such as papers, unsuitable plastics, textiles or the like) on the
sealing surfaces, to avoid risk of fire and damage to the appliance.
• Work surface: To ensure safe and efficient operation, always place the
appliance on a level and stable work surface that is easily accessible, dry
and of sufficient size. Do not place the appliance near the edge of the table
or benchtop, or on a sloping surface, or where it can fall.
• Heat and moisture protection: Do not place the appliance on a wet or
hot surface, or near a heat source. If liquids spill onto the work surface,
immediately wipe them off.
• Clearances: During operation, leave at least 20cm free space at the sides of
the appliance and 1m above it for sufficient ventilation.
• Flammable liquids: Do not vacuum seal flammable liquids (e.g. alcoholic
beverages or solvents). Caused by low pressure, large amounts of liquid will
evaporate, thus building up a hazardous explosive mixture. Additionally, the
appliance will get damaged.

5
0800 422 274
NZ
General Safety Instructions (Cont.)
CAUTION: HOT! RISK OF BURNS!
• Take extreme care when using this appliance. It is designed for vacuum
packing food and other items. The sealing wire and vacuum pump are
powered electrically and the sealing wire gets hot during operation,
especially after repeated sealing processes. The heating starts as soon as
the sealing indicator is illuminated.
• Avoid touching the sealing wire immediately after operation with any parts of
your body or heat-sensitive items.
• After each sealing process, let the appliance cool down for at least
20 seconds (with the lid left open) before starting again.
• Plastic film rolls and bags: Only use the designated rolls of plastic film and
designated plastic bags with the appliance to avoid damage.
• Moving and storage: When moving or storing the appliance, close the lid to
protect the sealing wire and gaskets.
• Damage: Check the appliance, accessories and power cord regularly
for damage. Do not use the product if there are any signs of damage. A
damaged cord or plug must be replaced by the manufacturer or a qualified
person in order to avoid a hazard.
• Do not pick up or operate the appliance when the appliance, or any part of
it, has been damaged, or after it has malfunctioned. The appliance is likely
to be damaged if it has been subject to inadmissible strain (e.g. overheating,
mechanical or electric shock), or if there are any cracks, excessively frayed
or melted parts or distortions.
• In case of damage, immediately unplug the appliance and contact our after
sales support line to arrange return or repair of the damaged product.
• Repair and service: This appliance contains no user serviceable parts
contained within. Do not attempt to service this product yourself. Only have it
serviced by authorised personnel. Contact our after sales support centre for
advice.
• Liability: Improper installation and the use of accessory attachments or
spare parts not recommended by the appliance distributor may result in fire,
electric shock, personal injury and/or damage to the unit. We assume no
responsibility for any eventual damages caused by improper handling, faulty
use or noncompliance with these instructions.

6
0800 422 274
NZ
Product Overview
Parts list
1 Sealing Strip
2 Sealing Gaskets
3 Sealing Wire (Heat Strip)
4 Drip Tray
5 Vacuum Chamber
6 Release Button (one on each side)
7 Seal Only Button
2
1
4
4
5
3
6
8 Cancel Button
9 Vacuum & Seal Button
10 Hose Port for Vacuum Canister
(hose and canister are not included)
11 Lid
Plastic bags starter pack (not pictured)
7 8 9 10
11

7
0800 422 274
NZ
Product Overview (Cont.)
Seal Only Button
This button has three uses:
1. Creates a seal when making bags from a roll.
2. Immediately stops the vacuum process and begins sealing the bag,
preventing delicate foods from being crushed.
3. Creates a seal on a foil-lined food storage bag (such as a potato chip bag) to
keep food sealed airtight.
Cancel Button
Immediately stops the current function.
Vacuum & Seal Button
Vacuum seals food airtight; the appliance shuts off automatically.
Hose Port for Vacuum Canister
This is a connection port for the (optional) accessory hose and vacuum canister,
with which you can vacuum package food inside the canister.
Release Buttons
Pressing these buttons at the sides of the appliance opens the lid after the
sealing process is completed.

8
0800 422 274
NZ
Features
Introduction
• The process of vacuum sealing removes air from inside a bag and seals it
airtight, keeping the food inside fresh for longer in your fridge, freezer or
pantry.
• This Vacuum Food Sealer can be used with the supplied specially designed
plastic bags, or with specially designed rolls of plastic film (sold separately)
that you cut to size and then turn into bags for vacuum sealing.
• Using the appliance is easy, just cut the roll to size, seal it into a bag, add the
food and vacuum seal it for storage. The process is explained in detail in this
manual.
Key Features
• Sleek design with low noise during operation
• Wide sealing line (up to 3mm) prevents air leakage and keeps food
vacuumed sealed for longer
• Easy to lock: only requires light pressure on the lid to lock
• Easy to unlock: just press the two release buttons to unlock
• "Seal Only" function (for creating custom sized plastic bags)
• 30cm (max.) sealing width

9
0800 422 274
NZ
Getting Started
Unpacking
• This product has been packaged to protect it against transportation damage.
Unpack the appliance and remove all promotional materials and packaging
from around and inside the appliance but DO NOT remove any warning
labels or the appliance rating label.
• We recommend you keep the original packaging carton and materials in a safe
place. It will help prevent any damage if the product needs to be transported in
the future, and you can use it to store the appliance when it is not in use. In the
event the carton is to be disposed of, please recycle all packaging materials
where possible.
• Plastic wrapping can be a suffocation hazard for babies and young children,
so ensure all packaging materials are out of their reach and disposed of
safely.
• Read this manual to familiarise yourself with the appliance before first use.
Pay particular attention to the safety instructions on the previous pages.
• Check and ensure that the foam rubber sealing gaskets (in the base and lid
of the appliance) as well as the sealing strip are level and clean. Otherwise,
the appliance cannot generate a vacuum and/or close the bags airtight.
• Unwind the power cord to its full length and inspect it for damage. Do not
use the appliance if the cord or plug have been damaged or are not working
properly. In case of damage, contact our after sales support line for advice
on examination, repair or return of the damaged product.
• Insert the undamaged cord in the cable guide at the back of the base so it
can exit securely through the cut-out at the back of the base.
• Place the appliance on a convenient and dry surface with enough space in
front of the appliance for comfortable working.
• The appliance is now ready. Make sure you read and understand all
instructions and notes on the following pages before first use.

10
0800 422 274
NZ
Getting Started (Cont.)
IMPORTANT: READ BEFORE FIRST USE!
Bags and rolls
• Only use the supplied bags or the designated rolls with the appliance to
avoid damage. Any other plastic bags will melt on the sealing strip which in
turn will damage the sealing strip and prevent the generation of a vacuum.
• Keep the bags clean when vacuum sealing. Take care that no food particles,
liquids or grease are in the sealing section of the plastic bag. The brim of the
bag must be smooth and clean. Otherwise no vacuum can be generated.
• You cannot generate side seams with the appliance. The pre-sealed seams
of the designated rolls are welded in a special way for usage with the appliance.
Filling the bags
• Do not overfill the plastic bag. Leave a free space of about 6cm above the
food. Otherwise the appliance cannot generate a vacuum, or liquids or small
parts of food can be sucked in (especially if powdery or finely ground) and
damage the pump. Always take special care when vacuum sealing runny food
or beverages.
• Do not leave too much air inside the bag. Reduce air in the bag by
squeezing it out carefully before vacuum sealing. Too much air inside the bag
may overload the vacuum pump and prevent the generation of a vacuum.
Food storage and safety
• IMPORTANT: Vacuum packaging is NOT a substitute for refrigeration
or freezing. Any perishable foods that require refrigeration must still be
refrigerated or frozen after vacuum packaging.
• Only vacuum seal fresh edible foods that are well within their shelf life.
Once food has begun to deteriorate, vacuum packaging may only slow the
deterioration process. Vacuum sealing cannot prevent mould growth. Other
disease causing microorganisms can still grow in low oxygen environments
and may require further measures for elimination.
Cooking, thawing and reheating food in a vacuum bag
• Simmering food in a vacuum bag helps retain its flavour and it helps with the
clean-up as well ... no dirty saucepans.
• When reheating food in the microwave using your vacuum bags, always
puncture open the bag to allow hot air to escape. Alternatively, reheat the vacu-
um sealed food package by placing it in water at a low simmer below 75°C.
IMPORTANT: Always thaw food in the refrigerator, microwave or in hot water –
do not thaw perishable food at room temperature.

11
0800 422 274
NZ
IMPORTANT: READ BEFORE FIRST USE!
Food Preparation Tips
• Pre-freeze liquids or food with a high water content (e.g. sauces, beverages,
soups, stock) in a casserole dish, loaf pan or ice cube tray before vacuum
sealing. Then stack the bags in the freezer. This way no liquid can get sucked
into the vacuum pump and the food will not get squashed.
• Should any liquid get sucked in, IMMEDIATELY press the Cancel button and
unplug the appliance to avoid risk of electric shock and damage to the appli-
ance. Clean and dry the appliance thoroughly.
• When vacuum sealing powdery or finely ground food like flour, it is best to
use the food's original packaging inside the vacuum bags, or place a paper
filter bag on top of the food. Otherwise the fine powder could get sucked into
the machine and cause enough damage to shorten the life of the Vacuum
Food Sealer.
• Before vacuum sealing fish, remove its innards.
• We recommend pre-freezing meat and fish for 1–2 hours before vacuum
sealing. This helps retain the juice and shape, and provides for a better seal.
If you cannot pre-freeze it, place a folded paper towel between the food and
top of the bag, but below the seal area. Leave the paper towel in the bag to
absorb excess moisture and juices during the vacuum sealing process.
• When vacuum sealing food with sharp edges and points like fish bones and
hard shells, carefully wrap this type of food with kitchen paper before vacuum
sealing. Sharp edges and points may penetrate and tear the bag.
• Vegetables should be blanched to stop the enzyme action that could lead to
loss of flavour, colour and texture during storage. To blanch vegetables, place
them in simmering water, or in a microwave, until they are cooked but still
crisp. (Blanching times can range from 1–2 minutes for leafy greens and peas,
3–4 minutes for snap peas, sliced zucchini or broccoli, about 5 minutes for
carrots, and 7–11 minutes for corn on the cob.) After blanching, immerse the
vegetables in cold water to stop the cooking process.
• Pre-freeze the vegetables for 1–2 hours, then vacuum seal them in the
portion size you require and return to the freezer for storage.
• When vacuum sealing cheese, make the bag just a little longer than needed,
then you can re-seal the bag after each use.
• IMPORTANT: DO NOT vacuum seal soft cheese, fresh mushrooms,
onions and garlic due to the risk of anaerobic bacteria. Other foods not
suitable for vacuum sealing include carbonated beverages (such as
lemonade), biscuits made from beaten egg whites and meringues.
Getting Started (Cont.)

12
0800 422 274
NZ
Instructions
IMPORTANT!
Only use the designated bags or rolls for vacuum packing. Any other bags will
melt on the sealing strip, damaging the sealing strip and/or the sealing gaskets.
When using the designated roll, start the process by closing the bottom of the
bag. (When using one of the supplied designated bags, start at Step 2, opposite.)
Step 1: Creating a custom sized plastic bag (closing the bottom of a bag)
1. Pull enough bag material off the roll – not too short – and cut it in a straight
line using a pair of scissors or a sharp knife.
NOTE: You will need a sufficient length of plastic film to cover the food plus
an extra 8cm: approximately 6cm for sealing the bag above the food
and 2cm for sealing the bottom of the bag.
2. Get the appliance ready for use as described on page 9 and plug it into an
appropriate power point. Open the lid. (If it is locked, press the two release
buttons at the side to unlock.)
3. Ensure the gaskets are clean and that no foreign substances are stuck on the
sealing wire.
4. Place one open end of the cut bag on the sealing wire. The plastic film does
not need to extend over the black sealing gasket into the vacuum chamber,
because there is no need to operate the vacuum pump for sealing the bag.
NOTE: To get an airtight seam, the length of plastic film must be completely
clean and dry and must lie smoothly on the sealing wire.
5. Close the lid and press it down firmly on both front corners. Check and ensure
that the lid is securely locked and the lock has engaged at both sides – you
will hear a clicking sound when the lid snaps shut.

13
0800 422 274
NZ
Instructions (Cont.)
NOTE: The sealing process will NOT work properly unless both sides of the
lid are properly locked.
6. Press the Seal Only button to create a custom sized bag. The appliance
will start operating and the sealing indicator will illuminate red and remain
illuminated until the bottom of the bag is sealed.
NOTE: If the sealing indicator does not light up after pressing the Seal Only
button, check and make sure that the lid is closed properly.
7. When the indicator has turned off, press the Release buttons on both sides
of the appliance to open the lid and take out the plastic bag.
8. Check if the seam is even and smooth. The bottom of the bag is sealed
properly if there is a smooth line with no interruption and no crease on the
seam. If in doubt, just place another seal near the first one using the Seal
Only button.
CAUTION!
• The sealing wire could get hot after repeated sealing processes. Do not
touch it with any parts of your body or heat sensitive items immediately
after sealing.
• Always let the appliance cool down for at least 20 seconds with the lid
left open after each sealing process to avoid overheating.
• The appliance is not intended for continuous operation. If sealing more
than 20 bags in a row, wait at least 25 minutes before resuming use of your
appliance.
Step 2: Vacuum sealing food in a plastic bag
1. After sealing the bottom of the bag and ensuring that the seam is airtight,
you can fill the bag. Make sure you have read the ‘IMPORTANT' notes on
pages 10–11 before starting the vacuum sealing process.
2. Do not overload the plastic bag. Leave approximately 6cm of free space
above the food, otherwise the appliance cannot generate a vacuum. Pre-
freeze moist food before vacuum packing, this way no liquids can get sucked
into the appliance and the food will not get squashed.
3. Check and ensure the drip tray is properly installed and its brim is flush with
the foam rubber seal of the vacuum chamber.

14
0800 422 274
NZ
Instructions (Cont.)
3. Place the open end of the bag in the middle of the vacuum chamber, in
between the sealing gaskets. If you wish to generate a vacuum, the bag must
reach into the vacuum chamber.
NOTE: Ensure no food particles, liquids or grease are in the sealing section
of the bag. Otherwise the seam could leak.
4. Close the lid and press it down firmly on both front corners. Check and
ensure that the lid is securely locked and the lock has engaged at both sides.
5. Press the Vacuum Seal button to start the vacuum sealing process. The
respective indicator illuminates green, the vacuum pump is audibly working
and the plastic film clings to the content of the bag. As soon as vacuum
sealing is finished, the sealing indicator illuminates red. The complete
process is finished when both indicators switch off.
6. Press the Release buttons on either side of the appliance to open the lid and
take out the vacuum sealed plastic bag.
7. Check if the seam is even and smooth. The bag is sealed properly if there is
a smooth line with no interruption and crease on the seam. If in doubt, just
place another seal near the first one using the Seal Only button.
8. Unplug the appliance when you have finished operating.
NOTE
• Avoid injury and damage – always observe the 'IMPORTANT' notes on
pages 10–11.
• If there are any liquids (e.g. condensate) or parts of the food in the drip
tray, take it out and clean it before starting the vacuum pump again.

15
0800 422 274
NZ
Troubleshooting
If any problems occur during operation, check for a solution in the table below.
Problem Possible cause and solution
Nothing happens when I
press the Vacuum & Seal
button.
• Check and ensure that the appliance is properly
connected to a power outlet.
• Ensure that the power outlet works. Connect
another appliance to the same outlet and check.
• Check whether the power cord and plug are
defective. In such a case, contact our after sales
support line for advice on repair or return.
• Make sure the bag is positioned correctly down in
the vacuum chamber.
• Press down on both sides of the lid and make sure
it is locked in place.
• Wait 25 minutes to allow the appliance to cool
down, and then try it again.
The appliance does not
generate a full vacuum.
Check and ensure that:
• The bag is clean and dry, properly positioned
and the end of the bag extends into the vacuum
chamber.
• There are no pieces of food inside the plastic
bag in the sealing wire area. (Food with high
liquid contents may prevent the bag from sealing
properly. Cut the bag open, wipe the top inside of
the bag and then try to reseal it.)
• The bag has no gaps, folds, wrinkles or holes in it.
• The bag is not leaking. To check, dip the sealed
bag into water. If there are leaks, air will escape
when you put slight pressure on the bag. In such a
case, seal the bag again or use a new one.
• The black sealing gaskets of the vacuum chamber
are clean and in perfect condition.
The bag melts. • The sealing wire may have become too hot during
the sealing process. Allow the unit to cool for 20
seconds between uses. If the bag continues to
melt, allow the unit to cool with the lid open for 25
minutes before reusing.

16
0800 422 274
NZ
Troubleshooting (Cont.)
The appliance does not
seal the bag properly.
Check and ensure that:
• The bag is clean and dry, properly positioned
and the end of the bag extends into the vacuum
chamber.
• The bag has no gaps, folds, wrinkles or holes in it.
• The sealing strip area and gaskets are clean and dry.
• No food has spilled into the sealing area of the bag.
If food with high liquid contents prevents the bag
from sealing properly, cut the bag open, wipe the
top inside of the bag and then try to reseal it.
• No plastic has melted and is sticking on the
sealing strip and wire area. In such a case, unplug
the appliance, let it cool down and clean any
melted plastic off the sealing section.
• You’ve given the appliance time to cool down. Wait
20 seconds between seals.
After successfully vacuum
sealing food in a plastic
bag, the bag is losing its
vacuum. Air is seeping
back into the bag.
• Folds, crumbs, grease or moisture on the sealing
section of the bag can cause leaking. In such a
case, cut open the bag, clean the interior of the
bag in the section where you wish to seal it and
seal the bag again, or use an entirely new bag.
Partially freeze foods with excess liquids, prior to
vacuum sealing.
• Some foods (e.g. fresh fruit and vegetables) can
ferment and generate gases which may escape.
• Lack of refrigeration or changing storage
temperatures can cause food to deteriorate.
• Check whether the bag is leaking. To check, dip
the sealed bag into water. If there are leaks, air
will escape when you put slight pressure on the
bag. In such a case, seal the bag again or use a
new one.
• Ensure the sealing gaskets are still in their proper
place and in good condition.
If these suggestions do not help you solve your problem with the vacuum food
sealer, contact our after sales support line for advice.

17
0800 422 274
NZ
Other Useful Information
Cleaning and Care
CAUTION: HOT!
• Always unplug the appliance and let it cool down completely before cleaning.
• Do not touch the sealing wire shortly after operation.
• Always keep the appliance out of reach of young children.
WARNING: * Do not immerse the appliance or power cord in water or any other
liquids for cleaning, or spill any liquids on the appliance.
* Ensure that no liquids get into the interior of the appliance.
* Always wipe off spilled liquids immediately.
* Do not place the appliance or power cord in a dishwasher.
* Do not place the appliance on wet or damp surfaces.
* Do not use any abrasive cleaners, metal scouring pads or corrosive
chemicals (e.g. bleach) for cleaning.
• For easy cleaning, wipe the appliance clean after each use, as soon as it has
cooled down and is safe to touch. This way no leftover food will stick or burn
onto the sealing wire.
• Take out the drip tray and clean it in warm water with a little washing-up
detergent. Dry thoroughly before reinserting it into the vacuum chamber.
• Wipe the sealing gaskets, sealing strip and sealing wire with a soft cloth,
dampened with warm dishwater. Take particular care not to damage these
parts during cleaning.
• If necessary, carefully clean the exterior of the vacuum sealer and power
cord. Take care not to spill or drip water or any other liquids on the
appliance.
• After cleaning, let the appliance dry naturally before storage.

18
0800 422 274
NZ
Other Useful Information (Cont.)
Storage
WARNING!
Make sure the appliance is unplugged, clean and dry before storage.
• Always handle the power cord with care. Never knot, twist, pull, strain or
squeeze the power cord. To store the cord safely out of the way, loosely wind
it around the mountings in the cord storage area underneath the appliance.
• Store the appliance where it is clean, dry and safe from frost, direct sunlight
and inadmissible strain (mechanical or electric shock, heat, moisture) and
where it is out of reach of young children. We recommend storing it in its
original carton to protect it from dust.
• Place the appliance on a clean and stable surface where it cannot fall.
• Do not place any hard or heavy objects on the appliance or any part of it.
• We recommend storing any accessories (bags or rolls of plastic film) with the
appliance.
Service
• If the appliance requires service, contact our after sales support line for
advice. Do not attempt to open and repair the product yourself. Doing so will
void the warranty.
Technical Specifications
Model VFSLR-LC
Power supply 220-240VAC 50Hz
Power consumption 150W
Weight 1.9kg
Dimensions (mm) 390 x 160 x 85
Accessories included 5 x 220 x 300mm vacuum bags
CLASS II - DOUBLE INSULATED APPLIANCE
This symbol indicates that the appliance has been designed in such a way
that it does not require a safety connection to electrical earth (ground).

19
0800 422 274
NZ
Responsible disposal
At the end of its working life, do not throw this appliance out with your household
rubbish. Electrical and electronic products contain substances that can have
a detrimental effect on the environment and human health if disposed of
inappropriately. Observe any local regulations regarding the disposal of electrical
consumer goods and dispose of it appropriately for recycling. Contact your local
authorities for advice on recycling facilities in your area.
Other Useful Information (Cont.)

0800 422 274
NZ
Warranty
We pride ourselves on producing a range
of quality home appliances that are both packed with features
and completely reliable. We are so confident in our products,
we back them up with a 1 year warranty.
Now you too can relax knowing that you are covered.
Customer Helpline NZ: 0800 422 274
This Product is covered by 1 year warranty when
accompanied by proof of purchase.
V1.0
Table of contents
Other Living & Co Kitchen Appliance manuals