9
1 OH
2 OH
3 OH
4 OH
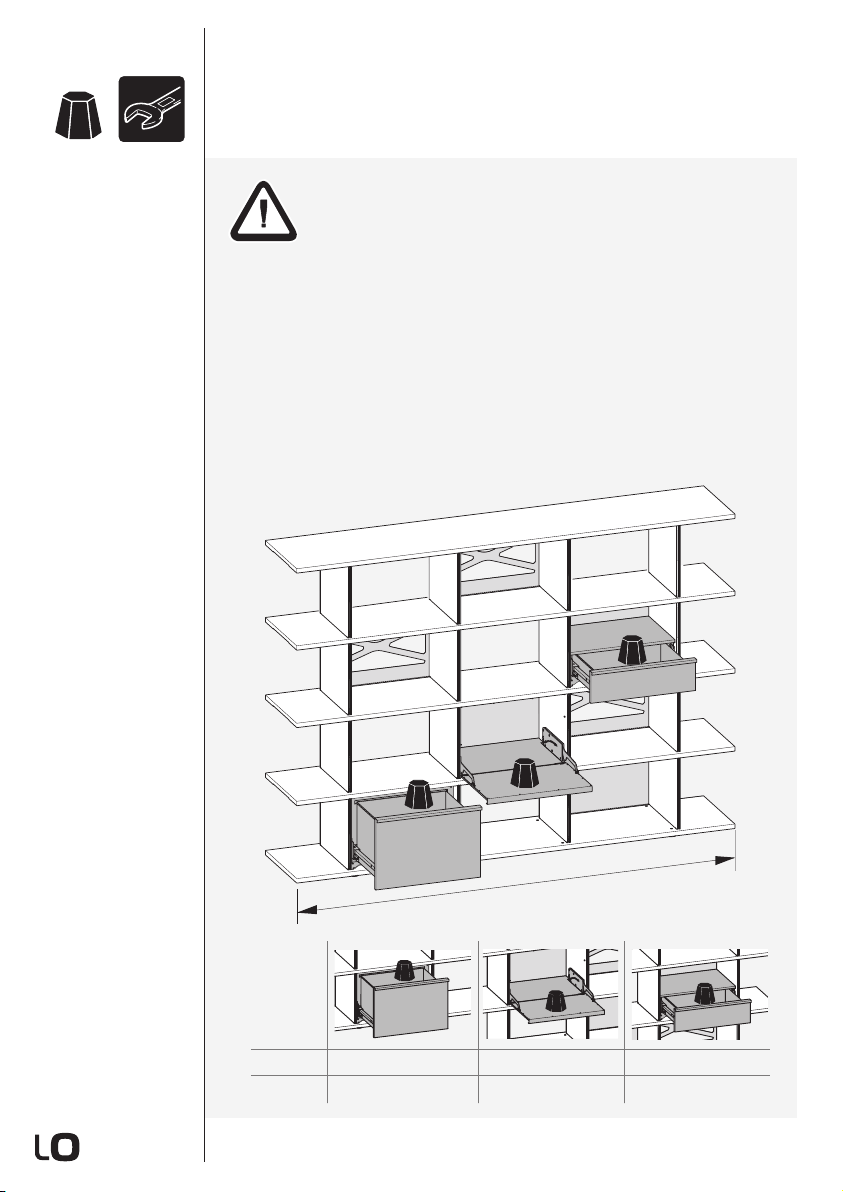
Schubladen,
Schubladeneinbau
Tiroirs,
montage des tiroirs
Cassetti,
inserimento cassetti
Drawers,
fitting drawers
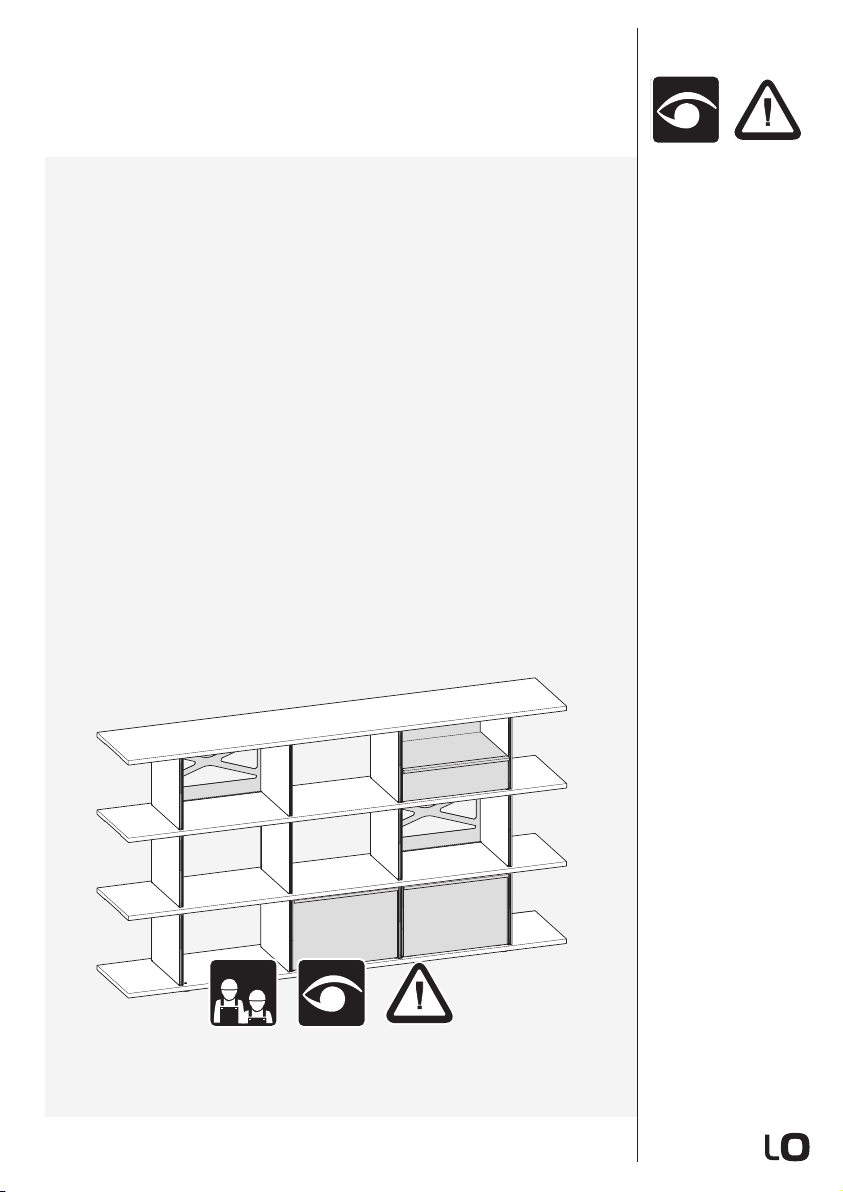
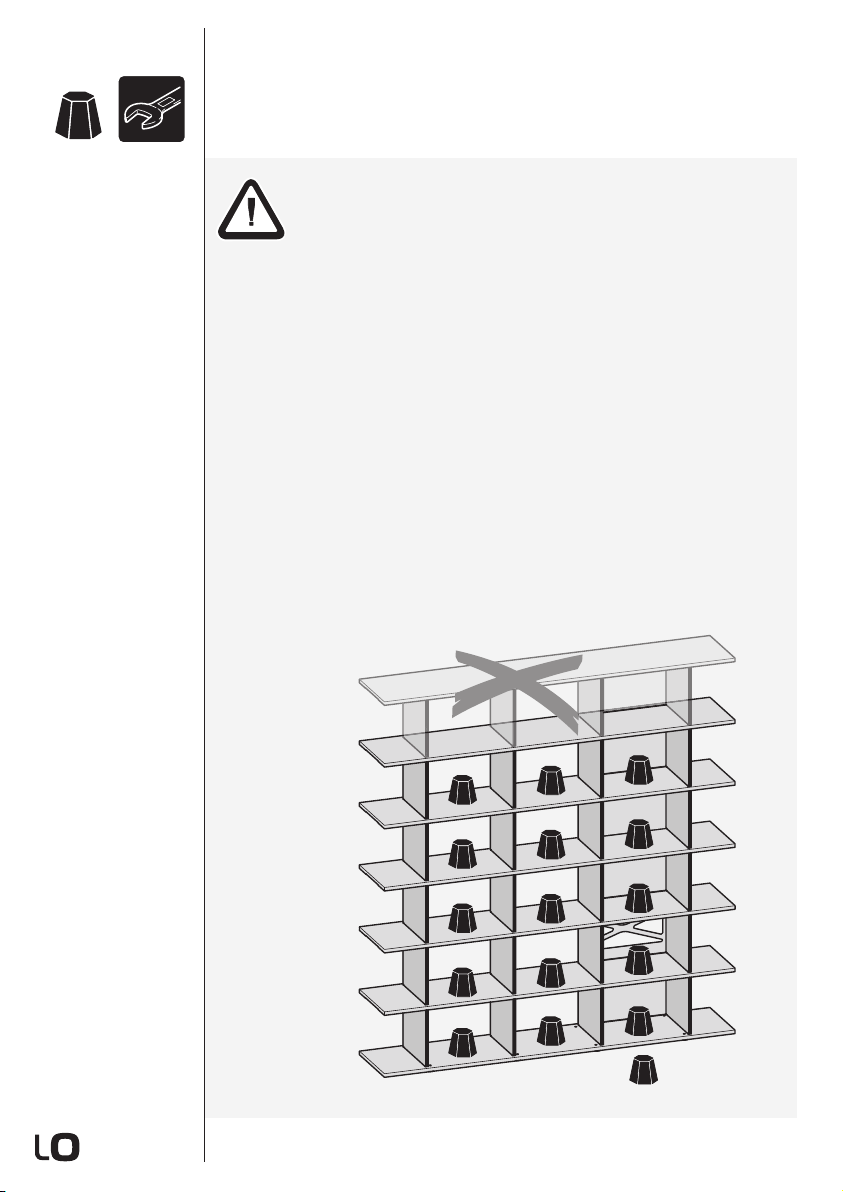
Schubladen dürfen maximal bis zu 3 OH und in 2/3 der Fächer mit
entsprechenden Gegengewichten eingebaut werden.
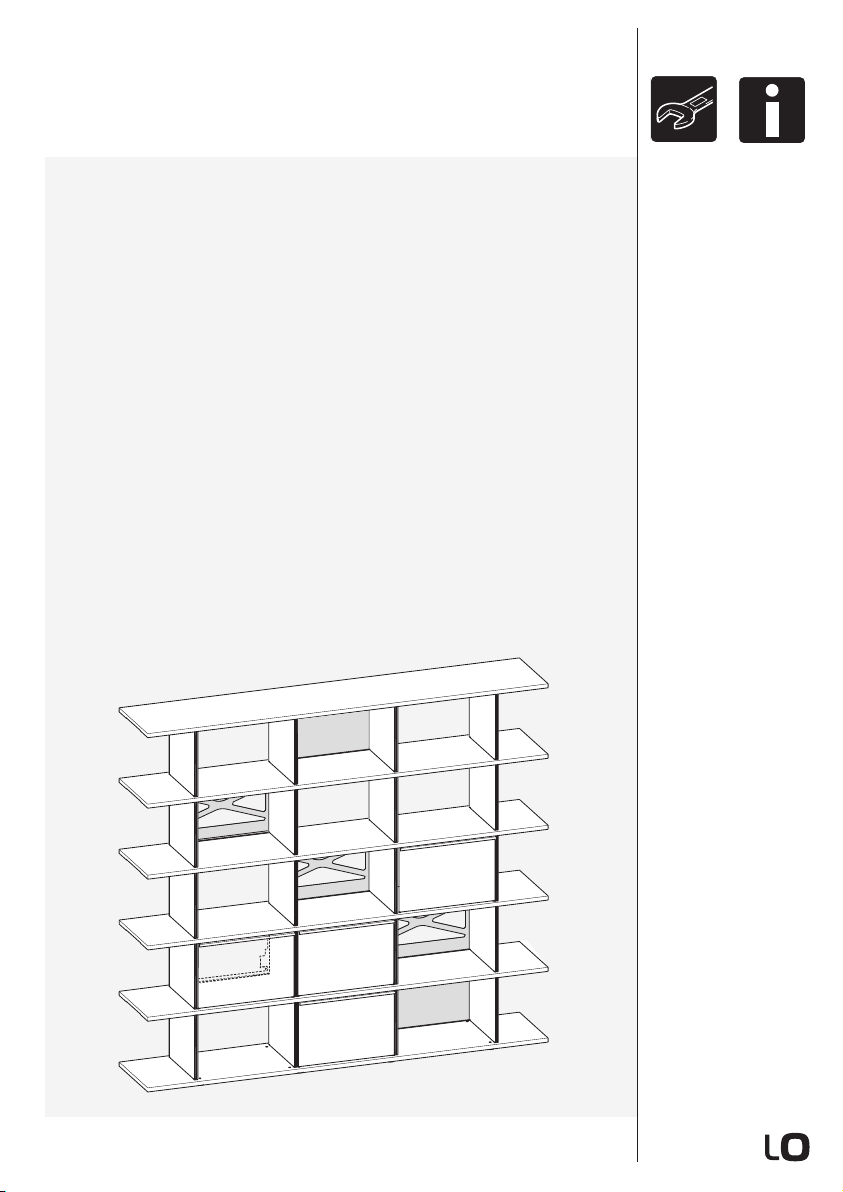
Werden mehr als 1/3 der Fächer mit Einbauten belegt, muss für die Ermittlung
der Anzahl notwendigen Rückwände mit Gegengewicht die komplette
Konfiguration mit dem LO Next Konfigurator konfiguriert werden.
Die Verwendung von zwei A6 Schubladen übereinander im gleichen Fach ist
nicht möglich.
Les tiroirs peuvent être montés avec les contrepoids nécessaires jusqu'à 3
hauteurs de classeur maximum et dans 2 casiers sur 3.
Si plus d'1/3 des casiers sont équipés d'éléments, pour calculer le nombre de
parois arrière nécessaires munis d'un contrepoids, toute la configuration doit
être effectuée avec le configurateur LO Next.
L'utilisation de deux tiroirs A6 superposés dans le même casier n'est pas pos-
sible.
I cassetti si possono montare al massimo fino a H 3 raccoglitori e in 2/3 degli
scomparti con i relativi contrappesi.
If more than 1/3 of compartments are fitted with built-in elements, complete
configuration with LO Next configurator is necessary in order to calculate how
many back panels with counterweights are needed.
Non è possibile utilizzare due cassetti A6 l’uno sull’altro nello stesso
scomparto.
Drawers may be fitted up to a maximum height equal to three files and in
two-thirds of compartments with corresponding counterweights.
Se più di 1/3 degli scomparti viene dotato di inserti, per determinare il numero
necessario di pareti posteriori con contrappeso bisogna eseguire la configura-
zione completa con il configuratore LO Next.
It is not possible to fit two A6 drawers on top of each other in the same
compartment.