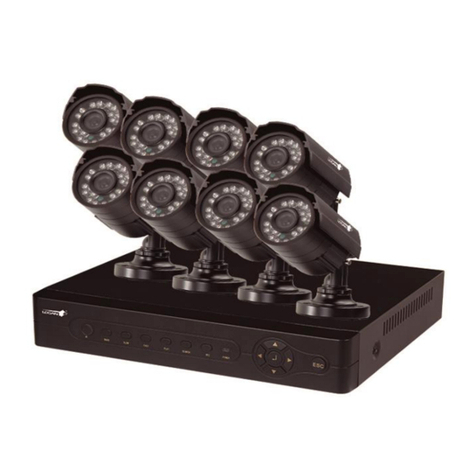
Logan LGK4C4CNVRSP1 User manual


1

2

3
Contents
1. Installation.............................................................................................................................................4
1.1. HDD Installation.....................................................................................................................4
1.2. Front /rear Panel and connection ............................................................................................5
1.3. Remote Operation...................................................................................................................6
1.4. Previewing window icon.........................................................................................................6
2. Fast Operation......................................................................................................................................7
2.1. Normal Login..........................................................................................................................7
2.2. Temporary Login ....................................................................................................................7
3. Menu Operation....................................................................................................................................8
3.1. IP Camera................................................................................................................................9
3.2. View Layout..........................................................................................................................10
3.3. Sequence Interval..................................................................................................................10
3.4. Video Adjust..........................................................................................................................10
3.5. Zoom.....................................................................................................................................11
3.6. PTZ .......................................................................................................................................12
3.7. Clients...................................................................................................................................12
3.8. Snapshot................................................................................................................................13
3.9. Photos....................................................................................................................................13
3.10. Record Function....................................................................................................................15
3.11. Playback................................................................................................................................15
3.12. Clear Alarm...........................................................................................................................17
3.13. Shutdown..............................................................................................................................18
4. System Setup......................................................................................................................................18
4.1. Basic set................................................................................................................................19
4.2. Channel.................................................................................................................................22
4.3. Network ................................................................................................................................26
4.4. Alarm Set..............................................................................................................................27
4.5. System Management.............................................................................................................31
4.6. Peripherals ............................................................................................................................33
5. Mobile software ..................................................................................................................................36
5.1. Install APP software..............................................................................................................36
5.2. Create an account or visitor login.........................................................................................37
5.3. Add NVR..............................................................................................................................38
5.4. Connect video .......................................................................................................................40

4
1. Installation
1.1.HDD Installation
1. Ensure Power supply has been disconnected, open the case cover;
2. Connect HDD data line, power line first , then fix the HDD in the case;
3. Install the cover, connect the power, which with adaptor, press the power switch;
4. Format the HDD (Please check details from : System Setup—Peripherals—Storage—Format );
5. NVR can normally make snapshot and video.
Connect power and data cable
Fix the HDD
Install the Cover

5
1.2. Front /rear Panel and connection
Front panel
Rear panel

6
1.3.Remote Operation
1.4.Previewing window icon
Icon
Description
Means recording
Means client-end is linking this channel.
(Yellow)
means that this channel is set alarm, but is not triggered
(Red)
Means the alarm is triggered.
No.
Description
1
Single/quad screen switch
2
Playback video
3
number
4
Return to previous menu
5
Move selection
6
Press this key , it will recycling show Right Click Menu, Main
Menu and Status Menu , it also has enter function
7
Device match ID, can make the Remote and NVR one-to-one
control
8
Playback control and record

7
2.Fast Operation
2.1.Normal Login
After starting system, right click and popup the main menu list, select System setup, it will popup
the login windows, after login user can make other operation.
1. [User Name] input default user name „admin‟;
2. [Password] is empty, not input anything
3. Single click [Login], then finish login operation.
Remarks: If login failure for 3 times, mouse will be locked for 10 seconds, NVR will alarm until
login successfully.
2.2.Temporary Login
If forget user name and password and make login failure, can use temporary login.
Steps:

8
1. Error login again, note [error code],
2. Contact with customer service, they will tell a temporary user name and password.
3.Menu Operation
Menu Operation is functions at [Right Click Menu] and [Main Menu], in order to make
operation more easily.
Right Click Menu: IP Camera ,Remote Step, System Setup, View layout, Video Adjust, PTZ,

9
Clients, Snapshot, Photos, Record setting, Playback, clear Alarm;
Main Menu: :System Setup, View Layout, Sequence Interval, Zoom, VideoAdjust, PTZ,
Snapshot, Photos, Record Setup, Playback, Shutdown.
3.1.IP Camera
Search/connect steps :
1. Right click and select “IP camera” to enter into add IP camera menu.
2. Search: search the IP camera in this LAN;
3. Add: Add the select camera to the added camera list
4. Add all: add all camera to the added camera list
5. Advanced add: input IP camera ID and password manually
6. Remove: delete the selected camera from the added camera list

10
7. Remove all: delete all the camera in the added camera list.
8. Set NVR: configure the NVR network
9. CH Change: change the camera channel sequence
10. Set IPC: Set camera password/Net setup/Stream/Video adjust/
3.2.View Layout
Function Location: Right Click Menu: View layout
Main Menu:
Function Summary: while previewing, it can adjust screen distribution mode, can choose
View1, View4.
3.3.Sequence Interval
Function Location: Main Menu:
Function Summary: [Sequence interval] can show the previewing screen in turns, after
finishing Sequence Interval, the screen layout will be the same with that before this function.
1. Setup how time interval ;
2. Single click [OK], then start „Sequence Interval‟
3. Single click button, can stop Sequence interval function.
3.4.Video Adjust
Function Location: Right Click Menu:

11
Main Menu:
Function Summary: can setup different video effects,
Lightness/Contrast/Chroma/Sharpness/Scene/AUTO AWB/Mirror/Turn/NOCOLOR/Enable WDR
3.5.Zoom
Function Location::main menu:
Function Summary: To enlarge the picture part of the contents of the target channel.

12
3.6.PTZ
Function Location: Right Click Menu:
Main Menu:
Function Summary:
[PTZ Adjust] can adjust PTZ lens direction, Iris, Focus, Zoom, Speed, Aux open ,
Preset ,Patrol
3.7.Clients
Function Location: Right Click Menu:
Function Summary:
1. Count client-end numbers that connecting with the NVR;
2. Disconnect any connection, or disconnect all connections.

13
All client-end connection information: channel, IP, Port, and Connections all information can
check here.
3.8.Snapshot
Snapshot function includes [Snapshot], [Photos] two functions.
Function Location: Right Click Menu:
Main Menu:
Function Summary: :Make snapshot of object image and store into the HDD.
3.9.Photos
Function Location: Right Click Menu:
Main Menu:

14
Function Summary:
1. Can query the snapshot stored in the NVR, include manual snapshot, alarm snapshot, record
snapshot.
2. Can copy the snapshot into USB disk.
Snapshot Query
1. [Search Type] choose snapshot type, default is All Picture;
2. [Channel] choose the channel for snapshot, default is All channels;
3. [Start] ~[End] is snapshot time range (Longest is 1 month), default is „today‟ ;
4. [Search] button, single click, then the right list can show the eligible snapshot.
Remarks: single click can show the snapshot contents.
Picture Backup
1. Connect FAT32 format U disk into the NVR USB port;
2. Single click to choose a picture and it can only choose one;

15
3. Single click [Backup to U-disk], after the prompt shown backup successfully can take away
the U disk.
3.10. Record Function
Record function includes:
Record Setup: open/close Manual Record (default is open), open/close scheduled record;
Function Location: Right click menu:
Main Menu:
Function Summary:
1. Can open/close each channel Manual Record;
2. Can open/close each channel Scheduled Record.
3.11. Playback
Function Location: Right Click Menu:
Main Menu:
Function Summary:
1. It can query, playback record file of any channel;
2. It can backup file into U disk.

16
Playback Adjusting
When playback, users can adjust the speed and progress.
Serial
No.
Name
Description
Serial
No.
Name
Description
1
Playback time
Current playback time
9
Fast Backward
Fast backward display, single click to
switch X8/X16
2
Progress Bar
Progress of the current
playback file in 1 hour
10
Snapshot
Snapshot for object screen
3
Sound
Open/close sound playback
11
Pause
Pause display
4
Condition
Playback Condition
12
Display
Display the video
5
Window
Choose the operation
window
13
Fast Display
Accelerate display , single click to switch
X2/X4/X8/X16
6
Shutdown
Exit the playback
14
Slow Display
Decelerate display, single click to switch
X1/2 ,X1/4, X1/8, X1/16
7
A Hour Ago
Choose the window and
15
Single Frame
Each single click can go ahead 1frame

17
playback the video a hour
ago
8
Backward
Each single click chosen
widow ,it will back up 2S
16
Next a Hour
Choose the window and display the
video next hour
Backup
Backup the record file into U-disk.
Operation Steps:
1. Single click [Backup] , open the backup interface;
2. Modify the backup start time;
3. Modify the backup time range;
4. Choose Record Type, Scheduled/ Manual/Alarm/ Motion detection record;
5. Choose backup channel;
6. Single click [Backup to U-disk] to backup the file selected into U disk;
7. Install the display plug-in, then can use Media Player to display the backup file.
3.12. Clear Alarm
Function Location: Right Click Menu:
Function Summary: can clear some channel or all channel Alarm effect.
1. Right click alarming channel, choose [Clear Alarm/ Current] can clear alarming of
current channel;
2. Right click all channels, choose [Clear Alarm/ Clear All] can clear alarming of all
channels.

18
3.13. Shutdown
Function Location: Main Menu:
Function Summary: Logout, Shutdown and Restart.
4.System Setup
Function Location: Right Click Menu:

19
4.1.Basic set
Functions:
General: for example: Language, Transparency, VGA Resolution, Device ID, Wizard,
etc.
Time: for example date format, Set Date/Set Time, Auto Synchronize Time, Time zone
setting;
User: Local User, Network User Add/Delete/ Edit.
Table of contents
Languages:
Other Logan Security System manuals