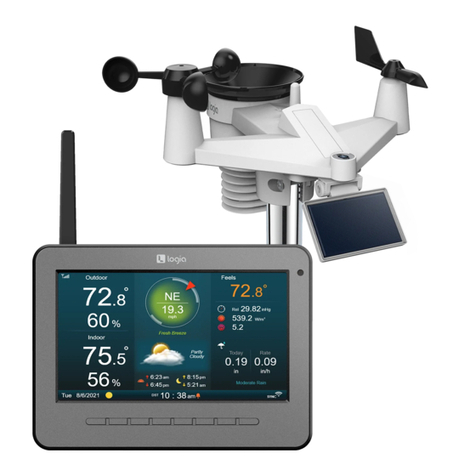
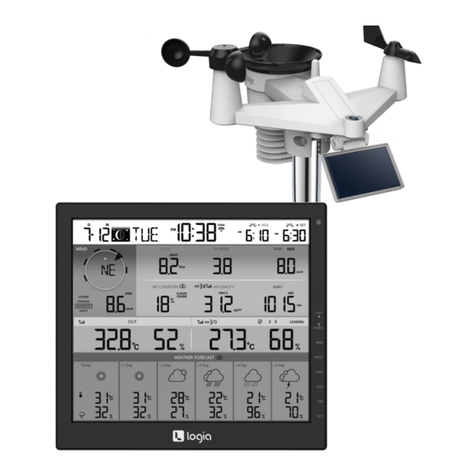
Logia LOWSC7110FWB8 User manual

™
7-IN-1 WIRELESS
24-HOUR/10-DAY FORECAST
WEATHER STATION WITH
WI-FI®, BUILT-INSOLAR
PANEL, AND 8” FULL-COLOR
LCD DISPLAY
USER GUIDE
LOWSC7110FWB8

2
Thank you for purchasing the Logia 7-in-1 Wireless 24-Hour/10-Day Forecast Weather
This User Guide is
intended to provide you with guidelines to ensure that operation of this product is safe and does
not pose risk to the user. Any use that does not conform to the guidelines described in this User
Guide may void the limited warranty.
Please read all directions before using the product and retain this guide for reference. This
product is intended for household use only. It is not intended for commercial use.
This product is covered by a limited one-year warranty. Coverage is subject to limits and
exclusions. See warranty for details.
SAFETY PRECAUTIONS
PRODUCT FEATURES
PACKAGE CONTENTS
PRODUCT OVERVIEW
INSTALLATION INSTRUCTIONS
OPERATING INSTRUCTIONS
CARE/MAINTENANCE
TROUBLESHOOTING
SPECIFICATIONS
WARRANTY
3
4
5
6
9
13
44
46
47
51
TABLE OF CONTENTS

3
SAFETY PRECAUTIONS
WARNING! Please read and understand all safety precautions, operating instructions,
and care/maintenance instructions before operating this appliance. Keep this manual for
future reference.
• This product is not a toy. Keep out of the reach of children.
• This product is designed for use in the home only as an indication of weather conditions. This
product is not to be used for medical purposes or public information.
• Do not clean the unit with abrasive or corrosive materials.
• Do not place the appliance near open ames or heat sources. Fire, electric shock, product
damage, or injury might occur.
• Only use fresh, new batteries in the product. Do not mix new and old batteries together.
• Do not disassemble, alter, or modify the product.
• Only use attachments or accessories with this product specied by the manufacturer.
• Do not submerge the unit in water. Dry the product with a soft cloth if liquid spills on it.
• Do not subject the unit to excessive force, shock, duct, extreme temperature, or humidity.
• Do not cover or block the ventilation holes with any objects.
• This console of this product is intended to be used indoors only.
• This product is only suitable for mounting at heights less than 6.6 ft. (2 m).
• Do not tamper with the unit’s internal components. Tampering with the product will void the
warranty.
• Batteries are not included. When inserting batteries, make sure that the positive and negative
polarities match with the markings in the compartment.
• Do not mix standard, alkaline, and rechargeable batteries together.
• Leaving a battery exposed to extremely high temperatures in the surrounding environment can
result in an explosion or leakage of ammable liquid or gas.
• Leaving a battery exposed to extremely low air pressure in the surrounding environment can
result in an explosion or leakage of ammable liquid or gas.

4
TIPS FOR SENSOR SITE SELECTION
• Rain collector must be cleaned every few months.
• Batteries in the sensor must be changed every two to two and a half (2 – 2.5) years.
• Sensor should be installed at least 5’ (1.5 m) away from any building or structure.
• Choose a location in an open space under direct sunlight with no obstructions.
• The sensor should remain in line of sight and within 450’ (150 m) of the console for consistent,
steady transmission.
• Keep your sensor and console away from household appliances that operate on the same frequency.
The console and sensor should be at least 3’ – 7’ (1 – 2 m) away from such interferences.
PRODUCT FEATURES
1. Wireless 7-in-1 weather sensor measures wind speed, wind direction, rainfall, UV index, light
intensity, temperature, and humidity
2. No calibration needed! The product is fully pre-calibrated and mostly assembled; all you need to do
is install and sync it with the included display console
3. Provides precise weather and environmental information directly from your backyard, instead of
relying on a national weather station
4. 8” LCD display screen with adjustable 24-hour or 10-day weather forecast viewing
5. Syncs via Wi-Fi® to online weather servers
6. Compatible with the user-friendly WSLink app

5
MOD
NDX
CH
24H 10-Day Forecast
PACKAGE CONTENTS
1. Weather display console
2. Console power adapter
3. Console CR2032 battery
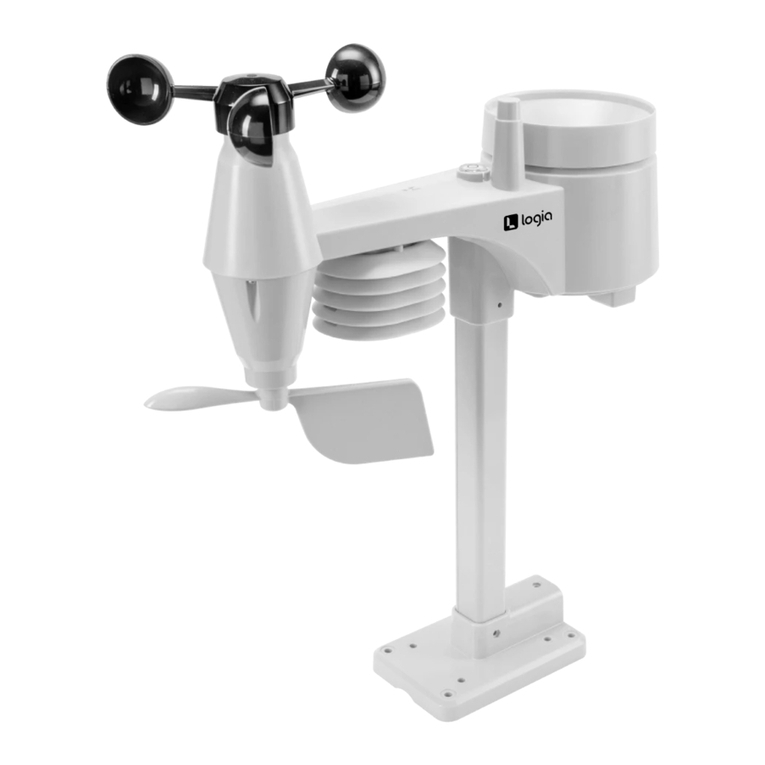
4. 7-in-1 outdoor weather sensor
5. Mounting clamp
6. 2 x screws (for clamp)
7. 2 x hexagonal nuts (for clamp)
8. 2 x rubber pads (for clamp)
9. User guide
1
4
9
8
6
7
2
5
3

6
2AD2W-LOWSC710SWBO
This device compl ieswith Par t15 of the FCC Ru les.
Operatio n is su bject t o the follo win g two c ondi tions:
(1) this device may not cause h armful inter fe rence, an d
(2) this device must accept any int e rfere nce received,
includi ng interference that may cau se un desi red o perati on.
PRODUCT OVERVIEW
WIRELESS SENSOR OVERVIEW
1
2
8
7
3
5
6
9
12
10
11
4
1. Antenna
2. Radiation shield & hygro-thermo sensor
3. Mounting base
4. Battery door
5. Reset button
6. Transmission status LED
7. Bubble level
8. Rain collector
9. Wind vane
10. UV/Light sensor
11. Solar panel
12. Wind cups

7
MOD
NDX
CH
24H 10-Day Forecast
HOUR DAY MEM BARO ALARM / SNOOZERAI N S KY AIR GRAPH
SET UNIT ALARM
WI-FI
SENSOR
REFRESH
RESET
HI LO AUTO
DC5V 1A
This devicecomplieswith Part 15of the FCC Rules.
Operation
is subject tothe following t wo conditions:
(1) this device may
not causeharmful interference, an d
(2) this device mus t accept
any interference received,
including interference that may c ause
undesired operation.
2AD2W-LOWSC5711FABI
C&A Marketing Inc.
Model No.:LOWSC7110FWB8
1
17
10
11
12
13
14
15
16
2
18
3
19 2120
4
2722 2523 24 26
5 6 7 8 9
1. Hour button
2. Day button
3. MEM button
4. Baro button
5. Alarm/Snooze button
6. Rain button
7. Sky button
8. Air button
9. Graph button
10. Ambient light detector
11. ^/Mod button
12. v/NDX button
13. Sun button
14. Wind button
15. CH button
16. Display screen
17. Set button
18. Unit button
19. Alarm button
20. Wall mount hole
21. Refresh button
22. Kickstand
23. Backlight
24. Sensor/Wi-Fi button
25. Power jack
26. Reset button
27. Battery compartment
WEATHER CONSOLE OVERVIEW

8
MOD
NDX
CH
24H 10-Day Forecast
SCREEN DISPLAY OVERVIEW
1
2
4
9
5
10
12
6
8
11
3
7
1. Moon phase, time & date, sunrise/sunset,
moon rise/moon set
2. Outdoor temperature & humidity
3. Indoor temperature & humidity
4. UV index and exposure level
5. Light intensity/sunburn time
6. Wind speed & direction
7. Barometric pressure
8. Rain rate & rainfall
9. Cloud cover/lightning
10. Visibility/air quality
11. Multi-function history graph
12. 10-day or 24-hour weather forecast

9
INSTALLATION INSTRUCTIONS
SETTING UP THE WIRELESS 7-IN-1 OUTDOOR SENSOR
INSTALLING THE RAIN FUNNEL
INSTALLING THE BATTERIES
The wireless 7-in-1 outdoor sensor measures wind speed, wind direction, rainfall, UV, light intensity,
temperature, and humidity for you.
1. Align the lock grooves on the rain funnel with the lock grooves in the rain collector.
2. Lower the rain funnel onto the rain collector. Then, turn the rain funnel clockwise to lock it in place.
1. Unscrew the battery door at the bottom of the 7-in-1 outdoor sensor using a screwdriver (not
included).
2. Insert three (3) AA batteries (not included) into the battery compartment.
3. Close and fasten the battery door back on the compartment.

10
The outdoor wireless weather sensor is calibrated to be pointed north for maximum accuracy.
However, for your convenience, if you are a user located in the Southern Hemisphere, you canuse
the sensor with the wind vane pointing south.
1. Mount and install the wireless weather sensor with the N marker (near the rain collector)
pointing South, instead of North. (Please refer to Mounting the Sensor on a Pole for mounting
instructions.)
POINTING THE WIRELESS 7-IN-1 OUTDOOR SENSOR TO SOUTH (OPTIONAL)
MOUNTING THE SENSOR ON A POLE
1. Stick the rubber pads on the inside of the mounting clamp and mounting base of the sensor.
2. Insert two (2) screws into the mounting base and clamp. Then, loosely tighten the screws using
included nuts.
3. Place the mounting xture over a pole (not included).
4. Tighten all the screws so the sensor sits rmly and securely on the pole.
Add rubber pad
before mounting
on pole
Point to
NORTH
Point to
SOUTH
2 Meter
of the
ground
Mounting pole
and stand not
included

11
POWERING UP THE CONSOLE
1. Remove the battery door on the back of the console.
2. Insert a CR2032 battery (included) into the compartment.
3. Place the battery door back onto the compartment and twist it in place.
1. Connect the power adapter (included) to the console.
2. Plug the other end of the power adapter into a power outlet to turn on the console.
2. Set hemisphere to South in the Time & Date settings. (Please refer to section for setup details)
SETTING UP THE DISPLAY CONSOLE

12
PAIRING THE CONSOLE WITH THE WIRELESS 7-IN-1 SENSOR
DATA CLEARING
Sensors within the 7-in-1 outdoor sensor may activate incorrectly during installation. Press the
RESET button once to restart the console and clear all erroneous data.
1. Once your display console powers on, it should automatically enter AP mode and search for the
wireless weather sensor. If the console does not connect within the rst 15 minutes, press the
SENSOR/WIFI button to manually pair the sensor and console.
2. Once the pairing process is complete, the antenna icon will appear blinking and the readings for
outdoor temperature, humidity, wind speed, wind direction, UV, light intensity, and rainfall will
appear in their designated sections of the LCD display.

13
SUNNY
THUNDERY THUNDERY SHOWERS
SNOWY
Up to 19 dierent weather icons are provided according to the weather forecasted:
OPERATING INSTRUCTIONS
FORECAST

14
...
MULTI-DAY WEATHER FORECAST CHART
HIGH/LOW TEMPERATURE FORECAST
Based on the longitude and latitude of the device in your ProWeatherLive (PWL) account, (refer to
PWL section for setup), the console indicates the weather forecasts for today and the next 10 days.
To switch between the coming 5 days and the following 5 days, press and hold the DAY button.
By default, the console shows the high (HI) and low (LO) temperatures of the current day. To view the
HI and LO temperature from today to the next 10 days, simply press the DAY button as shown below.

15
...
AVERAGE TEMPERATURE WITH CHANCE OF RAIN FOR TODAY & NEXT 10 DAYS
Instead of HI and LO temperature, the user can simply press the ^/MOD button to switch between
HI/LO temperatures mode and average temperature (AVG) and chance of rain mode.
To view the average temperature and chance of rain from today to the next 10 days, simply
press the DAY button.

16
WEATHER FORECAST FOR PRESENT TIME & NEXT 23 HOURS
AVERAGE TEMPERATURE AND CHANCE OF RAIN FOR PRESENT TIME & NEXT 23 HOURS
The console also indicates the weather forecasts for the present time and the next 23 hours. Press
the HOUR button to switch to 24-hour forecast. To view the weather forecast for all 24 hours in
6-hour intervals, simply press & hold the HOUR button.
By default, the console shows the average temperature and chance of rain for the current hour. To
view the average temperature and chance of rain for the next 23 hours, simply press the HOUR
button as shown below.

17
The atmospheric pressure is the pressure at any location of the earth caused by the weight of the
column of air above it.
BAROMETRIC PRESSURE
1. Relative or absolute indicator
2. Barometric pressure reading
1
2
ABSOLUTE OR RELATIVE BAROMETRIC PRESSURE MODE
While in normal mode, press the BARO button to switch between ABSOLUTE and RELATIVE
barometric pressure.
• ABS is absolute atmospheric pressure of your location.
• REL is relative atmospheric pressure based on the sea.

18
TEMPERATURE & HUMIDITY
OUTDOOR TEMPERATURE & HUMIDITY
1. Temperature index indicator
2. Outdoor sensor low battery indicator
3. Outdoor sensor signal indicator to show the signal receiving strength
4. Outdoor temperature reading
5. Outdoor temperature trend
6. Outdoor humidity reading
7. Outdoor humidity trend
2 3 4 5 6 71
OUTDOOR TEMPERATURE INDEX
Press the v/NDX button to switch between Feels Like, Heat Index, Wind Chill, and Dew Point.

19
HEAT INDEX
WIND CHILL
DEW POINT
FEELS LIKE
The heat index is determined by the wireless weather sensor’s temperature and humidity
readings when the temperature is between 79 °F (26 °C) and 120 °F (50 °C).
Wind chill is determined by a combination of the wireless weather sensor’s temperature and
wind speed data.
The dew point is the temperature below which the water vapor in air at constant barometric
pressure condenses into liquid water at the same rate at which it evaporates. The condensed
water is called dew when it forms on a solid surface.
The dew point temperature is determined by the temperature and humidity data from the
wireless weather sensor.
The Feels Like temperature index determines what temperature it actually feels like outside,
taking into account factors like wind chill and the heat index.
Heat Index Range Warning Explanation
81 °F – 90 °F (27 °C – 32 °C) Caution Possibility of heat exhaustion
91 °F – 104 °F (33 °C – 40 °C) Extreme caution Possibility of heat dehydration
106 °F – 129 °F (41 °C – 54 °C) Danger Heat exhaustion highly likely
≥ 131 °F (≥ 55 °C) Extreme danger Strong risk of dehydration/ heatstroke

20
1. Channel (CH) number
2. Low battery indicator for CH sensor
3. Sensor signal strength icon
4. Indoor/CH sensor temperature trend
5. Water leak sensor status (for optional sensors)
6. Auto loop icon
7. Indoor/CH sensor temperature reading
8. Floating pool sensor icon
9. Soil moisture sensor icon
10. Indoor/CH sensor humidity reading
11. Indoor/CH sensor humidity trend
1 2
6 7 8 9 10 11
4 53
INDOOR/CHANNEL TEMPERATURE & HUMIDITY
INDOOR TEMPERATURE & HUMIDITY
This section can show the reading and status of the optional indoor hygro-thermo sensor(s)
and water leak sensor(s).
This section can show the reading and status of the temperature and humidity indoors.
Table of contents
Other Logia Weather Station manuals

Logia
Logia LOWSC715FWB10 User manual

Logia
Logia LOWSC510WB User manual

Logia
Logia LOWSL710FWB7 User manual

Logia
Logia LOWSC717FWB19 User manual

Logia
Logia LOWSB510PB User manual

Logia
Logia LOWSC510SWB User manual

Logia
Logia LOWSCB711SAB User manual

Logia
Logia LOWSC710SWB User manual
Logia
Logia LOWSC713SWB User manual
Logia
Logia LOWSC715FWB10 User manual