Logitech ZONE 900 Assembly Instructions

LOGITECH ZONE 900 RECEIVER
Complete Setup Guide
Guide d'installation complet

WHAT’S IN THE BOX
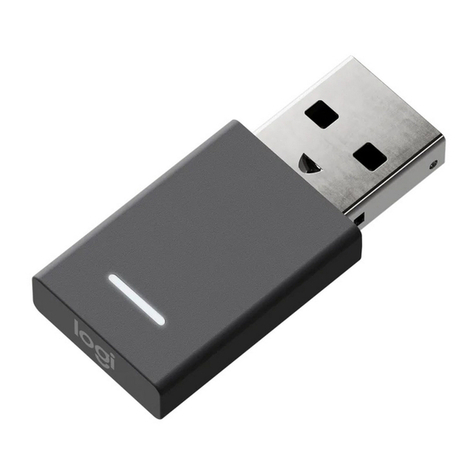
USB-A Unifying + Audio receiver
USB-A Unifying
+Audio receiver
Light indicator
KNOW YOUR PRODUCT
3English

USB-C
USB-A
Zone 900 connected
With Zone 900 you can connect up to 6
mice and keyboards.
Add mouse or keyboard
Done
CONNECTING THE RECEIVER TO THE HEADSET
1. Insert your Zone 900 receiver into thecomputer
USB-A port. Or to connect it via USB-C,
insertthereceiver into USB-C adapterrst.
Thenplug in the USB-C adapter into
thecomputer USB-C port.
2. Install and open Logi Tune Desktop. Download it from
www.logitech.com/tune
3. Logi Tune Desktop will conrm that a new receiver
isfound. Click Done to start connecting to
theheadset.
4English

Connecting to your headset
Keep your receiver plugged in during the
connection process and make sure your
headset for is in pairing mode.
Cancel pairing
Connection successful
Device is ready to use.
Done
New receiver found
Press and hold the paring button on your
headset for 3 sec to enter pairing mode.
Show me how
Continue
Power
4. Enter pairing mode on headset by pressing
thepower button for 3 seconds. Click Continue.
5. If pairing mode is successful, light indicators
on the receiver and headset will ash white.
6. Once you see this screen, the receiver is now
paired with the headset. Light indicators on
the receiver and headset will turn solid white.
5English

60%
Logi Zone 900
SOUND SETTINGS
About the headset
Add mouse or keyboard
Voice prompts
Rotate to mute
Button functions
Sleep settings
Logi Zone 900Device name
1 hour
Receiver support multiple devices
Logitech® Unifying Software
Welcome
Plug it. Forget it. Add to it.
Learn more...
You are now ready to use your Logitech® Unifying receiver.
And you can pair up to six compatible wireless mice, keyboards, and number pads with
one single Logitech Unifying receiver.
Advanced...
Copyright © 2018 Logitech
Next
RECEIVER:
Height x Width x Depth: 35.5 mm x 16.2 mm x 5.3 mm
DIMENSIONS
www.logitech.com/support/zone900
7. With Zone 900 receiver, you can pair up to 6 Logitech
Unifying peripherals.
a. On Logi Tune Desktop, go to Settings and click
Add mouse or keyboard.
b. If you already have the Unifying Software installed
on your computer, it should open. If not, it will be
downloaded and installed automatically.
c. Follow the Unifying Software prompts to
complete adding your mouse and keyboard.
d. To add more devices, follow steps 2 and 3 and
follow the steps in the Unifying Software.
© 2021 Logitech, Logi and the Logitech Logo are trademarks or registered trademarks of
Logitech Europe S.A. and/or its aliates in the U.S. and other countries. Logitech assumes
noresponsibility for any errors that may appear in thismanual. Information contained herein
issubject to change without notice.

CONTENU DU COFFRET
Récepteur USB-A Unifying + audio
Récepteur USB-A
Unifying + audio
Témoin lumineux
PRÉSENTATION DU PRODUIT
7Français

USB-C
USB-A
Zone 900 connected
With Zone 900 you can connect up to 6
mice and keyboards.
Add mouse or keyboard
Done
CONNEXION DU RÉCEPTEUR AU CASQUE
1. Insérez le récepteur Zone 900 dans le port USB-A
de l'ordinateur. Pour le connecter via USB-C,
insérez d'abord le récepteur dans l'adaptateur
USB-C. Insérez ensuite l'adaptateur USB-C dans
le port USB-C de l'ordinateur.
2. Installez et ouvrez Logi Tune Desktop. Téléchargez-le
àl'adresse www.logitech.com/tune
3. Logi Tune Desktop conrmera qu'un nouveau
récepteur a été trouvé. Cliquez sur Terminé pour
commencer à vous connecter au casque.
8Français

Connecting to your headset
Keep your receiver plugged in during the
connection process and make sure your
headset for is in pairing mode.
Cancel pairing
Connection successful
Device is ready to use.
Done
New receiver found
Press and hold the paring button on your
headset for 3 sec to enter pairing mode.
Show me how
Continue
Mise sous/
hors tension
4. Accédez au mode de couplage sur le casque
enappuyant sur le bouton d'alimentation
pendant 3 secondes. Cliquez sur Continuer.
5. Si le mode couplage réussit, les témoins
lumineux du récepteur et du casque clignotent
en blanc.
6. Une fois que vous voyez cet écran, lerécepteur
est maintenant couplé avec le casque.
Lestémoins lumineux du récepteur et
ducasque deviennent blancs xes.
9Français

60%
Logi Zone 900
SOUND SETTINGS
About the headset
Add mouse or keyboard
Voice prompts
Rotate to mute
Button functions
Sleep settings
Logi Zone 900Device name
1 hour
Receiver support multiple devices
Logitech® Unifying Software
Welcome
Plug it. Forget it. Add to it.
Learn more...
You are now ready to use your Logitech® Unifying receiver.
And you can pair up to six compatible wireless mice, keyboards, and number pads with
one single Logitech Unifying receiver.
Advanced...
Copyright © 2018 Logitech
Next
RÉCEPTEUR:
Hauteur x largeur x profondeur:
35,5 mm x 16,2 mm x 5,3 mm
DIMENSIONS
www.logitech.com/support/zone900
7. Avec le récepteur Zone 900, vous pouvez coupler
jusqu’à 6 périphériques Logitech Unifying.
a. Sur Logi Tune Desktop, accédez à Paramètres
etcliquez sur Ajouter une souris ou un clavier.
b. Si le logiciel Unifying est déjà installé sur
votreordinateur, il devrait s'ouvrir. Si cen'est
pas le cas, il sera téléchargé et installé
automatiquement.
c. Suivez les invites du logiciel Unifying pour
terminer l'ajout de votre souris et de votre clavier.
d. Pour ajouter d'autres dispositifs, suivez les étapes 2
et 3, et suivez les étapes du logiciel Unifying.
© 2021 Logitech, Logi et le logo Logitech sont des marques commerciales ou déposées
deLogitech Europe S.A. et/ou de ses sociétés aliées aux États-Unis et dans d'autres pays.
Logitech décline toute responsabilité en cas d'erreurs susceptibles de s'être glissées dans
le présent manuel. Les informations énoncées dans ce document peuvent faire l'objet de
modications sans préavis.
CONTENIDO DE LA CAJA
USB-A Unifying + receptor de audio
Receptor USB-A
Unifying + Audio
Indicador luminoso
COMPONENTES DEL PRODUCTO
11 Español

USB-C
USB-A
Zone 900 connected
With Zone 900 you can connect up to 6
mice and keyboards.
Add mouse or keyboard
Done
CONECTAR EL RECEPTOR A LOS AUDÍFONOS
1. Inserta el receptor de Zone 900 en el
puertoUSB-A de la computadora. O establece
conexión através deUSB-C, insertando primero
elreceptor en eladaptador USB-C. Luegoinserta
eladaptadorUSB-C al puerto USB-C de
lacomputadora.
2. Instala y abre Logi Tune para escritorio.
Descargalaaplicación desde
www.logitech.com/logitune
3. Logi Tune para escritorio conrmará que se encontró
un nuevo receptor. Haz click en Listo para comenzar
a conectar tus auriculares.
12 Español

Connecting to your headset
Keep your receiver plugged in during the
connection process and make sure your
headset for is in pairing mode.
Cancel pairing
Connection successful
Device is ready to use.
Done
New receiver found
Press and hold the paring button on your
headset for 3 sec to enter pairing mode.
Show me how
Continue
Botón de
encendido
4. Entra en modo de emparejamiento en
losaudífonos presionado el botón de encendido
por 3 segundos. Haz click en Continuar.
5. Si el emparejamiento es correcto,
losindicadores luminosos del receptor
ydelosauriculares emitirán destellos blancos.
6. Cuando veas esta pantalla, el receptor
estará emparejado con los auriculares.
Losindicadores luminosos del receptor
ydelosauriculares se iluminarán
conluzblanca permanente.
13 Español

60%
Logi Zone 900
SOUND SETTINGS
About the headset
Add mouse or keyboard
Voice prompts
Rotate to mute
Button functions
Sleep settings
Logi Zone 900Device name
1 hour
Receiver support multiple devices
Logitech® Unifying Software
Welcome
Plug it. Forget it. Add to it.
Learn more...
You are now ready to use your Logitech® Unifying receiver.
And you can pair up to six compatible wireless mice, keyboards, and number pads with
one single Logitech Unifying receiver.
Advanced...
Copyright © 2018 Logitech
Next
RECEPTOR:
Altura x Anchura x Profundidad:
35,5 mm x 16,2 mm x 5,3 mm
DIMENSIONES
www.logitech.com/support/zone900
7. Con el receptor de Zone 900 puedes emparejar
unmáximo de seis periféricos Logitech Unifying.
a. En Logi Tune para escritorio, ve a Ajustes y haz
click en Agregar mouse o teclado.
b. Si ya tienes el software Unifying instalado
en tucomputadora, debería abrirse.
Sino,sedescargará e instalará automáticamente.
c. Sigue las indicaciones del software Unifying para
completar la adición del mouse y el teclado.
d. Para agregar más dispositivos, sigue los pasos 2
y3, y luego sigue los pasos en el software Unifying.
© 2021 Logitech, Logi y el logo de Logitech son marcas comerciales o registradas de Logitech
Europe S.A. y/o sus liales en Estados Unidos y otros países. Logitech no asume ninguna
responsabilidad por la presencia de posibles errores en el presente manual. La información aquí
contenida está sujeta a posibles cambios sin previo aviso.

ITENS INCLUÍDOS NA EMBALAGEM
USB-A Unifying + receptor de áudio
USB-A Unifying +
receptor de áudio
Indicador de luz
CONHECER O PRODUTO
15 Português

USB-C
USB-A
Zone 900 connected
With Zone 900 you can connect up to 6
mice and keyboards.
Add mouse or keyboard
Done
CONEXÃO DO RECEPTOR AO HEADSET
1. Insira o receptor Zone 900 na porta USB-A
docomputador. Ou para conectá-lo via USB-C,
insira primeiro o receptor no adaptador USB-C.
Em seguida, conecte o adaptador USB-C
naporta USB-C do computador.
2. Instale e abra o Logi Tune Desktop. Faça o download
em www.logitech.com/logitune
3. O Logi Tune Desktop conrmará que um novo
receptor foi encontrado. Clique Concluído para
começar a conectar ao headset.
16 Português

Connecting to your headset
Keep your receiver plugged in during the
connection process and make sure your
headset for is in pairing mode.
Cancel pairing
Connection successful
Device is ready to use.
Done
New receiver found
Press and hold the paring button on your
headset for 3 sec to enter pairing mode.
Show me how
Continue
Interruptor
4. Entre no modo de pareamento no headset
pressionando o botão liga/desliga por
3segundos. Clique em Continuar.
5. Se o modo de pareamento for bem sucedido,
os indicadores luminosos no receptor
enoheadset piscarão em branco.
6. Depois de ver esta tela, o receptor estará
pareado com o headset. Os indicadores
luminosos no receptor e no headset carão
brancos sólidos.
17 Português

60%
Logi Zone 900
SOUND SETTINGS
About the headset
Add mouse or keyboard
Voice prompts
Rotate to mute
Button functions
Sleep settings
Logi Zone 900Device name
1 hour
Receiver support multiple devices
Logitech® Unifying Software
Welcome
Plug it. Forget it. Add to it.
Learn more...
You are now ready to use your Logitech® Unifying receiver.
And you can pair up to six compatible wireless mice, keyboards, and number pads with
one single Logitech Unifying receiver.
Advanced...
Copyright © 2018 Logitech
Next
RECEPTOR:
Altura x largura x profundidade:
35,5 mm x 16,2 mm x 5,3 mm
DIMENSÕES
www.logitech.com/support/zone900
7. Com o receptor Zone 900, você pode parear até
900periféricos Logitech Unifying.
a. No Logi Tune Desktop, vá para Congurações
eclique em Adicionar mouse ou teclado.
b. Se você já possui o Software Unifying instalado
noseu computador, ele deve abrir. Caso contrário,
ele será baixado e instalado automaticamente.
c. Siga as instruções do Software Unifying para
completar o adicionamento do seu mouse
eteclado.
d. Para adicionar mais dispositivos, siga as etapas 2
e3 e siga as etapas no Software Unifying.
© 2021 Logitech, Logi e o Logotipo da Logitech são marcas comerciais ou marcas registradas
da Logitech Europe S.A. e/ou de suas liais nos EUA e em outros países. A Logitech não se
responsabiliza por quaisquer erros possíveis neste manual. As informações aqui contidas estão
sujeitas a alterações sem prévio aviso.
WEB-621-002104 002
Other manuals for ZONE 900
4
Table of contents
Other Logitech Receiver manuals

Logitech
Logitech Bluetooth Audio Adapter Assembly Instructions

Logitech
Logitech ZONE WIRELESS Assembly Instructions

Logitech
Logitech ZONE WIRELESS PLUS Assembly Instructions

Logitech
Logitech 980-000912 Assembly Instructions

Logitech
Logitech ZONE WIRELESS Assembly Instructions

Logitech
Logitech ZONE 900 Assembly Instructions