Operation and Maintenance Instruction LNK-OM-LB-02B/V3.4
4
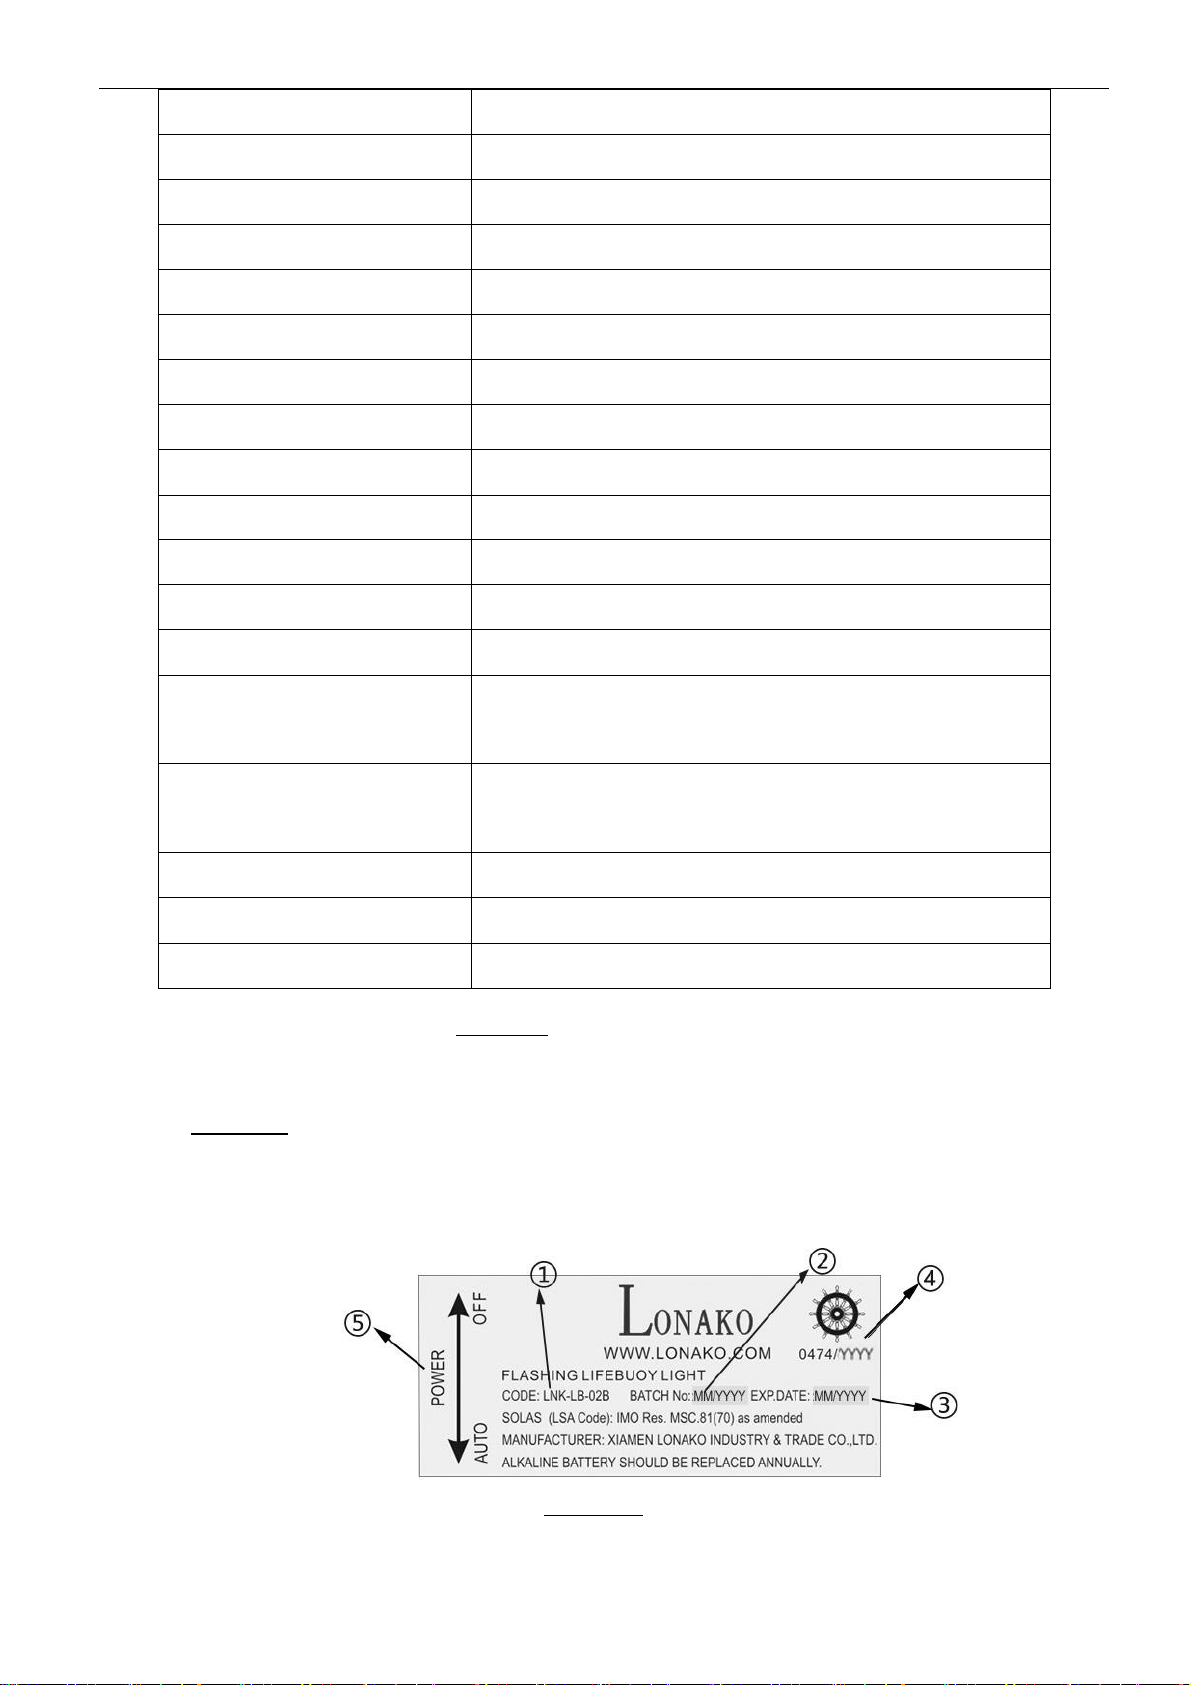
machine or label.
2.4.1.2 Marking content contains:
①Basic information : Product name, Manufacturer`s company website, Product Code
number, Fulfilled SOLAS standards, Manufacturer, safety CAUTION
②Manufacturing Batch Number ( see 2.4.2);
③Expire Date (see 2.4.2);
④Wheel Mark , Notified body number 0474 , and "YYYY" at figure 2-2 ④represents
mark affixed year.
⑤Power switch direction indicating.
2.4.2 MFG batch number and EXP. Date show the latest status of light and manufacturing
batch.
They will be shown as MM/YYYY, "MM" at figure 2-2 ②and ③represents the month of
manufacturing /expired date , "YYYY" at figure 2-2 ②and ③represents the year of
manufacturing/expired date.
SECTION ⅢINSTALLATION &ASSEMBLE INSTRUCTIONS
3.1 Installation Limitation
LNK-L B-02B lifebuoy light fits for all types of lifebuoys.
3.2 Installation Requirement
LNK-LB-02B lifebuoy light was supplied with installation clip and rope. The clip is normally
installed by the side of lifebuoy, and the lifebuoy light placed on the clip meanwhile it must tied
together with the lifebuoy firmly with the rope. The typical installation is shown as below
Figure3-2. Users must ensure that the light can be pulled out from the clip and go with the
lifebuoy it attached with when the lifebuoy is thrown into water:
3.2.1 Twist the light and turn the POWER to “AUTO” status as Figure2-2 ⑤shows.
3.2.2 Each lifebuoy light is packed with clip and rope well. When the user is ready to install light,
the clip should be separated from light as Figure 3-1.
3.2.3 The first step of installation is to fix the clip to the suitable position by screws. The second
step is to insert light head to clip and ensure the light locked in clip as Figure 3-1 shows.
3.2.4 When the light is installed well, user should bind the rope of light firmly with lifebuoy as
Figure3-2 shows. When the lifebuoy is thrown into water, the light should be pulled out
and thrown with the lifebuoy it attached with.
3.2.5 User should install the light as above steps every time in order to ensure the light in good
condition.