manuals.online logo
Brands
  1. Home
  2. •
  3. Brands
  4. •
  5. Lorex
  6. •
  7. DVR
  8. •
  9. Lorex Vantage LH010 ECO BLACKBOX SERIES User manual

Lorex Vantage LH010 ECO BLACKBOX SERIES User manual

LH010 ECO BlackBox Series Quick Setup Guide - English - R1
4. Enter the following information in each field:
5. Click Login to access your DVR. Lorex Client 11 connects to your
DVR and streams live video from your cameras.
SkillLevel
Intermediate
easy advanced
Time
under30 minutesunder15 minutes under60 minutes
HandTools Hardware
Router
HiSpeed
over60 minutes
SkillLevel
Intermediate
easy advanced
Time
under30 minutesunder15 minutes under60 minutes
HandTools Hardware
Router
HiSpeed
over60 minutes
Time: 20 Minutes Time: 20 Minutes
Hand Tools Skills - Easy Skills - Easy
BASIC INSTALLATION GUIDE BASIC INSTALLATION GUIDE BASIC INSTALLATION GUIDE
SkillLevel
Intermediate
easy advanced
Time
under30 minutesunder15 minutes under60 minutes
HandTools Hardware
Router
HiSpeed
over60 minutes
Digital Video Surveillance Recorder
ECO BlackBox LH010 Series
Quick Setup Guide
ATTENTION:
• ThisguiderefersonlytotheDVRset-up.
• Monitorandcamerasarenotincluded.
• Broadbandrouterandcomputerarerequiredforlocalandremotemonitoring
(not included).
Informationinthisdocumentissubjecttochangewithoutnotice.As
ourproductsaresubjecttocontinuousimprovement,LorexTechnology
Inc.andoursubsidiariesreservetherighttomodifyproductdesign,
specificationsandprices,withoutnoticeandwithoutincurringany
obligation.E&OE©2012LOREX.Allrightsreserved.
* For setup of Instant Mobile Viewing
refer to your Instruction Manual.
It’sallontheWeb
Time: 30 Minutes Skills - IntermediateHardware:
PC/Router
SkillLevel
Intermediate
easy advanced
Time
under30 minutesunder15 minutes under60 minutes
HandTools Hardware
Router
HiSpeed
over60 minutes
SkillLevel
Intermediate
easy advanced
Time
under30 minutesunder15 minutes under60 minutes
HandTools Hardware
Router
HiSpeed
over60 minutes
Congratulations!Youcannowview&playbackvideoonyoursystemviaLAN.
1xDigitalVideoRecorderwithpre-installedHDD*
1 x USB mouse
1 x Power adapter
1 x Remote control
1xEthernetcable
1 x Instruction manual
1 x Quick start guide
1 x CD
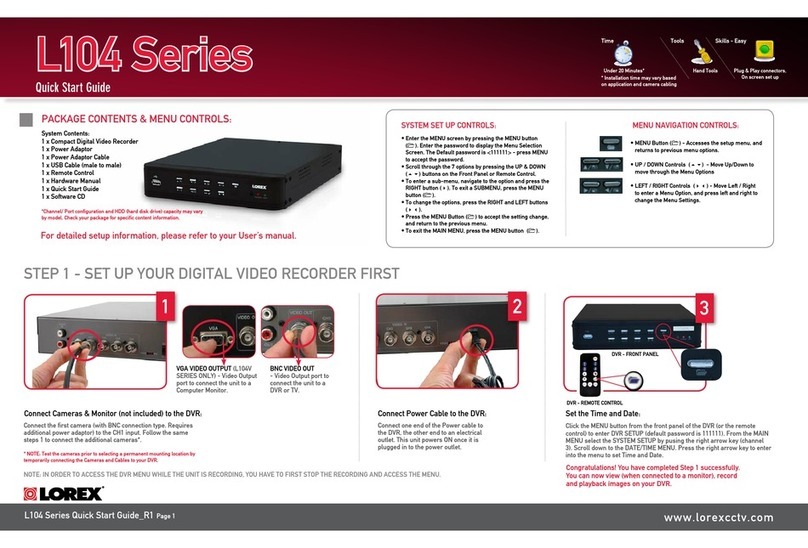
PACKAGE CONTENTS:
Connecting the USB Mouse
2Connect the USB mouse to either the USB port on the front
panelortheonelocatedatthebackoftheDVR.
Front Panel USB port Back Panel USB port
4
Connecting the Ethernet Cable
Connect one end of the
Ethernetcabletoanavailable
LANportofyourrouter(not
included) and the other end to
the DVR’s LAN port.
2
Using a Mouse (Recommended)
1:Left-button:Clicktoselectamenu
option;duringliveviewinginsplit-
screen,double-clickonachannel
to view the selected channel in
full-screen;double-clickthechannel
againtoreturntosplit-screenview.
2:Right-button:Clicktoopenthe
MenuBarortoexitfromamenu.
3:Scroll-wheel:Nofunction.
1 2
3
YouhavecompletedSTEPS1&2successfully.YourDVRis
nowreadytouse.RefertotheInstructionManualtolearn
howtorecord,playback,searchandforallotherfeatures
availablewiththisDVR.
Managing Passwords
Bydefault,passwordsaredisabledonthesystem.
You do not need to enter a password when accessing the
MenuBarorMainMenu.However,youmaybeaskedfor
a password to access certain functions.
7
NOTE: For security purposes, it is highly recommended to
enable passwords on the system using the Password Menu.
Please refer to the instruction manual for more information.
NOTE: By default, the
username is admin and
password is 000000.
Connecting Cameras (not included)
1ConnectBNCcamerastothe
BNCports(VIDEO INPUT) on
the rear panel.
NOTE:Testthecameraspriorto
selecting a permanent mounting
locationbytemporarily
connecting the cameras and
cablestoyourDVR.
NOTE: If the mouse curser
doesnotappearonscreen,
please press “0” three times
on the remote control to switch
betweenVGAandBNC.
NOTE:Thefourchannel
model is shown.
Connect to your DVR using Lorex Client 11 (LOCALLY)
BASICSETUPBASICSETUP NAVIGATIONANDCONTROLS SET-UPLOCALVIEWINGONYOURPC
Continued
STEP1 STEP2 STEP3
STEP1
3aConnectaVGAcable(not
included) from a monitor or
TVtotheVGA port on the
rear panel of the DVR.
3bFrom one of the VIDEO
OUTPUTportsconnectaBNC
terminatedcable(notincluded)
toaTVorCCTVmonitor.
OR
Connecting a Monitor
TheECOBlackBoxfeaturestwooptionsforconnectingtoamonitor.
Powering ON the DVR
5ConnectthepowercabletotheDC
12V port on the rear panel and
the power cord into an electrical
outlet.TheDVRwillautomatically
turn on once power is connected.
16 channel models: turn the power
switch,locatedonthebackpanel,to
the“ON”position.
Atstartup,thesystemperformsabasicsystemcheckandruns
aninitialloadingsequence.Afterafewmoments,thesystem
loads a live display view.
NOTE:Makesureallcamerasandcablesareproperlyconnected
prior to powering on the system.
Using the Main Menu
Right-clickanywhereon-screentoopentheSub-Menuandselect
MAIN MENU(mouseonly),orpressthe buttononthe
remote control.
1
5
6
7
8
1
2
3
4
1. Display
2.Search
3.Alarm
4. System
5. Record
6.Network
7. Device
8.Advanced
It is important to set the correct time to assure accurate time
stamps on video recordings.
Setting the Date & Time
1.Movethemousecursortothebottomofthescreento
openthemenubarandselectMAIN MENU.
2.ClickSYSTEM.
3. Configure the Date & Time and press APPLY to save
your settings. Click APPLY.Tofinish,pressOK.
6
NOTE:
A pop-up key
pad will open.
When you
have selected
the desired
date, press the
button to
confirm.
Recordtheinformationinthesectionbelow:
IPADDRESS: _______._______ ._______._______
MACADDRESS: _____:_____:_____:_____:_____:____
CLIENTPORT: ___________
(RequiredforDDNSregistration)
Retrieve the DVR Information
1Thisstepwillteachyouhowtolocally
viewyoursystemovertheLAN(local
area network) using your PC.
NOTE:Thismethodonlyworksifyour
computer is on the same network as the DVR.
TorecordyourIPAddress,MACAddress
andClientPort,rightclickanywhereon
the screen and select Main Menu. From
there,selectSystem and then Info.
CHECK OUR WEBSITE FOR LATEST DVR SOFTWARE
FIRMWARE UPGRADES, VIDEOS & DOCUMENTATION.
www.lorextechnology.com
* Contentmayvarybymodel,includingnumberofchannels/portconfigurationand
HDD (hard disk drive) capacity. Check your package for specific content information.
IP Address: Enter the local IP
address of your DVR.
User Name:Thedefaultuser
name is admin.
Password:Bydefault,the
password is left blank.
Client Port:Bydefault,thisis
9000.
Other Control Options
TheDVRcanalsobecontrolledusingtheincludedremotecontrol.
Please refer to the instruction manual for more information.
3
*remotecontrolmaynotbeexactlyasshown
21. Insert the system’s software CD into your computer.
2.Followtheon-screeninstructionstoinstallLorex Client
Software - PC.
3.Onceinstalled,double-clickontheLorex Client 11
iconfromyourdesktop.TheDVRloginscreenwillappear.
LH010 ECO BlackBox Series Quick Setup Guide - English - R1
INTERNETREMOTEMONITORING
INTERNETREMOTEMONITORING INTERNETREMOTEMONITORING INTERNETREMOTEMONITORING INTERNETREMOTEMONITORING
Continued
Continued
Continued Continued
5
Openyourwebbrowser(InternetExplorerbydefault)and
enter http://www.lorexddns.netintheaddressbar.
DDNS (Dynamic Domain Name System) Set-up
http://www.lorexddns.net
1: Populate the Router Database
3
TheAutoPortForwardingWizard
automatically populates a list of
currentrouters,anddetectsthe
numberofconnectedrouters.
1. Click the Nextbuttonafterthe
software detects your router
configuration.
2.UnderRouter IP,clicktheDetect Router IP button.
Therouter’sIPpopulatesintheblankfield.
3. Under Username and Password,entertherouter’s
username and password.
4. Under IP,entertheIPaddressofyour
LorexdeviceasrecordedinStep3-1.
5. Under Port,entertheport
number(s)thatrequireforwarding
(80,9000,1025).
6. Click Next to continue.
80Your IP
9000
1025
NOTE: Click the Auto Detectbuttonifyouhavea
LinksysorNetgearrouter(thisworkswithmostmodels).
2: Enter your Router Settings
1.UndertheRouterdrop-downlist,selectthemodelofyour
router OR click the Searchbuttontoenterthenameof
your router model.
NOTE: Ensure you select the proper model and firmware
numberoftherouter(asitappearsonthebackoftherouter)
IMPORTANT:Defaultportsthatmustbeportforwarded
for remote access:
Port 80(HTTPPort)
Port 9000 (Client Port)
Port 1025(MobileConnectivityPort)
4: Test your Connection
1. Click the Test Your Connection button.Yoursystem’s
defaultbrowseropensandconnectstoyourLorexdevice.
NOTE: Ensure that Internet Explorer is your system’s
defaultinternetbrowser.
3: Update the Router Settings
1. Click the Update Router
button.Theprogrambegins
updating the router settings.
Thismaytake20-30seconds.
2.Closetheupdate window
when the update finishes.
NOTE: You may have to
manually save your router settings
after the software makes the
requiredchangestoyourrouter.
Auto Port Forward Wizard
1
TheLorexAutoPortForwardingWizardisasoftwarethat
automates router port forwarding.
NOTE: YoumustbeonthesamenetworkastheDVRwhen
settinguptheDDNS.
Youmusthavethefollowingbeforeyouconfigurethesoftware:
1. Your router’s model and versionnumbers
2.Yourrouter’suser name and password
3. Your Lorex device’s IP address (recorded in Step 3-1)
4. Your Lorex device’s portnumbersthatrequireportforwarding
(80,9000,1025)
Optional: Manual Port Forward
4
If you were unable to port-forward your router
automatically using the wizard, you will need to
manually forward ports 80, 9000 and 1025 to
your DVR’s IP address.
Anexampleofaportforwardingscreenisshownfor
illustration purposes.
Allroutersaredifferent.Toportforwardyourrouter,pleaserefer
to your router’s user manual.
80 80
HTTP
EXAMPLE
9000 12
12
Media 9000
1025 12
Mobile 1025
STEP4 STEP4 STEP4 STEP4 STEP4
REMOTE INSTALLATION GUIDE
Time: 30 Minutes Skills - IntermediateHardware:
PC
SkillLevel
Intermediate
easy advanced
Time
under30 minutesunder15 minutes under60 minutes
HandTools Hardware
Router
HiSpeed
over60 minutes
9Enable DDNS on the DVR
1. Click on Main Menu fromthemenubar,thenclickNetwork.
2. ClicktheDDNStab.
3. Select Enable in the DDNSdrop-downmenu.
NOTE:Pleaseallow10~15minutesfortheDDNSserverstoupdate
withyournewDDNSaddress.ThisisnormalfortheDDNSsystem.
Click Apply to save your settings.
Enter the following into the DDNS Setup menu:
•Domain Name: Enter the Domain Name/URL
RequestthatwasemailedtoyouafterDDNSregistration.
•User Name: Enter your DDNS User Name that was
emailedtoyouafterDDNSregistration.
•Password: Enter your DDNS Device Password that
wase-mailedtoyouafterDDNSregistration.
Enter the DDNS Information into the DVR
10
Select Enable
Domain Name:
EnterDomainName/
URLRequest
User Name: Enter
DDNSUserName
Password: Enter
DDNSDevicePassword
1.Insertthesystem’ssoftwareCD,andfollowtheinstructions
to launch the Lorex Auto Port Forwarding Wizard
software.
Installation
2
NOTE: TheWizardisPCcompatibleonly.
 Macusers,pleasegotoStep4-4.
Congratulations! You have completed Step 4 successfully. You
cannowconnectovertheinternettoviewandplaybackvideo.
1-21082012
Instant
Mobile
Viewing
Forremoteconnectivityusingcompatiblesmartphones
andtabletsrefertotheinstructionmanual.Makesure
tocompleteStep4entirely.Toconnectremotelyusing
Mac,refertotheInstructionManual.
Shouldyourequirefurtherassistance,LOREXTech
Supportisavailabletoassistyou.Makesureto
register your product prior to contacting support at :
www.lorextechnology.com/support
1. Click Step 1
2.CreateanewMyLorexaccountor
sign in using an existing account.
6Create Account
7. Click SavetoregisteryourproductforDDNS.ADDNS
registrationconfirmationemailwillbesenttotheemail
addressusedtoregisterforMyLorex.
NOTE:URLRequestshouldnotbemorethan15characters.
6.FillouttheMy
DDNSform:
• Product Warranty:
Select the product
warranty you created
in the previous steps.
• Device Name: Enter a name for your device. You can
enteryourname,businessname,oranythingofyourchoice.
• MAC Address:EntertheMACaddressofyourLorex
systemrecordedinStep3-1.
• URL Request:Enterthewebsiteaddressthatwillbe
used to connect to your Lorex system.
Complete New Account Information
7
NOTE:WarrantyRegistrationisrequiredforDDNS.
3.UnderYourAddress,
select an address or click
Enter a New Address
to create a new address.
Fill in your address
information and click
Create Address.
1. Click Warranties.
2. ClickActivate Warranty.
4. Fill in the warranty registration
form with your product and
purchase details and click Save
Warranty. Check the sticker
underneath your DVR for the
ProductModelNumberand
SerialNumber.
5. Click Set Up a New DDNS.
AnautomatedREGISTRATION CONFIRMATION E-MAIL
willbesenttoyouremail.Printandsavethisconfirmation.You
willneedtoenteritintoyoursystemtoenableremoteaccess.
8Registration E-mail
DomainName/URLRequest:tomsmith
DDNSUserName:tomsmith
DDNSDevicePassword:(yourpassword)
EXAMPLE 3. Enter the following information in each field:
4. Click Login to access your DVR. Lorex Client 11 connects to your
DVR and streams live video from your cameras.
11
1. Install Lorex Client 11 onto your computer using the included
softwareCD,ifyouhavenotdonesoalready.
2.Onceinstalled,double-clickonthe
Lorex Client 11 icon from your desktop.
TheDVRloginscreenwillappear.
Logging into the System Remotely
IP Address: Enter the DDNS address of your DVR. (if your URL
Requestistomsmith enter tomsmith.lorexddns.net)
User Name:Thedefaultusernameisadmin.
Password:Bydefault,thepasswordisleft blank.
Client Port:Bydefault,thisis9000.
EntertheDVR’sDDNSaddress
EntertheDVR’sUserName
(default: admin)
Enter the DVR’s Password
(bydefault,thisis left blank)
Enter the DVR’s Client Port
(default: 9000)
Forafullexplanationofallbuttonsandfeaturesof
Lorex Client 11,pleaserefertotheInstructionManual.

Other manuals for Vantage LH010 ECO BLACKBOX SERIES

2

Other Lorex DVR manuals

Lorex D242B Series User manual

Lorex

Lorex D242B Series User manual

Lorex DXR4280UQ-A User manual

Lorex

Lorex DXR4280UQ-A User manual

Lorex L224 Series User manual

Lorex

Lorex L224 Series User manual

Lorex LHV5100 Series Instruction Manual

Lorex

Lorex LHV5100 Series Instruction Manual

Lorex D841 Series User manual

Lorex

Lorex D841 Series User manual

Lorex LHV5100W Series User manual

Lorex

Lorex LHV5100W Series User manual

Lorex LH600 SERIES User manual

Lorex

Lorex LH600 SERIES User manual

Lorex LH324501 User manual

Lorex

Lorex LH324501 User manual

Lorex N843 Series User manual

Lorex

Lorex N843 Series User manual

Lorex LH060 Series User manual

Lorex

Lorex LH060 Series User manual

Lorex LH120 Series User manual

Lorex

Lorex LH120 Series User manual

Lorex LH330 Edge2 Series User manual

Lorex

Lorex LH330 Edge2 Series User manual

Lorex L224 Series User manual

Lorex

Lorex L224 Series User manual

Lorex LH400 LINK SERIES User manual

Lorex

Lorex LH400 LINK SERIES User manual

Lorex L404 User manual

Lorex

Lorex L404 User manual

Lorex LHV1000 SERIES Operator's manual

Lorex

Lorex LHV1000 SERIES Operator's manual

Lorex L20WD800 Series Instruction Manual

Lorex

Lorex L20WD800 Series Instruction Manual

Lorex DXR209161 User manual

Lorex

Lorex DXR209161 User manual

Lorex N4K2-86BB User manual

Lorex

Lorex N4K2-86BB User manual

Lorex LHA2000 Series Instruction Manual

Lorex

Lorex LHA2000 Series Instruction Manual

Lorex DXR116 User manual

Lorex

Lorex DXR116 User manual

Lorex L104000 User manual

Lorex

Lorex L104000 User manual

Lorex SC325000 User manual

Lorex

Lorex SC325000 User manual

Lorex LH050 ECO SERIES User manual

Lorex

Lorex LH050 ECO SERIES User manual

Popular DVR manuals by other brands

iVigil Multiplex DVR user manual

iVigil

iVigil Multiplex DVR user manual

ClearView Phoenix user manual

ClearView

ClearView Phoenix user manual

Ganz DR-16F44-AT installation guide

Ganz

Ganz DR-16F44-AT installation guide

Ness 104-005 user manual

Ness

Ness 104-005 user manual

epiphan Pearl-2 Rackmount user guide

epiphan

epiphan Pearl-2 Rackmount user guide

EverFocus PowerFlex eDR400 Administrator's guide and operating instructions

EverFocus

EverFocus PowerFlex eDR400 Administrator's guide and operating instructions

Sparsh Dual Streaming user manual

Sparsh

Sparsh Dual Streaming user manual

SIC DVR user manual

SIC

SIC DVR user manual

JVC SR-HD1500 instructions

JVC

JVC SR-HD1500 instructions

SoundMax SM-DVR55FHD instruction manual

SoundMax

SoundMax SM-DVR55FHD instruction manual

Bosch DVR4C Series quick guide

Bosch

Bosch DVR4C Series quick guide

TiVo Series1 Viewer's guide

TiVo

TiVo Series1 Viewer's guide

SVSi N6223 user manual

SVSi

SVSi N6223 user manual

DGTEC DG-FV500PVR user manual

DGTEC

DGTEC DG-FV500PVR user manual

Gentner APV200-IP Installation & operation manual

Gentner

Gentner APV200-IP Installation & operation manual

Avermedia AVerDiGi MOB1304 NET user manual

Avermedia

Avermedia AVerDiGi MOB1304 NET user manual

Dahua Technology DH-5208AN-4KL-X-8 user manual

Dahua Technology

Dahua Technology DH-5208AN-4KL-X-8 user manual

Hills NVR-CH4 quick guide

Hills

Hills NVR-CH4 quick guide

manuals.online logo
manuals.online logoBrands
  • About & Mission
  • Contact us
  • Privacy Policy
  • Terms and Conditions

Copyright 2025 Manuals.Online. All Rights Reserved.