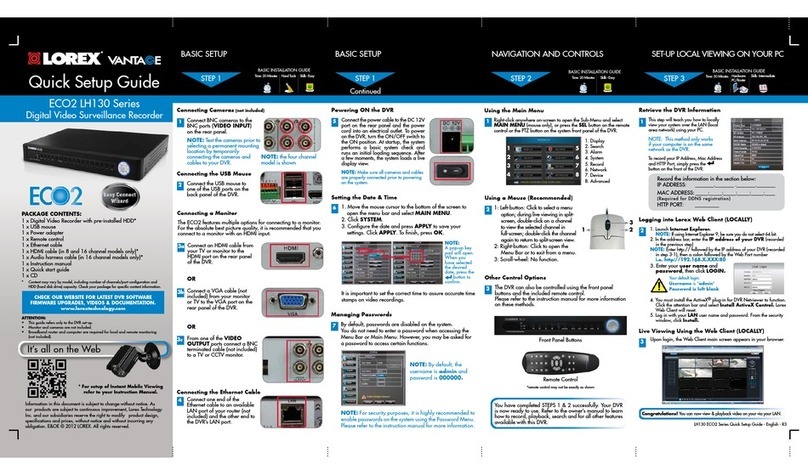
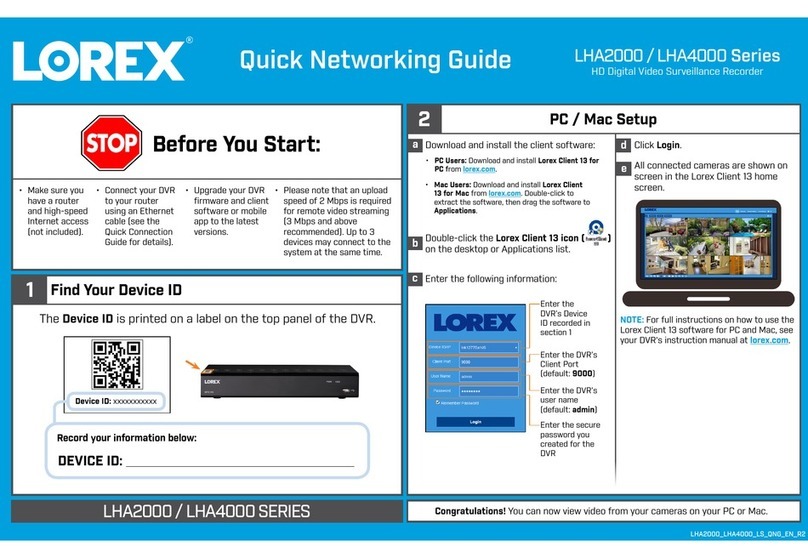
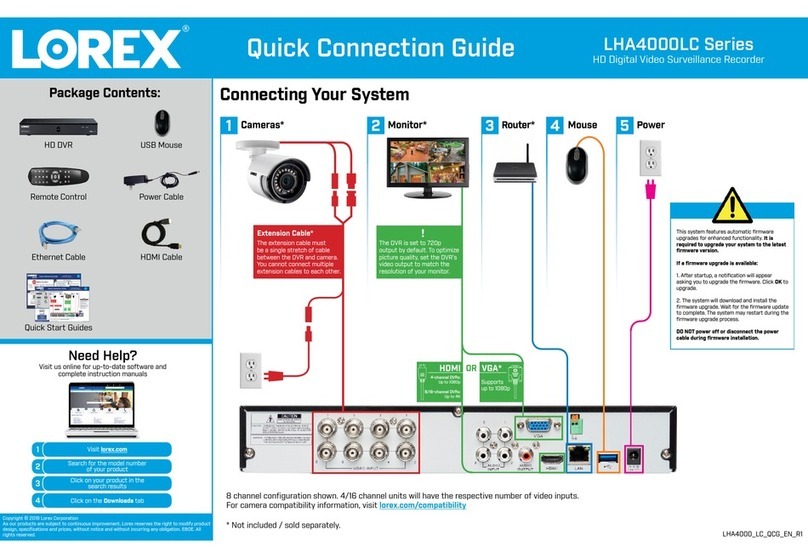
Congratulations!Youcannowview&playbackvideoonyourPCviayourLAN.
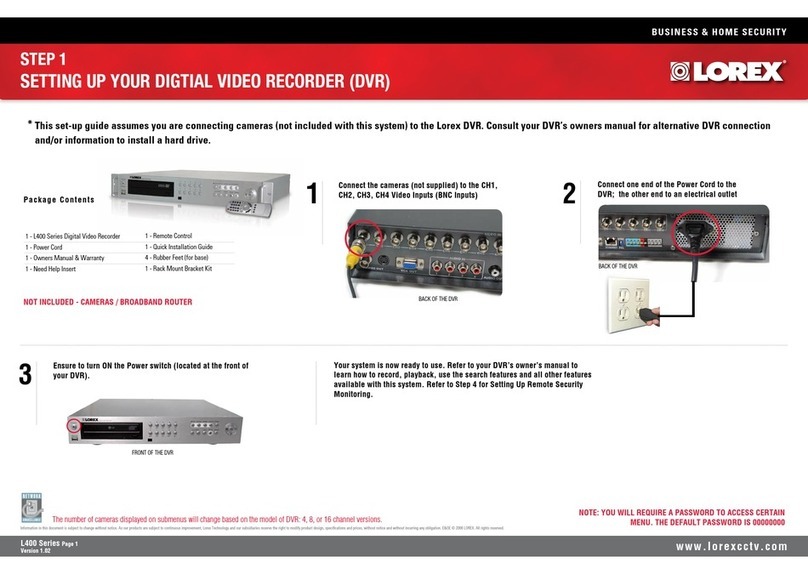
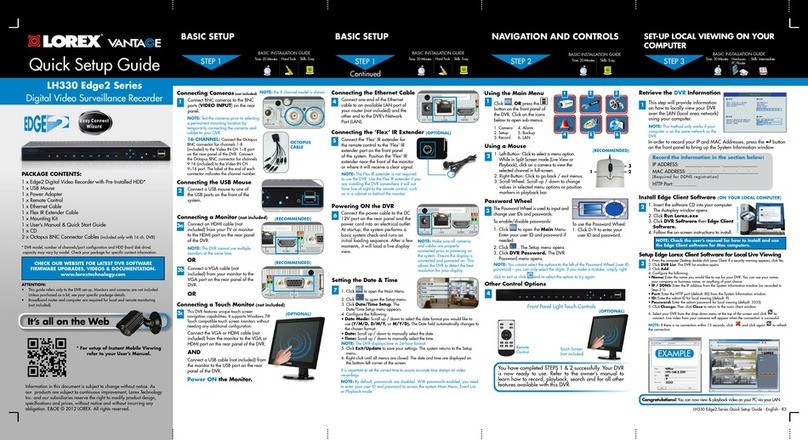
1xEDGE3DigitalVideoRecorderwithPre-InstalledHDD*
1xUSBMouse
1xPowerAdapter
1xRemoteControl
1xEthernetCable
1xFlexIRExtenderCable
1xMountingKit
1xUser’sManual&QuickStartGuide
1xCD
2xOctopusBNCConnectorCables(includedonlywith16ch.DVR)
*DVRmodel,numberofchannels/portconfigurationandHDD(harddiskdrive)
capacitymayvarybymodel.Checkyourpackageforspecificcontentinformation.
PACKAGE CONTENTS:
4
Connecting the Ethernet Cable
ConnectoneendoftheEthernet
cabletoanavailableLANportof
yourrouter(notincluded)andthe
otherendtotheDVR’sNetwork
Port(LAN).
2
Using a Mouse
1.Left-Button:Clicktoselectamenuoption.
WhileinSplit-Screenmode(LiveViewor
Playback),clickonacameratoviewthe
selectedchannelinfull-screen.
2.Right-Button:Clicktogoback/exitmenus.
3.Scroll-Wheel:Scrollup/downtochange
valuesinselectedmenuoptionsorposition
markersinplaybackbar.
1 2
3
YouhavecompletedSTEPS1&2successfully.YourDVR
isnowready touse.Refer totheinstruction manualto
learnhowtorecord,playback,searchandforallother
featuresavailablewiththisDVR.
Using the Main Menu
Click ,ORpressthe
buttononthefrontpanelof
theDVR.Clickontheicons
belowtoopensub-menus.
1
Other Control Options
4
Retrieve the DVR Information
InordertorecordyourIP and MAC addresses,pressthe button
onthefrontpaneltobringuptheSystemInformationwindow.
1Thisstepwillprovideinformation
onhowtolocallyviewyourDVR
overtheLAN(localareanetwork)
usingyourcomputer.
NOTE:Thismethodonlyworksifyour
computerisonthesamenetworkasthe
DVR.
BASIC SETUPBASIC SETUP NAVIGATION AND CONTROLS SET-UP LOCAL VIEWING ON YOUR
COMPUTER
Continued
STEP1 STEP2 STEP3
STEP1
6
Powering ON the DVR
ConnectthepowercabletotheDC
12Vportontherearpanelandthe
powercordintoanelectricaloutlet.
Atstartup,thesystemperformsa
basicsystemcheckandrunsan
initialloadingsequence.Afterafew
moments,itwillloadalivedisplay
view.
NOTE:Makesureallcameras
andcablesareproperly
connectedpriortopoweringon
thesystem.Ensurethedisplayis
connectedandpoweredon.This
allowstheDVRtodetectthebest
resolutionforyourdisplay.
5
Connecting the ‘Flex’ IR Extender
Connectthe‘Flex’IRextenderfor
theremotecontroltothe‘Flex’IR
extenderportonthefrontpanel
ofthesystem.Positionthe‘Flex’IR
extendernearthefrontofthemonitor
orwhereitwillreceiveaclearsignal.
NOTE: TheFlexIRextenderisnotrequired
tousetheDVR.UsetheFlexIRextenderifyou
areinstallingtheDVRsomewhereitwillnot
havelineofsighttotheremotecontrol,such
asinacabinetorbehindthemonitor.
1.Camera
2.Setup
3.Record
1 2 3
4 5 6
NOTE:Bydefault,passwordsaredisabled.Withpasswordsenabled,youneed
toenteryouruserIDandpasswordtoaccessthesystemMainMenu,EventList,
orPlaybackmode.
Itisimportanttosetthecorrecttimetoassureaccuratetimestampsonvideo
recordings.
Setting the Date & Time
1.Click toopentheMainMenu.
2.Click toopentheSetupmenu.
3.ClickDate/Time Setup.The
Date/TimeSetupmenuappears.
4.Configurethefollowing:
•Date Mode:Scrollup/downtoselectthedateformatyouwouldliketo
use(Y/M/D, D/M/Y, or M/Y/D).TheDatefieldautomaticallychangesto
thechosenformat.
•Date:Scrollup/downtomanuallyselectthedate.
•Time: Scrollup/downtomanuallyselectthetime.
NOTE:TheDVRdisplaystimein24-hourformat.
5.ClickExit/Updatetosaveyoursettings.ThesystemreturnstotheSetup
menu.
6.Right-clickuntilallmenusareclosed.Thedateandtimearedisplayedon
thebottom-leftcornerofthescreen.
7
4.Alarm
5.Backup
6.LAN
Password Wheel
ThePasswordWheelisusedtoinputand
changeuserIDsandpasswords.
TousethePasswordWheel:
1.Click0~9toenteryour
userIDandpassword.
3
(RECOMMENDED)
(OPTIONAL)
IPADDRESS: _______._______ ._______._______
MACADDRESS: _____:_____:_____:_____:_____:____
Record the information in the section below:
(RequiredforDDNSregistration)
HTTPPort:
Setup Edge Lorex Client Software for Local Live Viewing
31.FromthecomputerDesktopdouble-clickLorexClient.Ifasecuritywarningappears,clickYes.
2.ClickDVR List.TheDVRlistwindowopens.
3.ClickAdd.
4.Configurethefollowing:
•Name:EnterthenameyouwouldliketouseforyourDVR.Youcanuseyourname,
yourcompanyorbusinessname,oranythingofyourchoice.
•IP / DDNS:EntertheIPaddressfromtheSystemInformationwindow(asrecordedin
Step3-1)
•Port:EntertheHTTPport(default:80)fromtheSystemInformationwindow.
•ID:EntertheadminIDforlocalviewing(default:9).
•Password:Entertheadminpasswordforlocalviewing(default:3333).
5.ClickChange.ThenclickClosetoreturntothemainclientwindow.
6.SelectyourDVRfromthedrop-downmenuatthetopofthescreenandclick to
connect.Livevideofromyourcameraswillappearwhentheconnectionissuccessful.
NOTE:Ifthereisnoconnectionwithin15seconds,click andclickagain torefresh
theconnection.
NOTE:YoucannotselecttheoptionstotheleftofthePasswordWheel(userID,
password)—youcanonlyselectthedigits.Ifyoumakeamistake,simplyright-
clicktoexitorclick andre-selecttheoptiontotryagain.
Connecting the USB Mouse
2ConnectaUSBmousetooneof
theUSBportsonthefrontofthe
system.
Connecting Cameras (not included)
1ConnectBNCcamerastotheBNC
ports(VIDEO INPUT)ontherear
panel.
NOTE:Testthecameraspriortoselecting
apermanentmountinglocationby
temporarilyconnectingthecamerasand
cablestoyourDVR.
NOTE:the8channelmodelisshown
16-CHANNEL: ConnecttheOctopus
BNCconnectorforchannels1-8
(included)totheVideoINCH1~8port
ontherearpaneloftheDVR.Connect
theOctopusBNCconnectorforchannels
9-16(included)totheVideoINCH
9~16port.Thelabelattheendofeach
connectorindicatesthechannelnumber.
Connecting a Monitor (not included)
OR
3c
ConnecttheVGAorHDMIcable(not
included)fromthemonitortotheVGAor
HDMIportontherearpaneloftheDVR.
OR
3b ConnectaVGAcable(not
included)fromyourmonitortothe
VGAportontherearpanelofthe
DVR.
3a ConnectanHDMIcable(not
included)fromyourTVormonitor
totheHDMIportontherearpanel
oftheDVR.
NOTE:TheDVRcannotusemultiple
monitorsatthesametime.
Connecting a Touch Monitor (not included)
OCTOPUS
CABLE
Power ON the Monitor.
(RECOMMENDED)
(RECOMMENDED)
(OPTIONAL)
ConnectaUSBcable(notincluded)from
themonitortotheUSBportontherear
paneloftheDVR.
AND
ThisDVRfeaturesuniquetouch-screen
navigationcapabilities.ItsupportsWindows7®
Touchcompatibletouchscreenmonitorswithout
needinganyadditionalconfiguration.
Remote
Control
FrontPanelLightTouchControls
TouchScreen
(notincluded)
(OPTIONAL)
2
Install Edge Client Software (ON YOUR LOCAL COMPUTER)
1.InsertthesoftwareCDintoyourcomputer.
TheAutoplaywindowopens.
2.ClickRun Lorex.exe
3.ClickDVR SoftwarethenEdge Client
Software.
4.Followtheon-screeninstructionstoinstall.
Computer-notincluded
NOTE: Check the user’s manual for how to install and use
the Edge Client software for Mac computers.
CHECK OUR WEBSITE FOR LATEST DVR SOFTWARE
FIRMWARE UPGRADES, VIDEOS & DOCUMENTATION.
www.lorextechnology.com
Toenable/disablepasswords:
1.Click toopentheMain Menu.
EnteryouruserIDandpasswordif
needed.
2.Click .TheSetupmenuopens.
3.ClickDVR Password. TheDVR
Passwordmenuopens.
80
Office
3333
192.168.5.220
9
EXAMPLE
