manuals.online logo
Brands
  1. Home
  2. •
  3. Brands
  4. •
  5. Lorex
  6. •
  7. DVR
  8. •
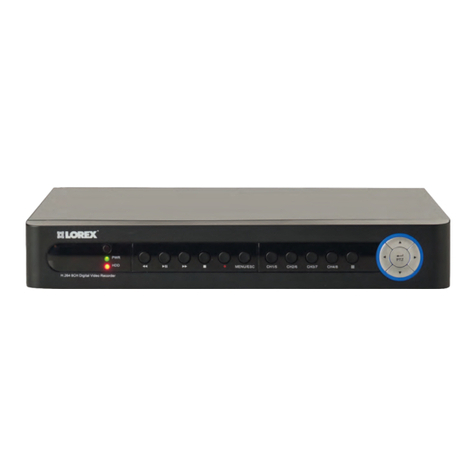
  9. Lorex LH330 Edge2 Series User manual

Lorex LH330 Edge2 Series User manual

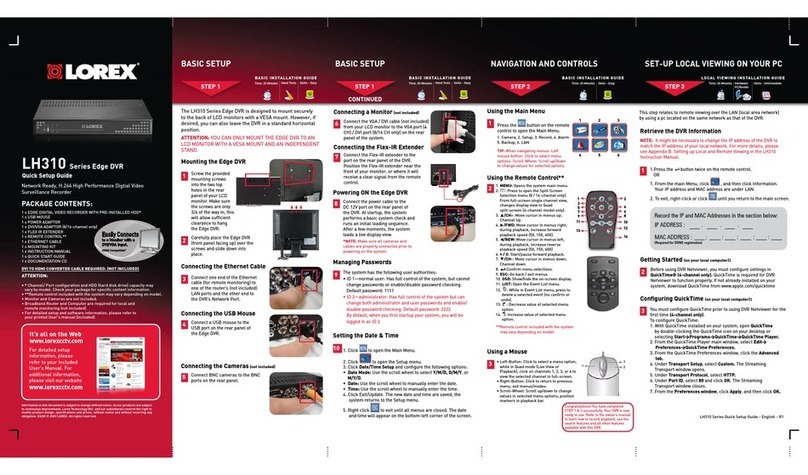
LH330 Edge2 Series Quick Setup Guide - English - R3
Skill Level
Intermediate
easy advanced
Time
under 30 minutesunder 15 minutes under 60 minutes
Hand Tools Hardware
Router
Hi Speed
over 60 minutes
Skill Level
Intermediate
easy advanced
Time
under 30 minutesunder 15 minutes under 60 minutes
Hand Tools Hardware
Router
Hi Speed
over 60 minutes
Time: 20 Minutes Time: 20 Minutes Time: 20 Minutes
Hand Tools Hand ToolsSkills - Easy Skills - Easy Skills - Easy
BASIC INSTALLATION GUIDE BASIC INSTALLATION GUIDE BASIC INSTALLATION GUIDE BASIC INSTALLATION GUIDE
Skill Level
Intermediate
easy advanced
Time
under 30 minutesunder 15 minutes under 60 minutes
Hand Tools Hardware
Router
Hi Speed
over 60 minutes
Skill Level
Intermediate
easy advanced
Time
under 30 minutesunder 15 minutes under 60 minutes
Hand Tools Hardware
Router
Hi Speed
over 60 minutes
Skill Level
Intermediate
easy advanced
Time
under 30 minutesunder 15 minutes under 60 minutes
Hand Tools Hardware
Router
Hi Speed
over 60 minutes
Digital Video Surveillance Recorder
LH330 Edge2 Series
Quick Setup Guide
ATTENTION:
• ThisguiderefersonlytotheDVRset-up.Monitorsandcamerasarenotincluded.
Unlesspurchasedasakit,seeyourspecificpackagedetails.
• Broadbandrouterandcomputerarerequiredforlocalandremotemonitoring
(notincluded).
Informationinthisdocumentissubjecttochangewithoutnotice.As
ourproductsaresubjecttocontinuousimprovement,LorexTechnology
Inc.andoursubsidiariesreservetherighttomodifyproductdesign,
specificationsandprices,withoutnoticeandwithoutincurringany
obligation.E&OE©2012LOREX.Allrightsreserved.
* For setup of Instant Mobile Viewing
refer to your User’s Manual.
It’s all on the Web
Time: 30 Minutes Skills - Intermediate
Hardware:
PC/Router
Skill Level
Intermediate
easy advanced
Time
under 30 minutesunder 15 minutes under 60 minutes
Hand Tools Hardware
Router
Hi Speed
over 60 minutes
Skill Level
Intermediate
easy advanced
Time
under 30 minutesunder 15 minutes under 60 minutes
Hand Tools Hardware
Router
Hi Speed
over 60 minutes
Congratulations!Youcannowview&playbackvideoonyourPCviayourLAN.
1xEdge2DigitalVideoRecorderwithPre-InstalledHDD*
1xUSBMouse
1xPowerAdapter
1xRemoteControl
1xEthernetCable
1xFlexIRExtenderCable
1xMountingKit
1xUser’sManual&QuickStartGuide
1xCD
2xOctopusBNCConnectorCables(includedonlywith16ch.DVR)
*DVRmodel,numberofchannels/portconfigurationandHDD(harddiskdrive)
capacitymayvarybymodel.Checkyourpackageforspecificcontentinformation.
PACKAGE CONTENTS:
4
Connecting the Ethernet Cable
ConnectoneendoftheEthernet
cabletoanavailableLANportof
yourrouter(notincluded)andthe
otherendtotheDVR’sNetwork
Port(LAN).
2
Using a Mouse
1.Left-Button:Clicktoselectamenuoption.
WhileinSplit-Screenmode(LiveViewor
Playback),clickonacameratoviewthe
selectedchannelinfull-screen.
2.Right-Button:Clicktogoback/exitmenus.
3.Scroll-Wheel:Scrollup/downtochange
valuesinselectedmenuoptionsorposition
markersinplaybackbar.
1 2
3
YouhavecompletedSTEPS1&2successfully.YourDVR
is now ready to use. Refer to the owner’s manual to
learnhowtorecord,playback,searchandforallother
featuresavailablewiththisDVR.
Using the Main Menu
Click ,ORpressthe
buttononthefrontpanelof
theDVR.Clickontheicons
belowtoopensub-menus.
1
Other Control Options
4
Retrieve the DVR Information
InordertorecordyourIPandMACAddresses,pressthe button
onthefrontpaneltobringuptheSystemInformationwindow.
1Thisstepwillprovideinformation
onhowtolocallyviewyourDVR
overtheLAN(localareanetwork)
usingyourcomputer.
NOTE:Thismethodonlyworksifyour
computerisonthesamenetworkasthe
DVR.
BASIC SETUPBASIC SETUP NAVIGATION AND CONTROLS SET-UP LOCAL VIEWING ON YOUR
COMPUTER
Continued
STEP1 STEP2 STEP3
STEP1
6
Powering ON the DVR
ConnectthepowercabletotheDC
12Vportontherearpanelandthe
powercordintoanelectricaloutlet.
Atstartup,thesystemperformsa
basicsystemcheckandrunsan
initialloadingsequence.Afterafew
moments,itwillloadalivedisplay
view.
NOTE:Makesureallcameras
andcablesareproperly
connectedpriortopoweringon
thesystem.Ensurethedisplayis
connectedandpoweredon.This
allowstheDVRtodetectthebest
resolutionforyourdisplay.
Remote
Control
5
Connecting the ‘Flex’ IR Extender
Connectthe‘Flex’IRextenderfor
theremotecontroltothe‘Flex’IR
extenderportonthefrontpanel
ofthesystem.Positionthe‘Flex’IR
extendernearthefrontofthemonitor
orwhereitwillreceiveaclearsignal.
NOTE: TheFlexIRextenderisnotrequired
tousetheDVR.UsetheFlexIRextenderifyou
areinstallingtheDVRsomewhereitwillnot
havelineofsighttotheremotecontrol,such
asinacabinetorbehindthemonitor.
1.Camera
2.Setup
3.Record
1 2 3
4 5 6
NOTE:Bydefault,passwordsaredisabled.Withpasswordsenabled,youneed
toenteryouruserIDandpasswordtoaccessthesystemMainMenu,EventList,
orPlaybackmode.
Itisimportanttosetthecorrecttimetoassureaccuratetimestampsonvideo
recordings.
Setting the Date & Time
1.Click toopentheMainMenu.
2.Click toopentheSetupmenu.
3.ClickDate/Time Setup.The
Date/TimeSetupmenuappears.
4.Configurethefollowing:
•Date Mode:Scrollup/downtoselectthedateformatyouwouldliketo
use(Y/M/D, D/M/Y, or M/Y/D).TheDatefieldautomaticallychangesto
thechosenformat.
•Date:Scrollup/downtomanuallyselectthedate.
•Time: Scrollup/downtomanuallyselectthetime.
NOTE:TheDVRdisplaystimein24-hourformat.
5.ClickExit/Updatetosaveyoursettings.ThesystemreturnstotheSetup
menu.
6.Right-clickuntilallmenusareclosed.Thedateandtimearedisplayedon
thebottom-leftcornerofthescreen.
7
4.Alarm
5.Backup
6.LAN
Password Wheel
ThePasswordWheelisusedtoinputand
changeuserIDsandpasswords.
TousethePasswordWheel:
1.Click0~9toenteryour
userIDandpassword.
3
(RECOMMENDED)
(OPTIONAL)
IPADDRESS: _______._______ ._______._______
MACADDRESS: _____:_____:_____:_____:_____:____
Record the information in the section below:
(RequiredforDDNSregistration)
HTTPPort:
Setup Edge Lorex Client Software for Local Live Viewing
31.FromthecomputerDesktopdouble-clickLorexClient.Ifasecuritywarningappears,clickYes.
2.ClickDVR List.TheDVRlistwindowopens.
3.ClickAdd.
4.Configurethefollowing:
•Name:EnterthenameyouwouldliketouseforyourDVR.Youcanuseyourname,
yourcompanyorbusinessname,oranythingofyourchoice.
•IP / DDNS:EntertheIPaddressfromtheSystemInformationwindow(asrecordedin
Step3-1)
•Port:EntertheHTTPport(default:80)fromtheSystemInformationwindow.
•ID:EntertheadminIDforlocalviewing(default:9).
•Password:Entertheadminpasswordforlocalviewing(default:3333).
5.ClickChange.ThenclickClosetoreturntothemainclientwindow.
6.SelectyourDVRfromthedrop-downmenuatthetopofthescreenandclick to
connect.Livevideofromyourcameraswillappearwhentheconnectionissuccessful.
NOTE:Ifthereisnoconnectionwithin15seconds,click and click again torefresh
theconnection.
NOTE:YoucannotselecttheoptionstotheleftofthePasswordWheel(userID,
password)—youcanonlyselectthedigits.Ifyoumakeamistake,simplyright-
clicktoexitorclick andre-selecttheoptiontotryagain.
Connecting the USB Mouse
2ConnectaUSBmousetooneof
theUSBportsonthefrontofthe
system.
Connecting Cameras (not included)
1ConnectBNCcamerastotheBNC
ports(VIDEO INPUT)ontherear
panel.
NOTE:Testthecameraspriortoselecting
apermanentmountinglocationby
temporarilyconnectingthecamerasand
cablestoyourDVR.
NOTE:the8channelmodelisshown
16-CHANNEL: ConnecttheOctopus
BNCconnectorforchannels1-8
(included)totheVideoINCH1~8port
ontherearpaneloftheDVR.Connect
theOctopusBNCconnectorforchannels
9-16(included)totheVideoINCH
9~16port.Thelabelattheendofeach
connectorindicatesthechannelnumber.
Connecting a Monitor (not included)
OR
3c
ConnecttheVGAorHDMIcable(not
included)fromthemonitortotheVGAor
HDMIportontherearpaneloftheDVR.
OR
3b ConnectaVGAcable(not
included)fromyourmonitortothe
VGAportontherearpanelofthe
DVR.
3a ConnectanHDMIcable(not
included)fromyourTVormonitor
totheHDMIportontherearpanel
oftheDVR.
NOTE:TheDVRcannotusemultiple
monitorsatthesametime.
Connecting a Touch Monitor (not included)
OCTOPUS
CABLE
Power ON the Monitor.
(RECOMMENDED)
(RECOMMENDED)
(OPTIONAL)
ConnectaUSBcable(notincluded)from
themonitortotheUSBportontherear
paneloftheDVR.
AND
ThisDVRfeaturesuniquetouch-screen
navigationcapabilities.ItsupportsWindows7®
Touchcompatibletouchscreenmonitorswithout
needinganyadditionalconfiguration.
FrontPanelLightTouchControls
TouchScreen
(not included)
(OPTIONAL)
2
Install Edge Client Software (ON YOUR LOCAL COMPUTER)
1.InsertthesoftwareCDintoyourcomputer.
TheAutoplaywindowopens.
2.ClickRun Lorex.exe
3.ClickDVR SoftwarethenEdge Client
Software.
4.Followtheon-screeninstructionstoinstall.
Computer-notincluded
NOTE: Check the user’s manual for how to install and use
the Edge Client software for Mac computers.
CHECK OUR WEBSITE FOR LATEST DVR SOFTWARE
FIRMWARE UPGRADES, VIDEOS & DOCUMENTATION.
www.lorextechnology.com
Toenable/disablepasswords:
1.Click toopentheMain Menu.
EnteryouruserIDandpasswordif
needed.
2.Click .TheSetupmenuopens.
3.ClickDVR Password. TheDVR
Passwordmenuopens.
80
Office
3333
192.168.5.220
9
EXAMPLE
LH330 Edge2 Series Quick Setup Guide - English - R3
INTERNET REMOTE MONITORING
INTERNET REMOTE MONITORING INTERNET REMOTE MONITORING INTERNET REMOTE MONITORING INTERNET REMOTE MONITORING
Congratulations!YouhavecompletedStep4successfully.
Youcannowconnectovertheinternettoview,setup&
backupvideofromyourDVR.
Continued
Continued
Continued Continued
5
Openyourwebbrowser(InternetExplorerbydefault)and
enter http://www.lorexddns.netintheaddressbar.
DDNS (Dynamic Domain Name System) Set-up
http://www.lorexddns.net
1.InsertthesoftwareCD,andfollowtheinstructionstolaunch
theLorex Auto Port Forwarding Wizardsoftware.
Installation
2
1: Populate the Router Database
3
TheAutoPortForwardingWizard
automaticallypopulatesalistof
currentrouters,anddetectsthe
numberofconnectedrouters.
1.ClickNextafterthesoftware
detectsyourrouterconfiguration.
2.UnderRouter IP,clicktheDetect Router IP button.
Therouter’sIPpopulatesintheblankfield.
3.UnderUsername and Password,entertherouter’s
usernameandpassword.
4.UnderIP,entertheIPaddress
ofyourLorexdeviceas
recordedinStep3-1.
5.UnderPort,entertheport
number(s)thatrequire
forwarding(80).
6.ClickNexttocontinue.
NOTE:ClicktheTry to Auto Detectbuttonifyouhavea
LinksysorNetgearrouter(thisworkswithmostmodels).
2: Enter your Router Settings
80
1.UndertheRouterdrop-downlist,selectthemodelofyour
router OR clicktheSearchbuttontoenterthenameof
yourroutermodel.
NOTE:Ensureyouselectthepropermodelandfirmware
numberoftherouter(asitappearsonthebackoftherouter)
IMPORTANT:Defaultportsthatmustbeportforwardedfor
remoteaccess:
Port80(HTTPPort)
4: Test your Connection
1.ClicktheTest Connection button.Yoursystem’sdefault
browseropensandconnectstoyourLorexdevice.
NOTE:EnsurethatInternetExplorerisyoursystem’sdefault
internetbrowser.
3: Update the Router Settings
1.ClicktheUpdate Router
button.Theprogrambegins
updatingtheroutersettings.
Thismaytake20-30seconds.
2.Closetheupdatewindow
whentheupdatefinishes.
NOTE:Youmayhavetomanually
saveyourroutersettingsafter
thesoftwaremakestherequired
changestoyourrouter.
ForRemoteConnectivityusingcompatible
SmartphonesandTablets,refertothe
User’sManual.Makesuretocomplete
Step4entirely.
ToconnectusingMac,refertotheUser’s
Manual.
Instant
Mobile
Viewing
Complete New Account Information
7
6Create an Account
ToaddanewentrytoyourDVRlistusingtheDDNSaddress:
1.OpentheEdgeLorexClient12softwareandclickDVR List.The
DVRListwindowopens.
2.ClickAdd.
3.Configurethefollowing:
•Name:EnterthenameyouwouldliketouseforyourDVR.
Youcanuseyourname,yourcompanyorbusinessname,or
anythingofyourchoice.
•IP/DDNS: EntertheDomain Name/URL Request
followedby.lorexddns.net.Forexample,iftheDomainName/
URLRequestistomsmith,entertomsmith.lorexddns.net).
•Port: EntertheHTTPport(default:80)fromtheSystem
Informationwindow.
•ID:EntertheadminIDforremoteviewing(default:9).
•Password:Entertheadminpasswordforremoteviewing
(default:3333).
4.ClickChange tosaveyoursettings.ThenclickClose to
returntotheclientwindow.
6.SelectyourDVRfromthedrop-downmenuatthetopofthe
screenandclick toconnect.Livevideofromyourcameras
willappearwhentheconnectionissuccessful.
NOTE:Ifthereisnoconnectionwithin15seconds,click
and click again torefreshtheconnection.
Auto Port Forward Wizard
1
TheLorexAutoPortForwardingWizardisasoftwarethat
automatesrouterportforwarding.
NOTE: YoumustbeonthesamenetworkastheDVRwhen
settinguptheDDNS.
Youmusthavethefollowingbeforeyouconfigurethesoftware:
1.Yourrouter’smodel and versionnumbers
2.Yourrouter’suser name and password
3.YourLorexdevice’sIPaddress(recorded in Step 3-1)
4.YourLorexdevice’sportnumbersthatrequireportforwarding
(bydefault:80)
OPTIONAL: Manual Port Forward
4
If you were unable to port-forward your router
automatically using the wizard, you will need to
manually forward port 80 to your DVR’s IP address.
Allroutersaredifferent.Toportforwardyourrouter,please
refertoyourrouter’susermanual.
Anexampleofaportforwardingscreenisshownfor
illustrationpurposes.
8
AnautomatedREGISTRATION CONFIRMATION E-MAIL
willbesenttoyouremail.Printandsavethisconfirmation.You
willneedtoenteritintoyoursystemtoenableremoteaccess.
Registration E-mail
DomainName/URLRequest:tomsmith
DDNSUserName:tomsmith
DDNSDevicePassword:(yourpassword) EXAMPLE
80 80
HTTP
EXAMPLE
12
STEP4 STEP4 STEP4 STEP4 STEP4
REMOTE INSTALLATION GUIDE
Time: 30 Minutes Skills - Intermediate
Hardware:
PC
Skill Level
Intermediate
easy advanced
Time
under 30 minutesunder 15 minutes under 60 minutes
Hand Tools Hardware
Router
Hi Speed
over 60 minutes
Update Lorex Edge Client 12 Software for Remote Viewing
11
10
REMOTE LIVE SITE
YOURIP
ToenableDDNSonyourDVR:
1.OpenEdgeClientSoftwareandclicktheSetupbutton.
2.OpentheDDNStab.
3.Configurethefollowing:
•Under DDNS Select,selecthttp://www.lorexddns.net
fromthedrop-down.
•DDNS User Name: EntertheDDNS User Name
fromtheconfirmationemailthatwassenttoyouafteryou
createdyourDDNSaccount.
• DDNS Password: EntertheDevice DDNS
Password fromtheconfirmationemail.
•DDNS Domain Name:EntertheDomain name/
URL Requestfromtheconfirmationemail.
5.ClickApplytosaveyourchanges.
Enable DDNS on the DVR
NOTE: Pleaseallow10~15minutesfortheDDNSservers
toupdatewithyournewDDNSaddressbeforeattempting
toconnect.
Install Edge Client Software (ON YOUR REMOTE COMPUTER)
1.InsertthesoftwareCDintoyour
remotecomputer.
TheAutoplaywindowopens.
2.ClickRun Lorex.exe
3.ClickDVR SoftwarethenEdge
Client Software.
4.Followtheon-screeninstructionsto
install.
Computer-notincluded
NOTE: Check the user’s manual for how to install and use
the Edge Client software for Mac computers.
9
NOTE: The Wizard is PC compatible only. Mac users,
please go to Step 4-Optional (Manual Port Forward).
1.ClickStep 1
2.CreateanewMyLorexaccountor
signinusinganexistingaccount.
3.UnderYourAddress,
selectanaddressorclick
Enter a New Address
tocreateanewaddress.
Fillinyouraddress
informationandclick
Create Address.
1.ClickWarranties.
2. ClickActivate Warranty.
NOTE:WarrantyRegistrationisrequiredforDDNS.
4.Fillinthewarrantyregistration
formwithyourproductand
purchasedetailsandclickSave
Warranty.Checkthesticker
underneathyourDVRforthe
ProductModelNumberand
SerialNumber.
5.ClickSet Up a New DDNS.
7.ClickSavetoregisteryourproductforDDNS.ADDNS
registrationconfirmationemailwillbesenttotheemail
addressusedtoregisterforMyLorex.
NOTE:URLRequestshouldnotbemorethan15characters.
6.FillouttheMy
DDNSform:
• Product Warranty:
Selecttheproduct
warrantyyoucreated
intheprevioussteps.
• Device Name:Enteranameforyourdevice.Youcan
enteryourname,businessname,oranythingofyourchoice.
• MAC Address:EntertheMACaddressofyourLorex
systemrecordedinStep3-1.
• URL Request:Enterthewebsiteaddressthatwillbe
usedtoconnecttoyourLorexsystem.
NOTE:CertainISP(InternetServiceProviders)blockport
80.Ifyouareunabletoconnect,checkwithyourISPand
consultwiththeusermanualforinstructionsonchangingthe
HTTPport.MakesuretoportforwardyourrevisedHTTPport.

Other manuals for LH330 Edge2 Series

2

Other Lorex DVR manuals

Lorex L284161 User manual

Lorex

Lorex L284161 User manual

Lorex N883 Series User manual

Lorex

Lorex N883 Series User manual

Lorex L114V User manual

Lorex

Lorex L114V User manual

Lorex LH160 ECO6 SERIES User manual

Lorex

Lorex LH160 ECO6 SERIES User manual

Lorex L164 Series User manual

Lorex

Lorex L164 Series User manual

Lorex N841 Series User manual

Lorex

Lorex N841 Series User manual

Lorex L104000 User manual

Lorex

Lorex L104000 User manual

Lorex LH120 Series User manual

Lorex

Lorex LH120 Series User manual

Lorex LH400 LINK SERIES User manual

Lorex

Lorex LH400 LINK SERIES User manual

Lorex LH318 User manual

Lorex

Lorex LH318 User manual

Lorex ECO 2 User manual

Lorex

Lorex ECO 2 User manual

Lorex LH150 ECO4 SERIES User manual

Lorex

Lorex LH150 ECO4 SERIES User manual

Lorex LHA4000LC Series Instruction Manual

Lorex

Lorex LHA4000LC Series Instruction Manual

Lorex ECO Blackbox+ LH010H Series Operator's manual

Lorex

Lorex ECO Blackbox+ LH010H Series Operator's manual

Lorex LH324501 User manual

Lorex

Lorex LH324501 User manual

Lorex D241 Series User manual

Lorex

Lorex D241 Series User manual

Lorex L154-81 User manual

Lorex

Lorex L154-81 User manual

Lorex N842A82 User manual

Lorex

Lorex N842A82 User manual

Lorex LH314 Instruction Manual

Lorex

Lorex LH314 Instruction Manual

Lorex L224 Series User manual

Lorex

Lorex L224 Series User manual

Lorex L404 User manual

Lorex

Lorex L404 User manual

Lorex SG7970 User manual

Lorex

Lorex SG7970 User manual

Lorex N881 Series User manual

Lorex

Lorex N881 Series User manual

Lorex N882A38B User manual

Lorex

Lorex N882A38B User manual

Popular DVR manuals by other brands

Gator GHDVR379 user guide

Gator

Gator GHDVR379 user guide

Speco D16HU user guide

Speco

Speco D16HU user guide

Bosch Divar -Digital Versatile installation instructions

Bosch

Bosch Divar -Digital Versatile installation instructions

Samsung SHR-5042 user manual

Samsung

Samsung SHR-5042 user manual

Sony HVRM25AU - Professional Video Cassete... operating instructions

Sony

Sony HVRM25AU - Professional Video Cassete... operating instructions

DSE RK Series installation manual

DSE

DSE RK Series installation manual

Siemens SISTORE AX9 user manual

Siemens

Siemens SISTORE AX9 user manual

Ganz NR4HL user manual

Ganz

Ganz NR4HL user manual

LG LV4947 user guide

LG

LG LV4947 user guide

Vitek VT-EH Series datasheet

Vitek

Vitek VT-EH Series datasheet

Hanwha Techwin WRR-5301 quick start guide

Hanwha Techwin

Hanwha Techwin WRR-5301 quick start guide

Sylvania SY164 instruction manual

Sylvania

Sylvania SY164 instruction manual

Dante DLW5400 Installation and operation manual

Dante

Dante DLW5400 Installation and operation manual

Home Automation 68A00-1 Installation and user guide

Home Automation

Home Automation 68A00-1 Installation and user guide

GeoVision GV-Compact DVR V2 user manual

GeoVision

GeoVision GV-Compact DVR V2 user manual

Streamax X1-H0401 user manual

Streamax

Streamax X1-H0401 user manual

SkyBest 8004VP user manual

SkyBest

SkyBest 8004VP user manual

Toshiba DVR user manual

Toshiba

Toshiba DVR user manual

manuals.online logo
manuals.online logoBrands
  • About & Mission
  • Contact us
  • Privacy Policy
  • Terms and Conditions

Copyright 2025 Manuals.Online. All Rights Reserved.