Lorex ACCHM2 Series User manual

Quick Start Guide (EN)
Guide de démarrage rapide (FR)
Guía de inicio rápido (ES)
Kurzanleitung (DE)
Guida rapida (IT)
Beknopte handleiding (NL)
ACCHM2-EU

EN
1 2
What's Included
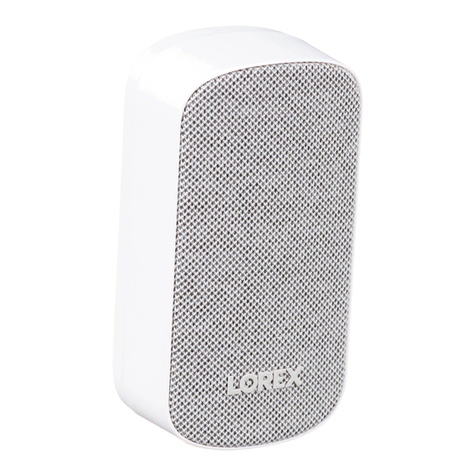
Wi-Fi Chimebox
(1×)
Type G
Power Plug (1×)
Type C
Power Plug (1×)
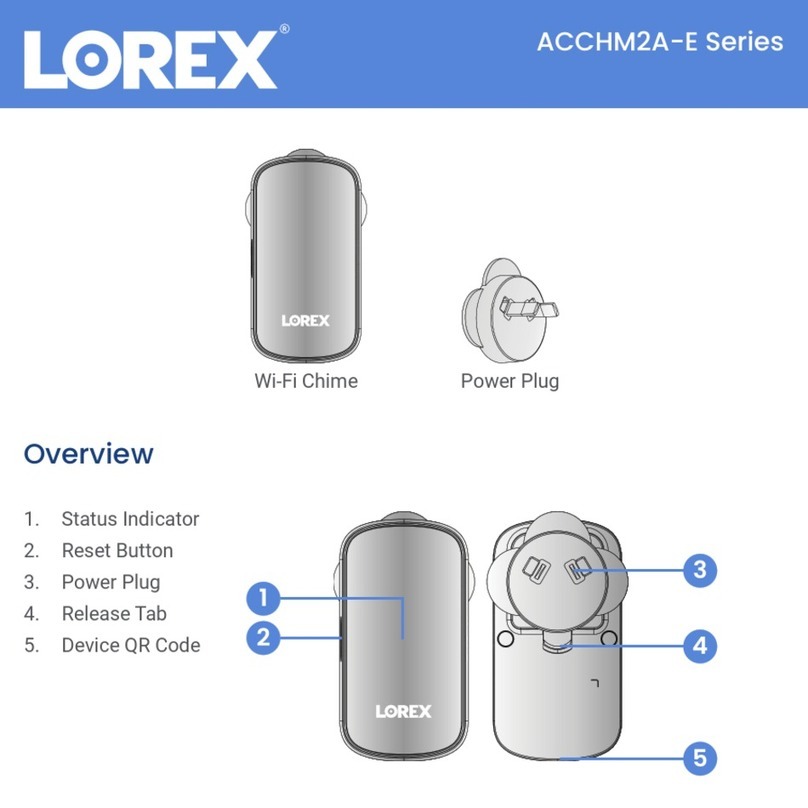
Overview
1. Status Indicator
2. Reset Button
3. Type G Power Plug*
4. Type C Power Plug*
5. Release Tab
6. Device QR Code
1 2
5
3
6
5
4
6
*Subject to region-specic power plug regulations.
*Try resetting your Wi-Fi Chimebox by holding down the reset button.
Status Indicators
Device ready
Ready for network connection
Device malfunction*
Network connection failed*
Firmware update in progress
IMPORTANT!
• Connect to a 2.4 GHz Wi-Fi network.
• Ensure your Video Doorbell and Wi-Fi Chimebox have the latest rmware in their device
settings.

EN
3 4
Setup
1. Download the Lorex app.
Support
For detailed instructions and additional support material, scan the QR code or visit
help.lorex.com/ACCHM2.
To register for warranty, please see our full Terms of Service and Limited Hardware
Warranty Policy at lorex.com/warranty.
2. (A) Attach the Power Plug for your region, then (B) secure it by pushing the release tab inward.
Note: Lift the release tab to remove the Power Plug.
3. Plug your Wi-Fi Chimebox into an outlet.
4. Tap
+
in the app and then follow the in-app instructions to add your Wi-Fi Chimebox.
A A
B B

FR
5 6
Compris dans le prix
Carillon Wi-Fi (1×) Fiche secteur
de type G (1×)
Fiche secteur de
type C (1×)
Aperçu
1. Voyant d’état
2. Bouton de
réinitialisation
3. Fiche secteur de
type G *
4. Fiche secteur de
type C *
5. Languette d’ouverture
6. QR code de l’appareil
1 2
5
3
6
5
4
6
* Sous réserve des réglementations régionales en matière de ches secteur.
* Réinitialisez votre carillon Wi-Fi en maintenant le bouton de réinitialisation enfoncé.
Voyant d’état
Appareil prêt à l’emploi
Prêt pour la connexion au réseau
Dysfonctionnement de l’appareil *
Échec de la connexion réseau *
Mise à jour du micrologiciel en cours
IMPORTANT !
• Connectez-vous à un réseau Wi-Fi de 2,4 GHz.
• Dans les paramètres de l’appareil, vériez que votre sonnette vidéo et votre carillon Wi-Fi
disposent du dernier micrologiciel.

FR
7 8
Installation
1. Téléchargez l’application Lorex.
Assistance
Pour obtenir des instructions détaillées et des documents supplémentaires, scannez
le QR code ou consultez le site help.lorex.com/ACCHM2.
Pour bénécier de la garantie, veuillez consulter nos conditions d’utilisation et notre
politique de garantie matérielle limitée sur le site lorex.com/warranty.
2. (A) Branchez la che secteur correspondant à votre pays, puis (B) xez-la en poussant la languette
d’ouverture vers l’intérieur.
Remarque : Soulevez la languette d’ouverture pour retirer la che secteur.
3. Branchez votre carillon Wi-Fi sur une prise de courant.
4. Dans l’application, appuyez sur
+
et suivez les instructions de l’application pour ajouter votre
carillon Wi-Fi.
A A
B B

Indicador de estado ES
9 10
Contenido
Caja de timbre por
Wi-Fi (1×)
Enchufe
tipo G (1×)
Enchufe
tipo C (1×)
Resumen
1. Indicador de estado
2. Botón de reinicio
3. Enchufe tipo G*
4. Enchufe tipo C*
5. Pestaña de liberación
6. Código QR del dispositivo
1 2
5
3
6
5
4
6
*Sujeto a normativas regionales especícas para enchufes.
*Pruebe a reiniciar su caja de timbre por Wi-Fi manteniendo pulsado el botón de reinicio.
Dispositivo preparado
Preparado para conectarse a la red
Fallo del dispositivo*
Fallo de la conexión de red*
Actualización de rmware en proceso
IMPORTANTE!
• Conéctese a una red Wi-Fi de 2,4 GHz.
• Compruebe que su timbre de video y su caja de timbre por Wi-Fi tengan instalada la última
versión del rmware en sus ajustes.

ES
11 12
Configuración
1. Descargue la aplicación Lorex.
Soporte técnico
Para acceder a instrucciones detalladas y material adicional de soporte técnico,
escanee el código QR o visite help.lorex.com/ACCHM2.
Para registrar la garantía, consulte nuestros Términos de servicio y la Política de
garantía limitada de hardware en lorex.com/warranty.
2. (A) Coloque el enchufe correspondiente a su región, luego (B) fíjelo empujando la pestaña de
liberación hacia adentro.
Nota: Levante la pestaña de liberación para retirar el enchufe.
3. Enchufe la caja de timbre por Wi-Fi a un tomacorriente.
4. Toque
+
en la aplicación y siga las instrucciones correspondientes para agregar su caja de timbre
por Wi-Fi.
A A
B B

Statusanzeige DE
13 14
Was im Lieferumfang enthalten ist
Wi-Fi Chimebox
(1×)
Typ-G-
Stromanschluss (1×)
Typ-C-
Stromanschluss (1×)
Übersicht
1. Statusanzeige
2. Reset-Taste
3. Typ-G-Stromanschluss*
4. Typ-C-Stromanschluss*
5. Ver- und Entriegelungs-
Tab
6. QR-Code des Geräts
1 2
5
3
6
5
4
6
*Gemäß den regionalen Normen für Stromstecker.
*Versuchen Sie, Ihre Wi-Fi-Chimebox zurückzusetzen. Halten Sie dazu die Reset-Taste gedrückt.
Gerät bereit
Bereit für Netzwerkverbindung
Gerätestörung*
Netzwerkverbindungsfehler*
Firmwareaktualisierung läuft
WICHTIG!
• Verbinden Sie sich mit einem WLAN mit 2,4 GHz.
• Prüfen Sie in den Geräteeinstellungen, ob Ihre Video-Türklingel und die Wi-Fi Chimebox die
aktuellste Firmware installiert haben.

DE
15 16
Einrichtung
1. Download der Lorex-App.
Kundendienst
Um detailliertere Anweisungen und weiteres Hilfsmaterial zu erhalten, scannen Sie
den QR-Code ein oder besuchen Sie help.lorex.com/ACCHM2.
Zur Registrierung der Garantie nehmen Sie bitte unter folgender Webadresse
unsere vollständigen Nutzungsbedingungen und die Regelungen zur beschränkten
Hardwaregarantie zur Kenntnis lorex.com/warranty.
2. (A) Schließen Sie den bei Ihnen vor Ort zu verwendenden Stromstecker an. (B) Sichern Sie den
Stecker, indem Sie den Ver- und Entriegelungs-Tab eindrücken.
Anmerkung: Zum Abziehen des Stromsteckers lösen Sie zunächst den Tab.
3. Verbinden Sie Ihre Wi-Fi-Chimebox mit einem Ausgang.
4. Tippen Sie in der App auf
+
und befolgen Sie die Anweisungen zum Hinzufügen Ihrer Wi-Fi
Chimebox.
A A
B B

Indicatore di stato IT
17 18
Cosa è incluso
Wi-Fi Chimebox
(1×)
Spina di alimentazione
di tipo G (1×)
Spina di alimentazione
di tipo C (1×)
Panoramica
1. Indicatore di stato
2. Pulsante di reset
3. Spina di alimentazione di
tipo G*
4. Spina di alimentazione di
tipo C *
5. Linguetta di sgancio
6. Codice QR del dispositivo
1 2
5
3
6
5
4
6
*Soggetto alle normative sulle spine di alimentazione speciche della regione.
*Provare a resettare il Wi-Fi Chimebox tenendo premuto il pulsante di reset.
Dispositivo pronto
Pronto per la connessione di rete
Malfunzionamento del dispositivo*
Connessione di rete non riuscita*
Aggiornamento del rmware in corso
IMPORTANTE!
• Collegarsi a una rete Wi-Fi a 2,4 GHz.
• Assicurarsi che il campanello video e il Wi-Fi Chimebox abbiano il rmware più recente nelle
impostazioni del dispositivo.

IT
19 20
Configurazione
1. Scaricare l'applicazione Lorex.
Supporto
Per istruzioni dettagliate e materiale di supporto aggiuntivo, scansionare il codice QR
o visitare il sito help.lorex.com/ACCHM2.
Per la registrazione della garanzia, consultare i nostri Termini di servizio completi e la
Politica di garanzia limitata sull'hardware all'indirizzo lorex.com/warranty.
2. (A) Collegare la spina di alimentazione della propria regione, quindi (B) ssarla spingendo la
linguetta di sgancio verso l'interno.
Nota: Sollevare la linguetta di sgancio per rimuovere la spina di alimentazione.
3. Collegare il Wi-Fi Chimebox a una presa di corrente
4. Toccare
+
nell'app e poi seguire le istruzioni mostrate per aggiungere il Wi-Fi Chimebox.
A A
B B

Statusindicator NL
21 22
Wat is meegeleverd
Wi-Fi Chimebox (1×) Type G-stekker (1×) Type C-stekker (1×)
Overzicht
1. Statusindicator
2. Knop Opnieuw
instellen
3. Type G-stekker*
4. Type C-stekker*
5. Ontgrendelingslipje
6. QR-code apparaat
1 2
5
3
6
5
4
6
*Onderhevig aan regiospecieke voorschriften voor stekkers.
*Probeer uw Wi-Fi Chimebox opnieuw in te stellen de door de resetknop ingedrukt te houden.
Apparaat gereed
Gereed voor netwerkverbinding
Apparaatstoring*
Netwerkverbinding mislukt*
Firmware-update wordt uitgevoerd
BELANGRIJK!
• Maak verbinding met een Wi-Fi-netwerk van 2,4 GHz.
• Controleer of uw videodeurbel en Wi-Fi Chimebox de laatste rmware hebben in hun
apparaatinstellingen.

NL
23 24
Instellen
1. Download de Lorex-app.
Ondersteuning
Voor gedetailleerde instructies en extra ondersteuningsmateriaal scant u de QR-code
of gaat u naar help.lorex.com/ACCHM2.
Raadpleeg onze volledige servicevoorwaarden en ons beperkte garantiebeleid voor
hardware op lorex.com/warranty.
2. (A) Bevestig de stekker voor uw regio en (B) zet hem vast door het ontgrendelingslipje naar binnen
te duwen.
Opmerking: Til het ontgrendelingslipje op om de stekker eraf te halen.
3. Steek de stekker van uw Wi-Fi Chimebox in het stopcontact.
4. Tik
+
in de app op en volg de instructies in de app om je Wi-Fi Chimebox toe te voegen.
A A
B B

ACCHM2-EU_QSG_Region2_R1
Copyright © 2023 Lorex Technology Inc.
As our products are subject to continuous improvement, Lorex reserves the right to modify product design, specications
and prices, without notice and without incurring any obligation. E&OE. All rights reserved.
Points de collecte sur www.quefairedemesdechets.fr
Privilégiez la réparaon ou le don de votre appareil !
À DÉPOSER
EN MAGASIN À DÉPOSER
EN DÉCHÈTERIE
OU
Cet appareil et
ses accessoires
se recyclent
FRFR RECICLA
RECYCLE
Points de collecte sur www.quefairedemesdechets.fr
Privilégiez la réparaon ou le don de votre appareil !
À DÉPOSER
EN MAGASIN À DÉPOSER
EN DÉCHÈTERIE
OU
Cet appareil et
ses accessoires
se recyclent
FRFR RECICLA
RECYCLE
Points de collecte sur www.quefairedemesdechets.fr
Privilégiez la réparaon ou le don de votre appareil !
À DÉPOSER
EN MAGASIN À DÉPOSER
EN DÉCHÈTERIE
OU
Cet appareil et
ses accessoires
se recyclent
FRFR RECICLA
RECYCLE
Points de collecte sur www.quefairedemesdechets.fr
Privilégiez la réparaon ou le don de votre appareil !
À DÉPOSER
EN MAGASIN À DÉPOSER
EN DÉCHÈTERIE
OU
Cet appareil et
ses accessoires
se recyclent
FRFR RECICLA
RECYCLE
Points de collecte sur www.quefairedemesdechets.fr
Privilégiez la réparaon ou le don de votre appareil !
À DÉPOSER
EN MAGASIN À DÉPOSER
EN DÉCHÈTERIE
OU
Cet appareil et
ses accessoires
se recyclent
FRFR RECICLA
RECYCLE
Points de collecte sur www.quefairedemesdechets.f
r
Privilégiez la réparaon ou le don de votre appareil !
À DÉPOSER
EN MAGASIN À DÉPOSER
EN DÉCHÈTERIE
OU
Cet appareil et
ses accessoires
se recyclent
FRFR RECICLA
RECYCLE
Points de collecte sur www.quefairedemesdechets.fr
Privilégiez la réparaon ou le don de votre appareil !
À DÉPOSER
EN MAGASIN À DÉPOSER
EN DÉCHÈTERIE
OU
Cet appareil et
ses accessoires
se recyclent
FRFR RECICLA
RECYCLE
Points de collecte sur www.quefairedemesdechets.fr
Privilégiez la réparaon ou le don de votre appareil !
À DÉPOSER
EN MAGASIN À DÉPOSER
EN DÉCHÈTERIE
OU
Cet appareil et
ses accessoires
se recyclent
FRFR
RECICLA
RECYCLE
lorex.com
help.lorex.com/ACCHM2
This manual suits for next models
1
Table of contents
Languages:
Other Lorex Intercom System manuals

Lorex
Lorex B862AJ Series User manual

Lorex
Lorex B463AJ Series User manual

Lorex
Lorex ACCHM2 Series User manual

Lorex
Lorex ACCHM1 Series User manual
Lorex
Lorex B451AJ-Z2 User manual

Lorex
Lorex B451AJ Series User manual

Lorex
Lorex B862AJ-Z1 User manual

Lorex
Lorex B862AJ Series User manual
Lorex
Lorex ACCHM1 Series User manual
Lorex
Lorex ACCHM2A-E Series User manual